
1. Important Safety Information
Please read these instructions carefully before installation and use. Keep this manual for future reference.
- Electrical Safety: Always disconnect power at the circuit breaker before installation, servicing, or cleaning. If you are unsure about electrical wiring, consult a qualified electrician.
- Installation: Ensure the mounting surface can support the weight of the fixture. Install in accordance with local electrical codes.
- Indoor Use Only: This fixture is designed for indoor use. Do not expose to moisture or extreme temperatures.
- Handling: Handle the fixture with care to avoid damage to the LED components or acrylic parts.
- Cleaning: Use a soft, dry cloth for cleaning. Do not use abrasive cleaners or solvents.
2. Package Contents
Verify that all components are present before beginning installation:
- LED Wall Sconce (1 unit)
- Remote Control (1 unit)
- Mounting Hardware (screws, wire nuts, etc.)
- Instruction Manual (this document)
3. Product Overview
The Benkut Modern LED Wall Sconce features a contemporary design with integrated LED lighting. It offers adjustable color temperature (3000K-6500K) and dimmable brightness, controlled via an included remote. The fixture is constructed from durable aluminum and acrylic materials.

Image 3.1: Benkut Modern LED Wall Sconce with remote control and various light settings.
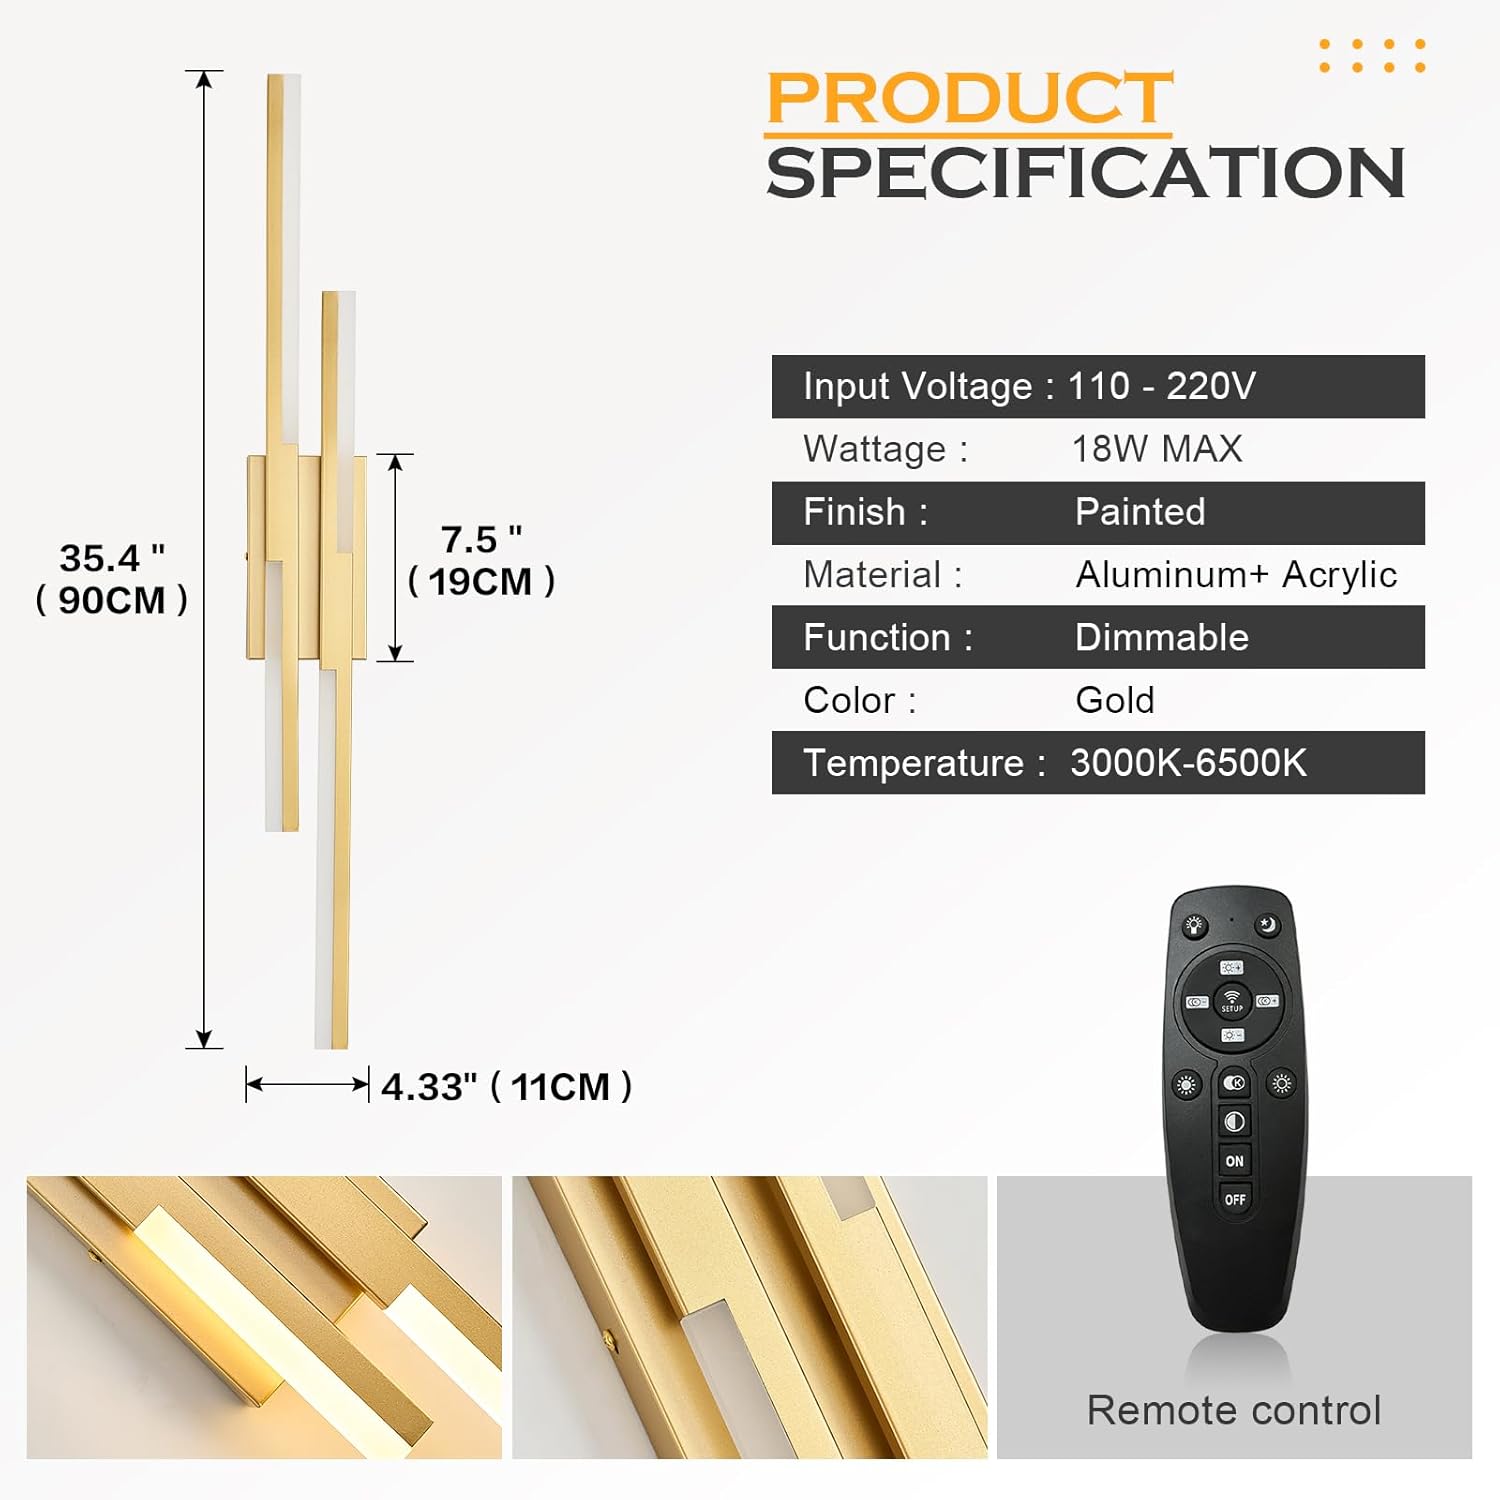
Image 3.2: Product dimensions and key specifications.
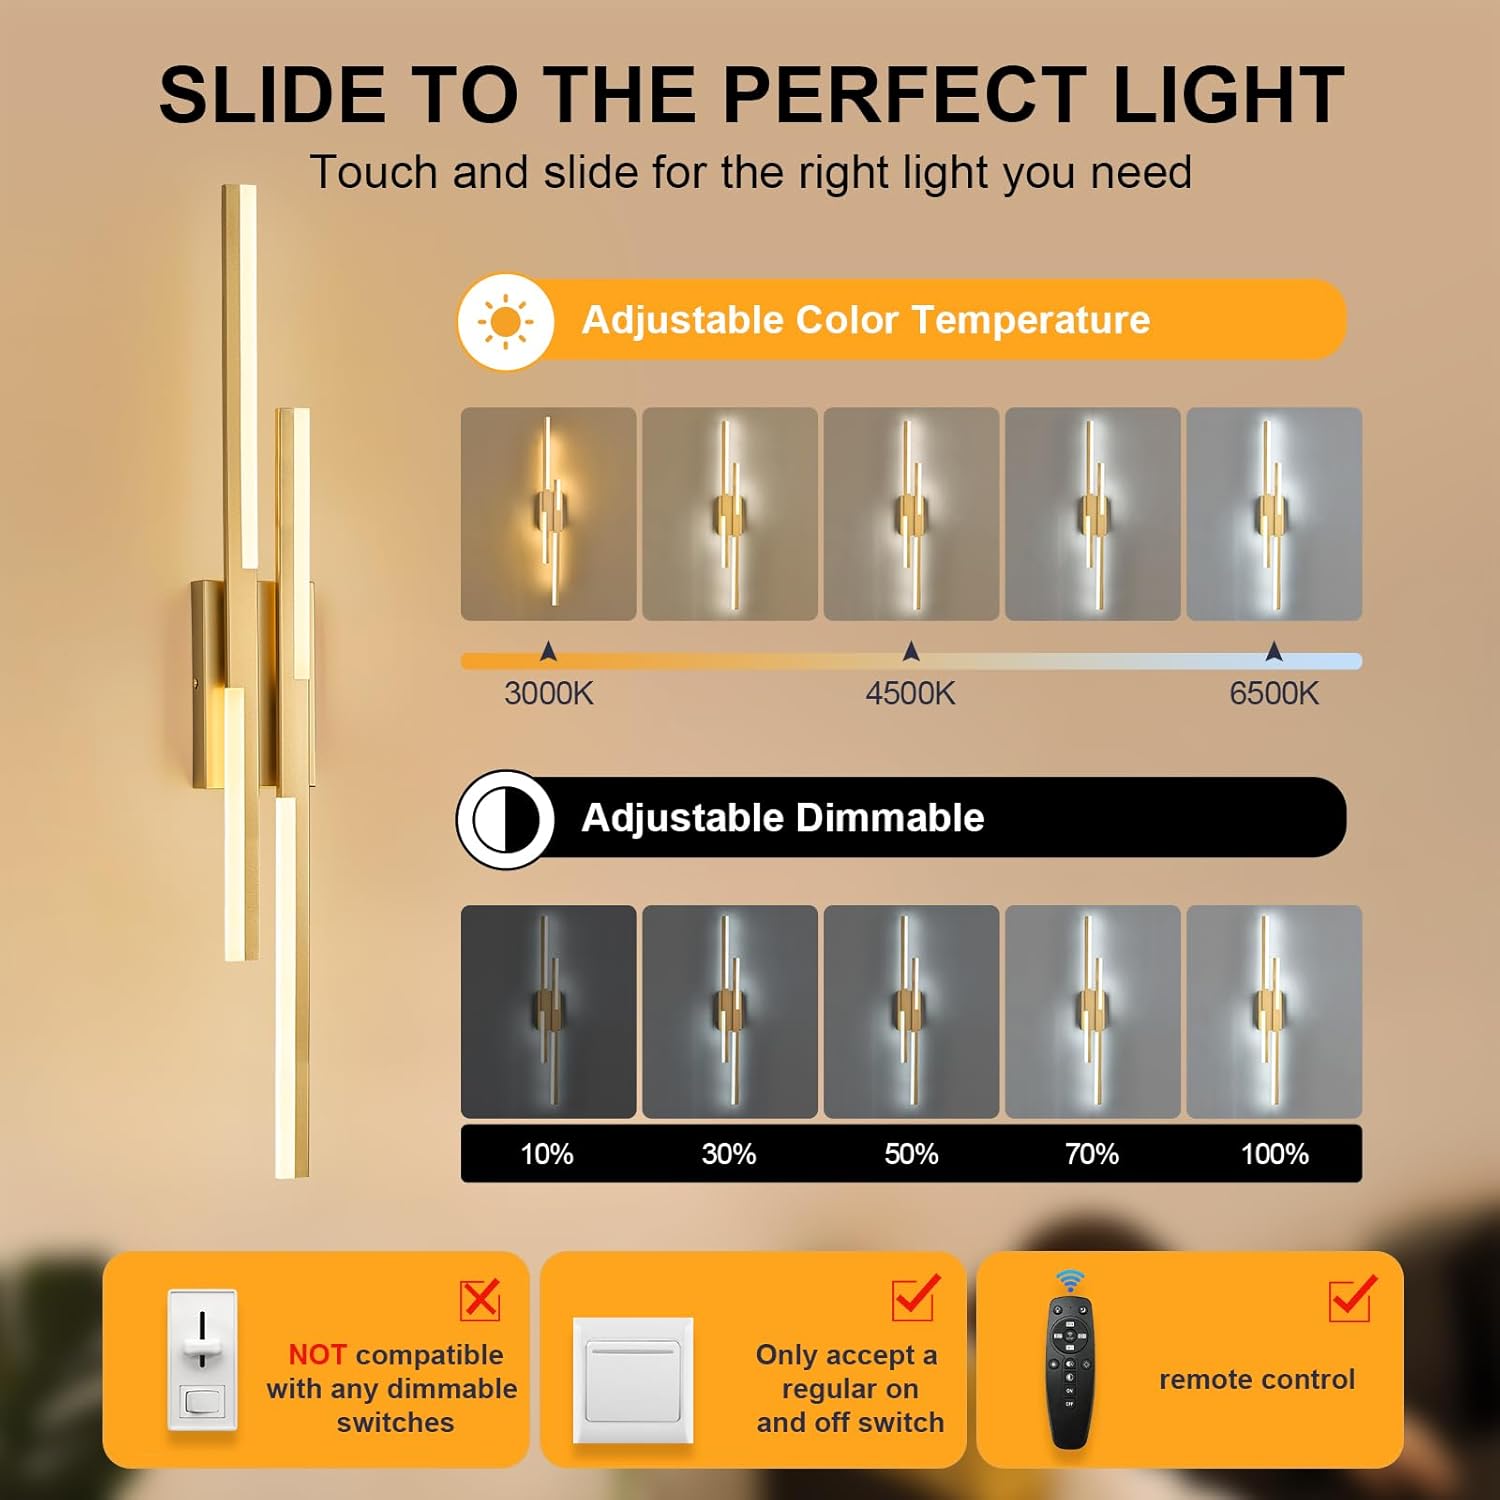
Image 3.3: Adjustable color temperature and dimming capabilities.
4. Installation Instructions
This wall light fixture is designed for direct connection to a standard wall junction box. All necessary mounting hardware is included.
Tools Required (Not Included):
- Screwdriver (Phillips head)
- Wire strippers
- Electrical tape
- Voltage tester
Installation Steps:
- Safety First: Turn off the power to the junction box at the main circuit breaker. Verify power is off using a voltage tester.
- Prepare Mounting Plate: Attach the mounting plate (usually pre-attached to the fixture) to the wall junction box using the provided screws. Ensure it is securely fastened.
- Wire Connections: Carefully connect the electrical wires:
- Connect the black wire from the fixture to the black (live) wire from the junction box using a wire nut.
- Connect the white wire from the fixture to the white (neutral) wire from the junction box using a wire nut.
- Connect the green or bare copper (ground) wire from the fixture to the green or bare copper (ground) wire from the junction box, and to the ground screw on the mounting plate.
- Mount the Fixture: Carefully tuck the wires into the junction box. Align the fixture with the mounting plate and secure it using the provided screws.
- Restore Power: Turn the power back on at the circuit breaker.

Image 4.1: Hard wiring installation diagram.
Note: This fixture is designed to work with a regular on/off wall switch and is not compatible with external dimmable switches.
5. Operating Instructions
The Benkut LED Wall Sconce is operated using the included remote control. The remote allows for adjustment of both brightness and color temperature.
Remote Control Functions:
- Power On/Off: Press the ON or OFF button to turn the light on or off.
- Brightness Adjustment: Use the brightness up/down buttons to increase or decrease the light intensity (10% to 100%).
- Color Temperature Adjustment: Use the color temperature up/down buttons to cycle through color temperatures from warm white (3000K) to daylight (6500K).
- Preset Modes: The remote may include preset buttons for specific brightness or color temperature settings. Refer to the remote's markings for details.
Image 5.1: Visual guide to adjustable color temperature and dimming.
Demonstration Video:
Video 5.1: This video demonstrates the Benkut Gold Wall Sconce in various room settings and showcases the 3-color dimming functionality controlled by the remote. It illustrates how to switch between bright white, warm white, and daylight settings.
6. Maintenance
Regular maintenance will help preserve the appearance and functionality of your LED wall sconce.
- Cleaning: To clean the fixture, ensure the power is off. Use a soft, dry, or slightly damp cloth. Avoid using harsh chemicals, abrasive cleaners, or sprays directly on the fixture, as these can damage the finish or electrical components.
- LED Longevity: The integrated LED light source is designed for long-term use and does not require bulb replacement.
7. Troubleshooting
If you encounter issues with your Benkut LED Wall Sconce, refer to the following common problems and solutions:
| Problem | Possible Cause | Solution |
|---|---|---|
| Light does not turn on | No power to the fixture | Check circuit breaker. Ensure wall switch is on. Verify wire connections. |
| Remote control not working | Remote battery is dead or improperly inserted | Replace remote battery. Ensure battery is inserted with correct polarity. |
| Light flickers or dims unexpectedly | Loose wire connection or incompatible dimmer switch | Turn off power and check wire connections. Ensure a standard on/off switch is used, not an external dimmer. |
| Incorrect color temperature or brightness | Remote settings are not adjusted correctly | Use the remote control to adjust color temperature and brightness to desired levels. |
If the problem persists after attempting these solutions, please contact customer support.
8. Specifications
| Attribute | Detail |
|---|---|
| Brand | Benkut |
| Model Number | 27804942-3b9b-4be4-abf4-868041c41eba |
| Color | Gold |
| Material | Acrylic, Aluminum, Iron |
| Style | Modern |
| Light Fixture Form | Sconce |
| Product Dimensions | 4"L x 2.4"W x 35.5"H |
| Indoor/Outdoor Usage | Indoor |
| Power Source | AC/DC |
| Installation Type | Wall Mount |
| Special Feature | Adjustable Color Temperature, Dimmable |
| Control Method | Remote |
| Light Source Type | LED |
| Voltage | 110-220 Volts |
| Light Color | 3000K-6500K (Adjustable) |
| Brightness | 1650 Lumens (Max) |
| Wattage | 18 Watts |
| Item Weight | 3.1 Pounds |
9. Warranty and Support
Information regarding product warranty and customer support was not provided in the available product data. For warranty details or technical assistance, please refer to the product packaging or contact the manufacturer directly through their official channels.