
1. Introduction
The SCULPFUN S1 Laser Engraver is a high-precision machine designed for engraving and cutting various materials. It features a 5.5W diode laser with an ultra-fine 0.06x0.06mm compressed laser focus spot, enabling detailed engraving and efficient cutting. This manual provides essential information for the safe and effective use of your device.

Image: The SCULPFUN S1 Laser Engraver showcasing its design and various engraved and cut samples on wood and other materials.
2. Safety Information
WARNING: This product contains a Class IV laser. Direct exposure to the laser beam can cause severe eye damage and skin burns. Always wear protective eyewear when operating the machine. Never look directly into the laser beam.
- Ensure the work area is well-ventilated to dissipate fumes from engraving/cutting.
- Keep a fire extinguisher nearby.
- Do not leave the machine unattended during operation.
- Use the provided A4 size protective plate to shield the work surface from laser damage and reduce fire risk.
- Keep children and pets away from the operating machine.
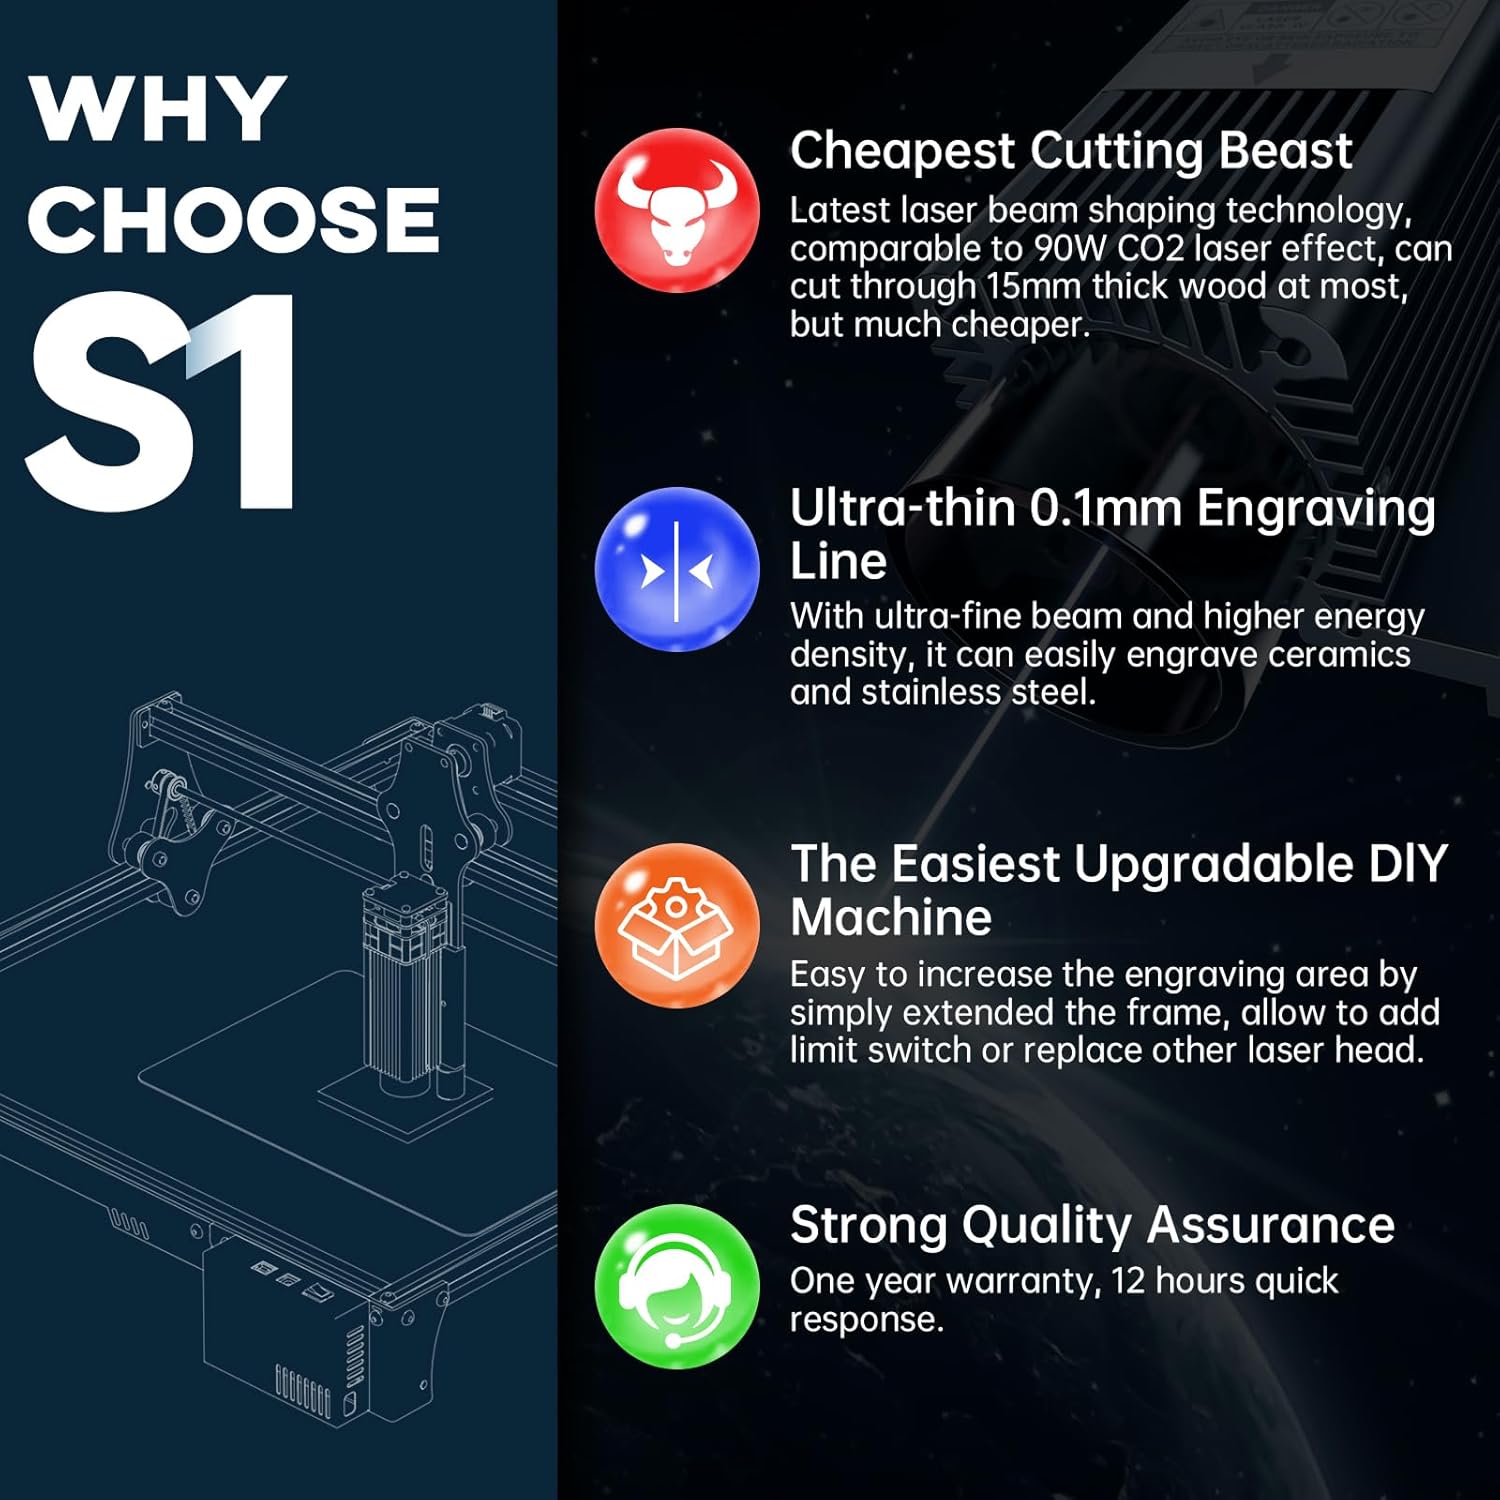
Image: This image illustrates several key features of the SCULPFUN S1, including its cutting capabilities, fine engraving precision, upgradable design, and warranty information.
3. Package Contents
Verify that all components listed below are present in your package:
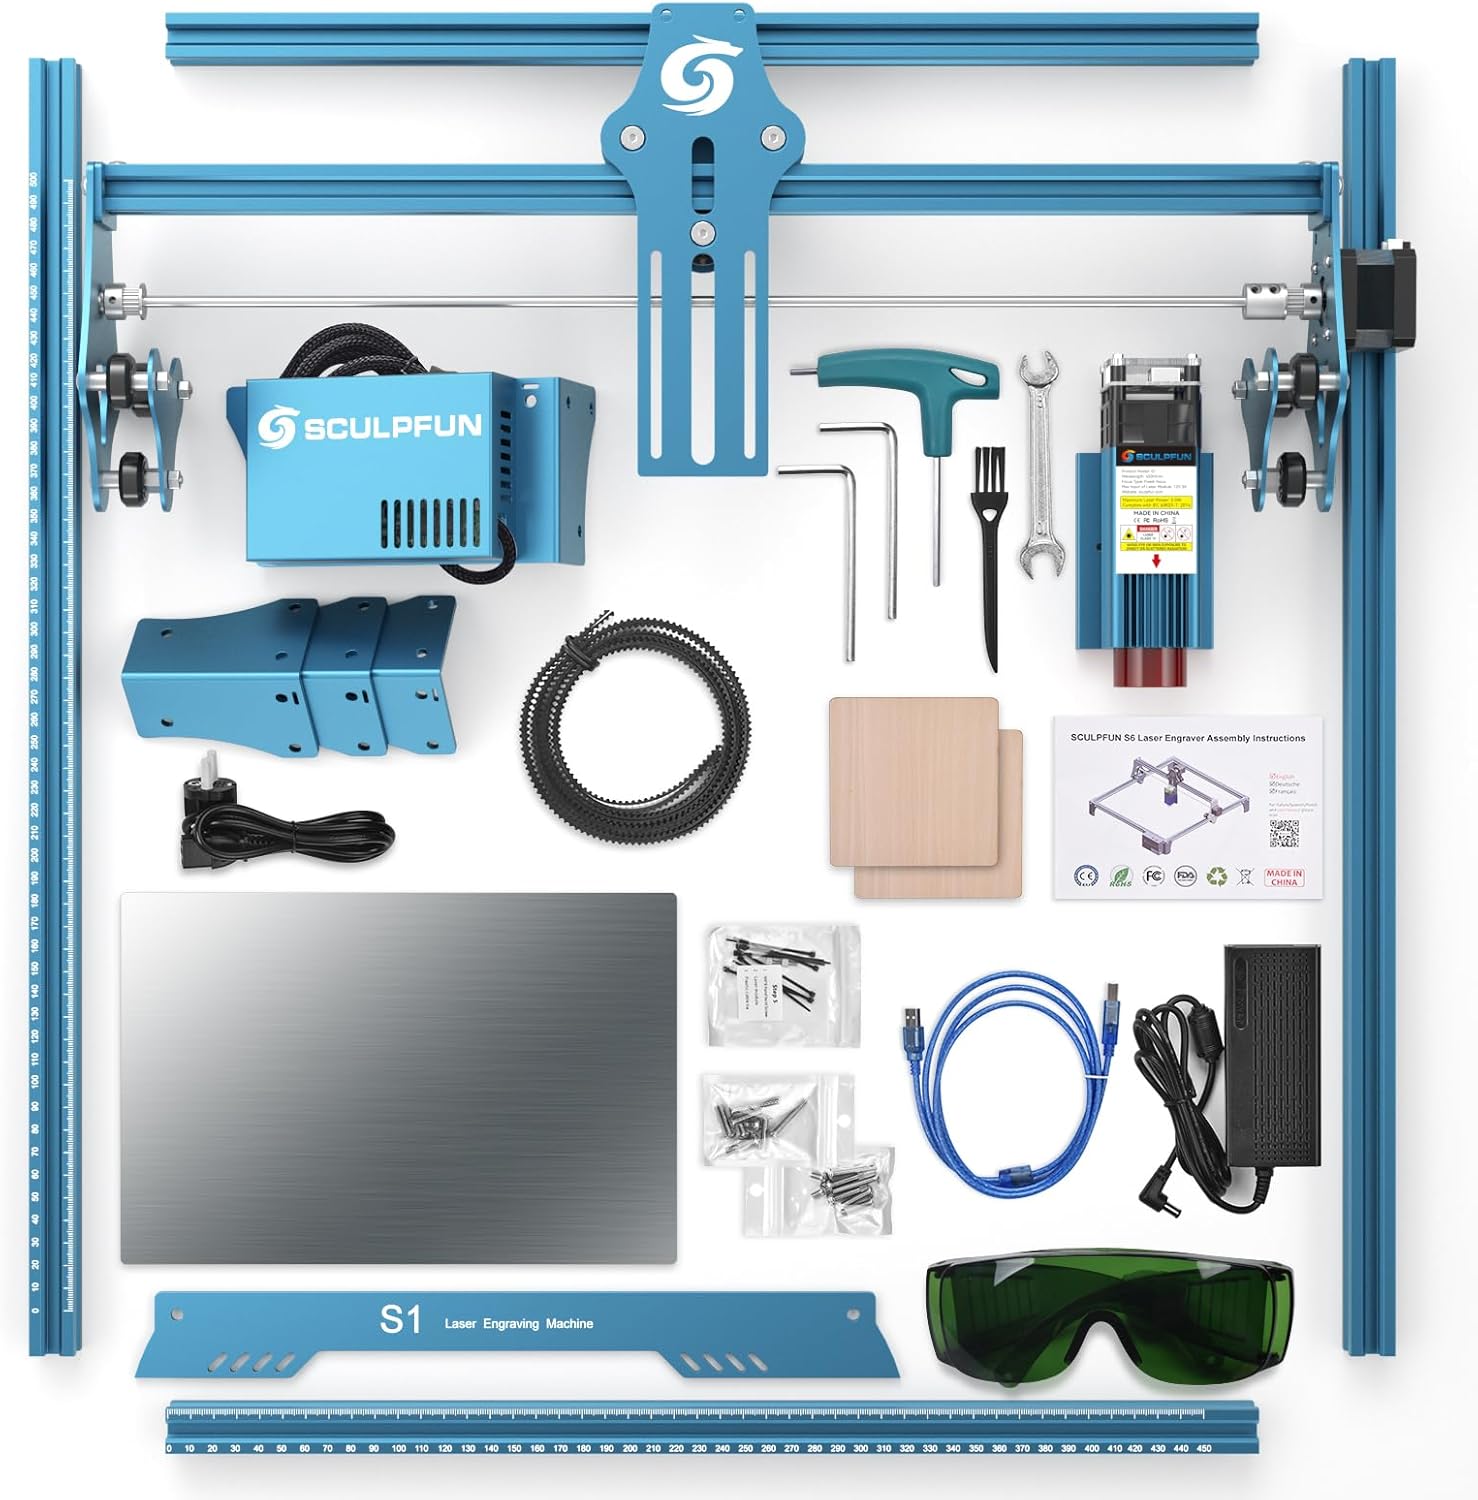
Image: An overhead view displaying all parts and accessories included in the SCULPFUN S1 Laser Engraver package, such as the main frame, laser module, power supply, USB cable, tools, and protective glasses.
- SCULPFUN S1 Laser Engraver Frame
- Laser Module
- Power Adapter and Cable
- USB Cable
- Protective Eyewear
- A4 Size Protective Plate
- Assembly Tools (wrenches, hex keys)
- Sample Materials (wood pieces)
- Instruction Manual (this document)
- Mounting Screws and Hardware
4. Setup Instructions
Follow these steps to assemble and prepare your SCULPFUN S1 Laser Engraver for first use:
- Assembly: Assemble the full-metal structure according to the included assembly instructions. The design allows for installation typically within 10-20 minutes.
- Placement: Place the assembled machine on a stable, level, and heat-resistant surface in a well-ventilated area.
- Laser Module Installation: Securely attach the laser module to the gantry.
- Power Connection: Connect the power adapter to the machine and then to a power outlet.
- Computer Connection: Connect the machine to your computer using the provided USB cable.
- Focusing: The SCULPFUN S1 features a fixed-focus lens and a sliding design. To focus, slide the laser module up or down until the laser spot is at its smallest point on the material surface, then tighten the screw to secure it.

Image: A hand adjusting the laser module's height using the sliding mechanism for fixed focus adjustment.

Image: Close-up of the X and Y axes showing precise scale lines for accurate object placement and measurement.
5. Operating Instructions
The SCULPFUN S1 is compatible with various engraving software. This section outlines general operating procedures.
5.1 Software Compatibility
The machine supports popular laser engraving software such as LaserGRBL and LightBurn. It is compatible with Windows systems (Win XP/7/8/10) and MAC systems (LightBurn). Supported file formats include JPG, PNG, DXF, SVG, G-Code, NC, BMP, and others.

Image: Displays the broad software compatibility of the SCULPFUN S1, featuring screenshots of LaserGRBL and LightBurn software running on Windows and Mac computers.
5.2 Material Preparation
Ensure your material is flat and securely placed within the 410 x 420 mm engraving area. Use the X and Y-axis scale lines for precise positioning.

Image: Diagram illustrating the 410 x 420 mm engraving area of the SCULPFUN S1.
5.3 Engraving and Cutting
The SCULPFUN S1 can engrave and cut a variety of materials:
- Engraving: Wood, Leather, Acrylic, Ceramics, Stainless Steel.
- Cutting: Up to 15mm thick wood, 10mm acrylic, 10mm plywood, leather, cloth.

Image: A collage showing various items successfully engraved (wood, leather, acrylic, steel) and cut (wood, leather, acrylic, cloth) by the SCULPFUN S1.

Image: Close-up of the laser module actively engraving a star shape onto a piece of wood, demonstrating the precision of the laser.
6. Maintenance
Regular maintenance ensures optimal performance and extends the lifespan of your laser engraver:
- Clean the Laser Lens: Periodically clean the laser lens with a soft, lint-free cloth and lens cleaning solution to maintain beam quality.
- Lubricate Moving Parts: Apply a small amount of lubricant to the guide rails and lead screws to ensure smooth movement.
- Clear Debris: Remove any dust, debris, or material residue from the machine, especially around the laser module and ventilation areas.
- Check Connections: Ensure all cables (power, USB) are securely connected.
7. Troubleshooting
Refer to this section for common issues and their solutions:
| Problem | Possible Cause | Solution |
|---|---|---|
| Laser not firing | Power cable loose, USB connection issue, software settings incorrect, laser module fault. | Check power and USB connections. Verify laser settings in software. Contact support if issue persists. |
| Poor engraving/cutting quality | Incorrect focus, wrong power/speed settings, dirty lens, material issues. | Adjust laser focus. Optimize power and speed settings for the material. Clean the laser lens. Ensure material is flat. |
| Machine not moving | Motor cable loose, software connection lost, mechanical obstruction. | Check motor cable connections. Restart software and machine. Clear any obstructions on the rails. |
8. Specifications
| Feature | Detail |
|---|---|
| Brand | SCULPFUN |
| Model | SCULPFUN S1 |
| Laser Output Power | 5.5W (Diode Laser) |
| Laser Spot Size | 0.06 x 0.06mm |
| Engraving Accuracy | 0.01mm |
| Engraving Area | 410 x 420mm |
| Material | Metal (Full-metal structure) |
| Product Dimensions | 16.54"L x 16.54"W |
| Item Weight | 10.38 pounds |
| Software Compatibility | LaserGRBL, LightBurn, Benbox, GrblController, LiteFire |
| Operating System | Windows (XP/7/8/10), MAC (LightBurn) |
| Supported File Formats | JPG, PNG, DXF, SVG, G-Code, NC, BMP, etc. |
| Laser Class | IV |
9. Warranty and Support
The SCULPFUN S1 Laser Engraver comes with a 1-Year Manufacturer Warranty.
For technical support, troubleshooting assistance, or warranty claims, please contact SCULPFUN customer service through their official channels or the retailer where the product was purchased.
For additional resources and updates, visit the official SCULPFUN website: SCULPFUN Store on Amazon