
Road Top Ultra-Narrow CarPlay Touchscreen for Mercedes-Benz C Class W204 NTG4.0
Contents
Road Top 12.3 Inch Ultra-Narrow CarPlay Touchscreen for Mercedes-Benz C Class W204 (2008-2010) with NTG4.0 System Instruction Manual
Introduction
This manual provides detailed instructions for the installation, setup, and operation of your Road Top 12.3 Inch Ultra-Narrow CarPlay Touchscreen. This system enhances your Mercedes-Benz C Class W204 (2008-2010) with NTG4.0 System by integrating wireless CarPlay, Android Auto, and Mirrorlink functionalities while retaining all original vehicle features.
Vehicle Compatibility
This product is specifically designed for:
- Mercedes-Benz C Class W204 models manufactured between 2008 and 2010.
- Compatible with vehicles equipped with the NTG4.0 System.
- Examples include C200, C230, C250, C300, C280, C350 from 2008-2010 with NTG4.0.
Important: Before installation, verify that your car dashboard matches the product images and that your vehicle uses the NTG4.0 system. This unit is NOT compatible with NTG4.5, NTG4.7, or NTG5.0 systems.

Image: Compatibility chart illustrating the correct NTG4.0 system interface and incompatible systems (NTG4.5/4.7/5.0) for Mercedes-Benz C Class W204.
Key Features
- 12.3 Inch Ultra-Narrow HD Touchscreen: 1920 x 720 resolution for clear visuals.
- Dual System Integration: Retains original OEM system while adding a Linux-based touchscreen interface.
- Wireless Connectivity: Supports Wireless Apple CarPlay, Wireless Android Auto, and Wireless Mirrorlink (for iOS and Android phones).
- Bluetooth Functionality: Integrated Bluetooth for calls and audio streaming.
- Audio Quality: EQ adjustable for optimized sound.
- Camera Support: Compatible with original factory reverse camera, parking radar, and aftermarket reverse cameras. Supports front view camera DVR (CVBS input). Does not support aftermarket 360 cameras.
- Control Methods: Supports hand touch control and original steering wheel control buttons (voice control, Tel button, volume).
- Automatic Brightness Adjustment: Intelligent switching based on vehicle headlight status for comfortable viewing.
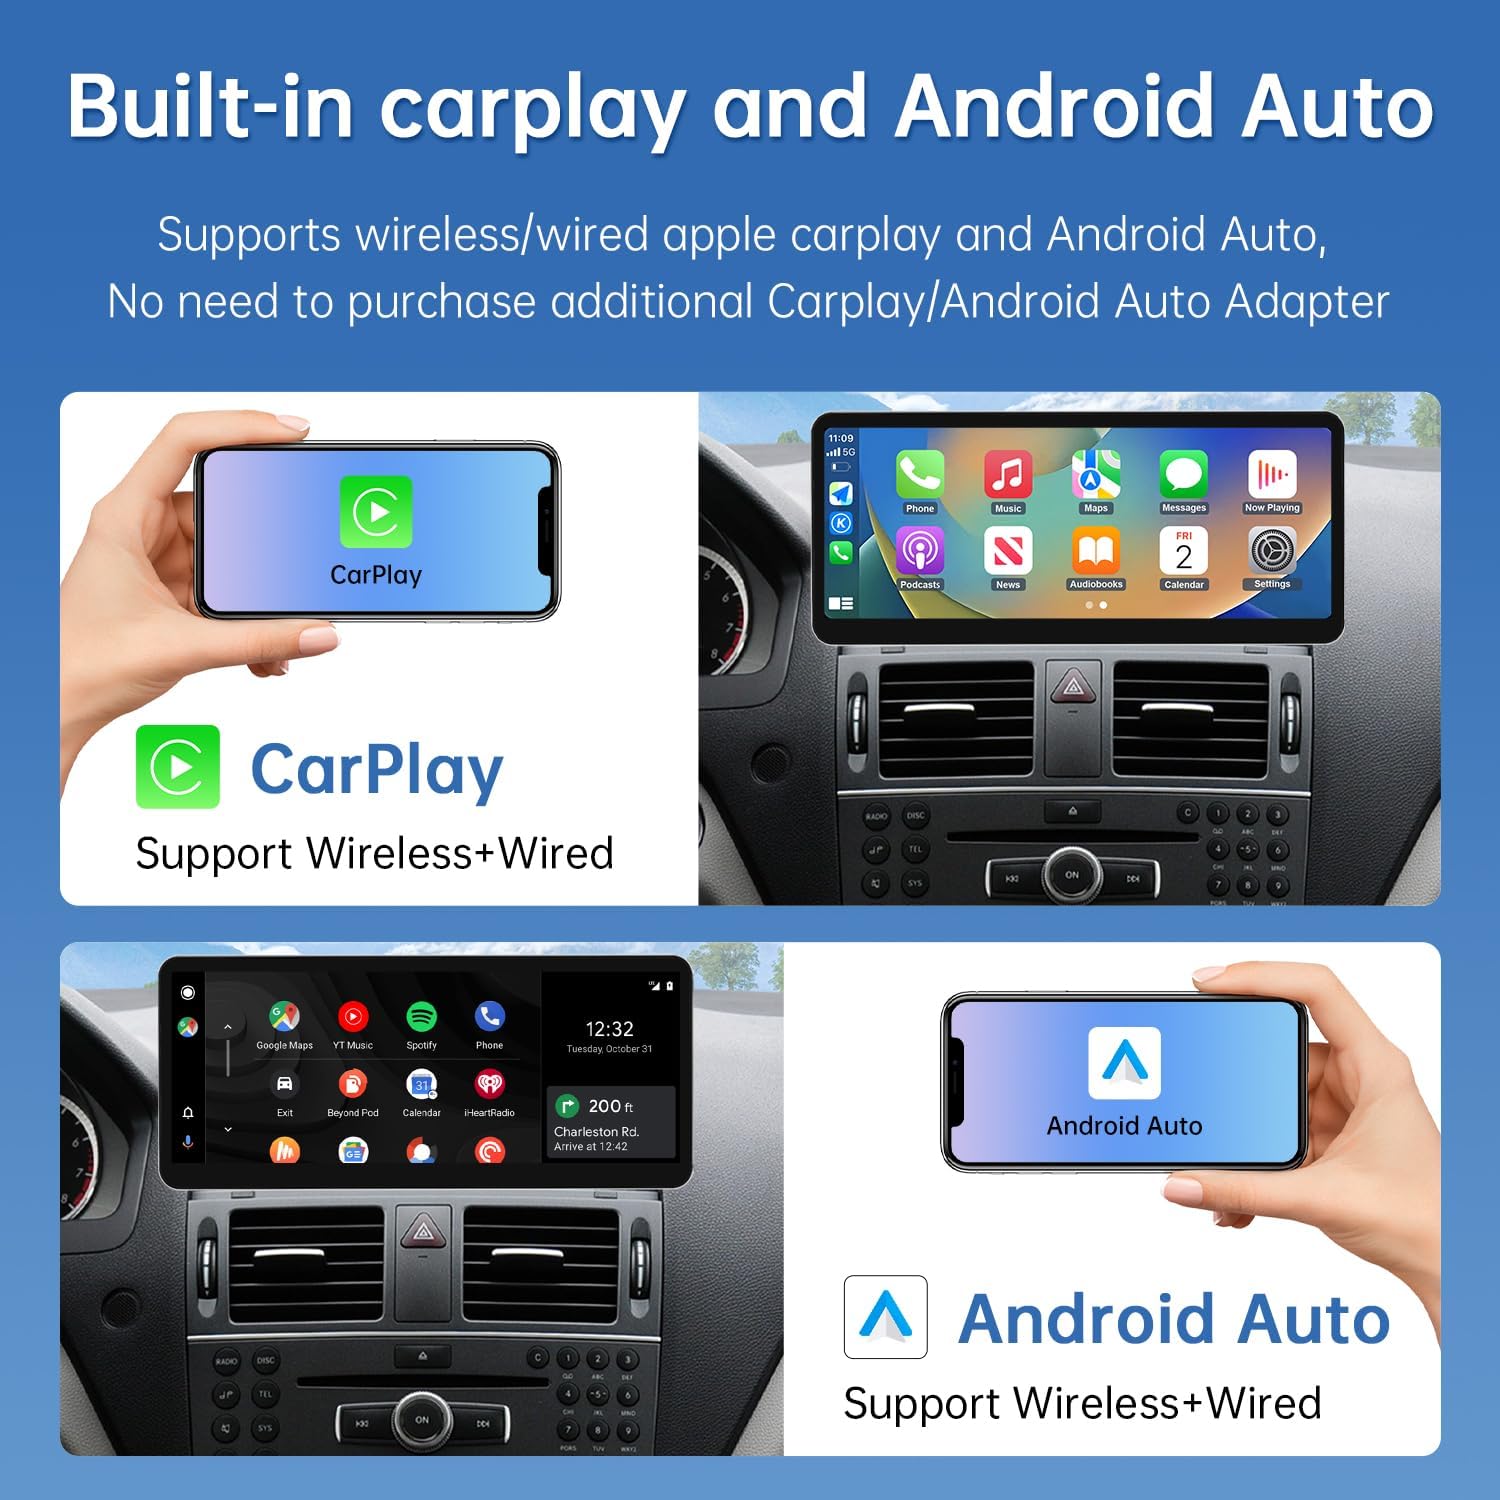
Image: The 12.3-inch touchscreen displaying both Apple CarPlay and Android Auto interfaces, highlighting the built-in wireless connectivity.

Image: Visual comparison demonstrating the superior 1920x720 HD resolution of the Road Top screen compared to lower resolution alternatives, emphasizing clarity and detail.
Package Contents
The following items are included in your product package:
- 1 x Road Top 12.3 Inch Ultra-Narrow CarPlay Touchscreen
- 1 x Power Cable
- 1 x LVDS/USB Cable
- 1 x AMI Cable (if applicable for your vehicle)

Image: A visual representation of the main unit (12.3-inch screen) and essential cables (Power, LVDS/USB, AMI) included in the package.
Installation Guide
Professional installation is recommended. The installation process requires removing parts of the car dashboard to connect the necessary wiring. Ensure all connections are secure and correct before reassembling the dashboard.
- Preparation: Disconnect the vehicle's battery before starting any electrical work.
- Dashboard Disassembly: Carefully remove the necessary dashboard trim and the original car screen to access the wiring.
- Wiring Connections: Connect the provided power cable, LVDS/USB cable, and AMI cable (if applicable) according to the vehicle's wiring diagram. Ensure all connections are firm.
- Test Functionality: Before fully reassembling, temporarily connect the new screen and test all functions (CarPlay, Android Auto, original system, audio, camera) to ensure proper operation.
- Reassembly: Once all functions are verified, carefully reassemble the dashboard components.
Note: Most installation issues arise from incorrect cable connections or settings. If you encounter problems, refer to the troubleshooting section or contact customer support.

Image: A side-by-side comparison showing the original Mercedes-Benz C Class W204 dashboard before and after the installation of the Road Top 12.3-inch touchscreen, demonstrating the integrated appearance.
Setup and Operation
1. Switching Between Original and Linux System
The Road Top touchscreen allows seamless switching between the original Mercedes-Benz system and the new Linux system.
- From Linux to Original: On the Linux system interface, select the "Original Car Interface" icon.
- From Original to Linux: Touch anywhere on the screen while in the original system, or hold the "Menu" button on your car's iDrive controller for 3 seconds.
2. Connecting Wireless CarPlay / Android Auto
To use wireless CarPlay or Android Auto, ensure the respective option is enabled in the system settings.
- Enable CarPlay/AirPlay: Navigate to Setup -> Smart Phone -> Smart Phone Setting and ensure "CarPlay" or "AirPlay" is toggled ON.
- Connect via Wi-Fi (for AirPlay/CarPlay): On your iPhone, go to Settings -> WLAN, turn on Wi-Fi, and connect to the screen's Wi-Fi network (named "CAR-XXXX"). If prompted for a password, enter "66668888".
- Activate Screen Mirroring (for AirPlay): On your iPhone, open Control Center, select "Screen Mirroring," and choose "AirPlay."
- Connect via Bluetooth (for CarPlay/Android Auto): On your phone, turn on Bluetooth. Search for the screen's Bluetooth device (named "CAR-BT-XXXX") and pair with it. Allow contacts and favorites sync if prompted.
- Initiate CarPlay/Android Auto: Once paired, a prompt will appear on your phone. Click "Use CarPlay" or "Use Android Auto" to activate the function.
3. Language Setup
To change the system language:
- Go to Setup -> System -> Language.
- Select your desired language from the list.
4. Display Settings
Adjust display parameters for optimal viewing:
- Navigate to Setup -> Display.
- Adjust settings such as Contrast, Chromaticity, Saturation, Day Dimmer Level, and Night Dimmer Level.
5. Audio Settings
Customize audio output and microphone settings:
- Access audio settings via Setup -> Audio.
- Volume: Adjust Media, Phone, Ringtone, Voice, and Other volume levels.
- EQ: Fine-tune the equalizer for preferred sound profiles.
- Call Echo Cancellation: Adjust or activate for clearer calls.
- Microphone Gain: Adjust Microphone OP gain and Microphone Pga gain for optimal microphone performance.

Image: Diagram illustrating two sound transmission methods: AUX cable connection (for cars without AUX/AMI port or with AMI port) and Bluetooth transmission, including steps for activation.
6. Car Settings
Configure vehicle-specific settings:
- Navigate to Setup -> Car Settings.
- Reversing Settings: Adjust Camera Type (Original/Aftermarket), Camera Format (SD NTSC/PAL, AHD), Reverse Line Detection, Reverse Mute, Parking Line, Radar, Reverse Camera Mirror, OEM Parking Sensor Button, Original Camera Exit Delay Time, Front-view Time, Front Camera Mirror.
- Original Car's Screen Resolution: Select the correct resolution for your original NTG system (e.g., NTG4.0 576X124, NTG4.0/4.5/4.7 800X480).
- Force OEM System Full Screen: Toggle ON/OFF.
- Aircondition Type: Select Type A or Type B based on your vehicle.
- Aircondition Popup Window: Toggle ON/OFF.
- Temperature Units: Select Celsius or Fahrenheit.
- AUX Activation: Enable if needed.
- Auto Switch to AUX: Toggle ON/OFF.
- OEM Navi System: Indicates if OEM navigation exists.
- Enter OEM Screen After Boot-up: Toggle ON/OFF.
- Front/Rear Door Setting: Show/Hide door status.
- Use External Microphone: Toggle ON/OFF.
- Pausing Audio When Switching OEM: Toggle ON/OFF.
- Headlamp Detection: Toggle ON/OFF.
- Swap Next/Prev Song: Toggle ON/OFF.
Troubleshooting
- No Sound: Ensure the AUX connection is correctly made and activated. Check the "Use Car's BT Channel" setting in Setup -> System.
- Screen Not Turning On: Verify all power connections are secure. Check vehicle's fuse box.
- CarPlay/Android Auto Not Connecting: Confirm Wi-Fi and Bluetooth are enabled on your phone and the screen. Ensure the correct Wi-Fi network and Bluetooth device are selected. Check CarPlay/AirPlay settings in Setup -> Smart Phone -> Smart Phone Setting.
- Original System Issues: If the original system is not displaying correctly, check the "Original Car's Screen Resolution" setting in Setup -> Car Settings.
- Touchscreen Unresponsive: Try restarting the unit. If the issue persists, check for firmware updates.
Specifications
| Feature | Detail |
|---|---|
| Display Size | 12.3 Inches |
| Resolution | 1920 x 720 HD |
| Operating System | Linux |
| Connectivity | Wireless CarPlay, Wireless Android Auto, Wireless Mirrorlink, Bluetooth |
| Vehicle Service Type | Car (Mercedes-Benz C Class W204 2008-2010 with NTG4.0) |
| Control Method | Touchscreen, Steering Wheel Controls, Original iDrive Controller |
| Item Weight | 4.38 pounds |
| Package Dimensions | 13.35 x 10.08 x 6.34 inches |
Warranty and Support
Your Road Top 12.3 Inch Ultra-Narrow CarPlay Touchscreen comes with a 1-Year Warranty.
For technical assistance, installation questions, or any issues, please contact Road Top Direct customer support. You can typically find contact information on the seller's page or through your purchase platform.
To contact support:
- Find our store name "Road Top Direct" next to the shopping cart on the product page.
- Click on "Road Top Direct".
- Click the "Ask a question" button.
- Provide pictures or videos of your technical or installation questions for faster assistance.
Ask a question about this manual
Ask about setup, troubleshooting, compatibility, parts, safety, or missing instructions. Manuals+ will review the question and use this page’s manual context to help answer it.