
XRC TECH V22
XRC TECH V22 4K Dash DVR Camera User Manual
Model: V22
Introduction
Thank you for choosing the XRC TECH V22 4K Dash DVR Camera. This manual provides detailed instructions for the installation, operation, and maintenance of your new dash camera system. Please read this manual thoroughly before use to ensure proper functionality and to maximize your driving safety and recording experience.
The XRC TECH V22 features a 4K UHD front camera and a 1080P rear camera, built-in WiFi for app control, GPS tracking, superior night vision, loop recording, and a 24-hour parking monitor. It is designed to capture clear and comprehensive video footage of your journeys.
Package Contents
Please check the package contents upon unboxing:
- XRC TECH V22 Dash Camera (Front Unit)
- 1080P Rear Camera (with 6m cable)
- Car Charger
- Electrostatic Adhesive
- User Manual

Image: Contents of the XRC TECH V22 Dash Camera package, showing the main unit, rear camera, car charger, electrostatic sticker, and user manual.
Specifications
| Feature | Description |
|---|---|
| Model | V22 |
| Front Camera Resolution | 4K UHD (3840*2160P/30fps) |
| Rear Camera Resolution | 1080P |
| Display Screen | 1.47 inch IPS screen |
| Video Format | M-JPEG, H.264 compression |
| Connectivity | 2.4G WiFi, USB Type-C |
| Special Features | Built-in GPS, G-Sensor, Night Vision, Loop Recording, 24-Hour Parking Monitor, Voice Alert |
| Max Memory Support | 256GB (SD card not included) |
| Power Source | AC (Car Charger), Type C Buck Line for parking monitor (sold separately) |
| Dimensions | 16 x 12 x 8 cm |
Setup Guide
1. Mounting the Dash Camera
The XRC TECH V22 comes with an electrostatic adhesive for easy and secure mounting on your windshield.
- Clean the area on your windshield where you intend to mount the camera. Ensure it is free of dust and grease.
- Apply the electrostatic adhesive to the windshield first, then attach the dash camera mount to the adhesive.
- Adjust the angle of the front camera to ensure it captures the road ahead clearly, avoiding obstruction from wipers or the rearview mirror.
- For the rear camera, mount it on the rear windshield using its adhesive, ensuring a clear view of the road behind. Route the cable neatly to the front unit.

Image: The XRC TECH V22 front and rear dash cameras, illustrating their compact design and mounting points.
2. Inserting the SD Card
The device supports up to 256GB SD cards. A high-speed (Class 10 or U3 recommended) SD card is required for optimal performance (not included).
- Locate the SD card slot on the dash camera.
- Insert the SD card with the gold contacts facing the correct direction until it clicks into place.
- It is recommended to format the SD card within the camera settings before first use to ensure compatibility and proper recording.
3. Connecting Power
- Connect the provided car charger to the Type-C port on the dash camera.
- Plug the other end of the car charger into your vehicle's cigarette lighter socket.
- The camera will automatically power on and begin recording when your vehicle starts.
Operating Instructions
Basic Operation and Controls
The dash camera features a 1.47-inch IPS screen for real-time video display and status indicators. Controls are typically located on the device itself.

Image: An illustration of the dash camera's main components and functions, including the front lens, rear lens connection, WiFi mode activation, and standby display.
- Power On/Off: Long press the power button to turn the device on or off. It will automatically power on/off with the vehicle's ignition.
- Recording: The camera automatically starts loop recording when powered on.
- Screen Display: The 1.47-inch screen can display real-time video, download QR codes for the app, and video time/status.
Dual Camera Recording (4K Front + 1080P Rear)
The V22 simultaneously records from both the front and rear cameras, providing comprehensive coverage of your driving environment.
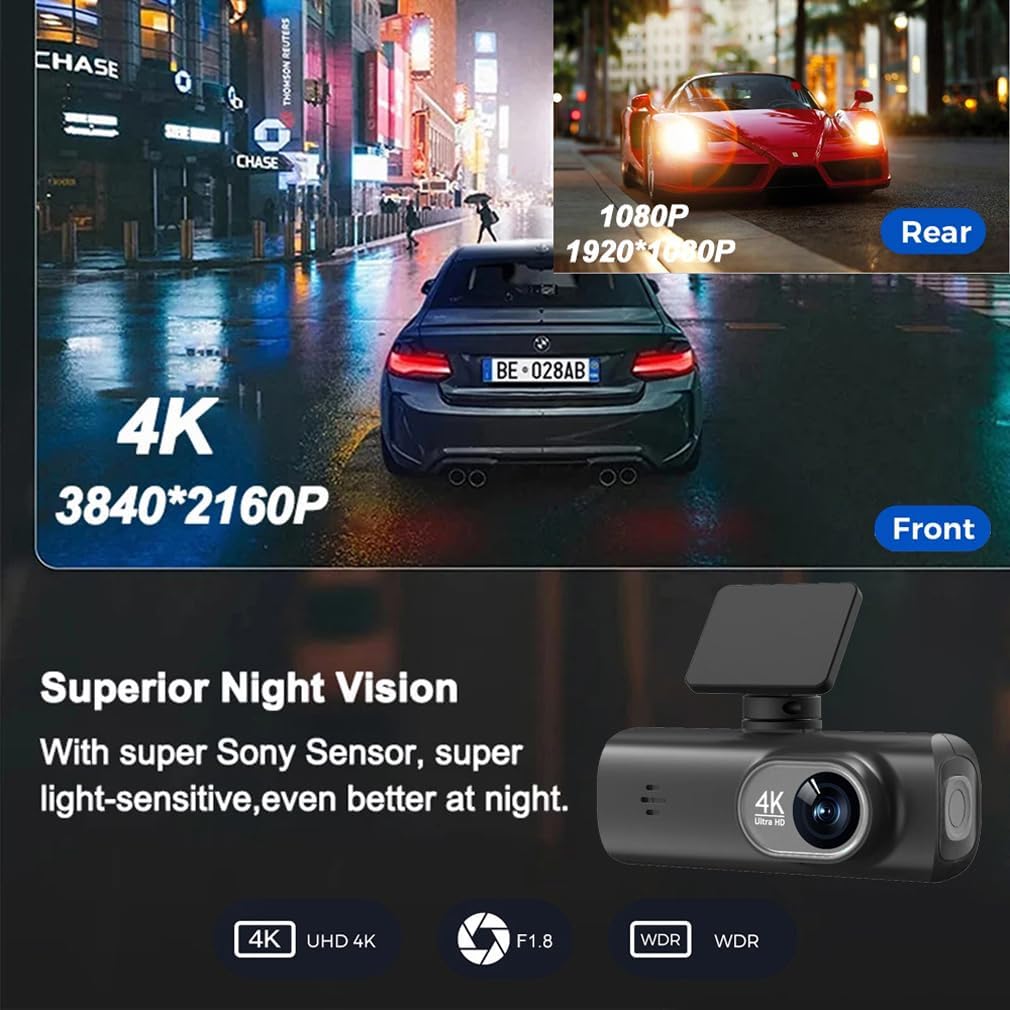
Image: Demonstrates the simultaneous recording capability of the dash camera, showing a 4K resolution view from the front and a 1080P resolution view from the rear.

Image: Highlights the dual recording feature, emphasizing security for driving with both front (4K) and rear (1080P) cameras.
Loop Recording
The dash camera utilizes loop recording to ensure continuous recording. When the memory card reaches full capacity, new recordings will automatically overwrite the oldest unlocked footage.
- Video files are typically saved in short segments (e.g., 1, 3, or 5 minutes).
- Emergency locked videos are protected from being overwritten.

Image: Visual representation of loop recording, showing how video segments are recorded, deleted, and how emergency locked files are preserved.
Smart Emergency Recording / G-Sensor
The built-in G-sensor detects sudden impacts or collisions. When triggered, the camera will automatically save and lock the current video segment, preventing it from being overwritten by loop recording.
- The G-sensor sensitivity can usually be adjusted in the camera settings.
Super Night Vision
Equipped with an F2.0 wide aperture lens and 6-glass wide-angle lenses, the V22 provides superior image quality even in low-light conditions, capturing details like license plates more accurately.
Image: Illustrates the dash camera's superior night vision, featuring UHD 4K, F1.8 aperture, and WDR technology for enhanced low-light performance.
WiFi App Control (Viidure App)
The built-in WiFi allows for easy connection to the "Viidure" app on your smartphone, enabling convenient control and access to your recordings.
- Download the App: Scan the QR code displayed on the camera screen or visit the official download link: Viidure App Download.
- Connect to WiFi: Turn on WiFi on your dash camera and connect your smartphone to the camera's WiFi network (SSID and password usually displayed on screen or in initial setup).
- App Functions: Through the app, you can:
- View live video feed.
- Download recorded videos and photos to your smartphone.
- Edit and share content on social media.
- Adjust camera settings.

Image: Depicts the built-in WiFi feature, showing a smartphone running the Viidure app, connected to the dash camera for live viewing, editing, downloading, and sharing of video and picture files.
GPS Tracker
The integrated GPS module accurately records your vehicle's location, speed, latitude, longitude, and route. This data can be viewed on Google Maps via the "Viidure" app or a dedicated GPS player on your computer.

Image: Illustrates the GPS Tracker functionality, showing how vehicle location, speed, and route data can be viewed on Google Maps via the Viidure app on a smartphone or a GPS player on a computer.
24-Hour Parking Monitor
The 24-hour parking monitor provides surveillance even when your vehicle is parked. If the G-sensor detects an impact or collision, the camera will automatically turn on, record a short video (approx. 1 minute), and lock it to prevent overwriting.
- Important: This feature requires a continuous power supply. You will need to connect the dash camera to an external power source using a Type C Buck Line (sold separately).

Image: Shows a car in a parking lot, symbolizing the 24-hour parking monitoring feature, which records front and rear views upon detecting collisions or shakes. Note: Requires a 3-lead Hardwire Kit.
Maintenance
- SD Card Formatting: Regularly format your SD card (at least once a month) within the camera's settings to ensure optimal performance and prevent data corruption. Back up any important files before formatting.
- Cleaning: Use a soft, dry cloth to clean the camera lens and body. Do not use abrasive cleaners or solvents.
- Temperature: Avoid exposing the camera to extreme temperatures for prolonged periods, as this can affect battery life and component integrity.
Troubleshooting
| Problem | Possible Solution |
|---|---|
| Camera not powering on. | Check the car charger connection. Ensure the vehicle's cigarette lighter socket is receiving power. Try a different power source if available. |
| Camera stops recording or shows "SD card error". | Format the SD card in the camera. Ensure the SD card is Class 10 or U3. Try a different SD card. The card might be full or corrupted. |
| Video footage is blurry or unclear. | Clean the camera lens. Ensure the protective film has been removed from the lens. Check if the camera is securely mounted and not vibrating. |
| WiFi connection issues with the app. | Ensure WiFi is enabled on the camera and your phone. Reconnect to the camera's WiFi network. Restart both the camera and your phone. Ensure the Viidure app is updated to the latest version. |
| Parking monitor not working. | Confirm that the camera is connected to a continuous power source (Type C Buck Line, sold separately). Check G-sensor sensitivity settings. |
Warranty and Support
For warranty information and technical support, please refer to the documentation included with your purchase or contact XRC TECH customer service directly. Keep your purchase receipt as proof of purchase.
Ask a question about this manual
Ask about setup, troubleshooting, compatibility, parts, safety, or missing instructions. Manuals+ will review the question and use this page’s manual context to help answer it.