
DANOPLUS DP-441
DANOPLUS Digital Sound Level Meter User Manual
Model: DP-441
1. Introduction
The DANOPLUS Digital Sound Level Meter (Model DP-441) is a precision instrument designed for measuring sound levels in various environments. It features a wide measurement range, high accuracy, and advanced data logging capabilities, allowing for real-time monitoring, data storage, and export for analysis. This manual provides detailed instructions for the proper setup, operation, and maintenance of your device.

Image: Front view of the DANOPLUS Digital Sound Level Meter with a digital display and a graphical representation of recorded data.
2. What's in the Box
Upon opening the package, please verify that all the following items are included:
- 1x Decibel Meter (DANOPLUS Model DP-441)
- 1x Sponge ball (windscreen for microphone)
- 1x USB Cable (Type-C)
- 1x User Manual

Image: All components included in the DANOPLUS Decibel Meter package.
3. Product Features
- Data Logging: Capable of recording up to 43,000 data points, viewable on the main unit and PC. Data can be exported via Excel file when connected to a PC.
- Three-Color Light Alarm: Equipped with green, yellow, and red indicators for low, medium, and high noise levels. Alarm thresholds are manually adjustable.
- High Accuracy: Measures sound levels from 30 to 130dB with an accuracy of +/-1.5dB.
- Visual Display: Colored screen with line chart display showing visual noise data changes, analog bars, date, and time.
- A/C Frequency Weighting: Allows switching between A and C frequency weighting for different measurement needs.
- Fast/Slow Measuring Response: Adjustable response time for environmental measurements.
- DC Output: Provides noise value by voltage mode according to proportion.
- USB Charging & PC Connectivity: Compatible with Windows 7, 10, and 11 for connecting, data exporting, analysis, and printing. Features a 1000mAh capacity battery with approximately 1.5 hours charging time.

Image: Overview of the DANOPLUS Decibel Meter's main features.
4. Component Identification
Familiarize yourself with the various parts of your decibel meter:
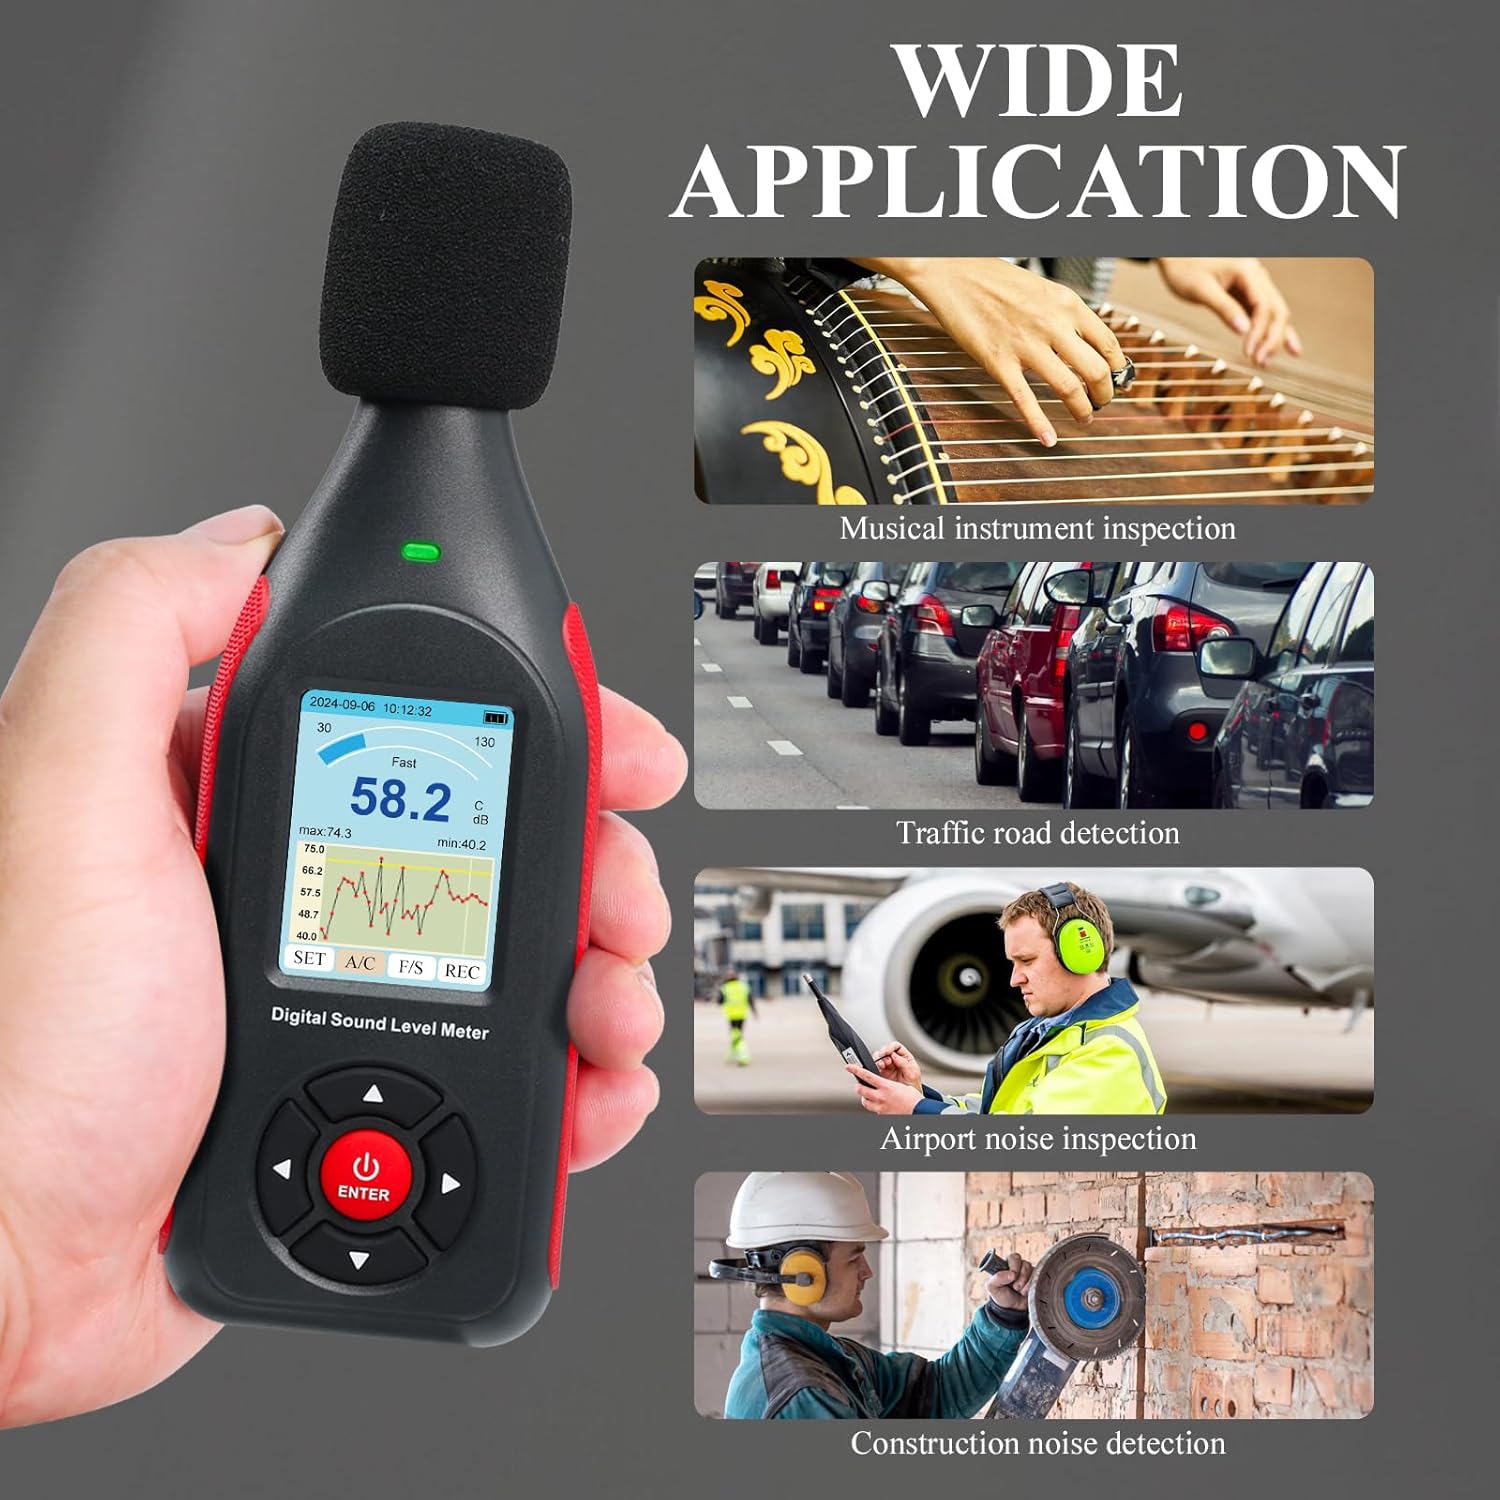
Image: Detailed diagram identifying all external components of the decibel meter.
- Capacitance Microphone: High-precision 1/2-inch microphone for sound detection.
- Spongeball: Windscreen to reduce wind interference and protect the microphone during measurements.
- Alarm Indicator: LED light indicating alarm status (Green, Yellow, Red).
- LCD Display: Shows measurement values, charts, settings, and other information.
- Navigation Buttons (Up/Down/Left/Right/Enter): Used for menu navigation, value adjustment, data hold, and starting/stopping recording.
- Power/Enter Button: Powers the device on/off and confirms selections.
- Type-C Interface: For USB charging and PC connectivity.
- DC Output: For external data output.
- Tripod Fixed Screw Aperture: Allows mounting the device on a tripod.
- Calibration Knob: For adjusting calibration.
5. Setup
5.1 Initial Charging
Before first use, fully charge the decibel meter. Connect the provided USB Type-C cable to the device's Type-C interface and the other end to a USB power source (e.g., computer USB port, wall adapter). The charging indicator will show the charging status. A full charge takes approximately 1.5 hours.

Image: USB-C charging port of the decibel meter.
5.2 Attaching the Sponge Ball
Gently place the sponge ball (windscreen) over the microphone at the top of the device. This helps to reduce wind interference and protect the microphone during outdoor measurements.
6. Operating Instructions
6.1 Power On/Off
To power on the device, press and hold the Power/ENTER button until the screen illuminates. To power off, press and hold the same button until the screen turns off.
6.2 Measurement Interface
Once powered on, the device will typically enter the real-time measurement interface, displaying the current sound level in decibels (dB), along with maximum (max) and minimum (min) values, and a line chart of recent readings.

Image: Overview of the decibel meter's screen interface, including measurement and settings views.
6.3 Data Hold
To freeze the current measurement value on the display, press the Up (▲) button. The "HOLD" indicator will appear. Press the Up (▲) button again to release the hold and resume real-time measurement.
6.4 Data Recording
The device can record up to 43,000 data points. To start or stop data recording:
- On the measurement interface, use the Left (◄) / Right (►) buttons to navigate to the REC option.
- Press the ENTER button to start recording. The "Recording" indicator will appear.
- Press the ENTER button again to stop recording.
Video: Demonstration of the DANOPLUS Decibel Meter's data logging, light alarm, frequency weighting, and time weighting functions. This video illustrates how to operate these key features of the device.
6.5 A/C Frequency Weighting
Frequency weighting adjusts the meter's response to different frequencies, mimicking human hearing (A-weighting) or providing a flat response (C-weighting).
- A-Weighting: Suitable for environmental noise detection, as it approximates the human ear's response.
- C-Weighting: Suitable for sound pressure analysis of engines or machinery, providing a more linear response across frequencies.
To switch between A/C frequency weighting:
- On the measurement interface, use the Left (◄) / Right (►) buttons to locate the A/C option.
- Press the ENTER button to toggle between A and C weighting.

Image: Explanation of A/C frequency weighting and Fast/Slow time weighting.
6.6 Fast/Slow Time Weighting
Time weighting determines how quickly the meter responds to changes in sound level.
- FAST (8 times/second): Suitable for environmental measurements with large variations in noise levels, capturing rapid changes.
- SLOW (1 time/second): Suitable for general environmental measurements where a more averaged reading is desired.
To switch between Fast/Slow time weighting:
- On the measurement interface, use the Left (◄) / Right (►) buttons to locate the F/S option.
- Press the ENTER button to toggle between Fast and Slow response.
6.7 Alarm Settings
The decibel meter features a 3-color light alarm system (Green, Yellow, Red) to indicate noise levels relative to set thresholds.

Image: Visual representation of the 3-color alarm system and its settings.
To set alarm thresholds:
- From the measurement interface, press the SET button to enter the main setting page.
- Navigate to "light alarm" using the Up/Down buttons and press ENTER.
- You can enable/disable the light alarm and set the thresholds for the yellow and red alarms. Use the navigation buttons to adjust values and ENTER to confirm.
- Green Indicator: Noise level does not exceed the yellow alarm value.
- Yellow Indicator: Noise level exceeds the yellow alarm value.
- Red Indicator: Noise level exceeds the red alarm value.
6.8 PC Connectivity and Data Export
The DANOPLUS Decibel Meter can connect to a PC for data download, real-time data sampling analysis, and printing of graphs and data. It is compatible with Windows 7, 10, and 11 operating systems.

Image: Decibel meter connected to a PC for data management.
To connect to a PC:
- Ensure the decibel meter is powered on.
- Connect the device to your PC using the provided USB Type-C cable.
- Download and install the dedicated software from the official website: https://cd50.net/441/.
- Follow the software instructions to view, analyze, and export recorded data.
7. Applications
The DANOPLUS Digital Sound Level Meter is suitable for a wide range of applications, including but not limited to:
- Musical instrument inspection and tuning.
- Traffic road noise detection and monitoring.
- Airport noise inspection and environmental assessment.
- Construction noise detection and compliance monitoring.
- Industrial noise measurement and workplace safety.
- Environmental noise assessment in residential areas.
- Quality control in manufacturing.

Image: Examples of common applications for the decibel meter.
8. Maintenance
- Keep the device clean and dry. Use a soft, dry cloth for cleaning. Do not use abrasive cleaners or solvents.
- Store the meter in a cool, dry place away from direct sunlight and extreme temperatures.
- Protect the microphone from dust and physical damage. Always use the sponge ball when measuring.
- If the device will not be used for an extended period, ensure it is fully charged before storage and recharge periodically to maintain battery health.
- Regular calibration is recommended (e.g., once a year) to ensure measurement accuracy. Refer to the calibration section in the software or contact support for guidance.
9. Troubleshooting
| Problem | Possible Cause | Solution |
|---|---|---|
| Device does not power on. | Low battery. | Charge the device using the provided USB cable. |
| Inaccurate readings. | Microphone obstructed or damaged; device needs calibration; environmental interference. | Ensure microphone is clear. Perform calibration. Minimize external interference. |
| Cannot connect to PC or export data. | Incorrect USB cable; driver not installed; software incompatibility (e.g., Mac OS). | Use the original USB cable. Install the correct drivers and software from the official website. Ensure your PC runs Windows 7, 10, or 11. |
| Alarm light not functioning. | Alarm feature disabled or thresholds incorrectly set. | Check alarm settings in the device menu and ensure thresholds are appropriate for the measured sound level. |
10. Specifications
| Parameter | Value |
|---|---|
| Calibration Sound Source | 94dB@1KHz |
| Measurement Range | 30~130dB (A), 35~130dB (C) |
| Accuracy | ±1.5dB (Reference sound pressure standard, 94dB@1KHz) |
| Resolution | 0.1dB |
| Frequency Weighting | A/C |
| Frequency Response | 31.5~8500Hz |
| Time-weighting | FAST / SLOW |
| Sampling Rate | FAST - 8 times/second; SLOW - 1 times/second |
| Rated Current | 70mA |
| Standby Current | 5uA |
| Power Supply | 3.7V Lithium battery / 1000mAh |
| Charging Time | 1.5h |
| Duration of Service | 8h |
| Data Storage | 43,000 records |
| Microphone | 1/2-inch polarization capacitance microphone |
| Product Dimensions | 5.98 x 2.55 x 1.06 inches |
| Item Weight | 5.76 ounces |
11. Warranty and Support
For warranty information, please refer to the product packaging or contact DANOPLUS customer support directly. Keep your purchase receipt for warranty claims.
For additional support, software downloads, or frequently asked questions, please visit the official product support page: https://cd50.net/441/.
Related documentsDP-441


Ask a question about this manual
Ask about setup, troubleshooting, compatibility, parts, safety, or missing instructions. Manuals+ will review the question and use this page’s manual context to help answer it.