1. Introduction
The Xiiaozet LK300EW Wireless USB Server and Print Server is a versatile device designed to enable multiple computers on a local network to share USB devices such as printers, scanners, or storage devices. It supports both Wi-Fi and Ethernet connectivity, offering flexible deployment options for home or small office environments. This manual provides detailed instructions for setting up and operating your device.

Figure 1: Xiiaozet Wireless USB Server and Print Server, illustrating its capability to share various USB devices over Wi-Fi.
2. Package Contents
Please verify that all items are present in your package:
- 1x USB Server
- 1x Power Adapter and Cable
- 1x Network Cable
- 1x User Manual
3. Product Overview
The LK300EW features multiple ports and indicator lights for easy setup and monitoring. Familiarize yourself with the device's layout:

Figure 2: Product Overview of the Xiiaozet LK300EW, detailing its ports and LED indicators.
LED Indicators:
- Power: Indicates power status.
- SYS: System status indicator.
- Cloud: Cloud connection status.
- USB1, USB2, USB3: Indicate activity on respective USB ports.
Ports and Buttons:
- USB 2.0 Ports (x3): Connect USB devices (printers, scanners, etc.).
- LAN Port: Connects to your router/switch or directly to a computer for configuration.
- Power Port (DC 5V===2A): Connects to the power adapter.
- Reset Button: Hold for 5 seconds to reset the device to factory settings.
4. Key Features
- Multi-Function Device: Functions as both a USB server and print server, allowing multiple network computers to share USB devices.
- Printer Compatibility: Converts standard USB printers into network-accessible printers. Supports RAW and IPP printing protocols. Compatible with major brands like HP, Canon, Epson. Note: Mobile printing and AirPrint are not supported.
- USB Device Sharing: Integrates software and hardware to wirelessly connect USB devices (scanners, dongles) via virtual USB software, simulating a direct physical connection.
- Flexible Network Options: Supports 2.4GHz Wi-Fi and Ethernet for stable connectivity within your local network.
- Multi-System Compatibility: Works with Windows, Linux, and macOS using lightweight client software.
5. Setup Guide
5.1. Hardware Installation
- Connect your USB printer(s) or other USB devices to the USB 2.0 ports on the Xiiaozet LK300EW.
- Connect the provided power adapter to the Power Port on the device and plug it into a power outlet.
- For initial setup or wired connection, connect the LAN port of the print server to your computer's Ethernet port using the provided network cable. Alternatively, connect it to your router/switch.
Video 1: Hardware Installation and Wi-Fi Mode Configuration for Windows. This video demonstrates connecting the print server to a printer and a computer, and configuring its Wi-Fi settings.
5.2. Network Configuration (Wi-Fi)
To connect your print server to your Wi-Fi network:
- Ensure your computer's wired network adapter is set to obtain an IP address automatically (DHCP).
- Open a web browser and enter the default IP address
192.168.6.1to access the print server's web management interface. - Log in using the default username and password:
admin. - Navigate to Basic Network > Wireless Network. Click Scan to find available Wi-Fi networks.
- Select your home/office Wi-Fi network name (SSID) and click JOIN NETWORK.
- Enter your Wi-Fi password in the WPA passphrase field. Do NOT change the name of the new network "wwan". Click SUBMIT.
- Verify that the mode is set to "Client" and the password is correct. Click SAVE & APPLY.
- After configuration, check the System Status > Overview > Wireless section. The print server should obtain an auto IP address (e.g., 192.168.1.248) from your local network. If the IP is not ending in .248, you may need to set a static IP for your print server.
Video 2: How to Setup the Print Server for Windows with Install Tool. This video provides a step-by-step guide for configuring the print server and adding a networked printer on a Windows computer.
5.3. Adding a Networked Printer (Windows)
Before adding the printer, ensure the printer driver software is installed on your computer. You can install it by directly connecting the printer to your computer or downloading it from the printer's website.
Method 1: Add Printer by TCP/IP Port (Recommended)
- Go to Start > Settings > Devices > Add a printer or scanner.
- Click "The printer that I want isn't listed".
- Select "Add a printer using a TCP/IP address or hostname" and click Next.
- Fill in the collected IP address of the print server (e.g., 192.168.1.248).
- Click Custom's Setting, then fill in your collected port (e.g., 9100 or 9101).
- Select your printer model from the list and click Next.
- Choose "Use the driver that is currently installed (recommended)" and click Next.
- Set a name for this networked printer (e.g., "Canon MG2500 series Printer (Networked)").
- Select "Do not share this printer" and click Next.
- Click Finish. It is recommended to set this printer as the default.
Method 2: Add Printer by Printer URL (Alternative)
This method is generally not recommended and should only be used if the TCP/IP Port method does not work for your specific printer.
- Go to Start > Settings > Devices > Add a printer or scanner.
- Click "The printer that I want isn't listed".
- Select "Select a shared printer by name".
- Fill in your collected printer URL (e.g.,
http://192.168.1.248:631/printers/Canon_MG2500_series) and click Next. - Select your printer model and click OK.
- This networked printer will have a default name including the HTTP URL. Click Next.
- Print a test page and click Finish.
Video 3: How to configure the network for print server. This video demonstrates the network configuration process for the print server.
Video 4: C202 Print Server Set Up Guide For DYMO LabelWriter 550/450. This video provides specific setup instructions for DYMO LabelWriter printers.
6. Operating the USB Server
Once the print server is configured and printers are added, other computers on the network can access them. For sharing other USB devices like scanners or dongles, you will typically use the dedicated virtual USB client software provided by Xiiaozet. This software creates a virtual connection, making the remote USB device appear as if it's directly connected to your computer.

Figure 3: Multiple computers in a Local Area Network (LAN) sharing a USB device through the Xiiaozet Print Server.
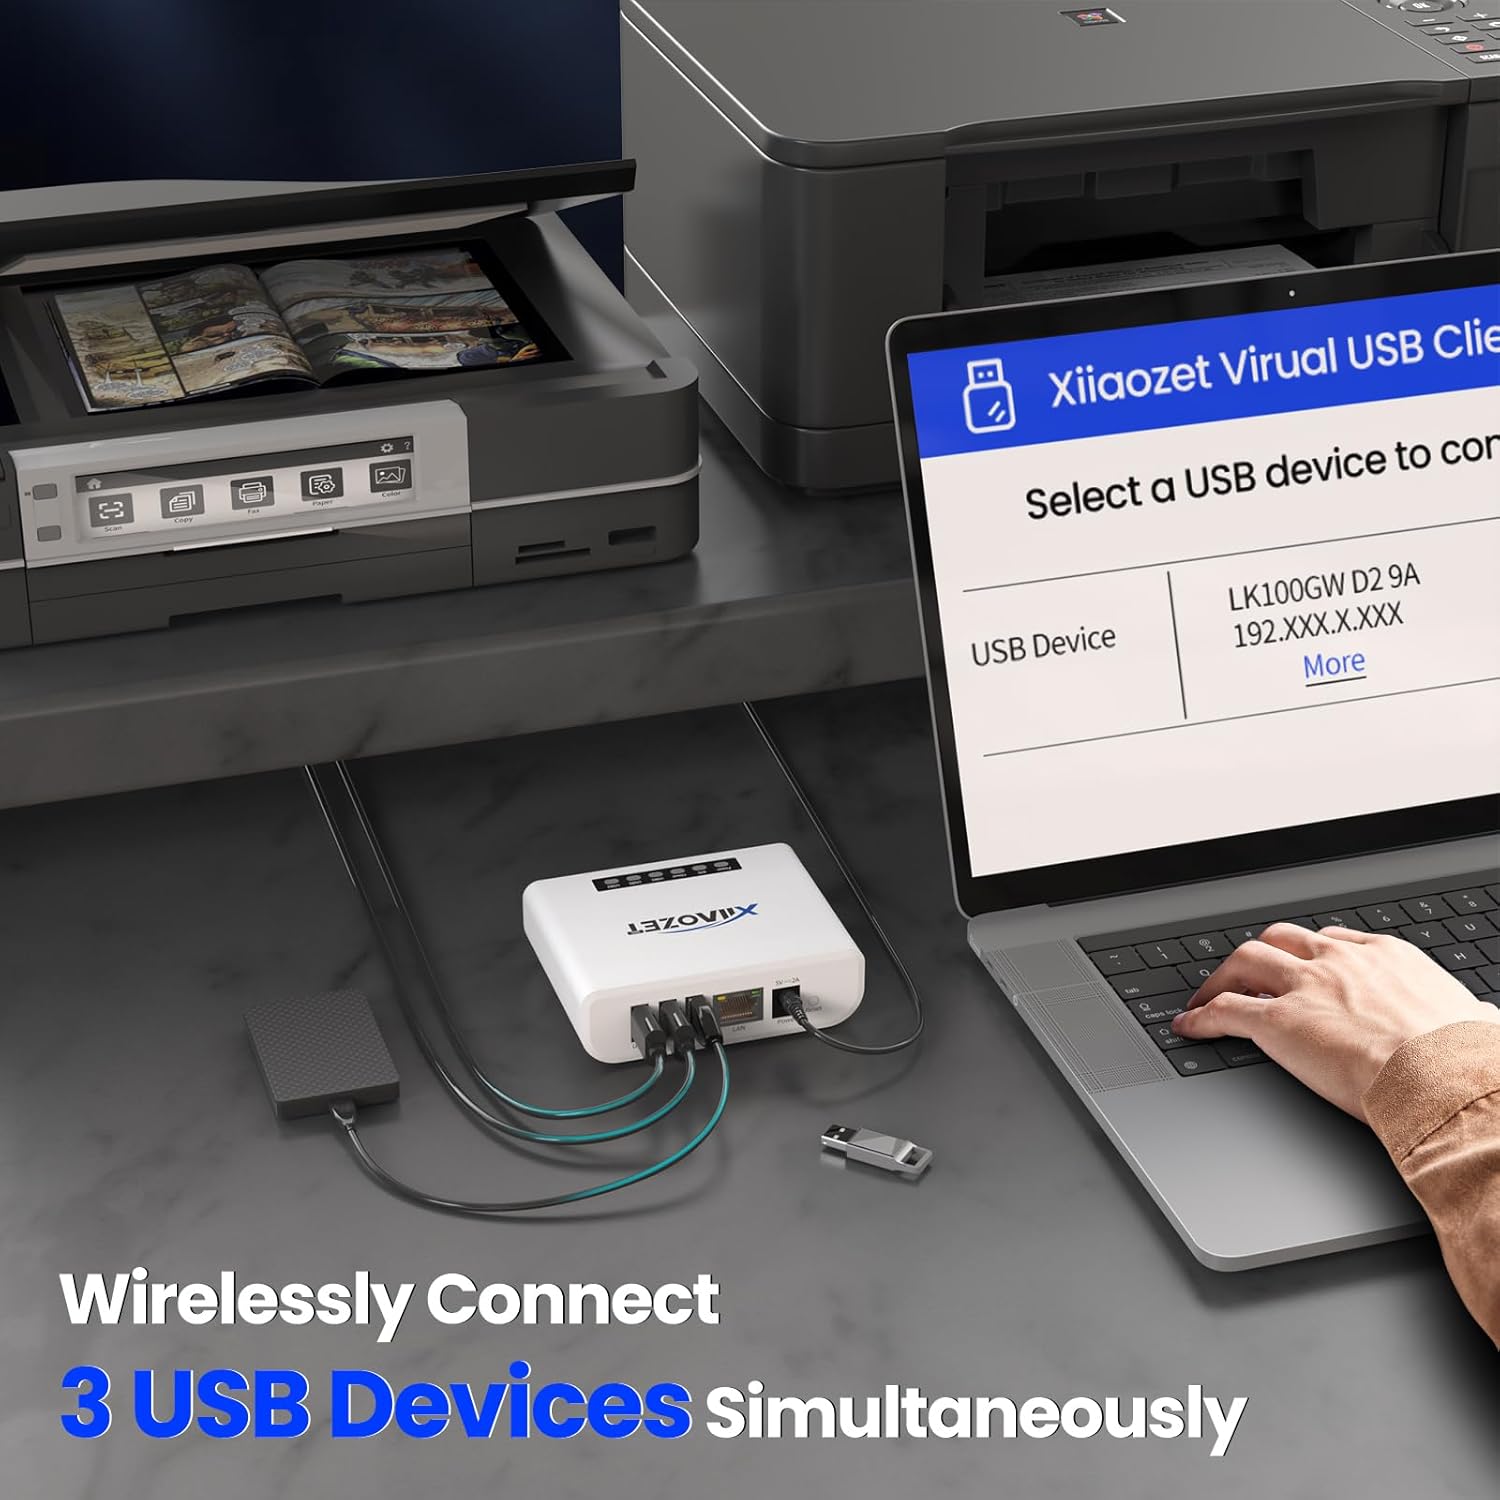
Figure 4: The Xiiaozet Virtual USB Client software interface on a laptop, demonstrating the ability to wirelessly connect up to 3 USB devices simultaneously.
7. Maintenance
- Keep the device in a cool, dry place away from direct sunlight and heat sources.
- Clean the device periodically with a soft, dry cloth. Do not use liquid cleaners.
- Ensure proper ventilation around the device to prevent overheating.
- Regularly check for firmware updates on the Xiiaozet website to ensure optimal performance and security.
8. Troubleshooting
8.1. Printer Errors / Ink Level Detection Issues
Some printer models, when added via TCP/IP Port, may encounter errors such as inability to detect ink levels or continuous printing without stopping. This can be due to the printer's bidirectional communication mode.
- On your computer, go to Start > Settings > Devices > Printers & Scanners.
- Select your networked printer and click Manage > Printer properties > Ports.
- Select your networked printer from the list of ports.
- Disable the "Enable bidirectional support" option.
- Click Apply and then OK.
- Power off and then power on the print server to restart it.
Video 5: This video, also used for setup, includes a segment at the end demonstrating how to turn off bidirectional mode for printers.
8.2. General Troubleshooting Tips
- No Power: Ensure the power adapter is securely connected to both the device and a working power outlet. Check the Power LED indicator.
- No Network Connection: Verify that the Ethernet cable is properly connected (if using wired setup) or that the Wi-Fi configuration is correct. Check the LAN and Cloud LED indicators.
- Device Not Found: Ensure your computer and the print server are on the same local network (subnet). Temporarily disable any firewalls on your computer that might be blocking communication.
- USB Device Not Recognized: Ensure the USB device is properly connected to the print server. Try connecting the USB device directly to your computer to confirm it functions correctly.
- Restart: If issues persist, try restarting the print server by unplugging and re-plugging the power adapter.
9. Specifications
| Feature | Detail |
|---|---|
| Model Number | LK300EW |
| Manufacturer | Xiiaozet |
| Package Dimensions | 4.45 x 3.31 x 2.52 inches |
| Item Weight | 8.8 ounces |
| Connectivity | 2.4GHz Wi-Fi, Ethernet |
| USB Ports | 3 x USB 2.0 |
| Compatibility | Windows, Linux, macOS |
| Date First Available | October 10, 2024 |
10. Support
For any setup or usage queries, our dedicated tech support team is available to assist you. Please refer to the contact information provided in your product packaging or on the official Xiiaozet website.
