
1. Important Safety Information
Before operating this snow blower, read and understand all safety instructions. Failure to follow these instructions may result in serious injury or property damage.
- Always wear appropriate safety gear, including eye protection and gloves.
- Keep hands and other body parts away from rotating parts.
- Never operate the snow blower in an enclosed area to prevent carbon monoxide poisoning.
- Always turn off the engine and allow the machine to cool before refueling.
- Store the snow blower and fuel in a safe, secure location.
- Always follow the manufacturer's instructions for operation and maintenance.
2. Product Overview
The PowerSmart HB7109B is a 26-inch self-propelled gas snow blower designed for efficient snow removal. It features a powerful B&S 208cc engine, electric start, and various functionalities to handle different snow conditions.
Key Features:
- Engine: 4-cycle OHV-208cc Snow Engine by B&S, providing efficient and reliable performance.
- Clearing Capacity: 26-inch clearing width and 20-inch clearing height, capable of throwing snow up to 50 feet.
- Auger and Impeller: Heavy-duty steel auger and impeller designed to cut through tough, icy snow.
- Starting System: Convenient 120V electric start with a recoil start backup for cold conditions (down to -20°F/-28.9℃).
- Drive System: Self-propelled with 6 forward and 2 reverse speed settings.
- Comfort Features: Hand-warmers for user comfort and an LED light for improved visibility during nighttime operation.
- Traction: 13-inch snow tires for excellent traction on slippery surfaces, with adjustable skid shoes for various driveways.
Component Identification:
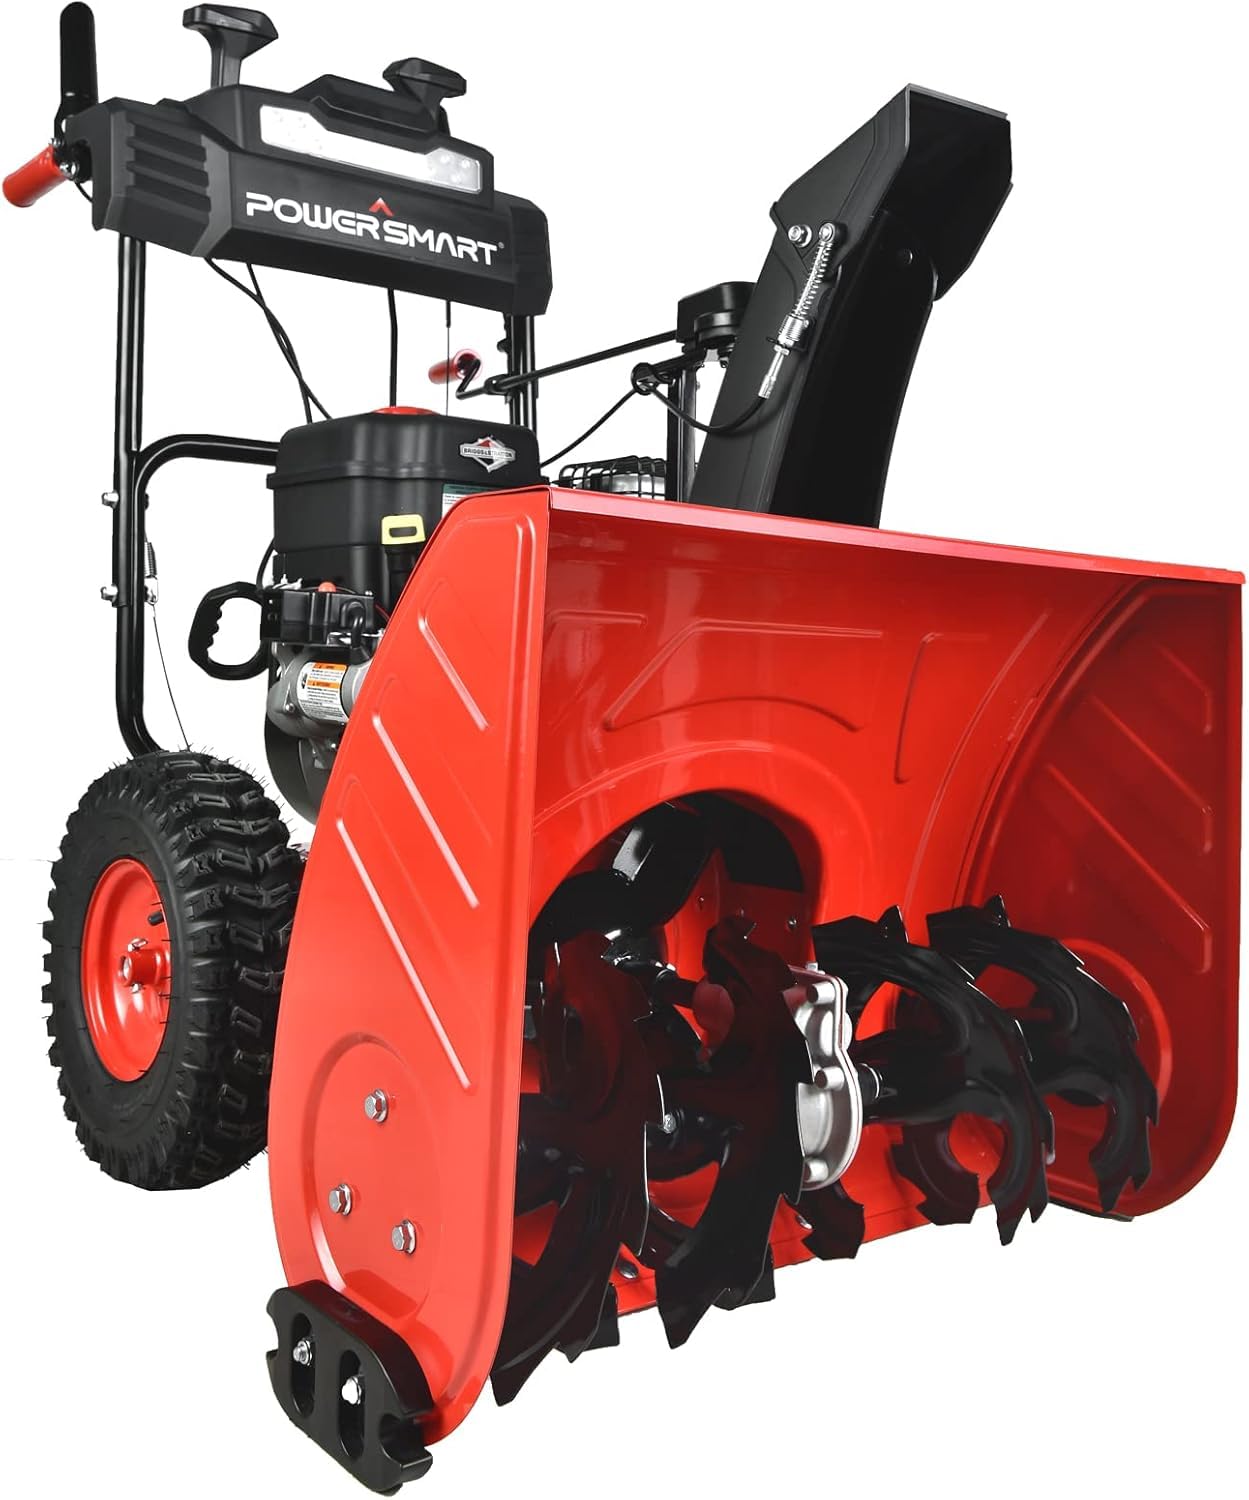


3. Setup and Assembly
This section provides general guidelines for setting up your snow blower. Refer to the detailed assembly instructions provided in your product packaging for specific steps.
3.1 Unpacking and Initial Inspection
- Carefully remove all components from the packaging.
- Inspect for any shipping damage. Contact customer support immediately if damage is found.
- Ensure all parts listed in the packing list are present.
3.2 Handlebar Assembly
Attach the handlebars to the main unit using the provided bolts and nuts. Ensure all connections are secure.
3.3 Chute Assembly
Mount the discharge chute and its control mechanism according to the instructions. Verify that the chute rotates freely and locks into position.
3.4 Fluid Checks
- Engine Oil: Check the engine oil level. Fill with 5W-30 engine oil if necessary, as indicated in the engine manual.
- Fuel: Fill the fuel tank with fresh, unleaded gasoline. Do not overfill.
4. Operating Instructions
Familiarize yourself with the controls before starting the engine.
4.1 Starting the Engine
- Electric Start:
- Connect the power cord to a 120V outlet and to the snow blower's electric start receptacle.
- Turn the ignition key to the "ON" position.
- Press and hold the electric start button until the engine starts.
- Once started, release the button and disconnect the power cord.
- Recoil Start (Backup):
- Ensure the ignition key is in the "ON" position.
- Pull the recoil starter handle firmly and steadily until the engine starts.
- Allow the engine to warm up for a few minutes before engaging the auger.
4.2 Operating the Snow Blower
- Engaging Auger: Squeeze the auger engagement lever to start the augers and impeller.
- Engaging Drive: Squeeze the drive engagement lever to activate the self-propelled system.
- Speed Control: Use the speed selector to choose from 6 forward and 2 reverse speeds. Adjust speed based on snow depth and density.
- Chute Control: Use the chute rotation crank to direct the snow discharge. Adjust the deflector to control throwing distance.
- Handle Warmers: Activate the handle warmer switch for comfort in cold weather.
- LED Lights: Turn on the LED lights for improved visibility during low-light conditions.
4.3 Stopping the Engine
- Release both the auger and drive engagement levers.
- Turn the ignition key to the "OFF" position.
- Allow the engine to cool down before storage or maintenance.
5. Maintenance
Regular maintenance ensures optimal performance and extends the life of your snow blower. Always refer to the engine manual for specific engine maintenance procedures.
5.1 General Maintenance Schedule
- Before Each Use: Check engine oil level, inspect for loose fasteners, check tire pressure, and ensure all controls operate smoothly.
- After Each Use: Clean snow and debris from the machine, especially around the auger and chute. Inspect shear pins for wear or damage.
- Seasonally: Change engine oil, inspect spark plug, check belts (auger drive belt, wheel drive belt), lubricate moving parts, and inspect skid shoes and shave plate.
5.2 Key Maintenance Parts

- Engine Oil (5W-30): Regularly check and change as per engine manual.
- Auger Drive Belt (302040079): Inspect for wear and replace if necessary.
- Wheel Drive Belt (302040078): Inspect for wear and replace if necessary.
- Shear Pins (303160355P): Replace if broken to protect the auger system.
- Key Switch (794696, 798177): Ensure proper function.
- 26" Shave Plate (303071443): Inspect for wear and replace to maintain clearing efficiency.
- Metal Skid Shoes (303070197P) & Plastic Skid Shoes (203050681): Adjust or replace as needed for different surfaces.
- Tires (302090220): Maintain proper inflation and inspect for damage.
- Spark Plug (691043): Inspect and replace periodically for optimal engine performance.
- Clean Out Tool (203050057): Use to safely clear clogs from the chute.
6. Troubleshooting
This section addresses common issues you might encounter. For problems not listed here, contact customer support.
| Problem | Possible Cause | Solution |
|---|---|---|
| Engine does not start | No fuel, stale fuel, spark plug issue, ignition key off, electric start cord not connected (for electric start) | Check fuel level, use fresh fuel, inspect/replace spark plug, ensure ignition key is ON, connect electric start cord properly. |
| Snow blower not clearing effectively | Clogged chute, worn shear pins, worn shave plate, incorrect speed setting | Turn off engine and clear chute with clean out tool, replace shear pins, replace shave plate, adjust speed. |
| Loss of drive power | Loose or worn wheel drive belt, low tire pressure | Inspect and replace drive belt if necessary, check and adjust tire pressure. |
| Excessive vibration | Loose fasteners, damaged auger or impeller | Check and tighten all fasteners, inspect auger/impeller for damage and replace if needed. |
7. Specifications
| Feature | Detail |
|---|---|
| Brand | PowerSmart |
| Model Number | HB7109B |
| Power Source | Gas Powered |
| Engine Type | 4 Cycle OHV-208cc (B&S) |
| Clearing Width | 26 Inches |
| Clearing Height | 20 Inches |
| Ideal Snow Depth | Up to 12 Inches (can handle more) |
| Throwing Distance | Up to 50 feet |
| Drive System | Self-Propelled (6 Forward, 2 Reverse Speeds) |
| Start Type | 120V Electric Start with Recoil Backup |
| Tires | 13-inch Snow Tires |
| Heated Handles | Yes (Constant temperature 131°F) |
| LED Lights | Yes |
| Product Dimensions (LxWxH) | 24"D x 33"W x 27.99"H |
| Item Weight | 146.9 Pounds |
| Color | Black (with red components) |
| UPC | 840432707289 |
8. Warranty and Customer Support
For detailed warranty information, please refer to the official documentation included with your PowerSmart HB7109B snow blower or visit the PowerSmart website.
If you require assistance with assembly, operation, maintenance, or troubleshooting, please contact PowerSmart Customer Support:
- Customer Support Hotline: 1-888-293-0024
- Online Support: Refer to the official PowerSmart website for FAQs and contact forms.