1. Introduction
Thank you for choosing the HATTEKER HT-6056 Professional Digital Display Cordless Hair Clipper. This manual provides essential information for the safe and effective operation, maintenance, and troubleshooting of your new hair clipper. Please read it thoroughly before first use and keep it for future reference.
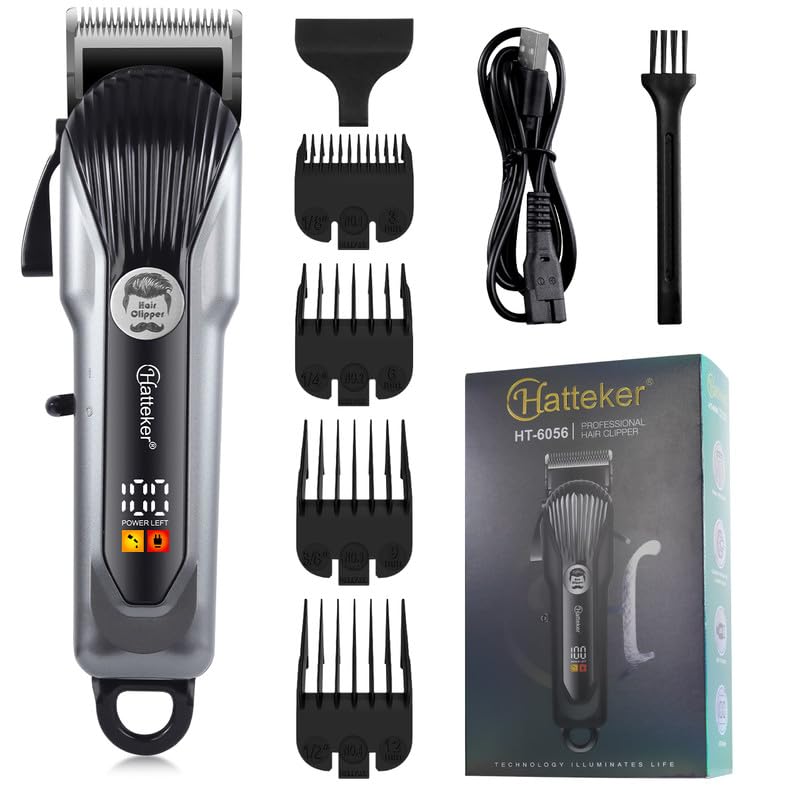
Image 1.1: The HATTEKER HT-6056 Hair Clipper kit, including the clipper, various guide combs, charging cable, and cleaning brush.
2. Safety Instructions
To reduce the risk of electric shock, injury, or damage, always follow these basic safety precautions:
- Do not immerse the appliance in water or other liquids.
- Keep the appliance away from water sources, especially when charging.
- Do not use the clipper if it has a damaged cord or plug, or if it is not working properly.
- Unplug the clipper from the power outlet immediately after use and before cleaning.
- This appliance is not intended for use by persons (including children) with reduced physical, sensory, or mental capabilities, or lack of experience and knowledge, unless they have been given supervision or instruction concerning use of the appliance by a person responsible for their safety.
- Children should be supervised to ensure that they do not play with the appliance.
- Use only the charger supplied with the appliance.
- Do not use outdoors or operate where aerosol (spray) products are being used or where oxygen is being administered.
- Store the appliance in a dry place.
3. Product Overview and Features
The HATTEKER HT-6056 is designed for professional and home use, offering precision and convenience.
Key Components:
- Clipper Body: Ergonomically designed for comfortable grip.
- Stainless Steel Blades: Self-sharpening, precision-ground blades for smooth cutting. Features zero-gapped and R-angle processing for skin protection.
- LED Digital Display: Shows remaining battery charge.
- Power Switch: On/Off button for easy operation.
- Adjustable Taper Lever: Allows for customization of cutting lengths without changing combs.
- Guide Combs: Four attachment combs (3mm, 6mm, 9mm, 12mm) for various cutting lengths.
- USB Charging Port: For convenient charging.
- Cleaning Brush: For maintaining the blades.
- Charging Cable: USB cable for power connection.
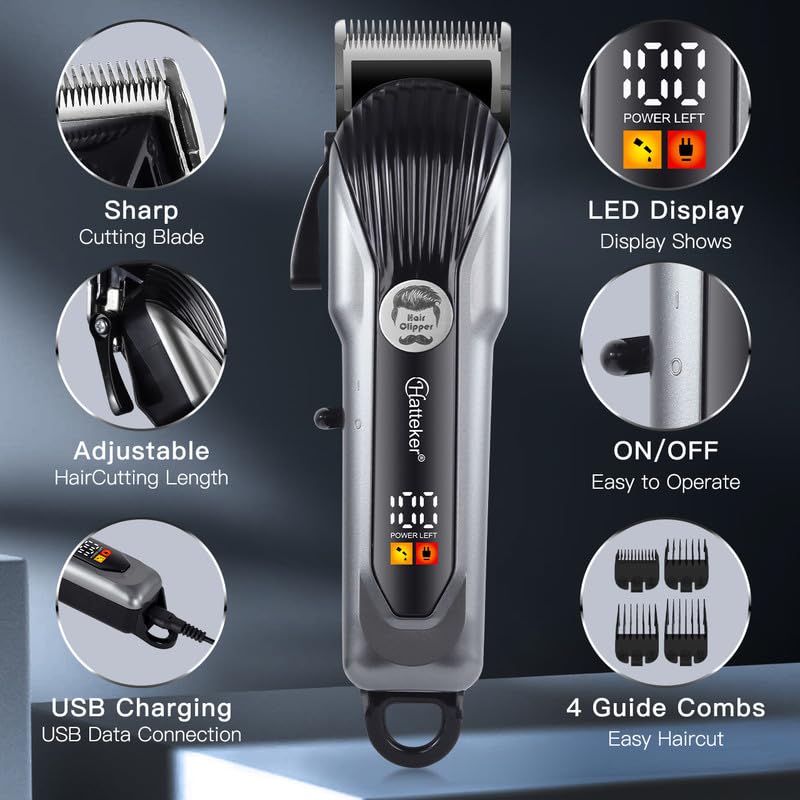
Image 3.1: Detailed view of the clipper highlighting its sharp cutting blade, LED display, ON/OFF switch, USB charging port, adjustable haircutting length, and four guide combs.
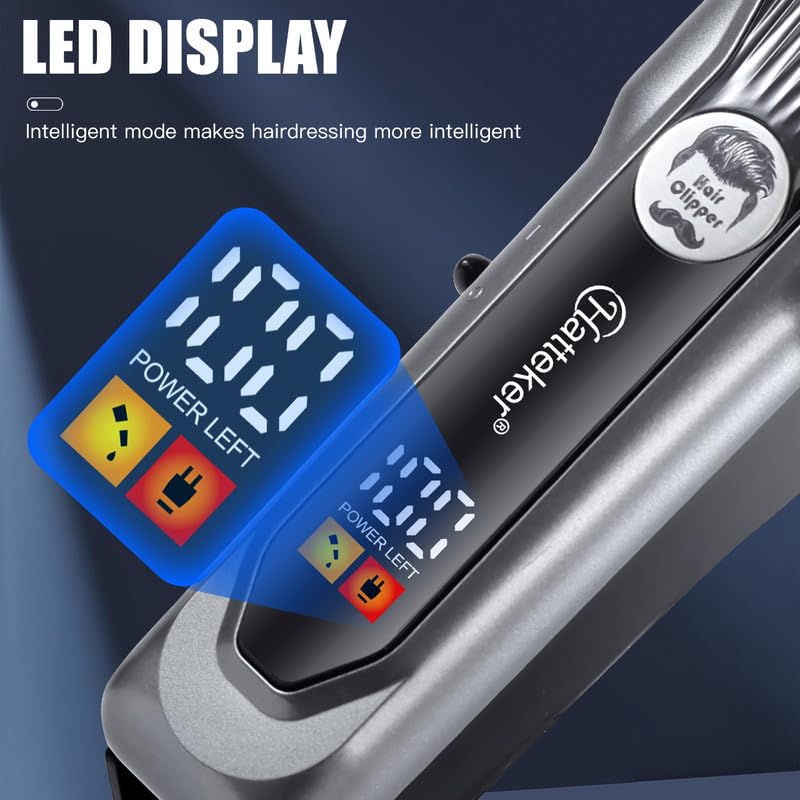
Image 3.2: The LED digital display clearly showing the "POWER LEFT" status, indicating the remaining battery charge.
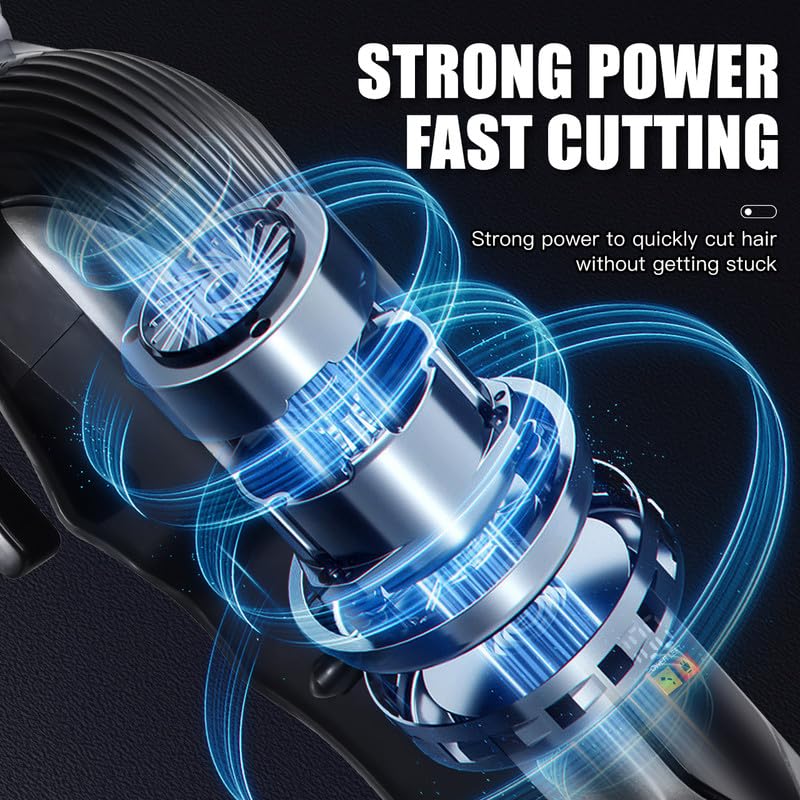
Image 3.3: An illustration depicting the strong internal motor of the clipper, designed for fast and efficient cutting without snagging.
4. Setup and Charging
Initial Charging:
Before first use, fully charge the clipper for approximately 3 hours. The LED display will indicate the charging status and battery level.
- Connect the USB charging cable to the clipper's charging port.
- Plug the other end of the USB cable into a compatible USB power adapter (not included) or a computer's USB port.
- The LED display will show the battery percentage increasing during charging.
- Once fully charged (100%), the clipper provides up to 180 minutes of cordless operation.
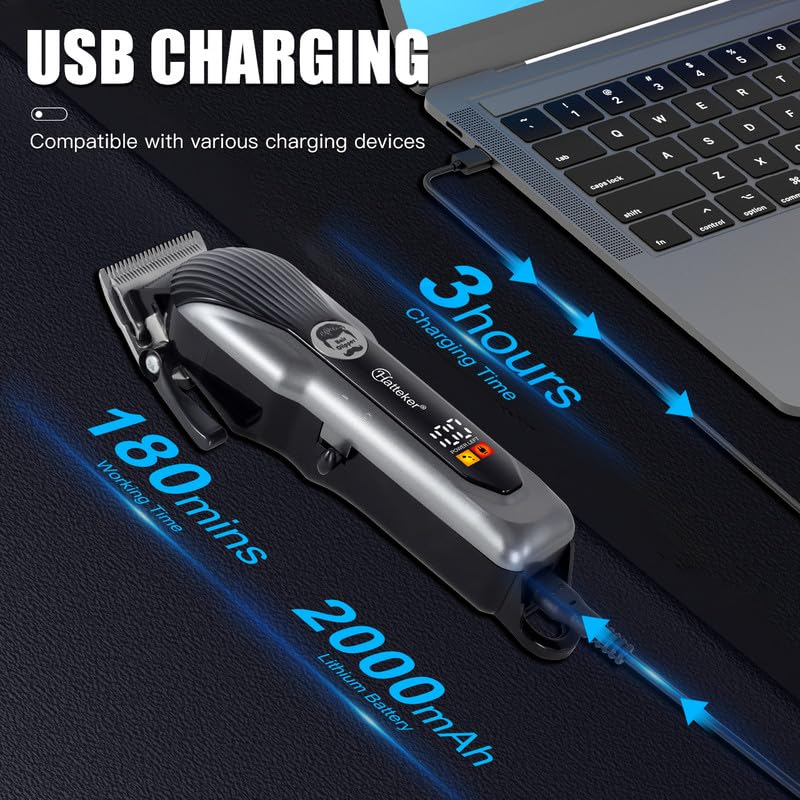
Image 4.1: The hair clipper being charged via USB, illustrating the 3-hour charging time, 180-minute working time, and the 2000mAh Lithium battery capacity.
Attaching Guide Combs:
The clipper comes with 4 attachment combs for different cutting lengths.
- Ensure the clipper is turned off.
- Select the desired guide comb (3mm, 6mm, 9mm, or 12mm).
- Align the comb with the clipper blade and push it firmly until it clicks into place.
- To remove, gently pull the comb away from the blade.

Image 4.2: The four included guide combs (3mm, 6mm, 9mm, 12mm) and how they attach to the clipper for different haircutting lengths.
5. Operating Instructions
Basic Operation:
- Ensure the clipper is charged.
- Attach the desired guide comb, or use without a comb for a close trim.
- Press the power switch to turn on the clipper.
- Hold the clipper firmly and move it against the direction of hair growth.
- For best results, use on clean, dry hair.
- After use, press the power switch to turn off the clipper.
Adjusting Cutting Length (Taper Lever):
The adjustable taper lever allows for fine-tuning of cutting lengths without changing guide combs, providing flexibility for blending and fading.
- Move the taper lever up for a shorter cut and down for a longer cut.
- This feature is ideal for precision work around the neckline and ears.
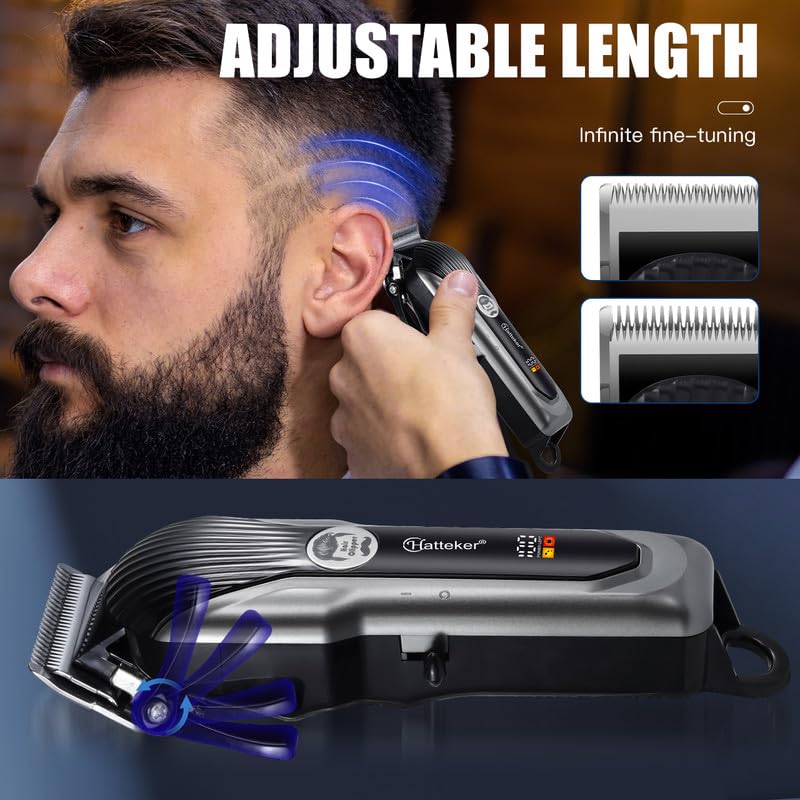
Image 5.1: Demonstrates the adjustable length feature of the clipper, allowing for precise control over hair cutting length.
Haircutting Tips:
- Start with a longer guide comb and gradually switch to shorter ones if needed.
- Always comb the hair in the direction of growth before cutting.
- Overlap strokes to ensure an even cut.
- For a clean finish, use the clipper without a comb to trim around the edges.
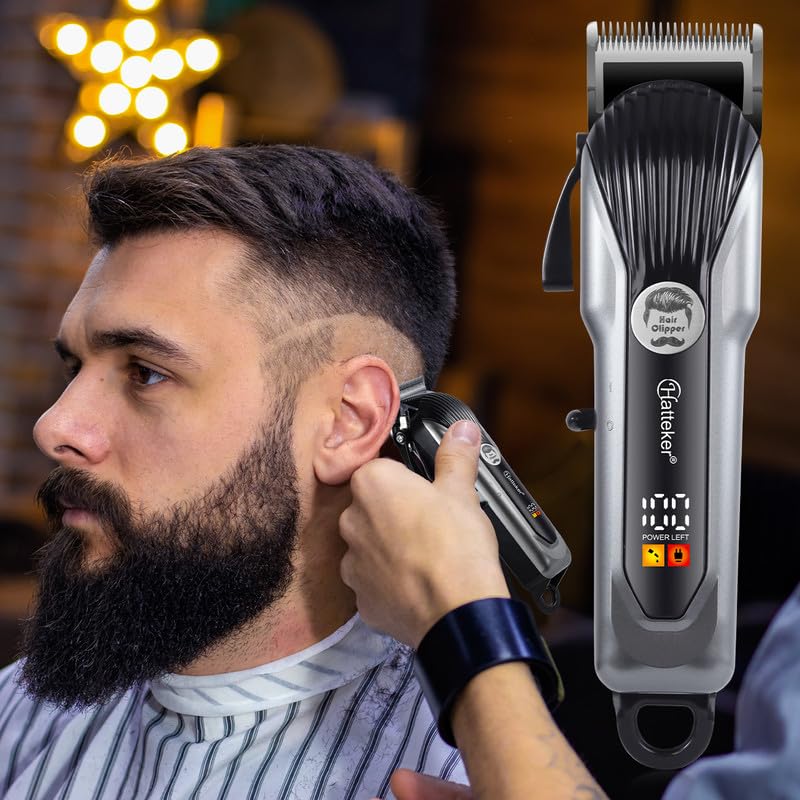
Image 5.2: A user demonstrating the use of the HATTEKER HT-6056 hair clipper for a precise side haircut.
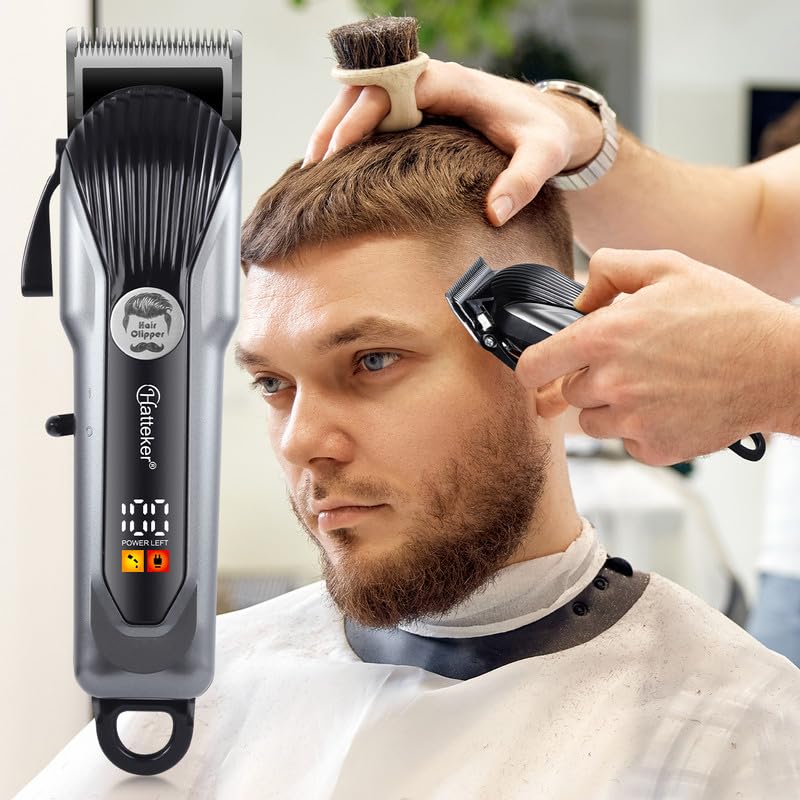
Image 5.3: A user demonstrating the use of the HATTEKER HT-6056 hair clipper for trimming hair on the top of the head.
6. Maintenance
Regular cleaning and maintenance will ensure optimal performance and extend the life of your clipper.
Cleaning the Blades:
- After each use, turn off and unplug the clipper.
- Use the provided cleaning brush to remove loose hairs from the blades.
- For a more thorough cleaning, the blades can be detached (refer to specific instructions if provided in packaging, otherwise, clean while attached).
- Do not rinse the entire clipper under water. The blades can be carefully wiped with a damp cloth.
Oiling the Blades:
To maintain cutting efficiency, it is recommended to oil the blades regularly (e.g., after every few uses).
- Apply a few drops of clipper oil (not included) to the teeth of the blades.
- Turn on the clipper for a few seconds to distribute the oil evenly.
- Wipe off any excess oil with a clean cloth.
Storage:
Store the clipper and its accessories in a dry, cool place, away from direct sunlight and moisture. Keep out of reach of children.
7. Troubleshooting
| Problem | Possible Cause | Solution |
|---|---|---|
| Clipper does not turn on. | Battery is depleted. | Charge the clipper fully (approx. 3 hours). |
| Clipper runs slowly or pulls hair. | Blades are dirty or not oiled. | Clean the blades and apply clipper oil. |
| Clipper makes unusual noise. | Blades may be misaligned or damaged. | Check blade alignment. If noise persists or blades are damaged, contact customer support. |
| Battery life is shorter than expected. | Battery not fully charged or aging battery. | Ensure full charge. Over time, battery capacity may decrease. |
8. Specifications
| Feature | Detail |
|---|---|
| Model Number | HT-6056 |
| Power Source | Cordless/Corded (Battery Powered) |
| Battery Type | Li-ion 2000mAh |
| Charging Time | Approx. 3 hours |
| Runtime | Up to 180 minutes (cordless) |
| Blade Material | Stainless Steel |
| Cutting Lengths (Combs) | 3mm, 6mm, 9mm, 12mm |
| Adjustable Taper Lever | Yes |
| Display | LED Digital Display |
| Noise Level | Lower than 60 dB |
| Product Dimensions | 23.2 x 14 x 6.5 cm |
| Item Weight | 480 g |
| Country of Origin | China |
9. Warranty and Support
HATTEKER provides a 12-month quality warranty for this product from the date of purchase. This warranty covers manufacturing defects and issues arising from normal use.
The warranty does not cover damage caused by:
- Improper use or handling.
- Unauthorized repairs or modifications.
- Accidental damage, misuse, or neglect.
- Normal wear and tear.
For warranty claims or technical support, please contact the seller or HATTEKER customer service. Please retain your proof of purchase for warranty validation.
If you are not satisfied with this product, please contact us without hesitation. Our customer service will contact you within 24 hours and provide a satisfactory result.


