1. Important Safety Instructions
When using electrical appliances, basic safety precautions should always be followed to reduce the risk of fire, electric shock, and injury to persons, including the following:
- Read all instructions before operating the appliance.
- Do not touch hot surfaces. Use handles or knobs.
- To protect against electric shock, do not immerse cord, plugs, or the main unit in water or other liquid.
- Close supervision is necessary when any appliance is used by or near children.
- Unplug from outlet when not in use and before cleaning. Allow to cool before putting on or taking off parts.
- Do not operate any appliance with a damaged cord or plug, or after the appliance malfunctions or has been damaged in any manner.
- The use of accessory attachments not recommended by the appliance manufacturer may cause injuries.
- Do not use outdoors.
- Do not let cord hang over edge of table or counter, or touch hot surfaces.
- Do not place on or near a hot gas or electric burner, or in a heated oven.
- Extreme caution must be used when moving an appliance containing hot oil or other hot liquids.
- Always attach plug to appliance first, then plug cord into the wall outlet. To disconnect, turn any control to "off", then remove plug from wall outlet.
- Do not use appliance for other than intended use.
- Ensure the appliance is placed on a stable, level surface during operation.
- Adequate air circulation is required around the appliance during use.
2. Product Overview
The Timco AF009 Air Fryer Oven is a versatile 12-liter multifunctional appliance designed to simplify your cooking experience. It combines the functions of an air fryer, oven, toaster, roaster, and dehydrator, offering a wide range of cooking possibilities with a single device. Featuring a digital touch screen and 10 preset functions, it allows for precise temperature control and convenient operation. The transparent window enables easy monitoring of food during cooking, and the automatic shut-off feature ensures safety. Its non-stick surface and removable door facilitate easy cleaning.
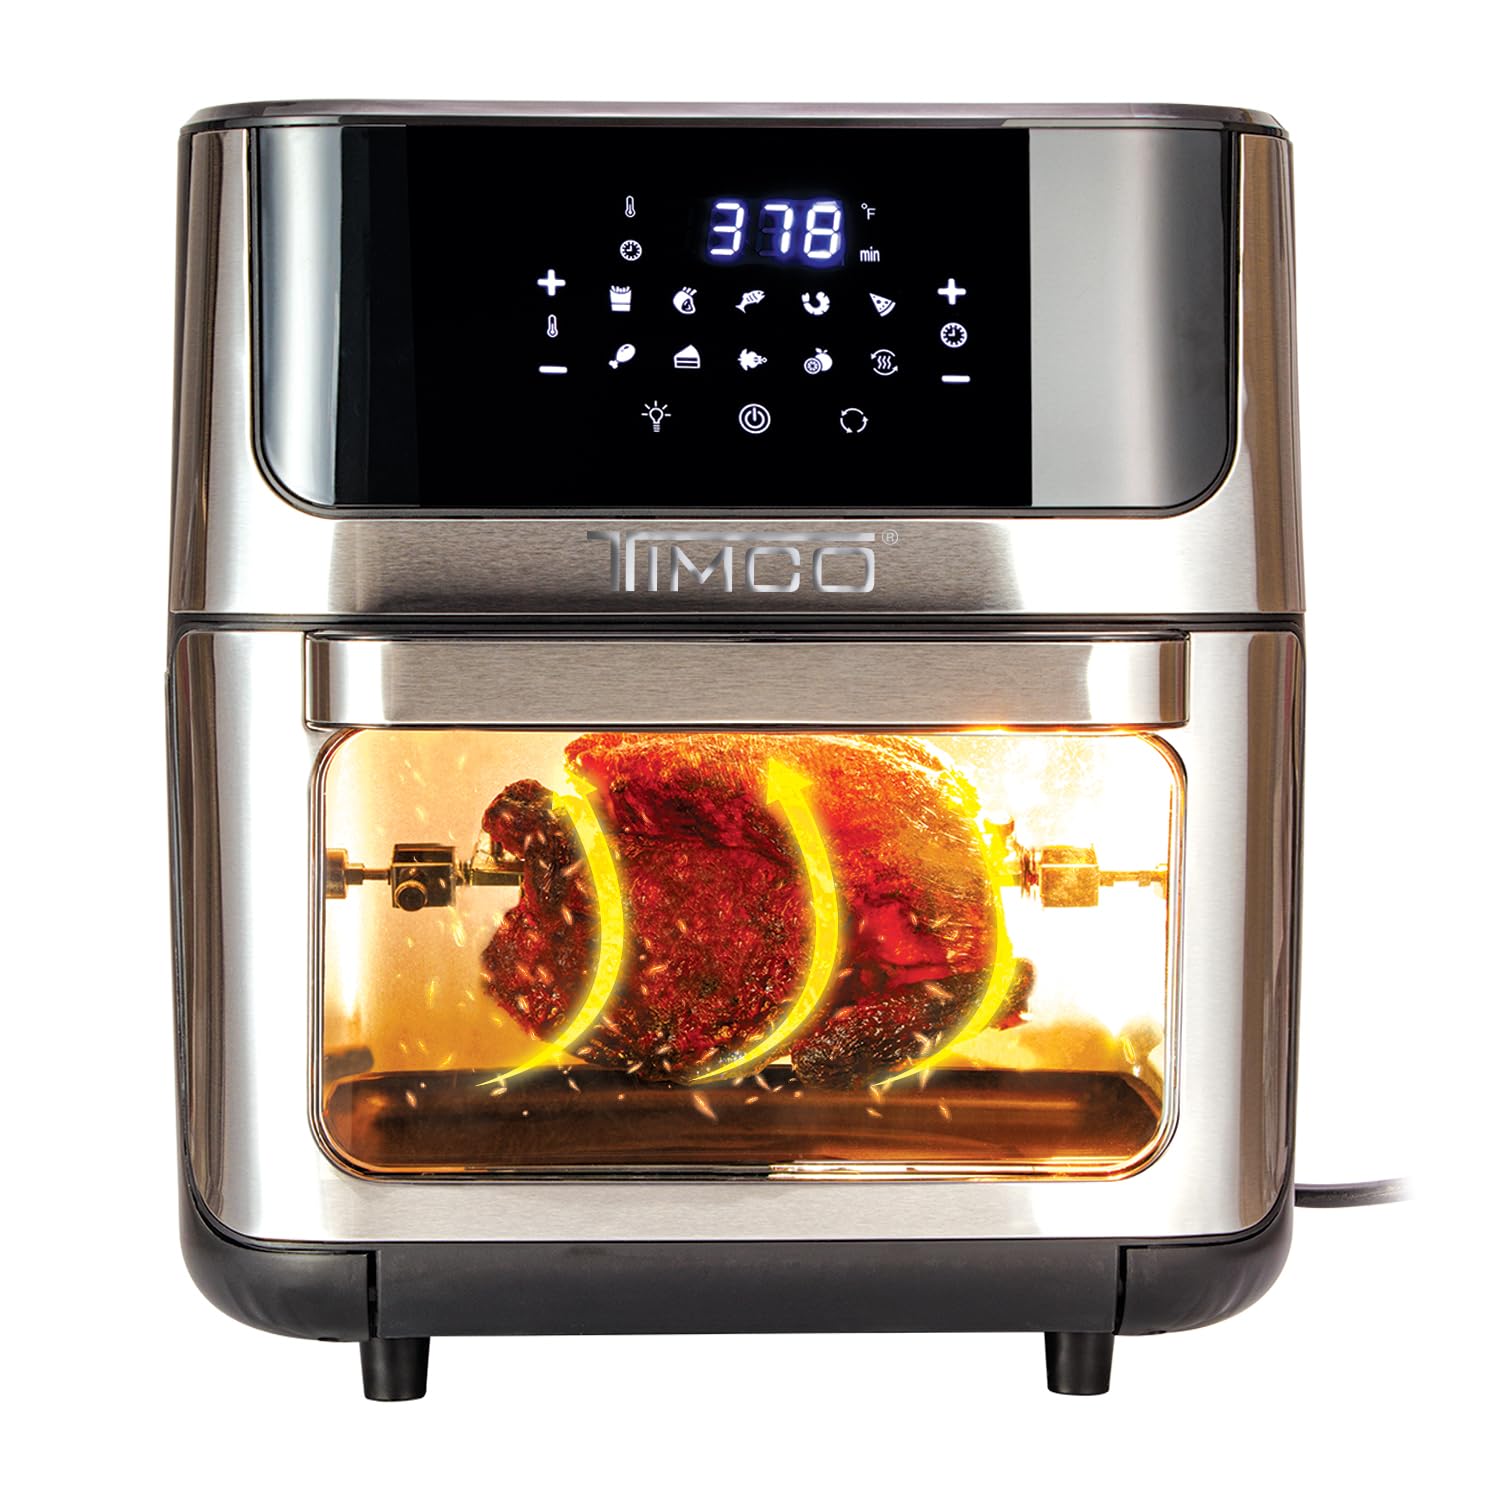
Figure 2.1: Front view of the Timco AF009 Air Fryer Oven with food visible through the transparent window.
3. Components and Accessories
The Timco AF009 comes with several versatile accessories to enhance your cooking options:
- Rotisserie Basket: Ideal for roasting smaller items like fries or nuts, ensuring even cooking.
- Mesh Rack: Used for air frying, dehydrating, or toasting.
- Drip Tray/Baking Pan: Collects drips and crumbs, or can be used for baking.
- Rotisserie Spit with Forks: For roasting whole chickens or larger cuts of meat.
- Rotisserie Handle: For safely inserting and removing the rotisserie spit.

Figure 3.1: Included accessories for the Timco AF009 Air Fryer Oven.

Figure 3.2: The Timco AF009 Air Fryer Oven showcasing the rotisserie function and various accessories.
4. Setup and First Use
- Unpack: Carefully remove all packaging materials, stickers, and labels from the appliance and its accessories.
- Clean: Wash all removable parts (mesh racks, drip tray, rotisserie accessories) in warm, soapy water. Wipe the interior and exterior of the main unit with a damp cloth. Dry thoroughly.
- Placement: Place the air fryer oven on a stable, heat-resistant, and level surface, ensuring at least 10 cm (4 inches) of clear space on all sides and above for proper ventilation.
- Power Connection: Plug the power cord into a grounded wall outlet.
- Initial Run (Optional but Recommended): Before cooking food, run the appliance for about 10-15 minutes at 180°C (350°F) to burn off any manufacturing residues. A slight odor or smoke may be present, which is normal. Ensure good ventilation during this process.
5. Operating Instructions
5.1 Control Panel
The Timco AF009 features an intuitive digital touch screen for easy operation. The panel includes controls for power, temperature, time, and various preset functions.
- Power Button: Turns the appliance on/off.
- Temperature Controls (+/-): Adjust cooking temperature (80°C to 200°C).
- Time Controls (+/-): Adjust cooking time.
- Preset Functions: Select from 10 pre-programmed settings for common dishes (e.g., fries, chicken, fish, cake, vegetables, pizza, steak, shrimp, dehydrate, reheat).
- Rotate Button: Activates the rotisserie function for even cooking.
- Light Button: Turns the interior light on/off to monitor food.
- Start/Stop Button: Initiates or pauses the cooking process.
5.2 Cooking Functions
This appliance offers multiple cooking modes:
- Air Fry: Uses rapid hot air circulation for crispy results with little to no oil.
- Bake: Ideal for cakes, pastries, and other baked goods.
- Toast: Perfect for bread, bagels, and other toasted items.
- Roast: For cooking meats and vegetables to tender perfection.
- Dehydrate: Removes moisture from food for snacks like fruit leathers or jerky.
- Reheat: Warms up leftovers efficiently.
5.3 Using the Rotisserie Function
- Assemble the rotisserie spit: Secure your food (e.g., whole chicken) onto the rotisserie spit using the forks.
- Insert the rotisserie spit: Using the rotisserie handle, carefully place the assembled spit into the designated slots inside the oven.
- Select cooking settings: Choose the appropriate preset or manually set the temperature and time. Press the 'Rotate' button to activate the rotisserie motion.
- Monitor and remove: Use the interior light to check progress. Once cooking is complete, use the rotisserie handle to safely remove the hot food.
6. Maintenance and Cleaning
Regular cleaning ensures optimal performance and extends the life of your appliance.
- Unplug and Cool: Always unplug the appliance and allow it to cool completely before cleaning.
- Removable Door: The front door is designed to be easily detachable for thorough cleaning. Gently open the door to a 45-degree angle, then lift it upwards to detach. Wash with warm, soapy water and dry completely before reattaching.
- Accessories: Wash the rotisserie basket, mesh racks, drip tray, and rotisserie spit in warm, soapy water. For stubborn food residue, soak them before cleaning. All accessories are dishwasher safe.
- Interior: Wipe the interior with a damp cloth and mild detergent. Avoid abrasive cleaners or scouring pads.
- Exterior: Wipe the exterior with a damp cloth. Do not immerse the main unit in water.
7. Troubleshooting
| Problem | Possible Cause | Solution |
|---|---|---|
| Appliance does not turn on. | Not plugged in; power outlet malfunction; power button not pressed. | Ensure the power cord is securely plugged in. Check the power outlet. Press the power button on the touch screen. |
| Food is not cooked evenly. | Overcrowding; incorrect temperature/time; food not rotated. | Do not overcrowd the racks. Adjust temperature and time as needed. For rotisserie items, ensure the rotate function is active. For other items, flip or shake halfway through cooking. |
| White smoke coming from the appliance. | Grease or food residue on heating element or drip tray. | Unplug and let cool. Clean the heating element and drip tray thoroughly. Ensure the drip tray is always in place during cooking. |
| Food is not crispy. | Too much oil; overcrowding; incorrect temperature/time. | Use minimal oil. Do not overcrowd the basket/racks. Increase temperature or cooking time slightly. |
8. Specifications
| Feature | Detail |
|---|---|
| Brand | Timco |
| Model Number | AF009 |
| Color | Black |
| Product Dimensions | 33 x 30 x 36 cm (13 x 11.8 x 14.2 inches) |
| Capacity | 12 Liters |
| Power | 1800 Watts |
| Voltage | 127 Volts |
| Material | Stainless Steel, Aluminum, Polypropylene (PP) |
| Automatic Shut-off | Yes |
| Special Features | Automatic Shut-off, Temperature Control, Programmable, Timer, Rotisserie, Digital Touch Screen, Transparent Window, Non-stick Surface |
| Product Weight | 6.2 kg (13.67 lbs) |
9. Warranty and Support
For warranty information or technical support, please refer to the warranty card included with your product or contact Timco customer service. Keep your purchase receipt as proof of purchase for any warranty claims.


