
1. Important Safety Instructions
Read all instructions carefully before operating the machine. Failure to follow these instructions may result in injury or damage to the machine.
- High Temperature Warning: The heating plates reach high temperatures. Avoid direct contact with the heating plates during operation and cool-down to prevent burns. Always use heat-resistant gloves if handling is necessary.
- Electrical Safety: Ensure the machine is connected to a grounded power outlet with the correct voltage (110V). Do not operate with damaged cords or plugs. Disconnect power before cleaning or maintenance.
- Hydraulic Pressure: This machine uses hydraulic pressure. Operate the hydraulic jack handle smoothly. Do not exceed the maximum pressure rating.
- Stable Surface: Place the machine on a stable, level, and heat-resistant surface.
- Ventilation: Ensure adequate ventilation around the machine during operation.
- Children and Pets: Keep children and pets away from the machine during operation and when it is cooling down.
- Flammable Materials: Do not operate the machine near flammable liquids or gases.
2. Product Overview
The xsdzgdzy 5 Ton Hydraulic Heat Press Machine is designed for efficient heat pressing applications. It features dual heating plates, an intelligent LCD controller, and a manual hydraulic jack for precise pressure application.
Key Features:
- High-Quality Construction: Iron housing with plastic spraying treatment and aluminum heating plates for durability and insulation.
- Fast & Even Heating: 1.57-inch thick aluminum plates (2.4"W x 4.7"L) with 900W power, reaching 392°F in approximately 10 minutes.
- 5 Ton Hydraulic Jack: Provides high pressure for effective heat pressing.
- Intelligent LCD Controller: Digital display for precise temperature and time settings (±50°F accuracy).
- Safety Features: High-temperature-resistant wiring, short-circuit, overvoltage, and over-temperature protection. Heat-sink design for heat dissipation.
- User-Friendly Design: Electronic timing function with warning sound, automatic thermostat, and large space between plates for easy item placement.
Components:

Image 2.1: Detailed Information. This image highlights various components of the heat press machine, including cooling holes, long handle, pressure relief knob, silicone feet, and the green countdown button.
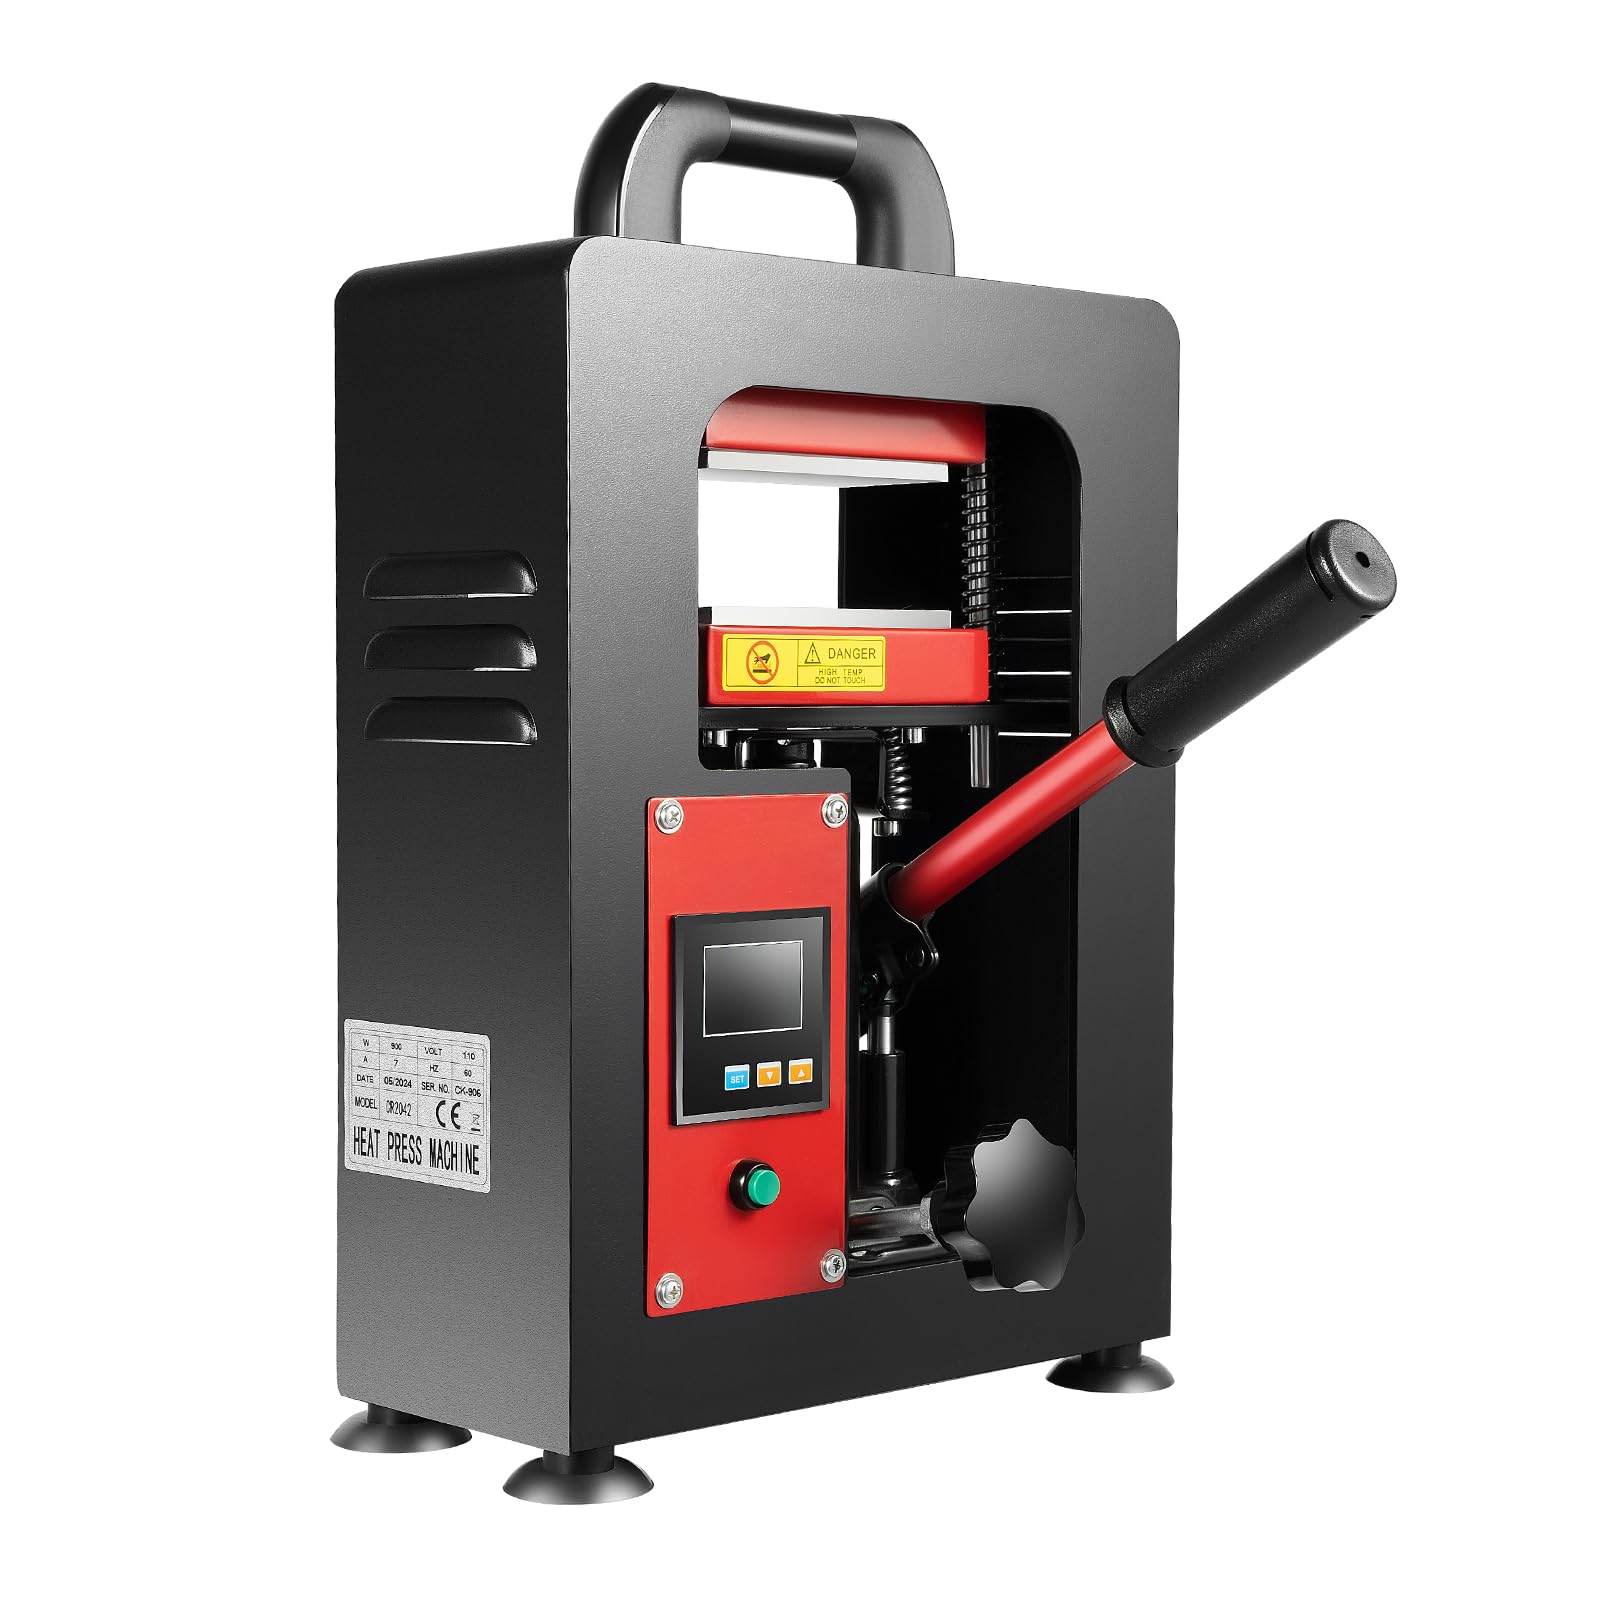
Image 2.2: High Working Efficiency. This image illustrates the machine's power (900W), pressure range (0-11023.11 lbs), and the presence of two heating plates, emphasizing constant temperature design.
Video 2.3: Product Demonstration. This video provides a visual overview of the heat press machine, demonstrating its features and basic operation, including setting temperature and applying pressure.
3. Setup
- Unpacking: Carefully remove the heat press machine and all accessories from the packaging. Inspect for any shipping damage.
- Placement: Place the machine on a sturdy, level, and heat-resistant workbench or table. Ensure there is sufficient space around the machine for ventilation and safe operation.
- Power Connection: Connect the power cord to the machine's AC socket and then plug it into a grounded 110V power outlet.
- Handle Installation: Insert the hydraulic jack handle into its designated slot.

Image 3.1: Included Accessories. This image shows the heat press machine along with its power cord and the instruction manual, indicating what is included in the package.

Image 3.2: Power Connection Area. A rear view of the heat press machine, highlighting the power switch and the aviation AC socket with fuse for electrical connection.
4. Operating Instructions
- Power On: Flip the main power switch to the "ON" position. The LCD controller will illuminate.
- Set Temperature:
- Press the "SET" button on the LCD controller.
- Use the "Up" and "Down" arrow buttons to adjust the desired temperature.
- Press "SET" again to confirm the temperature. The machine will begin heating.
- Set Time:
- After setting the temperature, press "SET" again to enter time setting mode.
- Use the "Up" and "Down" arrow buttons to adjust the desired pressing time in seconds.
- Press "SET" one more time to confirm the time.
- Preheating: Allow the machine to preheat until the actual temperature displayed on the LCD reaches the set temperature. An audible reminder may sound when ready.
- Place Material: Carefully place the material to be pressed onto the lower heating plate. Ensure it is centered and flat.
- Apply Pressure:
- Use the hydraulic jack handle to lower the upper heating plate until it makes contact with the material.
- Pump the handle to apply the desired pressure. The machine is designed for up to 5 tons of pressure.
- Start Timer: Press the green countdown button to start the pressing cycle. The timer will count down.
- Release Pressure: Once the timer completes and the warning sound emits, slowly turn the pressure relief knob counter-clockwise to release the hydraulic pressure.
- Remove Material: Carefully lift the hydraulic jack handle to raise the upper heating plate. Remove the pressed material, being cautious of residual heat.
- Power Off: When finished, turn off the main power switch and unplug the machine. Allow it to cool completely before storage.

Image 4.1: Pressing Operation. This image depicts the heat press machine in operation, demonstrating how materials are placed and pressed between the heating plates.

Image 4.2: LCD Controller. A close-up view of the intelligent LCD controller, showing the digital display for temperature and time settings, and control buttons.
5. Maintenance
- Cleaning: Ensure the machine is unplugged and completely cool before cleaning. Wipe down the exterior with a soft, damp cloth. For heating plates, use a non-abrasive cleaner suitable for aluminum.
- Inspection: Regularly inspect the power cord for any damage. Check the hydraulic system for leaks. Ensure all screws and fasteners are tight.
- Storage: Store the machine in a dry, clean, and safe environment when not in use.
6. Troubleshooting
| Problem | Possible Cause | Solution |
|---|---|---|
| Machine does not power on. | Power cord not connected, power switch off, faulty outlet, blown fuse. | Check power cord connection. Ensure power switch is ON. Test outlet with another device. Check and replace fuse if necessary. |
| Heating plates not heating. | Temperature not set, heating element issue. | Verify temperature settings on the LCD controller. If issue persists, contact support. |
| Insufficient pressure. | Hydraulic jack not fully engaged, air in hydraulic system. | Ensure the hydraulic handle is pumped sufficiently. Consult a qualified technician if hydraulic system issues are suspected. |
| Timer not working. | Timer not set, green button not pressed. | Set the desired time on the LCD controller. Press the green countdown button to start the timer. |
7. Specifications
| Feature | Detail |
|---|---|
| Brand | xsdzgdzy |
| Model Number | 110V 900W |
| Power | 900W |
| Voltage | 110V |
| Current | 7A |
| Frequency | 60Hz |
| Material | Iron, Aluminum |
| Heating Plate Dimensions | 2.4"W x 4.7"L (6cm x 12cm) |
| Temperature Range | Up to 400°F (204°C) |
| Timing Range | 0-999 seconds |
| Pressure Range | 0-14000psi (approx. 5 tons) |
| Product Dimensions (L x W x H) | 11.81" x 5.31" x 19.29" (30cm x 13.5cm x 49cm) |
| Net Weight | 39.35 lbs (17.85 kg) |
| Display Type | LCD |

Image 7.1: Detailed Specifications. This image provides a visual representation of the heat press machine with an overlay of its key specifications, including power, pressure, and heating plate details.

Image 7.2: Product Dimensions. This image displays the physical dimensions of the heat press machine, including its height, width, and depth.
8. Warranty and Support
For warranty information and customer support, please refer to the documentation included with your purchase or contact the manufacturer directly. Keep your purchase receipt as proof of purchase.
Manufacturer: xsdzgdzy
ASIN: B0DJNWWVZL
UPC: 757582946140