
TIMBERTECH CA-AS-207K
Timbertech Professional Airbrush Kit AS-207K User Manual
Model: CA-AS-207K | Brand: TIMBERTECH
Introduction
This user manual provides essential information for the safe and effective operation, maintenance, and troubleshooting of your Timbertech Professional Airbrush Kit with Multi-Functional Compressor AS-207K. Please read this manual thoroughly before first use and retain it for future reference.
The Timbertech AS-207K is a versatile airbrush system designed for a wide range of applications, including model painting, nail art, makeup, automotive graphics, temporary tattoos, and cake decoration. Its compact design and adjustable features make it suitable for both beginners and experienced artists.
Safety Information
- Always operate the airbrush kit in a well-ventilated area to avoid inhaling paint fumes.
- Wear appropriate personal protective equipment (PPE), such as a respirator, safety glasses, and gloves, especially when working with certain paints or chemicals.
- Ensure the power supply matches the compressor's voltage requirements (110 Volts DC).
- Do not immerse the compressor or power adapter in water or other liquids.
- Keep the airbrush and compressor out of reach of children.
- Disconnect the power supply before cleaning, performing maintenance, or when the unit is not in use.
- Avoid pointing the airbrush nozzle at yourself or others.
- Use only airbrush-compatible paints and cleaning solutions.
Package Contents
Verify that all items listed below are included in your package:
- 1x Dual-Action Airbrush Gun
- 1x Multi-Functional Air Compressor (AS-207K)
- 1x Power Adaptor
- 1x Air Hose (1.8m / 6ft)
- 1x User Manual (this document)
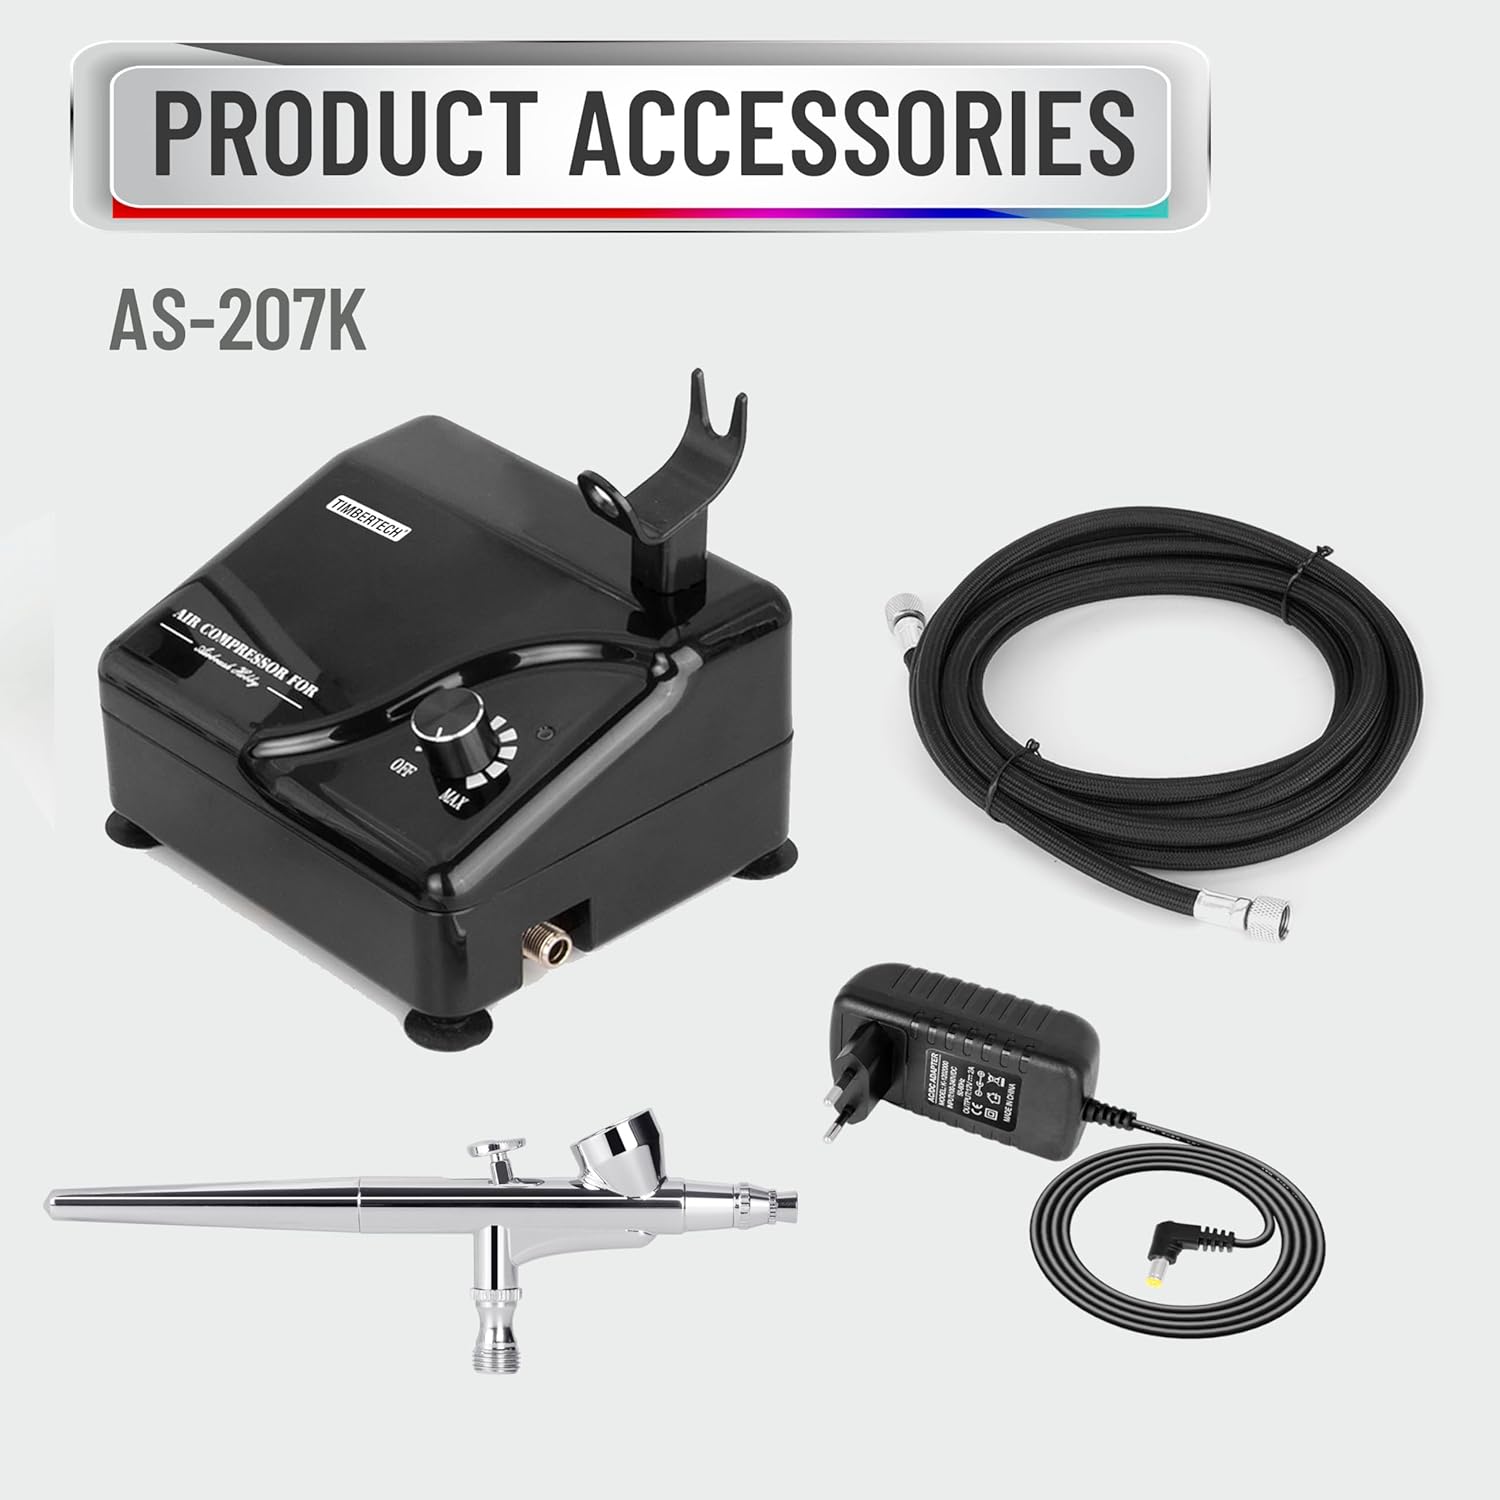
Figure 1: Complete contents of the Timbertech Professional Airbrush Kit.
Product Overview
Familiarize yourself with the main components of your airbrush kit:

Figure 2: Timbertech Professional Airbrush Kit AS-207K.
Compressor Features

Figure 3: Key features of the AS-207K Air Compressor.
- Airbrush Holder: Conveniently holds the airbrush when not in use.
- Control Knob: Adjusts air pressure from OFF to MAX.
- Power Indicator Light: Illuminates when the compressor is powered on.
- Connection (G8/1): Port for connecting the air hose.
- Anti-slip Rubber Feet: Provides stability and reduces vibration during operation.
Airbrush Components

Figure 4: Exploded view of the Dual-Action Airbrush.
- Fluid Cup: Holds the paint or medium.
- Main Lever: Controls both air and paint flow.
- Nozzle & Needle: Critical components for paint atomization and fine detailing. The kit includes a 0.2mm nozzle.
- Handle: Provides grip and access to internal components for cleaning.
Setup
Follow these steps to set up your airbrush kit for the first time:
- Unpack Components: Carefully remove all items from the packaging and check against the 'Package Contents' list.
- Place Compressor: Position the air compressor on a stable, flat, and well-ventilated surface. Ensure the anti-slip rubber feet are securely placed.
- Connect Air Hose: Screw one end of the air hose onto the air outlet port (G8/1) on the compressor. Ensure it is hand-tightened to prevent air leaks.
- Connect Airbrush: Screw the other end of the air hose onto the air inlet of the airbrush gun. Again, hand-tighten securely.
- Connect Power: Insert the power adapter's DC plug into the power input jack on the compressor. Plug the AC end of the adapter into a suitable 110V AC power outlet.
Operating Instructions
This section details how to operate your Timbertech airbrush kit.
Basic Operation
- Power On: Turn the control knob on the compressor from 'OFF' towards 'MAX'. The power indicator light will illuminate, and the compressor will start.
- Adjust Air Pressure: Rotate the control knob to adjust the air pressure. The compressor provides a maximum air pressure of 28 PSI (2 BAR) and an air flow of 15 L/min. For most applications, start with a lower pressure and gradually increase as needed. The compressor features an auto start/stop function: it starts at 1 BAR and stops at 2 BAR.
- Prepare Paint: Ensure your paint is properly thinned to the correct consistency for airbrushing. The ideal consistency is similar to milk.
- Fill Fluid Cup: Carefully pour the prepared paint into the fluid cup of the airbrush. Do not overfill.
- Test Spray: Before applying to your project, test the spray pattern on a scrap piece of material.
- Spray Technique (Dual-Action):
- Press down on the main lever to release air.
- Pull back on the main lever to release paint. The further back you pull, the more paint is released.
- Practice coordinating these two movements to achieve desired lines and coverage.
- Power Off: When finished, turn the control knob back to 'OFF'. Disconnect the power adapter from the wall outlet.
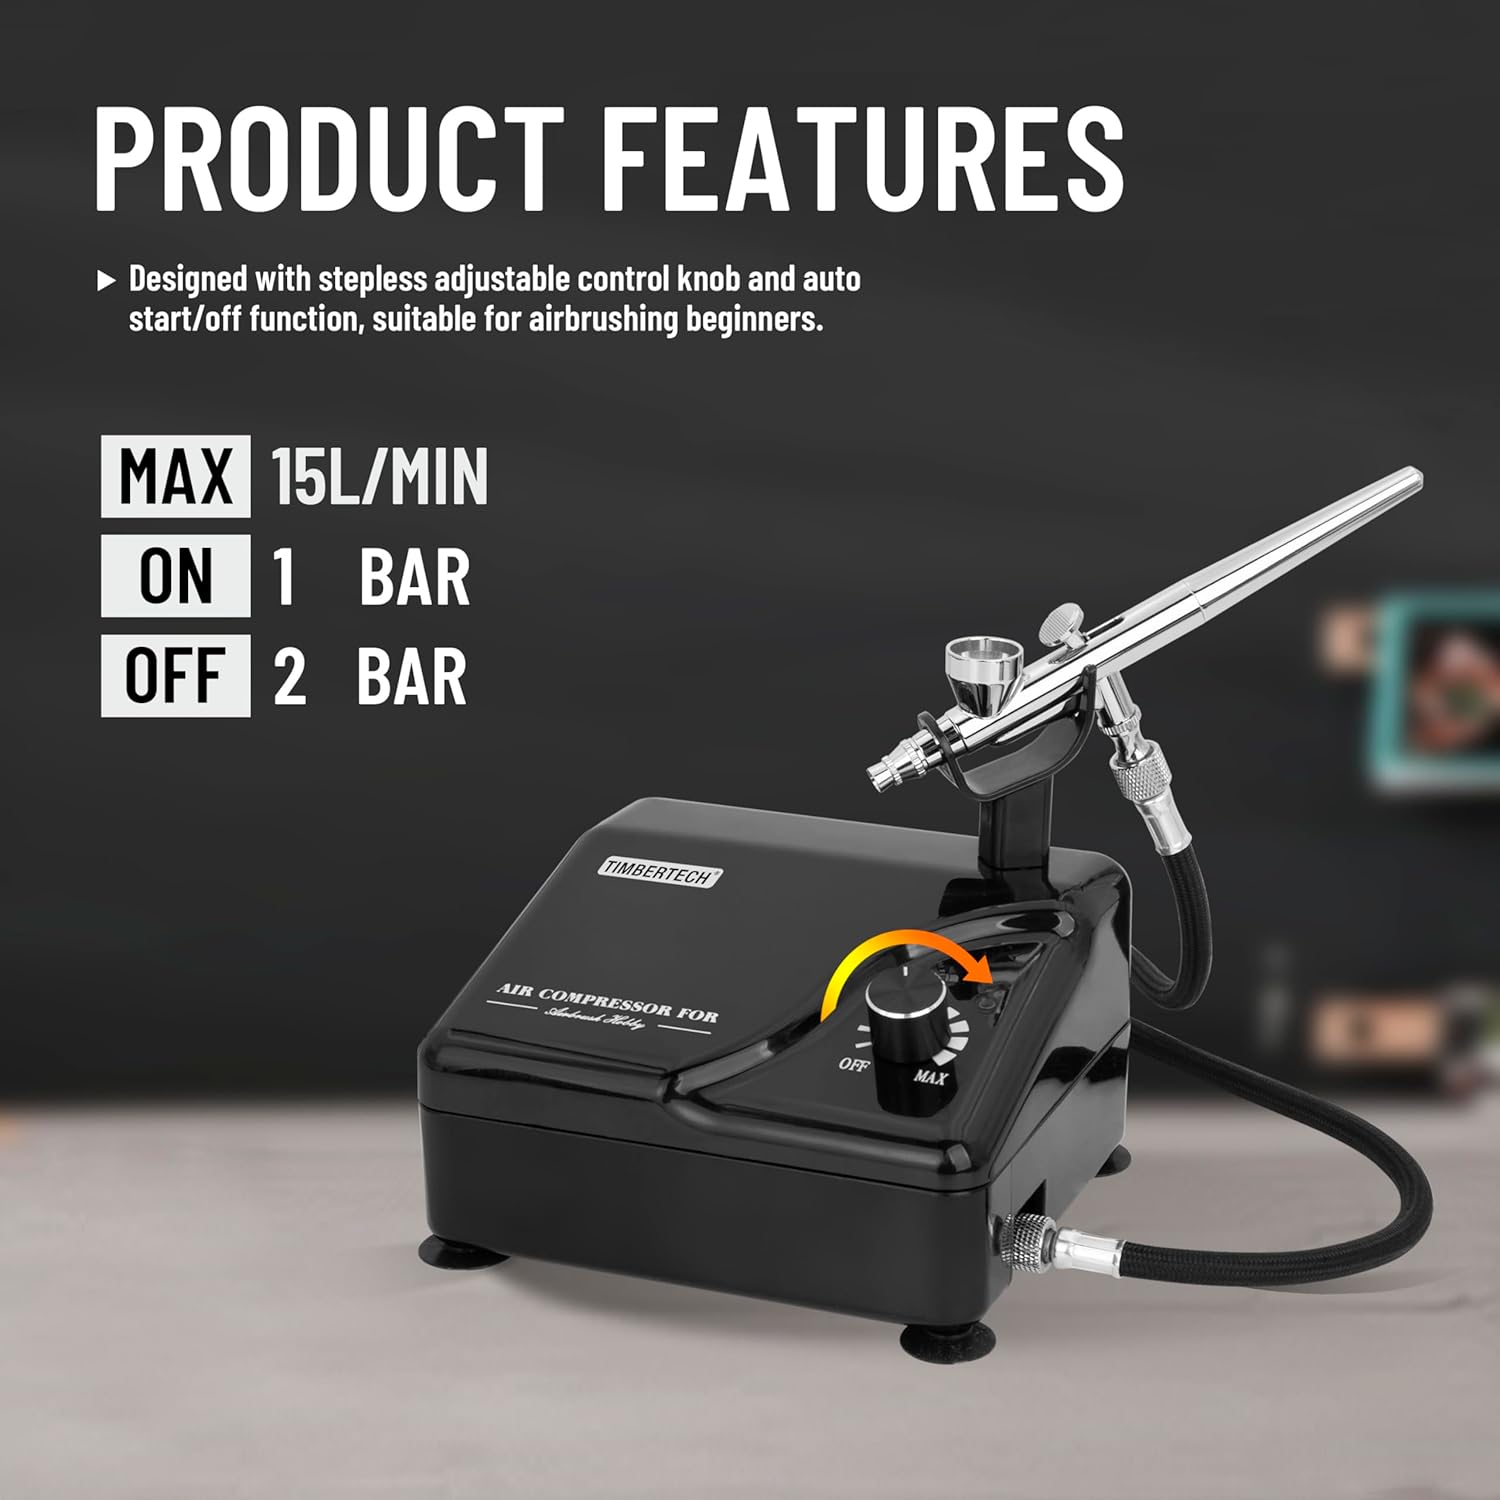
Figure 5: Compressor air pressure adjustment.
Maintenance
Proper cleaning and maintenance are crucial for the longevity and performance of your airbrush kit.
Cleaning the Airbrush
Clean the airbrush immediately after each use, especially when changing colors or finishing a session.
- Empty Fluid Cup: Pour out any remaining paint from the fluid cup.
- Rinse Cup: Add a small amount of appropriate cleaning solution (e.g., water for acrylics, solvent for enamels) to the fluid cup.
- Back-flush: Cover the nozzle with your finger or a cap and press down on the main lever to release air. This will cause air bubbles to back-flush into the fluid cup, cleaning the inside. Repeat several times.
- Spray Clean: Spray the cleaning solution through the airbrush onto a paper towel until it sprays clear.
- Disassemble for Deep Clean: Periodically, or if clogging occurs, disassemble the airbrush (refer to Figure 4). Clean the needle, nozzle, and head assembly thoroughly with cleaning solution and appropriate brushes. Be extremely careful with the needle and nozzle as they are delicate.
- Reassemble: Reassemble the airbrush carefully, ensuring all parts are correctly aligned and tightened.
Compressor Maintenance
- The compressor is oil-free and requires minimal maintenance.
- Keep the compressor clean and free of dust. Wipe the exterior with a damp cloth.
- Ensure the air intake vents are not obstructed to prevent overheating.
- Store the compressor in a dry, cool place when not in use.
Troubleshooting
Refer to the table below for common issues and their solutions.
| Problem | Possible Cause | Solution |
|---|---|---|
| No air from airbrush | Compressor not on; Air hose disconnected; Clogged nozzle/air passage | Check power; Reconnect hose; Clean airbrush thoroughly |
| No paint flow | Paint too thick; Clogged nozzle/needle; Fluid cup empty | Thin paint; Clean airbrush; Refill fluid cup |
| Uneven spray pattern | Partially clogged nozzle; Bent needle tip; Loose head assembly | Clean nozzle; Straighten/replace needle; Tighten head assembly |
| Air bubbles in fluid cup | Loose nozzle; Damaged nozzle/needle; Clogged air cap | Tighten nozzle; Inspect/replace parts; Clean air cap |
| Compressor not turning on | Power adapter not connected; Faulty power outlet | Check connections; Test outlet with another device |
Specifications
Technical specifications for the Timbertech Professional Airbrush Kit AS-207K:
| Feature | Specification |
|---|---|
| Model Name | US-AS-207K |
| Voltage | 110 Volts (DC) |
| Power Source | Corded Electric |
| Maximum Operating Pressure | 28 PSI (2 BAR) |
| Air Flow Capacity | 15 LPM |
| Noise Level | 62 dB |
| Hose Length | 1.8 Meters (6 ft) |
| Airbrush Nozzle Size | 0.2 mm (included) |
| Compressor Dimensions | 9.84 x 3.94 x 7.87 inches |
| Item Weight | 2.81 pounds |
| Special Features | Oil Free, Silent Operation, Stepless Air Pressure Adjustment, Auto Start/Stop |
Warranty and Support
Your Timbertech Professional Airbrush Kit AS-207K comes with a 1-year warranty from the date of purchase. This warranty covers manufacturing defects under normal use.
For warranty claims, technical support, or to inquire about accessories, please contact Timbertech customer service through the retailer where you purchased the product or visit the official Timbertech website for contact information.
Please retain your proof of purchase for warranty validation.
Ask a question about this manual
Ask about setup, troubleshooting, compatibility, parts, safety, or missing instructions. Manuals+ will review the question and use this page’s manual context to help answer it.