
1. Introduction
This manual provides essential information for the safe installation, operation, and maintenance of your FIREGAS Black Island Range Hood, Model FGS-UBI02G75CC. Please read these instructions thoroughly before installation and use, and retain them for future reference.
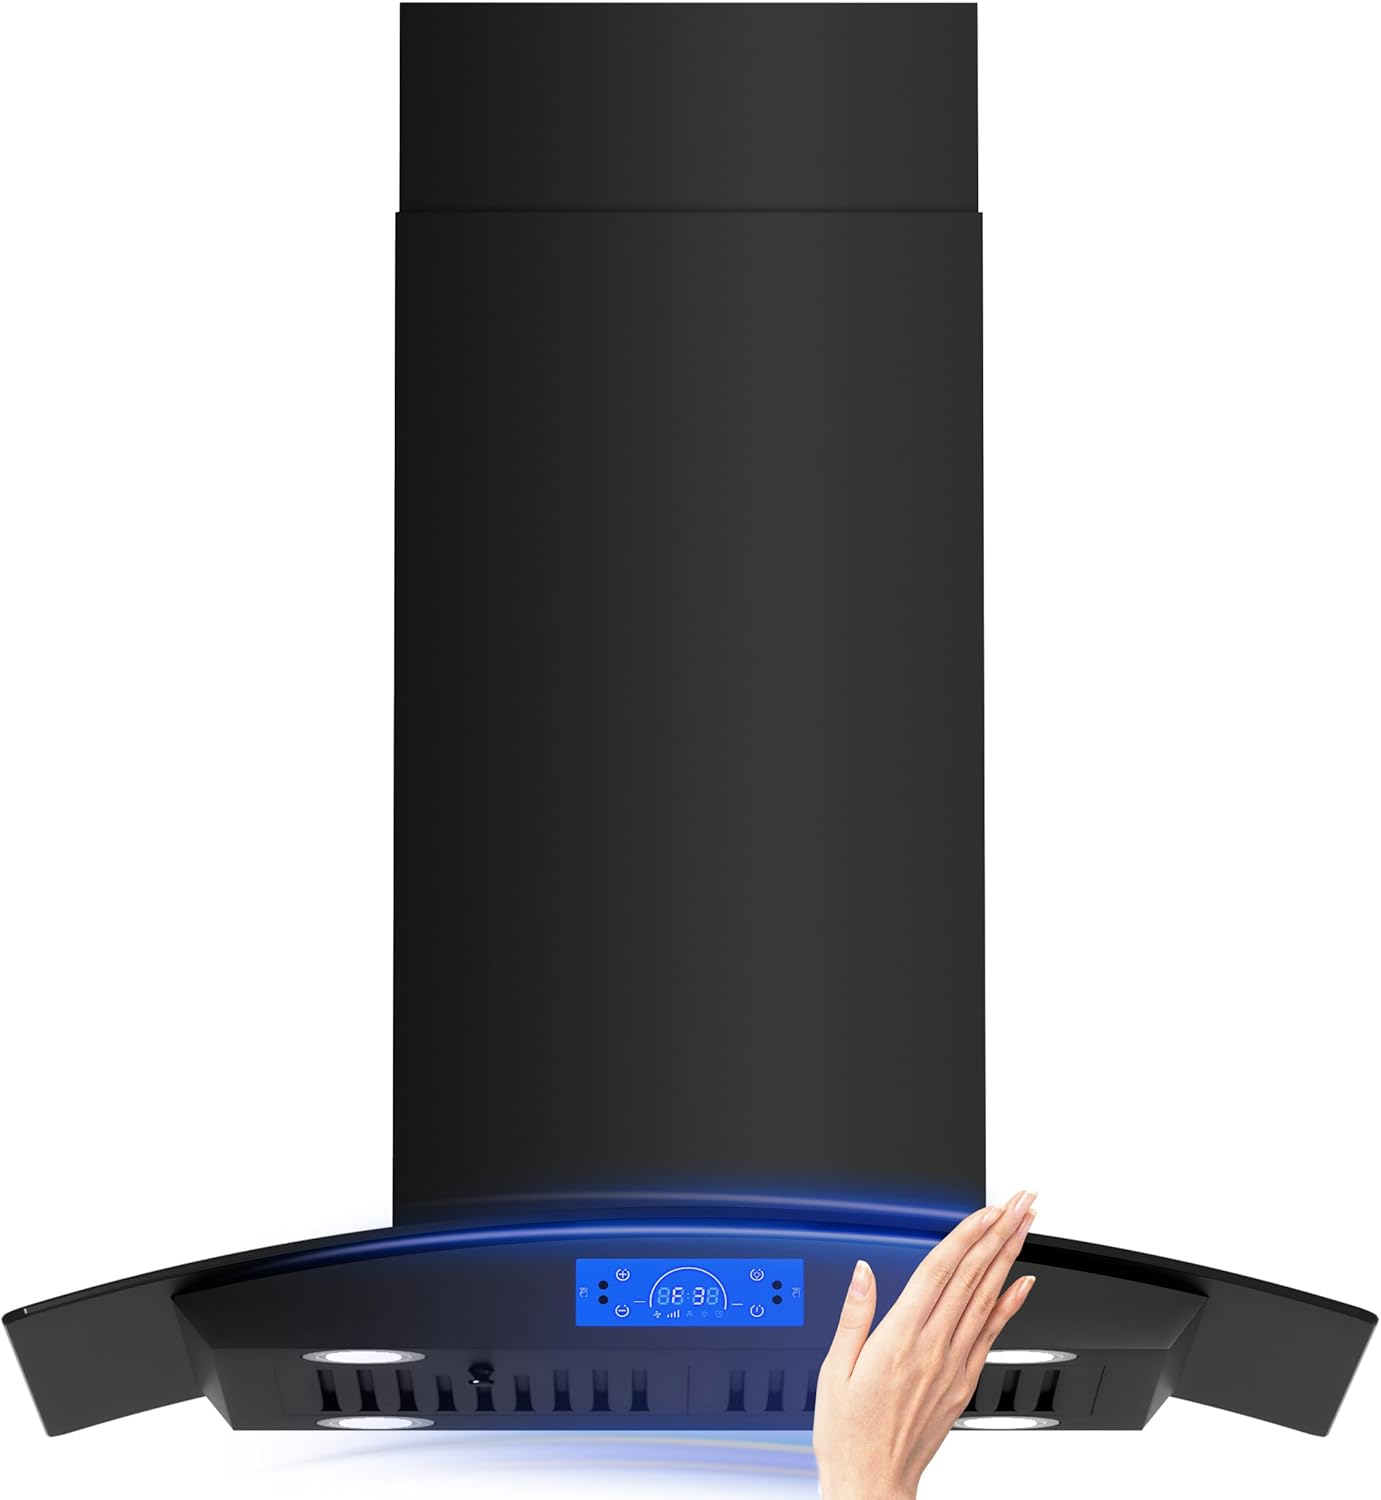
Figure 1: FIREGAS Black Island Range Hood 30 Inch
2. Safety Information
To reduce the risk of fire, electric shock, or injury, observe the following safety precautions:
- Always disconnect power to the range hood before servicing or cleaning.
- Installation must be performed by a qualified technician in accordance with all local codes and standards.
- Ensure proper ventilation for combustion gases from fuel-burning equipment to prevent back-drafting.
- Do not operate the range hood if the power cord is damaged. Contact customer service for replacement.
- Never flambé under the range hood.
- Clean grease filters regularly to prevent grease accumulation, which can be a fire hazard.
- This appliance is not intended for use by persons with reduced physical, sensory, or mental capabilities, or lack of experience and knowledge, unless they have been given supervision or instruction.
3. Package Contents
Verify that all components are present before beginning installation:
- 30 inch Black Island Range Hood
- Exhaust Pipe & Mounting Plate & Angle Bars
- Installation Drawing & Manual
- Oil Cups & CC110 Charcoal Filters (for ductless mode)
- Screws & Dampers
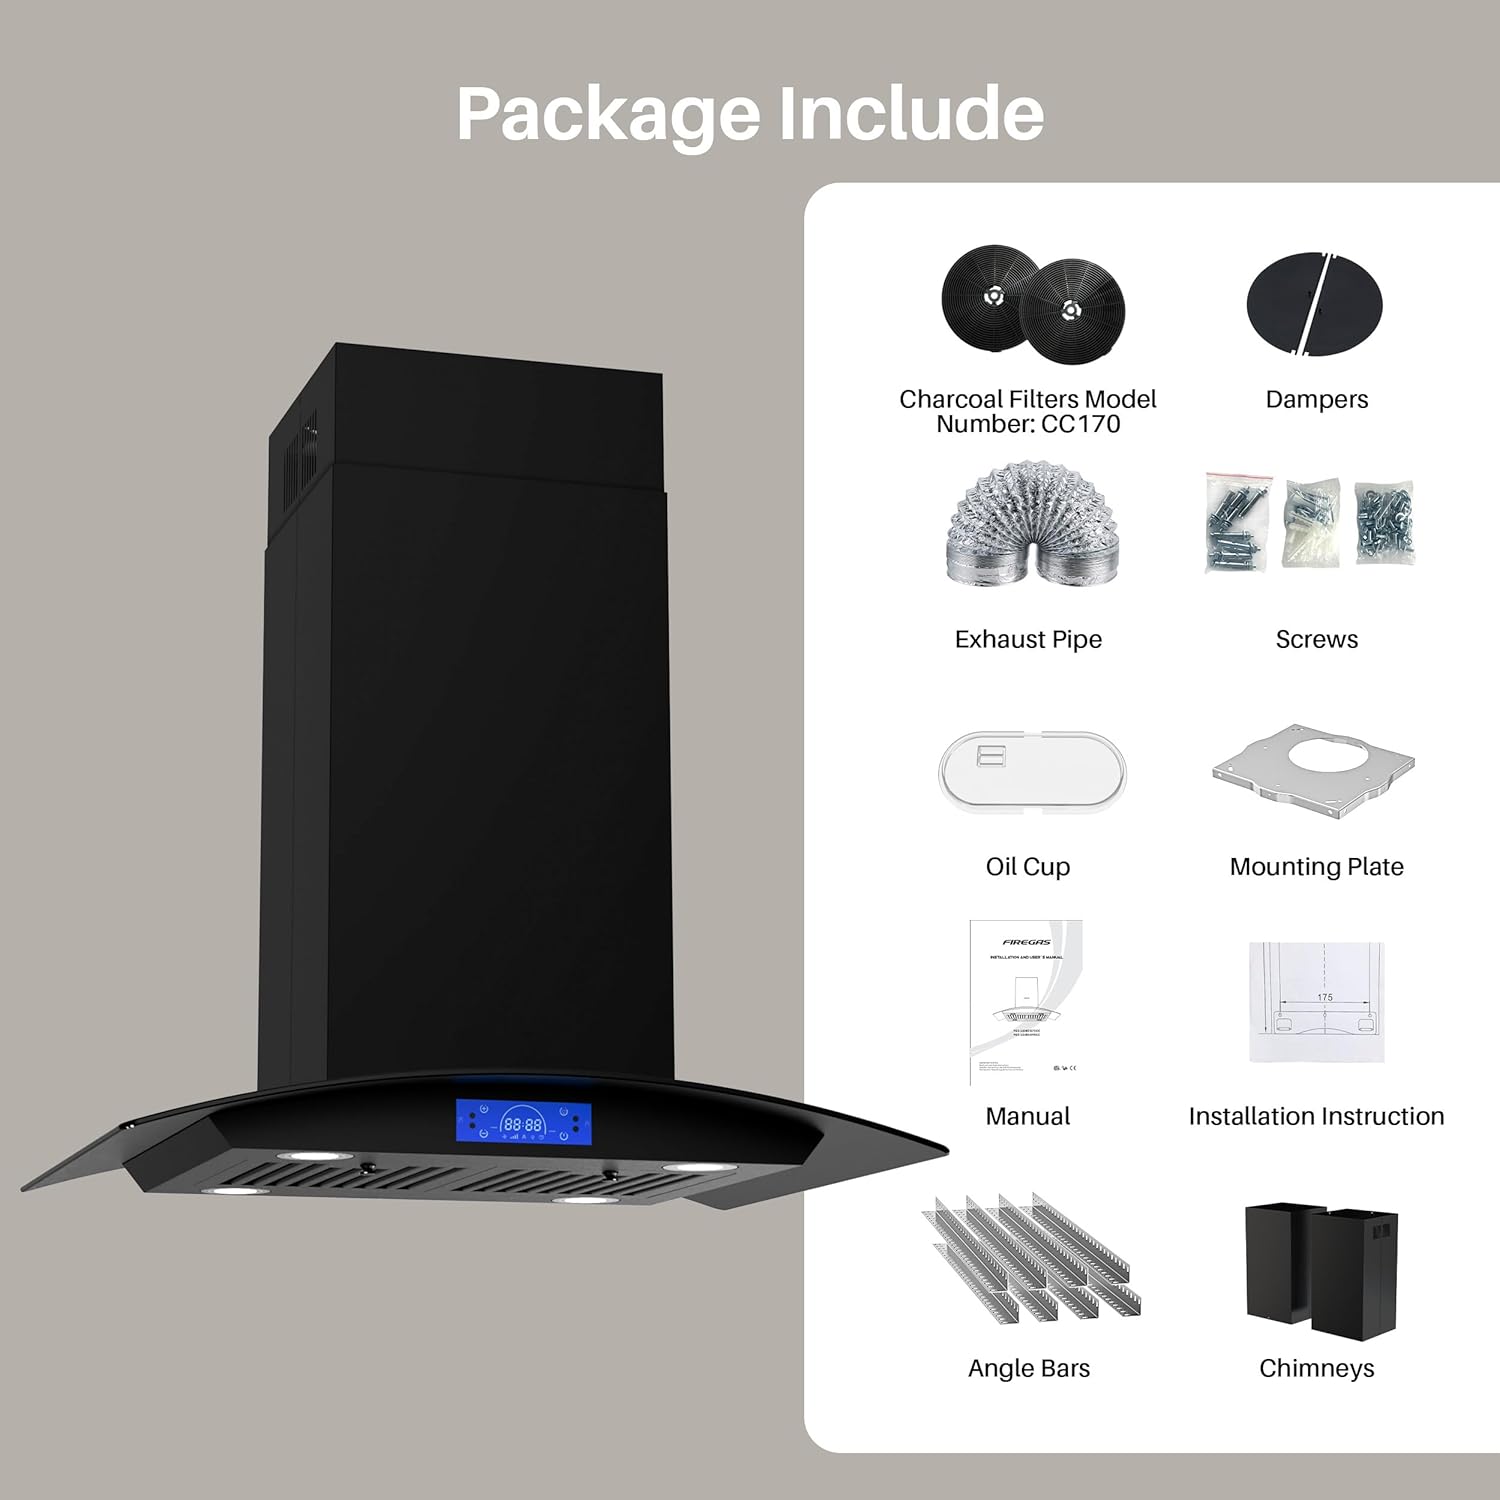
Figure 2: Included components in the package
4. Specifications
| Feature | Specification |
|---|---|
| Model Number | FGS-UBI02G75CC |
| Air Flow Capacity | 700 CFM |
| Noise Level | 58 dB |
| Mounting Type | Island Mount |
| Controls Type | Touch, Gesture |
| Number of Speeds | 3 |
| Light Source Type | LED |
| Wattage | 190 watts |
| Filter Type | Baffle |
| Ventilation Type | Convertible (Ducted/Ductless) |
| Product Dimensions | 29.33" (W) x 23.62" (D) x 25.31"-44.99" (H) adjustable |
| Item Weight | 49.9 pounds |
| Material | Stainless Steel, Tempered Glass |
| Voltage | 120V |
5. Installation
5.1 General Installation Notes
- Ensure the installation area is structurally sound to support the weight of the range hood.
- Maintain adequate clearance between the cooking surface and the bottom of the range hood. Recommended installation height is 25.6"-30" above the cooktop.
- All electrical wiring must be properly grounded and comply with local codes.
5.2 Ducted vs. Ductless Operation
This range hood is convertible and can be installed in either ducted or ductless (recirculating) mode.
- Ducted Mode: Requires an exhaust duct leading to the outside of your home. Fumes are vented externally.
- Ductless Mode: Requires the installation of charcoal filters (included) on both sides of the snail shell. Air is filtered and recirculated back into the kitchen.

Figure 3: Ducted (left) and Recirculation (right) Mode Configuration
5.3 Mounting and Dimensions
The range hood is designed for island mount installation. Refer to the provided installation drawing for detailed steps.

Figure 4: Product dimensions and adjustable chimney height
The chimney is adjustable from 22.83" to 42.51" to accommodate various ceiling heights.
6. Operating Instructions
6.1 Touch Control Panel
The range hood features a sensitive touch screen control panel for easy operation.
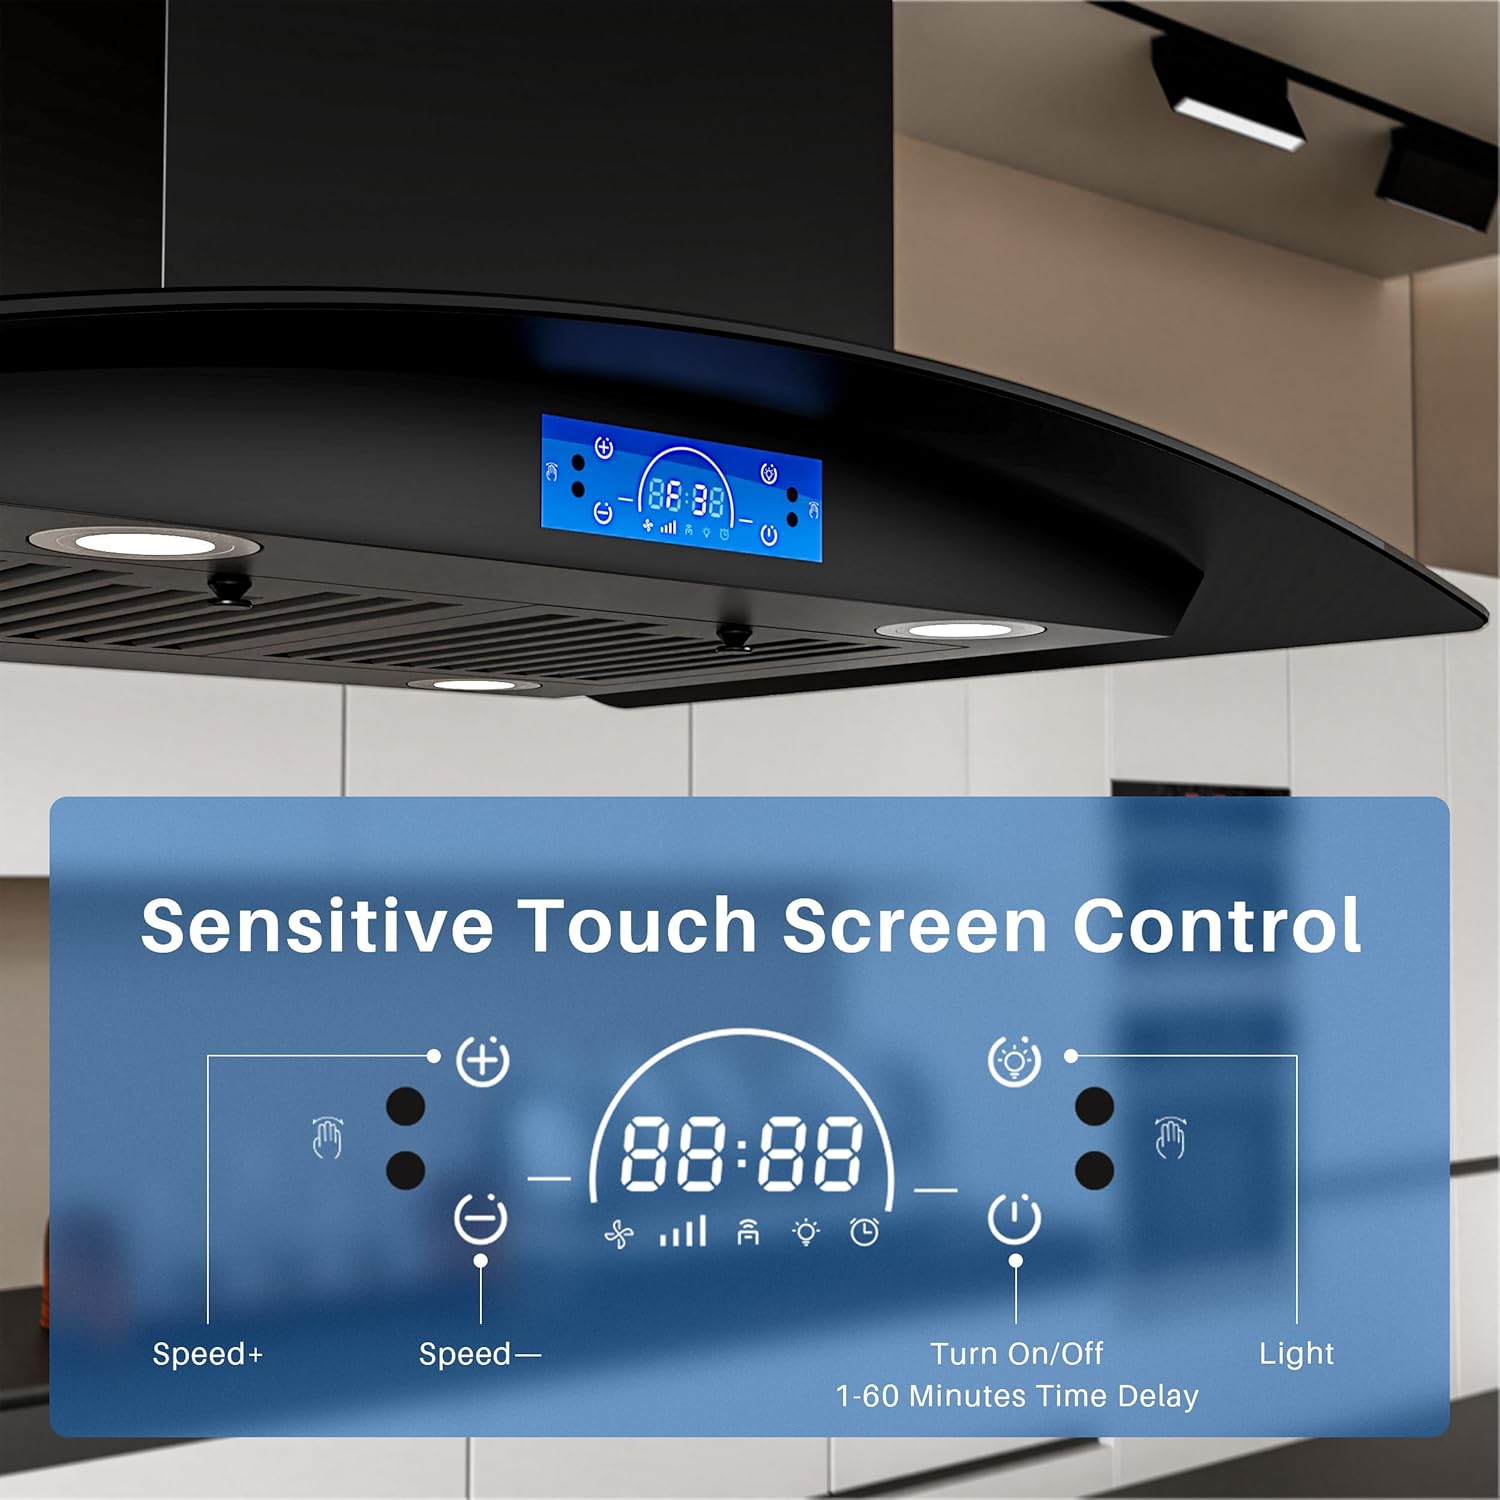
Figure 5: Sensitive Touch Screen Control Panel
- Power Button: Turns the hood On/Off.
- Speed +/- Buttons: Adjusts fan speed (3 levels).
- Light Button: Controls the LED lights.
- Timer Button: Activates the time delay function.
6.2 Gesture Control
For hands-free operation, the range hood can be controlled using gestures.

Figure 6: Gesture Control Functionality
- Wave Right: Increases fan speed.
- Wave Left: Decreases fan speed.
- Wave Left Twice: Turns the hood Off.
6.3 Fan Speed Adjustment
The 3-speed fan allows you to select the appropriate suction power for various cooking needs.

Figure 7: Three-Speed Exhaust Fan Operation
6.4 LED Lighting
The range hood is equipped with 4 energy-saving LED lights to illuminate your cooking area.

Figure 8: LED Lights for Cooktop Illumination
6.5 Time Delay Function
The time delay function allows the hood to continue operating for a set period (1-60 minutes) after cooking, ensuring complete air purification.

Figure 9: Smart Time Delay Function in operation
7. Maintenance
7.1 Baffle Filter Cleaning
The baffle filters effectively trap grease and impurities. Regular cleaning is essential for optimal performance and safety.
- Removal: Gently pull the release latch on each filter and slide it out.
- Cleaning: Filters can be washed by hand with warm, soapy water or placed in a dishwasher.
- Reinstallation: Ensure filters are completely dry before reinserting them into the hood.

Figure 10: Baffle Filter Maintenance Steps
7.2 Charcoal Filter Replacement (Ductless Mode)
If operating in ductless mode, the CC110 charcoal filters should be replaced every 3-6 months, depending on usage, to maintain effective odor filtration.
- Disconnect power to the range hood.
- Remove the baffle filters to access the charcoal filters.
- Twist and remove the old charcoal filters.
- Install new charcoal filters by twisting them into place.
- Reinstall baffle filters and restore power.
7.3 Exterior Cleaning
Clean the exterior surfaces with a soft cloth and a mild, non-abrasive cleaner. Avoid using harsh chemicals or abrasive pads that could damage the finish.
8. Troubleshooting
Before contacting customer service, review the following common issues and solutions:
| Problem | Possible Cause | Solution |
|---|---|---|
| Hood does not operate | No power supply | Check circuit breaker/fuse. Ensure power cord is securely plugged in. |
| Poor suction | Clogged filters, improper ducting, open windows/doors | Clean or replace filters. Check ductwork for obstructions. Close windows/doors during operation. |
| Lights not working | Faulty LED bulb, loose connection | Check bulb connections. If issue persists, contact customer service. |
| Excessive noise | Loose parts, motor issue, improper installation | Ensure all parts are securely fastened. Verify correct installation. Contact customer service if motor noise is unusual. |
9. Warranty and Support
FIREGAS products are manufactured to high-quality standards. For warranty information, technical support, or to order replacement parts, please refer to the contact information provided with your purchase documentation or visit the official FIREGAS website. Please have your model number (FGS-UBI02G75CC) and purchase date available when contacting support.