
1. Introduction
This manual provides comprehensive instructions for the installation, operation, and maintenance of your new Generic Android 13 Car Radio. Designed specifically for Chevrolet Lacetti Excelle+ vehicles, this multimedia system offers advanced features including a 9-inch touchscreen, GPS navigation, wireless CarPlay and Android Auto, DSP, RDS, FM/AM radio, 4G-WiFi connectivity, and support for a rear view camera. Please read this manual thoroughly before installation and use to ensure proper function and safety.
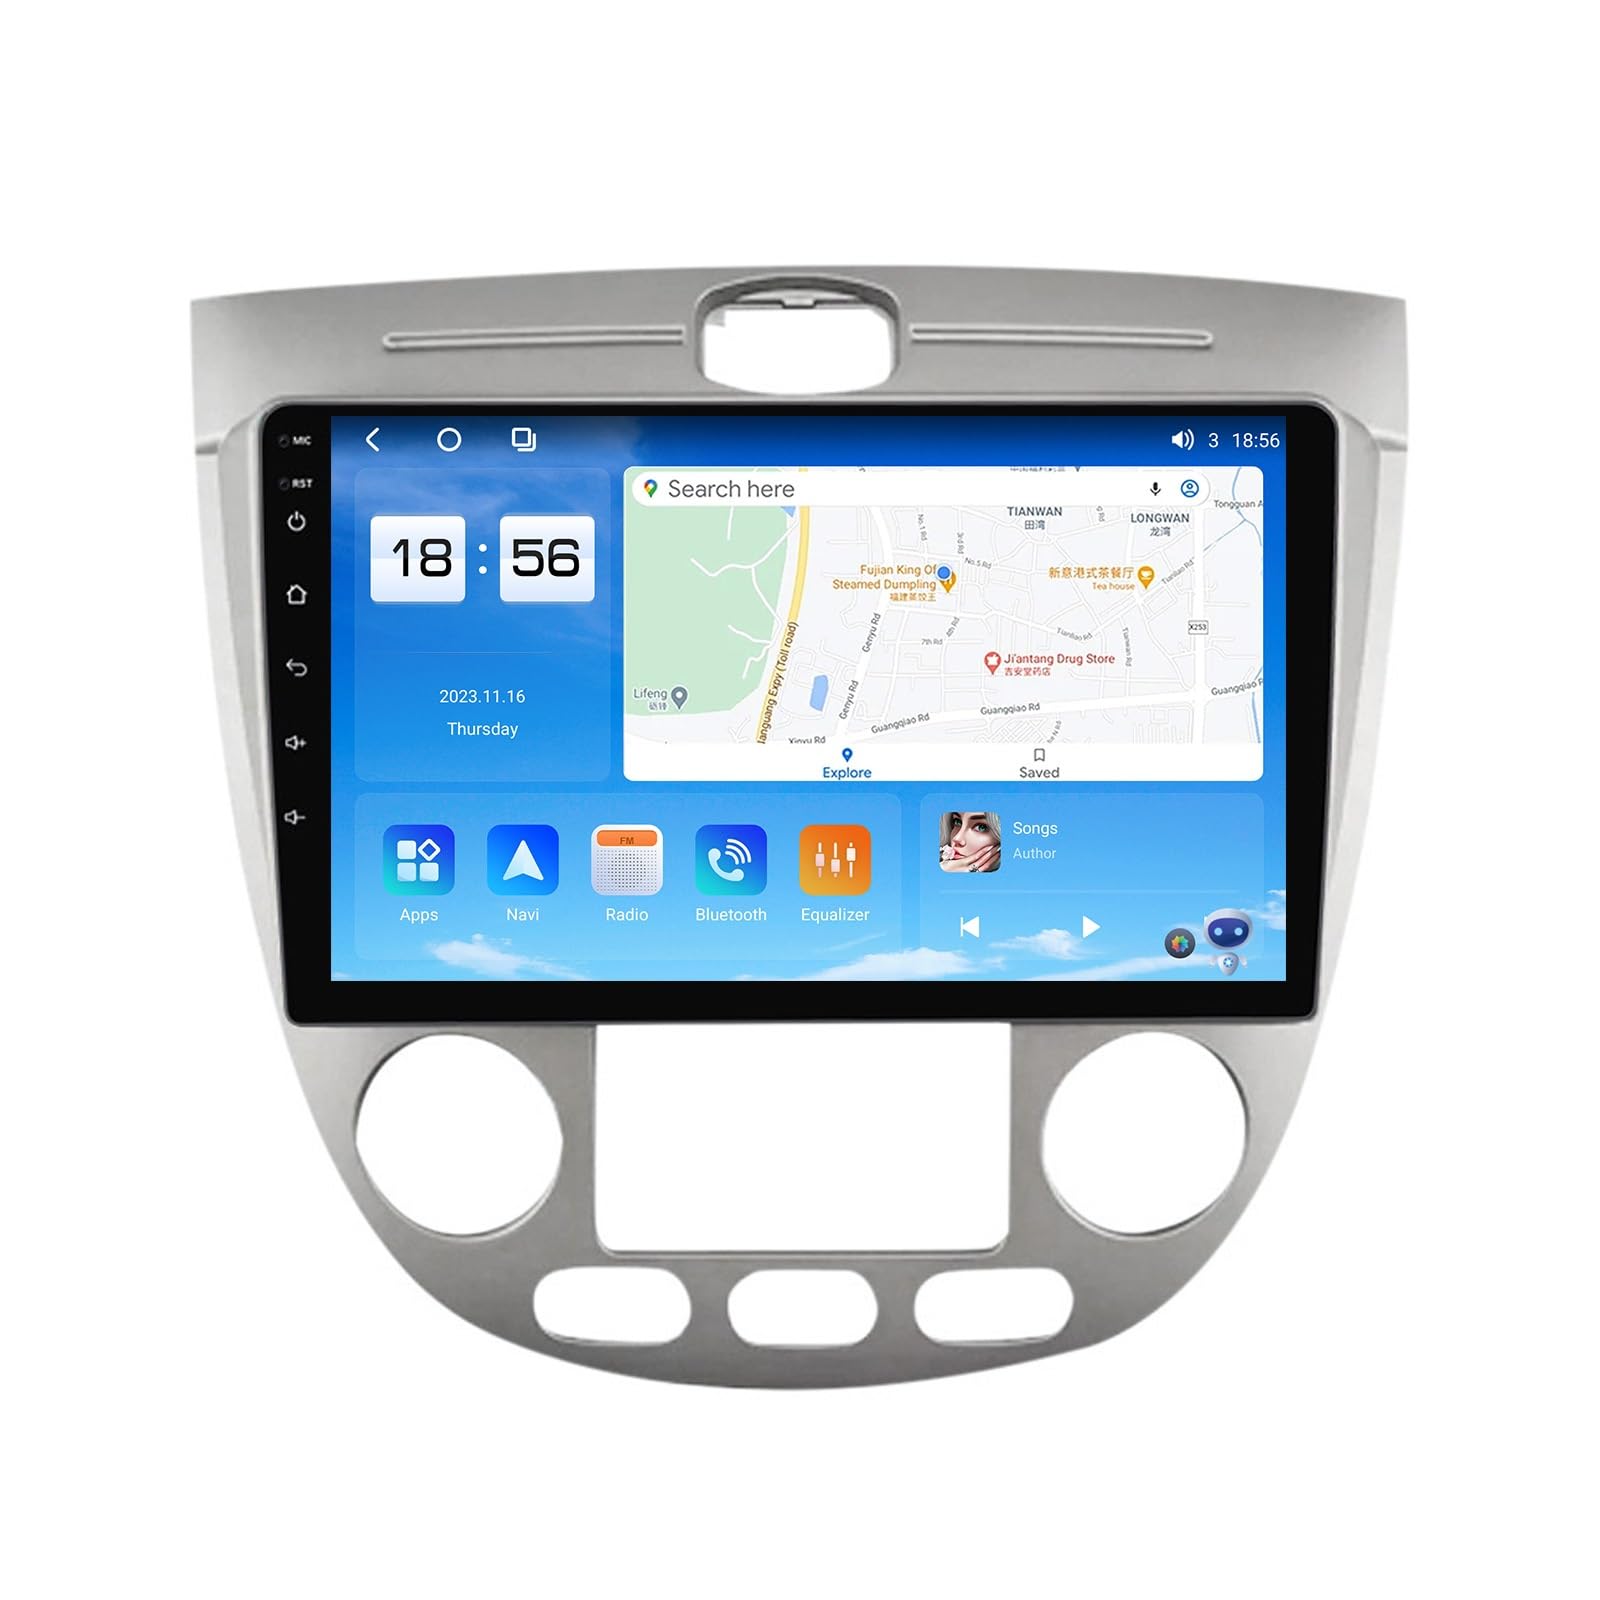
Image 1.1: Main unit of the Generic Android 13 Car Radio.
2. Product Overview and Features
The Generic Android 13 Car Radio is a dual-DIN multimedia system engineered to enhance your driving experience with modern connectivity and entertainment options. Key features include:
- Operating System: Android 13
- Display: 9-inch QLED capacitive touchscreen with 1280*720 resolution
- Processor: 8-core (for NF-3, NF-4, NF-5, NF-6, NF-7 series)
- Memory: 2GB RAM, 32GB ROM (for NF-3 model)
- Wireless Connectivity: Built-in Bluetooth 5.0, Wi-Fi, and 4G support (with SIM card slot for NF-3 to NF-7 series)
- Smartphone Integration: Wireless Apple CarPlay and Android Auto (for NF-2 to NF-7 series)
- Audio Processing: Built-in DSP (Digital Sound Processor) for enhanced audio quality, RDS, and DAB+ support (for NF-3 to NF-7 series)
- Navigation: Integrated GPS system
- Radio: FM/AM radio tuner
- Camera Support: AHD rear view camera input (1080P)
- Additional Features: Steering wheel control compatibility, split-screen function, floating window, dual cooling fan (for NF-3 to NF-7 series), multiple language support.

Image 2.1: Overview of Bluetooth 5.0, 4G LTE+WiFi, and wireless CarPlay/Android Auto capabilities.

Image 2.2: Features including dual cooling fan, FM/AM radio, GPS navigation, and steering wheel controls.

Image 2.3: Details on the Android system, 8-core processor, QLED screen, and rear view camera support.

Image 2.4: Advanced features such as DSP equalizer, floating window, multi-language support, and split-screen functionality.
3. Setup and Installation
This car radio is designed for Chevrolet Lacetti Excelle+ vehicles. Professional installation is recommended to ensure correct wiring and functionality. Before starting, ensure your vehicle's ignition is off and the battery is disconnected.
3.1. Package Contents
Verify that all components are present in the package before beginning installation:

Image 3.1: Contents of the product package, including the main unit, frame, various cables, and antennas.
3.2. Installation Steps
- Remove Original Radio: Carefully remove the existing car radio and dashboard trim. Refer to your vehicle's service manual for specific instructions.
- Connect Wiring Harness: Connect the provided power cable, RCA cables, GPS antenna, 4G antenna, and rear camera cable to the corresponding ports on the new head unit. Ensure all connections are secure.
- Install Frame: Mount the new radio unit into the vehicle's dashboard using the provided frame and mounting brackets.
- Test Functionality: Before fully reassembling the dashboard, reconnect the car battery and turn on the ignition to test the radio's basic functions (power, audio, touchscreen, etc.).
- Final Assembly: Once confirmed working, reassemble the dashboard trim.
The image below illustrates the appearance of the dashboard before and after the installation of the car radio for various Chevrolet Lacetti Excelle+ configurations.
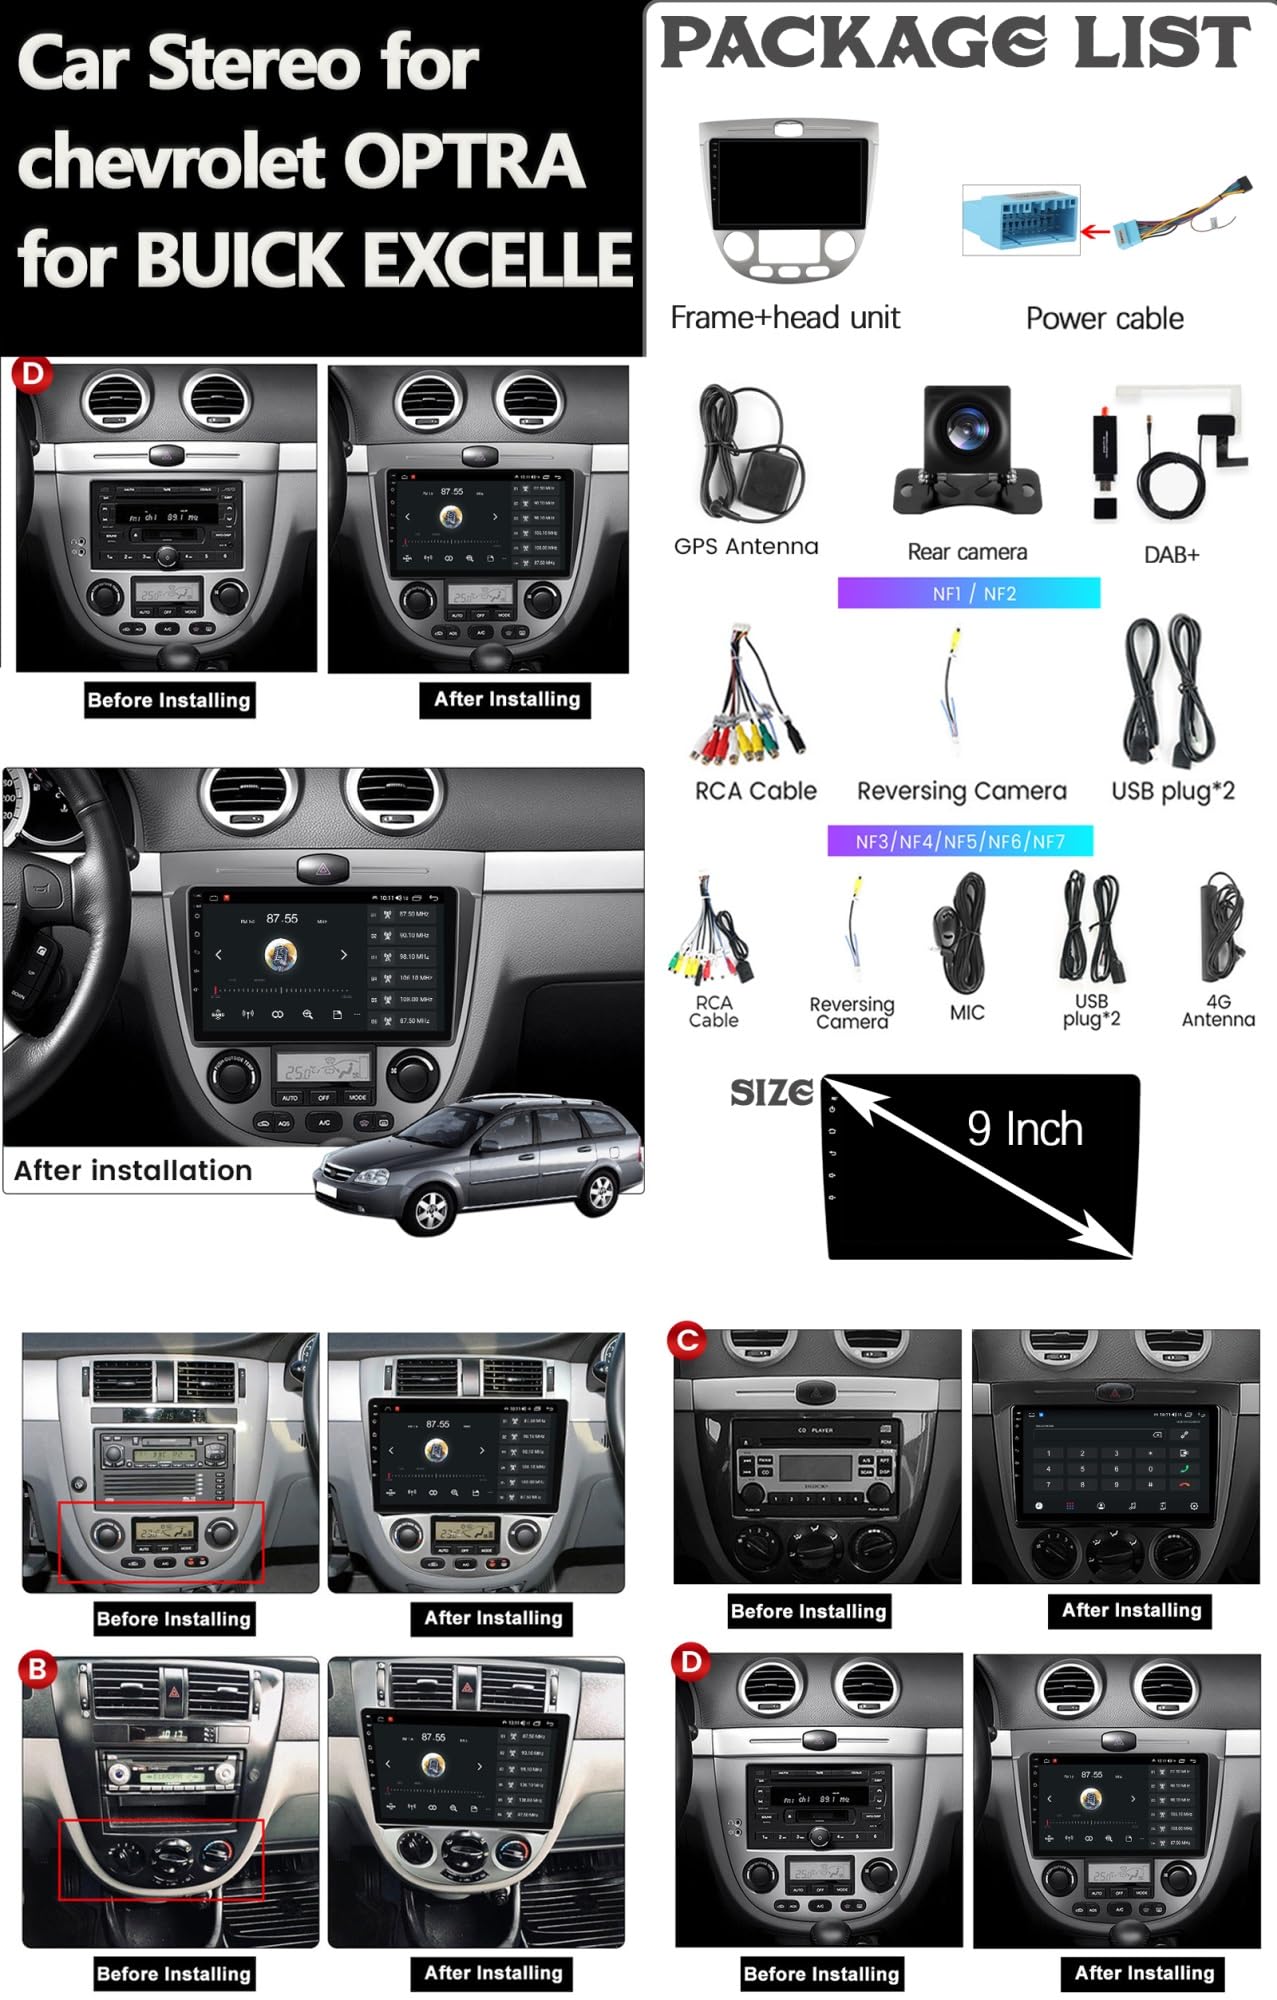
Image 3.2: Comparison of dashboard appearance before and after the car radio installation.
4. Operating Instructions
4.1. Power On/Off
Press the power button on the front panel or steering wheel control to turn the unit on or off. The unit will automatically power on when the vehicle's ignition is switched on.
4.2. Touchscreen Interface
Navigate through the system by tapping, swiping, and pinching on the 9-inch capacitive touchscreen. The Android 13 interface is intuitive and responsive.
4.3. Bluetooth Connectivity
- Go to the Bluetooth settings menu on the car radio.
- Enable Bluetooth on your mobile device and search for available devices.
- Select the car radio's Bluetooth name (e.g., "CarBT") from your device list and pair.
- Once connected, you can make hands-free calls and stream audio.
4.4. Wireless CarPlay and Android Auto
For models NF-2 to NF-7, wireless CarPlay and Android Auto are supported. Connect your compatible iPhone or Android device via Bluetooth and Wi-Fi as prompted by the system. This allows seamless integration of smartphone apps for navigation, music, and communication.
4.5. GPS Navigation
The unit comes with a built-in GPS module. Access the navigation application from the main menu. Ensure the GPS antenna is properly installed for optimal signal reception. You can download and use various navigation apps from the Google Play Store.
4.6. FM/AM Radio
Select the Radio application from the main menu. You can manually tune to stations or use the auto-scan function to find available frequencies. RDS (Radio Data System) is supported on NF-3 to NF-7 series, providing station information and traffic announcements.
4.7. Media Playback
Play audio and video files from USB drives connected to the unit's USB ports or stream music via Bluetooth from your paired smartphone.
4.8. Steering Wheel Controls
The unit supports your vehicle's original steering wheel controls. Access the steering wheel control settings in the system menu to configure or remap buttons as needed.
4.9. Split Screen and Floating Window
Utilize the split-screen feature to run two applications simultaneously (e.g., navigation and music player). The floating window function allows a small application window to overlay other apps for quick access.
4.10. Rear View Camera
When the vehicle is shifted into reverse gear, the display will automatically switch to the rear view camera feed, providing a clear view of the area behind your vehicle.
4.11. 4G/WiFi Connectivity
Connect to the internet via Wi-Fi hotspot or by inserting a 4G SIM card (for NF-3 to NF-7 series). This enables online navigation, streaming, and app downloads.
4.12. DSP Equalizer
Access the DSP settings to fine-tune audio output. Adjust equalizer bands, balance, fader, and sound effects to customize your listening experience.
5. Maintenance
5.1. Cleaning the Screen
Use a soft, lint-free cloth slightly dampened with water or a screen cleaner specifically designed for electronic displays. Avoid harsh chemicals or abrasive materials that could damage the screen.
5.2. Software Updates
Periodically check for software updates through the system settings or the manufacturer's website. Updates can provide new features, performance improvements, and bug fixes. Follow the on-screen instructions carefully during the update process.
6. Troubleshooting
If you encounter issues with your car radio, refer to the following common problems and solutions:
- No Power:
- Check all power connections and fuses.
- Ensure the vehicle's ignition is on.
- No Sound:
- Verify speaker connections.
- Check volume levels and mute settings.
- Ensure the correct audio source is selected.
- GPS Not Working/Poor Signal:
- Ensure the GPS antenna is properly connected and has a clear view of the sky.
- Check GPS settings in the system menu.
- Bluetooth Connection Issues:
- Ensure Bluetooth is enabled on both the car radio and your mobile device.
- Delete previous pairings and try reconnecting.
- Restart both devices.
- Touchscreen Unresponsive:
- Restart the unit.
- Ensure the screen is clean and free from debris.
For persistent issues not covered here, please contact customer support.
7. Specifications
| Model Number | HHIQBCZHC-D-NF-3 |
| Operating System | Android 13 |
| Screen Size | 9 inches |
| Screen Resolution | 1280*720 (QLED) |
| Processor | 8-core |
| RAM | 2GB |
| ROM | 32GB |
| Bluetooth Version | 5.0 |
| Connectivity | Wi-Fi, 4G (SIM card support) |
| Dimensions (Package) | 2.54 x 2.54 x 2.54 cm |
| Weight (Product) | 2500 Grams |
8. Warranty and Support
This product is provided without an explicit warranty, as indicated in the product specifications. For any technical assistance, installation queries, or operational support, please contact the customer service team of the retailer or manufacturer. They are available to provide online support and address your concerns.