1. Introduction
This manual provides comprehensive instructions for the installation, operation, and maintenance of your Wavtech audio system components: the Link700.4plus 4-Channel Amplifier, the link1000.1mini Mono Amplifier, and the linkRC Remote Level Control. Please read this manual thoroughly before attempting installation or operation to ensure proper use and optimal performance.

Image: The complete bundle including the Wavtech Link700.4plus 4-Channel Amplifier, link1000.1mini Mono Amplifier, and linkRC Remote Level Control.
2. Important Safety Information
Always observe the following safety precautions to prevent injury or damage to the equipment:
- Disconnect the vehicle's battery before any installation or wiring.
- Ensure all wiring is correctly routed and secured to prevent pinching or damage.
- Use appropriate gauge wiring for power and ground connections as specified by the amplifier's requirements.
- Avoid mounting amplifiers in locations exposed to excessive heat, moisture, or direct sunlight.
- Consult a professional installer if you are unsure about any aspect of the installation process.
3. Product Overview
This bundle includes three high-performance Wavtech components designed to enhance your car audio system:
3.1. Wavtech Link700.4plus 4-Channel Amplifier
The Link700.4plus is a powerful 4-channel amplifier providing flexible power delivery for your speakers. It features advanced sound processing capabilities and thermal management for reliable operation.
- Power Output: 700 Watts total, with 100 Watts x 4 @ 4 ohms and 175 Watts x 4 @ 2 ohms. Bridgeable to 350 Watts x 2 @ 4 ohms.
- Audio Processing: Includes a 1-band parametric EQ and bassFREQ processor.
- Crossovers: Adjustable crossovers for precise frequency control.
- Thermal Management: Active Thermal Management system.
- Inputs: RCA inputs and option for remote level control.
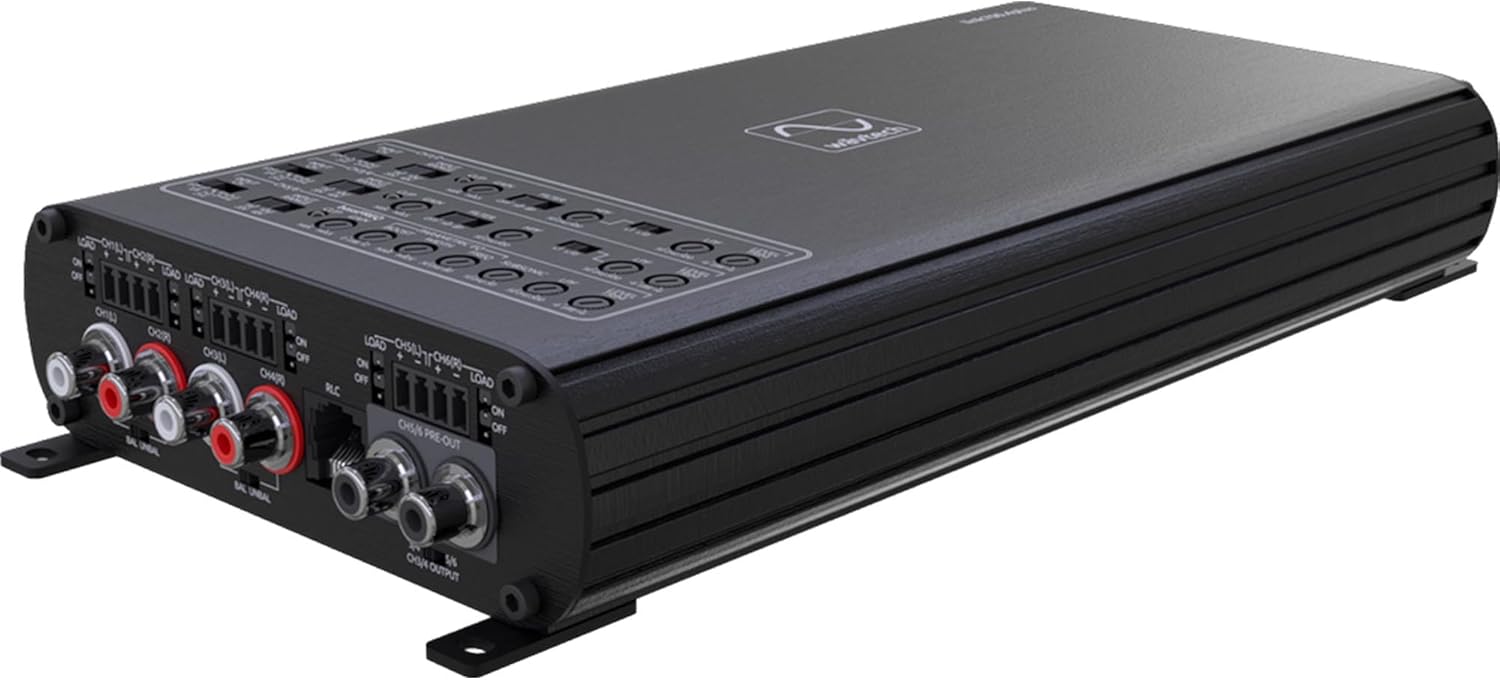
Image: Top view of the Wavtech Link700.4plus 4-Channel Amplifier, showing control panel and input/output connections.

Image: Rear view of the Wavtech Link700.4plus 4-Channel Amplifier, displaying power, ground, remote, and speaker output terminals.
3.2. Wavtech link1000.1mini Mono Amplifier
The link1000.1mini is a compact yet powerful mono amplifier designed for subwoofer applications, delivering substantial power with precise tuning options.
- Power Output: 1000 Watts RMS @ 2 ohms.
- Inputs: Speaker level inputs and RCA inputs.
- Audio Processing: Fully adjustable parametric EQ, low-pass crossover, and subsonic filter.
- Compatibility: Features adaptive loading technology and compatibility with OEM start/stop systems.
- Control: Remote level control capabilities.

Image: Top view of the Wavtech link1000.1mini Mono Amplifier, showing the control panel with various adjustments.

Image: Rear view of the Wavtech link1000.1mini Mono Amplifier, displaying power, ground, remote, and mono speaker output terminals.
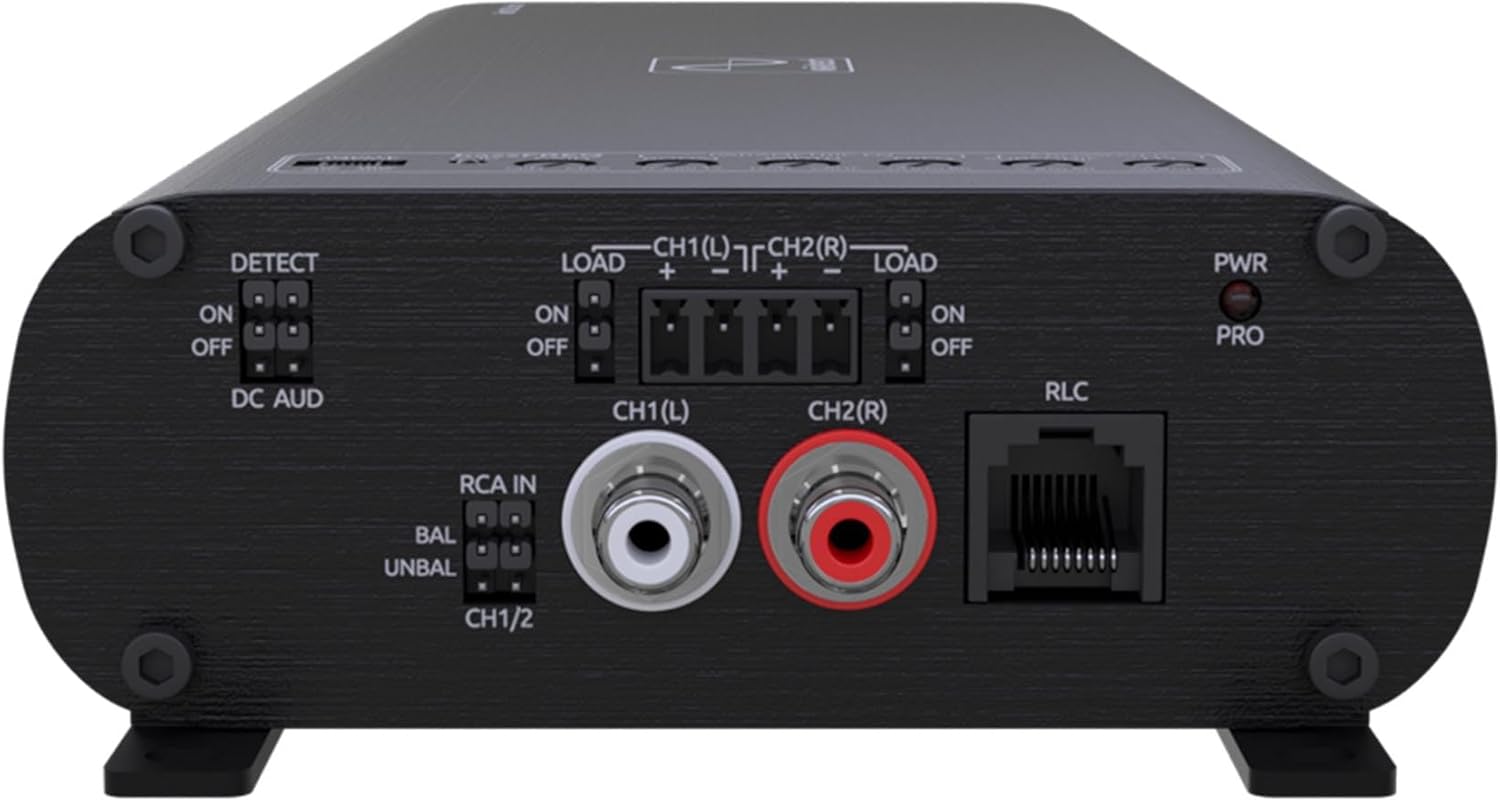
Image: Front view of the Wavtech link1000.1mini Mono Amplifier, showing RCA inputs, RLC port, and various switches for input and detection.
3.3. Wavtech linkRC Remote Level Control
The linkRC provides convenient remote adjustment of output levels for compatible Wavtech line output converters, line drivers, and signal processors.
- Function: Allows easy adjustment of output levels.
- Compatibility: Designed for select Wavtech line output converters, line drivers, and signal processors (e.g., linkDQ).
- Mounting: Offers flexible mounting options for convenient installation.

Image: The Wavtech linkRC Remote Level Control unit shown with its connecting cable.

Image: Front view of the Wavtech linkRC Remote Level Control, highlighting the adjustment knob and Wavtech logo.

Image: Rear view of the Wavtech linkRC Remote Level Control, showing the RJ45 port for cable connection.
4. Setup and Installation
Proper installation is crucial for optimal performance and safety. It is recommended to have these components installed by a qualified professional.
4.1. General Installation Guidelines
- Mounting Location: Choose a dry, well-ventilated location away from direct heat sources and moisture. Ensure sufficient airflow around the amplifiers for cooling.
- Power Wiring: Connect the main power wire directly to the vehicle's battery, using an appropriate fuse or circuit breaker within 18 inches of the battery terminal.
- Ground Wiring: Connect the ground wire to a clean, unpainted metal surface of the vehicle chassis, ensuring a solid electrical connection.
- Remote Turn-On: Connect the remote turn-on wire from your head unit to the amplifier's REM terminal.
- Signal Inputs: Use high-quality RCA cables for low-level inputs or connect speaker-level inputs directly from your head unit.
- Speaker Wiring: Ensure correct polarity for all speaker connections. Refer to the specific amplifier section for bridging instructions if applicable.
4.2. Link700.4plus 4-Channel Amplifier Setup
- Power Connections: Connect +12V, GND, and REM terminals as per general guidelines.
- Speaker Connections: Connect up to four speakers to the CH1/CH2/CH3/CH4 output terminals. For bridged mode (2-channel operation), refer to the amplifier's specific bridging diagram.
- Input Connections: Connect RCA cables from your head unit or signal processor to the RCA IN inputs.
- Crossover Adjustment: Use the adjustable crossover controls to set the desired frequency range for each channel.
- Gain Adjustment: Set the input gain to match the output voltage of your head unit. Start with the gain at minimum and slowly increase until desired volume is achieved without distortion.
- Parametric EQ/bassFREQ: Adjust these controls to fine-tune the audio response according to your preferences and vehicle acoustics.
4.3. link1000.1mini Mono Amplifier Setup
- Power Connections: Connect +12V, GND, and REM terminals.
- Subwoofer Connections: Connect your subwoofer(s) to the MONO output terminals. Ensure the impedance matches the amplifier's capabilities (e.g., 2 ohms).
- Input Connections: Use RCA inputs for low-level signals or the speaker-level inputs for high-level signals. The adaptive loading technology assists with OEM integration.
- Crossover and Subsonic Filter: Adjust the low-pass crossover to filter out high frequencies from the subwoofer. Use the subsonic filter to remove ultra-low frequencies that can cause distortion and waste power.
- Parametric EQ: Utilize the fully adjustable parametric EQ to optimize the subwoofer's frequency response.
- Gain Adjustment: Set the input gain to match the output voltage of your source unit.
- OEM Start/Stop Compatibility: This amplifier is designed to work seamlessly with vehicles equipped with OEM start/stop systems.
4.4. linkRC Remote Level Control Setup
- Connection: Connect the linkRC to the designated RLC port on your compatible Wavtech line output converter, line driver, or signal processor (e.g., linkDQ) using the provided cable.
- Mounting: Mount the linkRC in a convenient location within reach of the driver, using the flexible mounting options. Ensure the cable is routed safely and securely.
- Function: Once connected, the knob on the linkRC will allow you to adjust the output level of the connected Wavtech device.
5. Operating Instructions
Once installed, operating your Wavtech audio system is straightforward. Follow these general guidelines:
- Power On/Off: The amplifiers will turn on automatically when the remote turn-on signal is received from your head unit and turn off when the signal is removed.
- Volume Control: Use your head unit's volume control for overall system volume. The amplifier gain controls should be set once during initial setup and generally not used for daily volume adjustments.
- Remote Level Control (linkRC): Use the linkRC knob to adjust the output level of the connected Wavtech processor or line driver, typically used for subwoofer level control.
- Audio Adjustments: Fine-tune your sound using the parametric EQs, bassFREQ processor, and crossover settings on the amplifiers. Make small adjustments and listen carefully to the changes.
- Monitoring: Pay attention to any distortion or unusual sounds. If distortion occurs, reduce the volume or re-adjust gain settings.
6. Maintenance
Your Wavtech amplifiers and remote control are designed for reliable, long-term performance with minimal maintenance. Follow these simple steps:
- Cleaning: Periodically wipe the exterior surfaces with a soft, dry cloth. Do not use harsh chemicals or abrasive cleaners.
- Ventilation: Ensure that the amplifier's cooling fins are free from dust and debris to maintain proper heat dissipation.
- Connections: Occasionally check all power, ground, and signal connections to ensure they are secure and free from corrosion.
- Environment: Avoid exposing the units to extreme temperatures or high humidity.
7. Troubleshooting
If you experience issues with your Wavtech audio system, refer to the following common problems and solutions:
| Problem | Possible Cause | Solution |
|---|---|---|
| No Power / Amplifier Not Turning On |
|
|
| No Audio Output |
|
|
| Distorted Sound |
|
|
| Amplifier Overheating |
|
|
8. Specifications
8.1. Wavtech Link700.4plus 4-Channel Amplifier
- Output Power: 700 Watts total
- Per Channel Output: 100 Watts x 4 @ 4 ohms, 175 Watts x 4 @ 2 ohms
- Bridged Output: 350 Watts x 2 @ 4 ohms
- Dimensions (L x W x H): 10.25” x 5.5” x 1.65”
- Features: 1-band parametric EQ, bassFREQ processor, adjustable crossovers, Active Thermal Management, RCA inputs, remote level control option.
8.2. Wavtech link1000.1mini Mono Amplifier
- Output Power: 1000 Watts RMS @ 2 ohms
- Dimensions (L x W x H): 12.2” x 4.5” x 1.65”
- Features: Speaker level inputs, adaptive loading technology, OEM start/stop system compatibility, fully adjustable parametric EQ, low-pass crossover, subsonic filter, remote level control capabilities.
8.3. Wavtech linkRC Remote Level Control
- Function: Remote output level adjustment for compatible Wavtech devices.
- Connectivity: RJ45 port.
- Mounting: Flexible mounting options.
8.4. General System Specifications
- Brand: Wavtech
- Model Number (Bundle): WAVTECHBDL240928-09
- UPC: 840425812464
- Mounting Type: Freestanding
- Specification Met: FCC
- Approximate Item Weight (Bundle): 12.45 pounds
- Approximate Package Dimensions: 18 x 14 x 8 inches
9. Warranty and Support
Wavtech products are designed and manufactured to the highest quality standards. For specific warranty information, please refer to the warranty card included with your product or visit the official Wavtech website.
For technical support, troubleshooting assistance, or service inquiries, please contact Wavtech customer support through their official channels. Keep your purchase receipt as proof of purchase for warranty claims.
Wavtech Official Website: www.wavtech.com


