
ACASIS EC-7252
Contents
ACASIS Dual Bay 2.5 Inch USB-C to SATA HDD SSD RAID Enclosure User Manual
Model: EC-7252 | Brand: ACASIS
Introduction
This user manual provides detailed instructions for the installation, operation, and maintenance of your ACASIS Dual Bay 2.5 Inch USB-C to SATA HDD SSD RAID Enclosure. Please read this manual thoroughly before using the product to ensure proper functionality and to prevent damage.

Image: The ACASIS Dual Bay 2.5 Inch USB-C to SATA HDD SSD RAID Enclosure, a compact bluish-grey device with USB-C and DC 5V ports on the front, designed for housing two 2.5-inch SATA drives.
Key Features
- USB 3.0 Interface: Supports high-speed data transfer up to 5Gbps, enabling 1GB file transfer in approximately 3 seconds. Utilizes UASP acceleration protocol for faster transmission.
- Robust Power Supply: Features an auxiliary DC power supply port to ensure stable and sufficient power for dual-disk operation, preventing data transmission issues.
- Durable Aluminum Shell: Constructed with an aluminum alloy for strong anti-fall protection and efficient heat dissipation, maintaining optimal operating temperature below 38°C even after 12 hours of continuous use.
- Advanced Main Chip: Equipped with a powerful main chip for reduced latency and secure, fast data transmission.
- Wide Compatibility: Plug-and-play functionality with Windows, Mac, and Linux operating systems, requiring no additional drivers. Supports 2.5-inch SATA HDDs or SSDs with 7-9.5mm thickness.
- Intelligent Sleep Mode: Automatically enters hibernation after 10 minutes of inactivity to prolong hard disk lifespan and conserve power.
- RAID Array Modes: Offers four flexible RAID modes (RAID 0, RAID 1, JBOD, SPAN) to meet diverse storage needs, supporting up to 12TB total capacity.
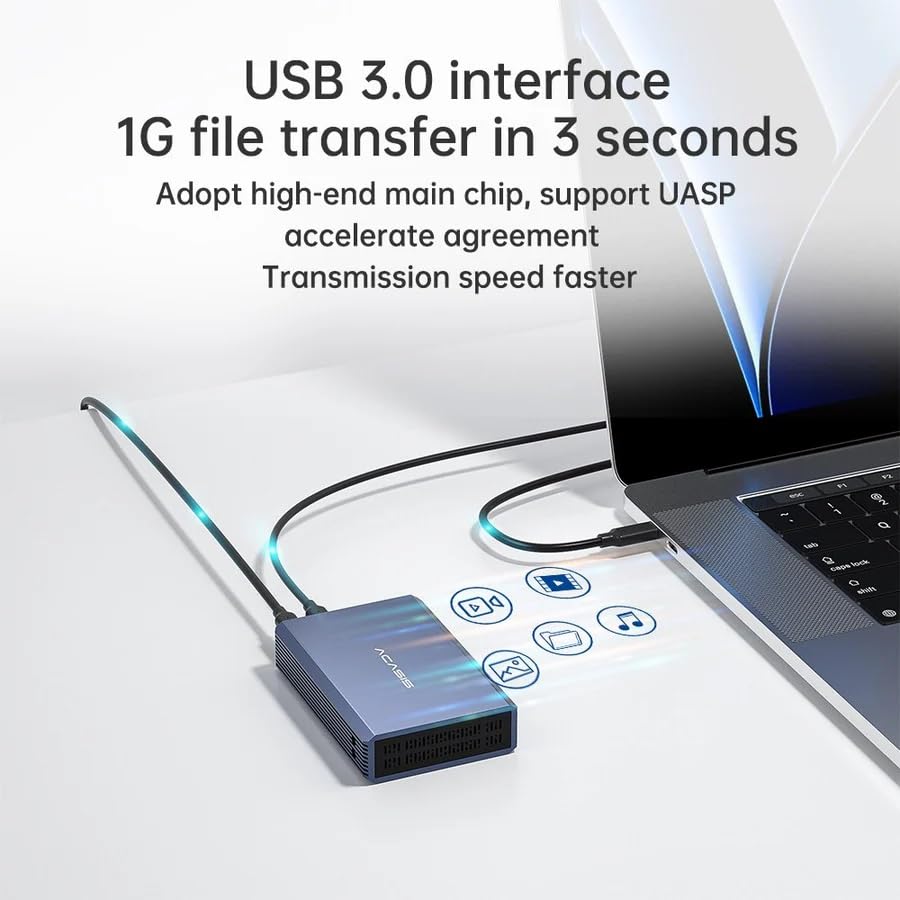
Image: A laptop connected to the ACASIS enclosure via a USB-C cable, illustrating fast data transfer with icons representing various file types.

Image: The ACASIS enclosure connected to a laptop, with arrows indicating heat dissipation from the enclosure and a temperature reading of less than 38°C.
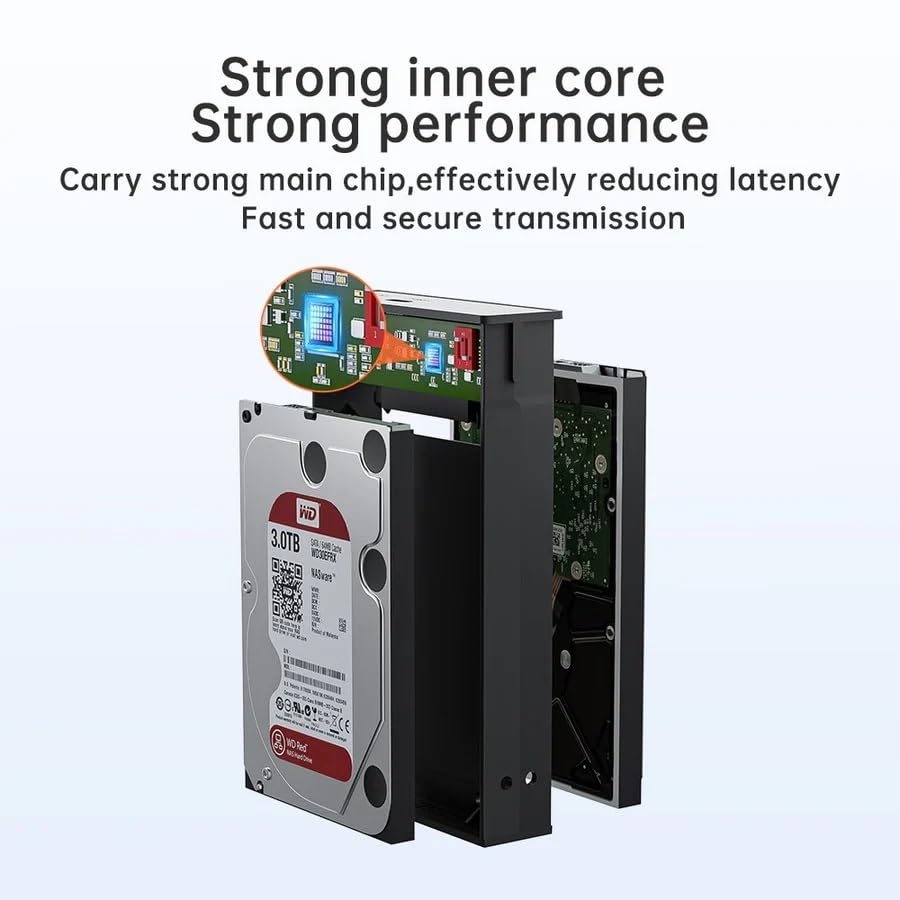
Image: An exploded view of the enclosure showing a hard drive being inserted into a tray, highlighting the internal main chip for strong performance.
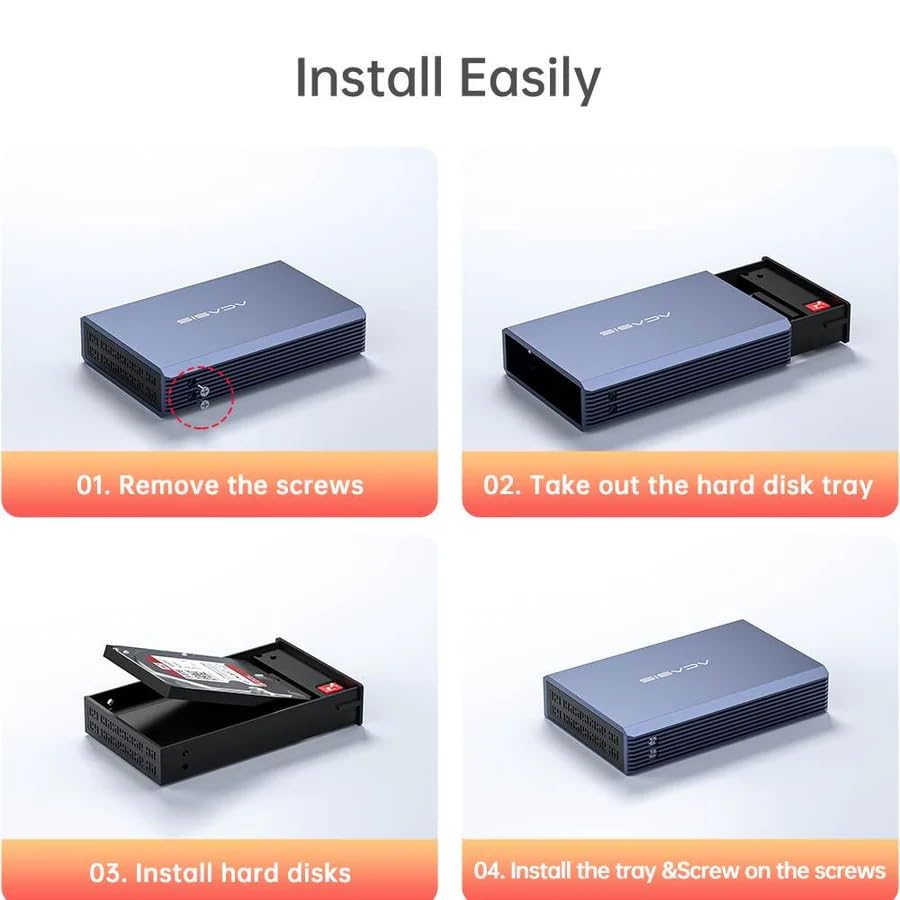
Image: Three monitors displaying Linux, Windows, and Mac OS logos, indicating broad operating system compatibility, along with various 2.5-inch SSDs/HDDs.
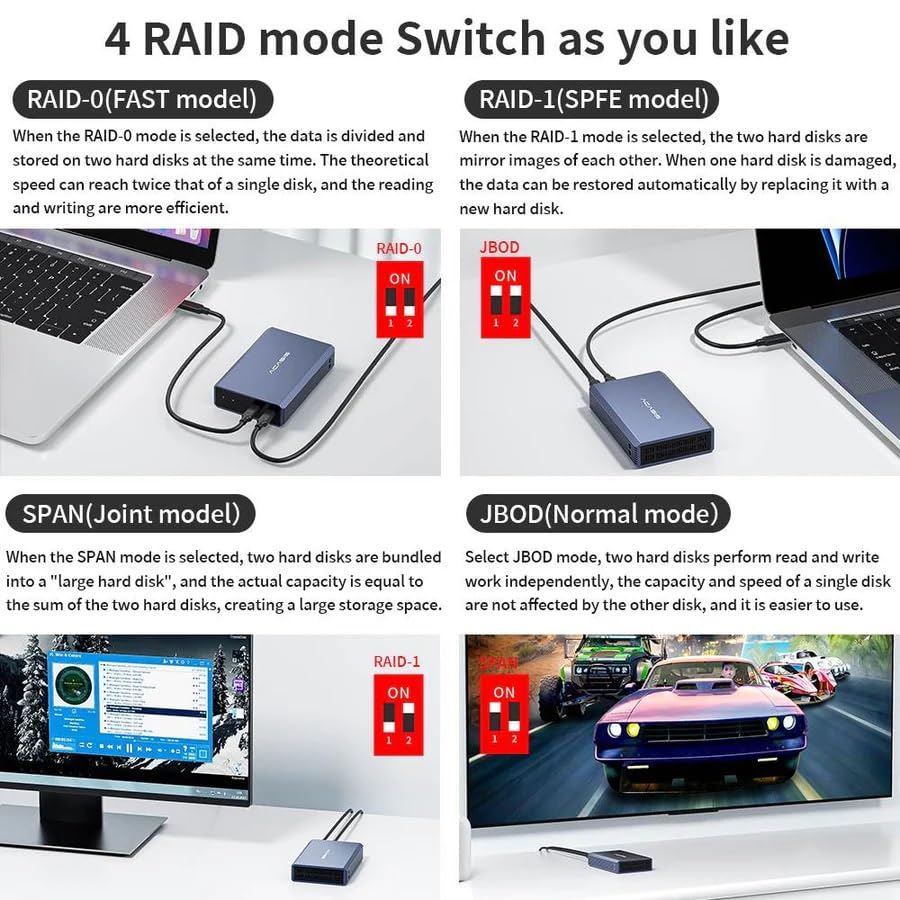
Image: The ACASIS enclosure with a hard drive partially inserted, showing a red RAID toggle switch for selecting different RAID modes.
Package Contents
Verify that all items are present in the package:
- Hard Disk Array Box (Enclosure) x 1
- 5V/4A Power Supply Cable x 1
- Data Cable (USB-C to USB-A/C) x 1
- Screw Driver Pack x 1
- User Manual x 1
Specifications
| Attribute | Detail |
|---|---|
| Model | EC-7252 |
| Material | Aluminum |
| Item Weight | 300 Grams |
| Memory Storage Capacity | Up to 12 TB (2 x 6TB) |
| Compatible Devices | Laptop, Gaming Console, Desktop |
| Hard Disk Form Factor | 2.5 Inches (7-9.5mm thickness) |
| Max Number of Supported Devices | 2 |
| Data Transfer Rate | 5 Gigabytes Per Second (USB 3.0) |
| Product Dimensions (LxWxH) | 10 x 5 x 2 Centimeters |
| Hardware Interface | USB 3.0 |
| Colour | Bluish Grey |
| Country of Origin | USA |
Setup and Installation
Follow these steps to install your 2.5-inch SATA HDDs or SSDs into the ACASIS enclosure:
- Remove the Screws: Locate and remove the screws securing the hard disk tray. Use the provided screwdriver.
- Take Out the Hard Disk Tray: Gently slide out the internal hard disk tray from the enclosure.
- Install Hard Disks: Carefully place your 2.5-inch SATA HDD(s) or SSD(s) into the designated slots on the tray. Ensure they are securely seated.
- Install the Tray & Screw on the Screws: Slide the tray back into the enclosure until it clicks into place. Reinsert and tighten the screws to secure the tray.
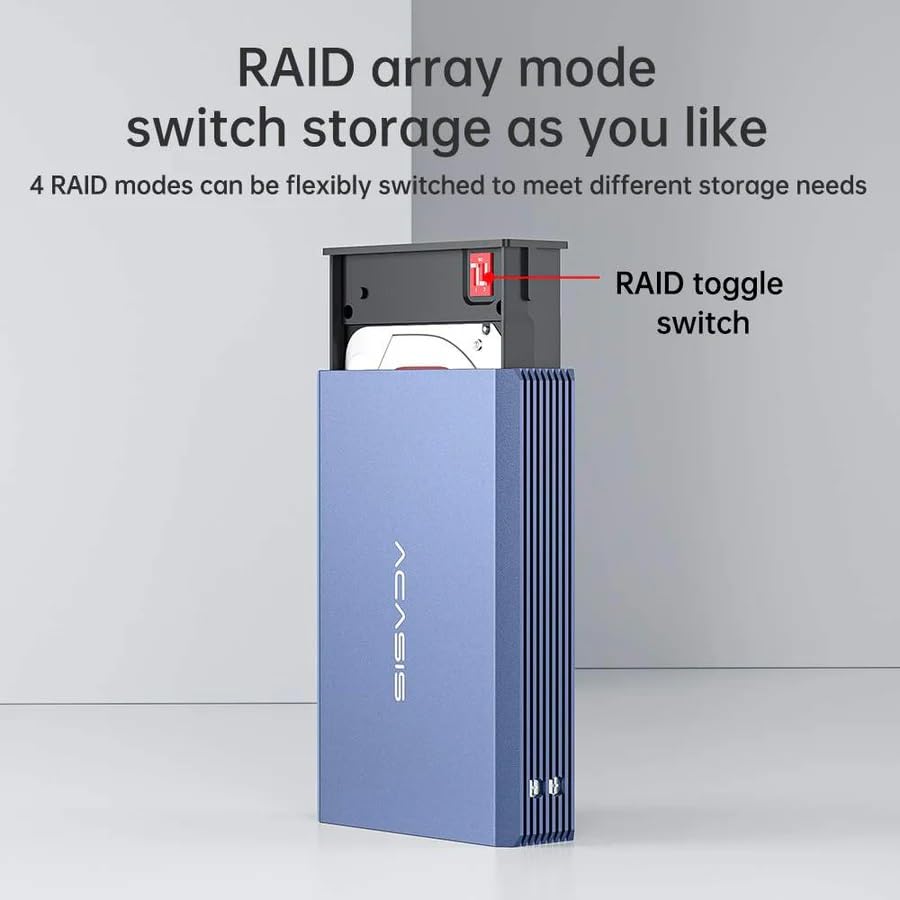
Image: A four-panel diagram illustrating the installation process: 1. Removing screws, 2. Taking out the tray, 3. Installing hard disks, 4. Reinserting the tray and screwing it back.
After installing the drives, connect the enclosure to your computer using the provided USB-C data cable and connect the power supply cable to a power outlet.
Operating Modes (RAID Configuration)
The ACASIS enclosure supports four different RAID modes, allowing you to configure your drives based on your specific needs for speed, redundancy, or capacity. Use the RAID toggle switch located on the hard disk tray to select your desired mode.
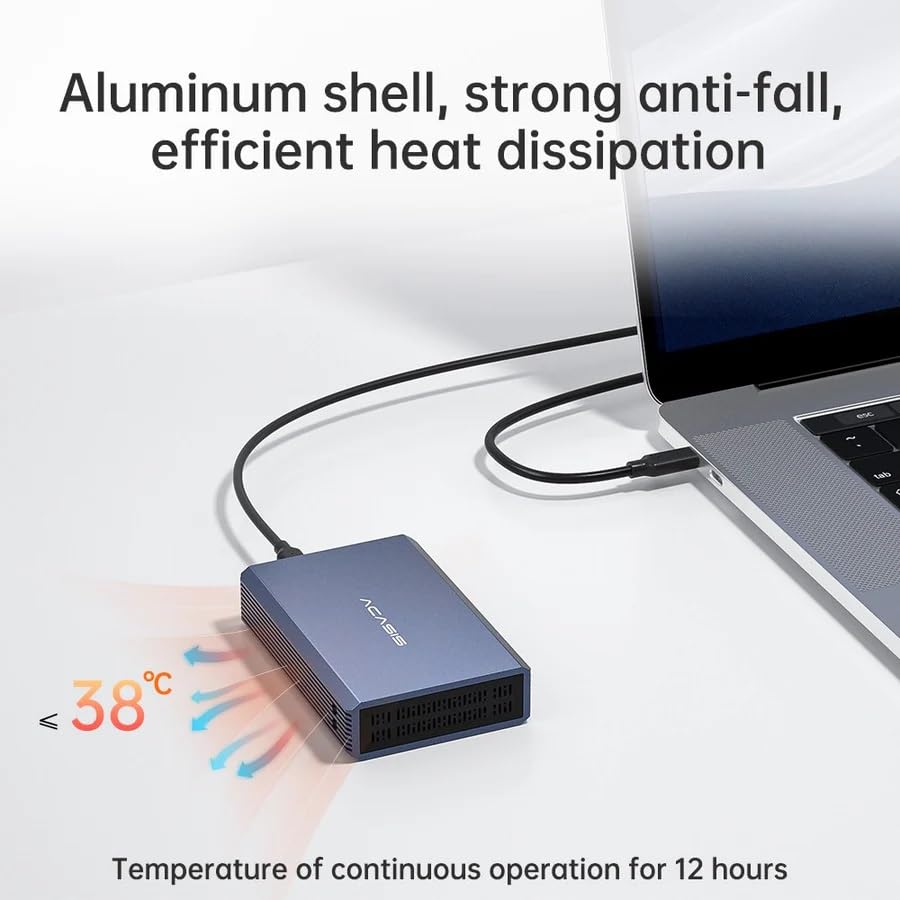
Image: A four-panel diagram explaining the different RAID modes: RAID-0, RAID-1, SPAN, and JBOD, with illustrations of their configurations and benefits.
RAID-0 (FAST model)
When RAID-0 mode is selected, data is divided and stored across both hard disks. This configuration offers the fastest theoretical speed, potentially doubling the read and write performance compared to a single disk. It is ideal for applications requiring high data throughput, such as video editing or large file transfers. Note: RAID-0 provides no data redundancy; if one disk fails, all data on both disks may be lost.
RAID-1 (SAFE model)
In RAID-1 mode, data is mirrored across both hard disks. This means an identical copy of your data exists on each drive. If one hard disk fails, the data can be automatically restored by replacing the damaged disk with a new one. RAID-1 is excellent for data redundancy and critical data storage. Note: The usable capacity is limited to that of a single drive.
SPAN (Joint model)
When SPAN mode is selected, the two hard disks are bundled into a single, larger logical volume. The actual capacity is the sum of the capacities of both hard drives. This mode is useful for creating a large storage space without the performance benefits of RAID-0 or the redundancy of RAID-1. Note: Data is written sequentially across drives; if one drive fails, data on both drives may be affected.
JBOD (Normal mode)
In JBOD (Just a Bunch Of Disks) mode, both hard disks perform read and write operations independently. The capacity and speed of a single disk are not affected by the other disk. This mode treats each drive as a separate volume, making it easy to use for individual drive access. Note: No data redundancy or performance enhancement is provided.
Maintenance
- Keep the enclosure in a clean, dry environment away from direct sunlight and extreme temperatures.
- Avoid dropping or subjecting the enclosure to strong impacts.
- Do not block the ventilation holes on the enclosure to ensure proper heat dissipation.
- Regularly back up important data, especially when using RAID-0 or SPAN modes, as these do not provide data redundancy.
- Clean the exterior with a soft, dry cloth. Do not use liquid cleaners or aerosols.
Troubleshooting
| Problem | Possible Cause / Solution |
|---|---|
| Enclosure not detected by computer. |
|
| Slow data transfer speeds. |
|
| Hard drives not spinning up. |
|
| RAID mode not functioning as expected. |
|
Warranty and Support
This ACASIS product comes with a 1-Year Warranty from the date of purchase. This warranty covers manufacturing defects and workmanship under normal use.
For technical support, warranty claims, or further assistance, please contact ACASIS customer service through their official website or the retailer where you purchased the product. Please have your model number (EC-7252) and proof of purchase ready when contacting support.
Manufacturer: ACASIS
Importer/Packer (India): KSP ELECTRONICS, info@kspelectronics.com, +91-6124512443
Documents and downloads
Ask a question about this manual
Ask about setup, troubleshooting, compatibility, parts, safety, or missing instructions. Manuals+ will review the question and use this page’s manual context to help answer it.