
1. Introduction
The OONO D-1630TBL is a versatile terminal block adapter module designed to facilitate the integration of the Arduino GIGA R1 WiFi into industrial control applications. This module provides a full GPIO breakout, allowing easy connection of A0-A11, D0-D75, and other special and power ports to screw terminal blocks. It supports both DIN rail and screw mounting options, offering flexibility for various installation environments.
2. Features
- Full GPIO Breakout: Supports A0-A11, D0-D75, and other special/power ports via screw terminal blocks.
- Industrial Application Ready: Extends Arduino GIGA projects to industrial control.
- High-Quality Terminal Blocks: Pitch 3.81mm/0.15", wire range 26-16AWG, strip length 5mm, Metric M2 slotted screw.
- Flexible Mounting Options: Includes a fireproof nylon material DIN rail mount carrier (supports 35mm, 32mm, or 15mm rails) and a pair of DIN rail to wall mounting adapter brackets for wall or wood panel mounting.
- Certified Components: UL CE CQC certified terminal blocks, UL 94-V0 certified PCB, and UL CE certified DIN rail mount carrier.
3. Product Overview and Components
The OONO D-1630TBL module provides a robust interface for your Arduino GIGA R1 WiFi board. Below are images illustrating the module and its components.

Figure 3.1: Included components of the OONO D-1630TBL module, showing the main board, DIN rail carrier, wall mount brackets, and screws.

Figure 3.2: Detailed pinout diagram for the OONO D-1630TBL module, illustrating the GPIO connections and power ports.
4. Setup and Installation
Follow these steps to properly set up and install your OONO D-1630TBL module with the Arduino GIGA R1 WiFi.
4.1. Attaching the Arduino GIGA R1 WiFi
- Carefully align the pin headers of your Arduino GIGA R1 WiFi board with the corresponding sockets on the D-1630TBL adapter module.
- Gently press the Arduino GIGA R1 WiFi board down until it is securely seated on the adapter module. Ensure all pins are correctly engaged.

Figure 4.1: Arduino GIGA R1 WiFi board correctly installed on the OONO D-1630TBL adapter module.
4.2. Mounting Options
The D-1630TBL module offers two primary mounting methods: DIN rail and screw mount.
4.2.1. DIN Rail Mounting
- Ensure the DIN rail carrier is attached to the module.
- Hook the top edge of the module onto the DIN rail.
- Push the bottom edge of the module towards the rail until it clicks into place.

Figure 4.2: The OONO D-1630TBL module securely mounted on a standard DIN rail.
4.2.2. Screw Mounting (Wall/Panel)
- Attach the provided DIN rail to wall mounting adapter brackets to the module using the included screws.
- Position the module on your desired wall or wood panel.
- Mark the screw hole locations through the brackets.
- Drill pilot holes if necessary, then secure the module to the surface using appropriate screws.

Figure 4.3: The OONO D-1630TBL module with wall mount brackets attached, ready for screw mounting.
4.3. Wiring to Terminal Blocks
Refer to the pinout diagram (Figure 3.2) for correct connections. The terminal blocks are designed for 26-16AWG wires. Strip approximately 5mm of insulation from your wires before inserting them into the terminal blocks and tightening the M2 slotted screws.
Video 4.1: Demonstration of the OONO D-1630TBL module, showcasing its features and potential applications with the Arduino GIGA R1 WiFi.
5. Operating Instructions
Once the Arduino GIGA R1 WiFi is securely mounted and wired to the terminal blocks, the module functions as a direct breakout for the Arduino's GPIO pins. You can program your Arduino GIGA R1 WiFi as usual, and the signals will be accessible via the robust screw terminals. Ensure your wiring matches the intended pin functions as per the Arduino GIGA R1 WiFi documentation and the D-1630TBL pinout diagram.
The module is compatible with additional shields, such as the GIGA Display Shield, as shown below.

Figure 5.1: The OONO D-1630TBL module supporting an Arduino GIGA R1 WiFi with an attached GIGA Display Shield.
6. Maintenance
The OONO D-1630TBL module requires minimal maintenance. Keep the module clean and free from dust and debris. Ensure all terminal block screws are tightened appropriately to maintain good electrical contact. Avoid exposing the module to excessive moisture or extreme temperatures.
7. Troubleshooting
- No Signal/Intermittent Connection: Check all wiring connections to the terminal blocks. Ensure wires are stripped correctly and screws are tight. Verify the Arduino GIGA R1 WiFi is properly seated on the adapter module.
- Module Not Mounting Securely: For DIN rail, ensure it's correctly hooked and clicked into place. For screw mount, verify the brackets are attached firmly and screws are appropriate for the mounting surface.
- Physical Damage: Inspect the module for any visible damage. If damage is present, discontinue use and contact support.
8. Specifications
| Attribute | Value |
|---|---|
| Model Number | D-1630TBL |
| Compatible Devices | Arduino GIGA R1 WiFi, Personal Computer, Microcontroller-based Devices |
| Terminal Block Pitch | 3.81mm / 0.15" |
| Wire Range | 26-16AWG |
| Wire Strip Length | 5mm |
| Terminal Screw Type | Metric M2 Slotted Screw |
| DIN Rail Support | 35mm, 32mm, or 15mm |
| PCB Certification | UL 94-V0 |
| Terminal Block Certification | UL CE CQC |
| DIN Rail Carrier Certification | UL CE |
| Item Weight | 11.04 ounces (approx. 313 grams) |
| Package Dimensions | 6.69 x 3.86 x 2.91 inches |
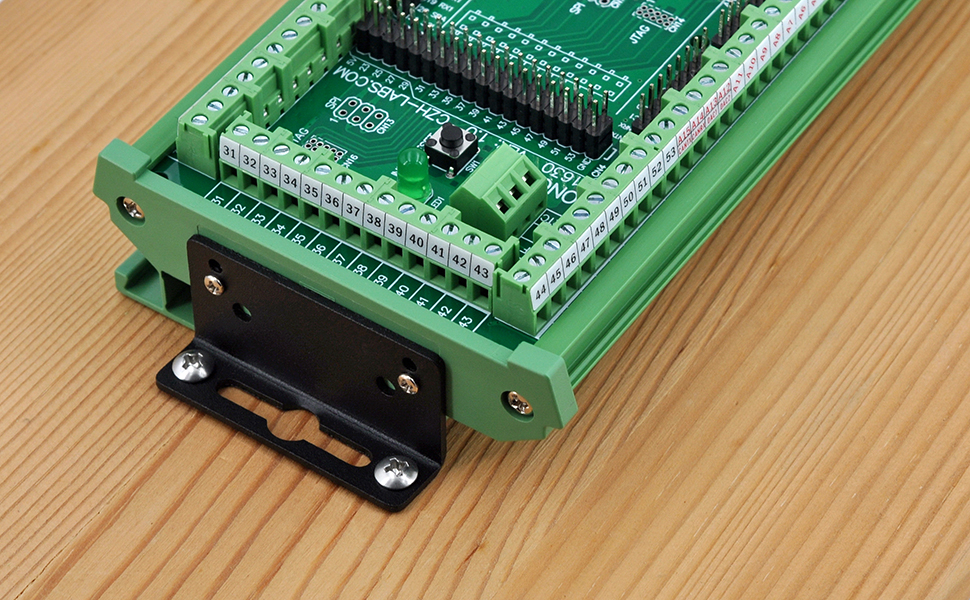
Figure 8.1: Dimensional drawing of the OONO D-1630TBL module, showing key measurements in millimeters.
9. Warranty and Support
For warranty information and technical support, please refer to the official OONO website or contact your retailer. Keep your purchase receipt for warranty claims.