
Falcon Electronics EagleEye 2nd Gen Triple Cam 2K Dashcam
FalconEye Electronics EagleEye 2nd Gen Triple Cam 2K Dashcam User Manual
Model: EagleEye 2nd Gen Triple Cam 2K Dashcam
1. Introduction
This manual provides detailed instructions for the installation, operation, and maintenance of your FalconEye Electronics EagleEye 2nd Gen Triple Cam 2K Dashcam. Please read this manual thoroughly before using the device to ensure proper functionality and to maximize its benefits.
2. What's in the Box
Verify that all components listed below are included in your package:
- Main Dash 2K Front Facing Camera with 4.0" LCD
- 2 Additional 1080P Waterproof Rear Cameras with 19' cables
- 1 Cigarette Lighter Mobile Charger
- 1 Suction Cup Windshield Mount
- GPS Antenna (for speed and location tracking)
- User Manual
- TF Card slot (supports up to 128GB microSD card, card not included in all variants)
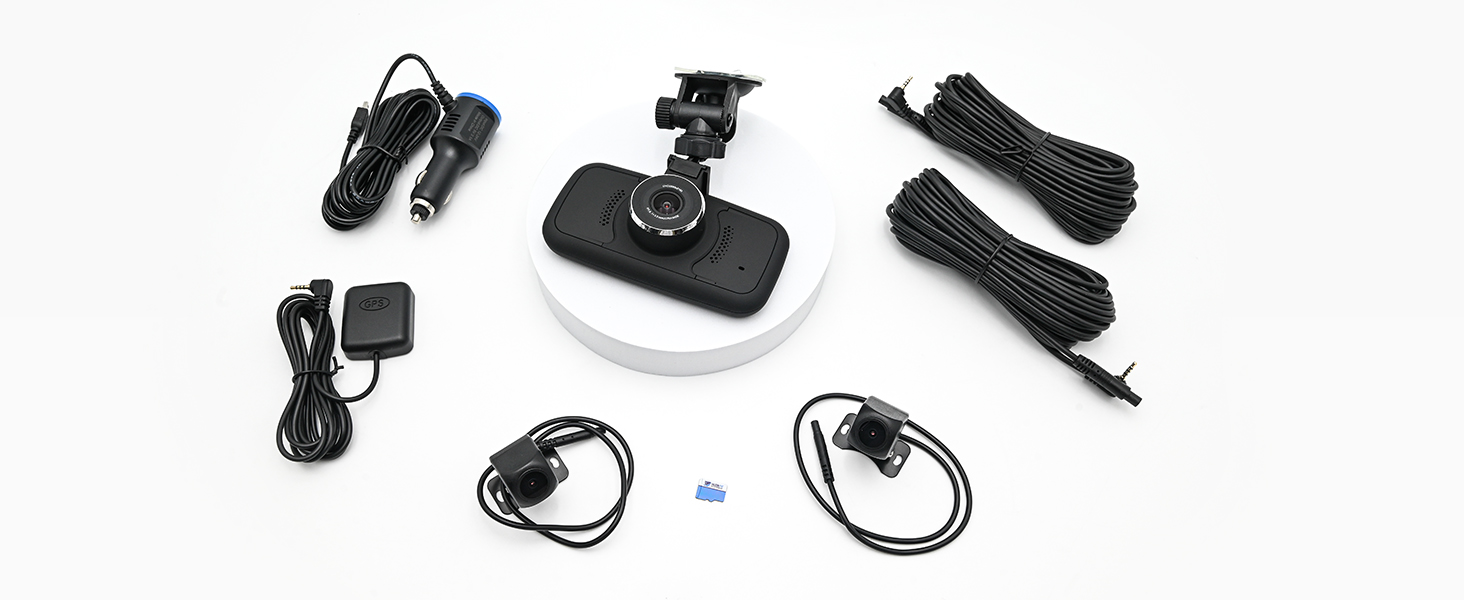
Image: All components included in the FalconEye EagleEye 2nd Gen Dashcam package.

Image: The included cigarette lighter power adapter and cable.

Image: The GPS antenna and the two external cameras with their connecting cables.
3. Product Overview
The FalconEye EagleEye 2nd Gen Dashcam is a triple-camera system designed to provide comprehensive video surveillance for your vehicle. It features a 2K front camera and two 1080P waterproof rear cameras, a 4-inch LCD screen, built-in WiFi, and GPS functionality.
Key Features:
- Multiple Viewpoints: Records simultaneously from a 2K front-facing camera and two 1080P waterproof rear cameras.
- High-Definition Recording: Captures clear video with excellent night vision capabilities.
- 4" LCD Screen: Allows for direct viewing and playback of recordings.
- SD Card Slot: Supports microSD cards up to 128GB for video storage.
- GPS Functionality: Records vehicle speed and location data (can be disabled by unplugging the antenna).
- WiFi Connectivity: Enables easy transfer and viewing of recordings via a mobile application.
- G-Sensor: Automatically locks video files upon detecting sudden impacts or collisions.
- Loop Recording: Continuously records by overwriting the oldest files when the memory card is full.

Image: The main dashcam unit with its 4-inch LCD screen and the two external cameras.

Image: Overview of the dashcam's features including GPS, G-Sensor, easy installation, and loop recording.

Image: Side view of the dashcam highlighting its connectivity ports: USB, 3.5mm jacks for cameras/GPS, and the Micro SD card slot.
4. Setup and Installation
Follow these steps for proper installation of your dashcam system.
4.1 Main Unit Installation
- Clean the windshield area where you intend to mount the dashcam.
- Attach the suction cup mount to the main dashcam unit.
- Securely attach the suction cup mount to the windshield, ensuring a clear view of the road.
- Connect the cigarette lighter power adapter to the dashcam and plug it into your vehicle's 12V power outlet. Route the cable neatly to avoid obstruction.

Image: Front view of the main dashcam unit with its suction cup mount.
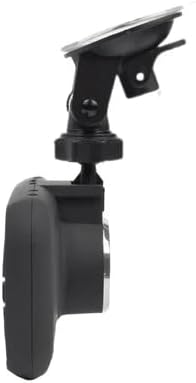
Image: Side view of the dashcam mounted, illustrating its position relative to the windshield.
4.2 External Camera Installation
The two additional cameras are waterproof and designed for external mounting, typically on side mirrors or the rear of the vehicle. The 19-foot cables provide flexibility for routing.
- Identify suitable mounting locations for the two external cameras, ensuring a clear field of view. Common locations include side mirrors or the rear of the vehicle.
- Securely mount the cameras using appropriate hardware (not specified, assume included or user-provided).
- Route the camera cables from the external mounting points to the main dashcam unit. Ensure cables are tucked away and secured to prevent interference with vehicle operation or damage.
- Connect the 3.5mm jacks of the external cameras to the corresponding ports on the main dashcam unit.

Image: Example of external cameras installed on the side mirrors of a truck.
4.3 GPS Antenna Installation
- Mount the GPS antenna on your dashboard or another location with a clear view of the sky for optimal signal reception.
- Connect the GPS antenna's 3.5mm jack to the designated port on the main dashcam unit.
- If you do not wish to record speed and location data, you may leave the GPS antenna unplugged.
4.4 MicroSD Card Insertion
- Ensure the dashcam is powered off.
- Insert a compatible microSD card (Class 10 or higher, up to 128GB) into the TF card slot on the side of the main unit until it clicks into place.
- Format the microSD card through the dashcam's menu settings before first use to ensure compatibility and optimal performance.
5. Operating Instructions
5.1 Powering On/Off
- The dashcam will automatically power on and begin recording when connected to a power source and the vehicle ignition is turned on.
- It will automatically power off shortly after the vehicle ignition is turned off.
- To manually power on/off, press and hold the power button on the unit.
5.2 Recording Modes
- Loop Recording: The dashcam continuously records video in short segments (e.g., 1, 3, or 5 minutes). When the memory card is full, the oldest unprotected files are overwritten.
- G-Sensor Recording: In the event of a sudden impact or collision, the built-in G-Sensor will detect the event and automatically lock the current video file, preventing it from being overwritten by loop recording.
- Manual Emergency Recording: Press the designated button (refer to device layout) to manually lock the current recording segment.
5.3 Playback on LCD Screen
- Stop recording by pressing the 'OK' button (or equivalent).
- Navigate to the playback mode using the menu buttons.
- Use the navigation buttons to browse through recorded video files.
- Select a file and press 'OK' to play.
6. WiFi Connectivity
The built-in WiFi feature allows you to connect your smartphone or tablet to the dashcam for easy viewing, downloading, and management of recorded videos.
- Download the dedicated mobile application (refer to the dashcam's on-screen instructions or packaging for app name).
- Enable WiFi on your dashcam through the settings menu.
- On your mobile device, go to WiFi settings and connect to the dashcam's WiFi network (SSID and password will be displayed on the dashcam screen).
- Open the mobile application to access live view, browse recordings, and download files to your device.
7. GPS Functionality
When the GPS antenna is connected, the dashcam records your vehicle's speed and location data, embedding this information into the video files. This data can be viewed during playback on the dashcam or through the mobile application/PC viewer software.
- Ensure the GPS antenna is securely connected and has a clear view of the sky.
- GPS data will automatically be recorded with your video files.
- To disable GPS recording, simply unplug the GPS antenna from the main unit.
8. G-Sensor and Accident Recording
The G-Sensor detects sudden acceleration, braking, or impacts. When such an event occurs, the dashcam automatically locks the current video segment, ensuring it is not overwritten by loop recording. This feature is crucial for preserving evidence in case of an accident.
- The G-Sensor sensitivity can typically be adjusted in the dashcam's settings menu (Low, Medium, High, Off).
- A higher sensitivity setting will trigger the G-Sensor more easily.
- Locked files are stored in a separate folder on the microSD card.

Image: The dashcam display indicating a G-Sensor activated recording during an accident scenario.
9. Maintenance
9.1 Cleaning
- Regularly clean the camera lenses with a soft, lint-free cloth to ensure clear video quality.
- Wipe the dashcam body with a dry or slightly damp cloth. Avoid using harsh chemicals or abrasive cleaners.
9.2 MicroSD Card Management
- Format the microSD card periodically (e.g., once a month) to maintain optimal performance and prevent data corruption. This will erase all data on the card, so back up important files first.
- Replace the microSD card if you notice frequent errors or degraded performance.
9.3 Firmware Updates
- Check the FalconEye Electronics website periodically for firmware updates. Updates can improve performance, add features, or fix bugs.
- Follow the instructions provided with the firmware update carefully.
10. Troubleshooting
If you encounter issues with your dashcam, refer to the following common problems and solutions:
| Problem | Possible Solution |
|---|---|
| Dashcam does not power on. | Check power connection to the 12V outlet. Ensure the vehicle ignition is on. Test the power adapter in another vehicle or with another device if possible. |
| Recording stops or freezes. | Ensure the microSD card is Class 10 or higher. Format the microSD card. Try a different microSD card. Check for firmware updates. |
| Poor video quality. | Clean the camera lenses. Ensure the protective film is removed from the lenses. Check video resolution settings. |
| GPS not recording location/speed. | Ensure the GPS antenna is securely connected. Place the antenna in a location with a clear view of the sky. |
| WiFi connection issues. | Ensure WiFi is enabled on the dashcam. Restart both the dashcam and your mobile device. Ensure you are within range of the dashcam's WiFi signal. |
| G-Sensor not triggering or too sensitive. | Adjust the G-Sensor sensitivity setting in the dashcam's menu. |
If the problem persists after trying these solutions, please contact FalconEye Electronics customer support.
11. Specifications
| Feature | Detail |
|---|---|
| Front Camera Resolution | 2K |
| Rear Camera Resolution | 1080p (x2) |
| Display | 4.0" LCD |
| Storage | MicroSD card, up to 128GB (Class 10 or higher recommended) |
| Connectivity | Wi-Fi |
| Special Features | Built-In WiFi, GPS, G-Sensor, Loop Recording, Night Vision |
| Power Source | 12V Cigarette Lighter Charger (Hardwire Kit optional) |
| Product Dimensions | 1"D x 6"W x 4"H |
| Item Weight | 2.49 pounds |
| Batteries | 1 Lithium Ion battery (included) |
| Vehicle Service Type | Car, Truck |
12. Warranty and Support
FalconEye Electronics products are designed for reliability and performance. For specific warranty details, please refer to the warranty card included with your product or visit the official FalconEye Electronics website.
Customer Support:
If you require technical assistance, have questions about your product, or need to initiate a warranty claim, please contact FalconEye Electronics customer support through their official channels. Contact information can typically be found on their website or in the product packaging.
Please have your product model and purchase date available when contacting support.
Ask a question about this manual
Ask about setup, troubleshooting, compatibility, parts, safety, or missing instructions. Manuals+ will review the question and use this page’s manual context to help answer it.