
1. Introduction
This manual provides detailed instructions for the installation, operation, and maintenance of your FalconEye Electronics 2nd Generation Wireless Backup Camera System. This system is designed to enhance safety and visibility for trucks, fleets, RVs, and other large vehicles by providing clear, real-time video feeds.
The system features a 7-inch LCD monitor and up to three high-resolution cameras with night vision capabilities, offering a wireless range of 200-300 feet.
2. Package Contents
Verify that all components are present in your package:
- Digital Wireless IP68 Heavy Duty Bracket CCD Camera (3 units for this system)
- Digital 7” TFT-LCD Monitor with built-in digital receiver & sun shield
- Cigarette Lighter power adapter for monitor
- 12V Additional monitor power cable (for hardwiring option)
- Dash Mount Holder for LCD
- Video cable
- Screws and wire connectors
- User manual (this document)

Image: System components laid out, showing the monitor, cameras, and accessories.
3. Setup and Installation
The system is designed for straightforward installation, typically taking 10-45 minutes. Ensure the vehicle's power is off before beginning installation.
3.1 Monitor Installation
- Attach the Dash Mount Holder to the 7-inch LCD monitor.
- Securely mount the monitor on your dashboard or a suitable flat surface within the vehicle, ensuring it does not obstruct your view.
- Connect the monitor to power using either the Cigarette Lighter power adapter for easy plug-and-play, or the 12V additional monitor power cable for a hardwired installation.
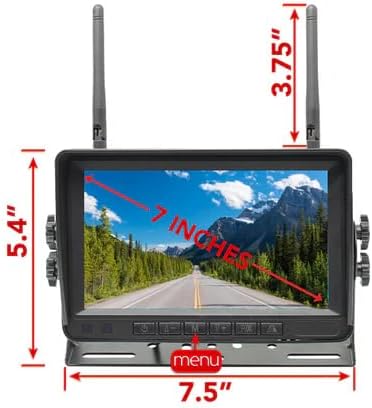
Image: Monitor dimensions and appearance.
3.2 Camera Installation
- Choose appropriate locations for each of your three cameras. Common placements include the rear of the vehicle, sides, or front, depending on your monitoring needs.
- Mount each Digital Wireless IP68 Heavy Duty Bracket CCD Camera securely using the provided screws and brackets. Ensure the camera has a clear line of sight.
- Connect each camera to a 12-24V DC power supply. The wireless video signal transmission eliminates the need for long video cables to the monitor.
- For portable use, optional rechargeable batteries and magnetic mounts are available (sold separately or included in specific variants) for quick installation and relocation.
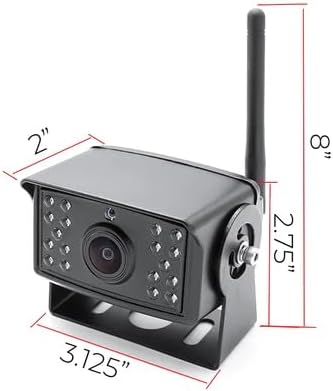
Image: Camera dimensions and appearance.

Image: Easy installation diagram for monitor and camera power connections.
3.3 Pairing Cameras with Monitor
The cameras are typically pre-paired with the monitor. If re-pairing is necessary or if adding new cameras, refer to the on-screen menu options. The system is designed to automatically reconnect cameras when power is restored.
4. Operating Instructions
4.1 Powering On/Off
Once connected to power, the monitor will automatically power on. Use the power button on the monitor or remote control (if included) to turn the display on or off.
4.2 Viewing Modes
The 7-inch LCD monitor allows you to view feeds from your cameras in several ways:
- Individual Camera View: Cycle through each camera to view its feed full screen.
- Split-Screen View: Display multiple camera feeds simultaneously on the screen. The system supports up to four cameras, allowing for various split-screen configurations.
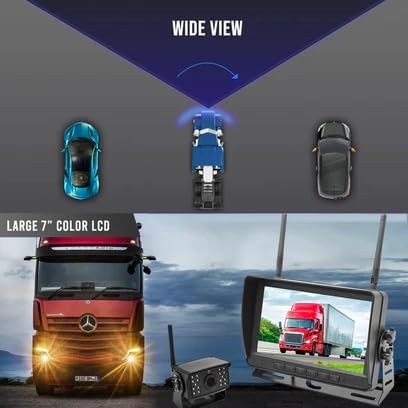
Image: Monitor displaying a wide view from a camera.
4.3 Night Vision
Each camera is equipped with 20 IR lights, providing high-resolution 720P video and up to 35-40 feet of visibility in low-light or dark conditions. The night vision activates automatically.
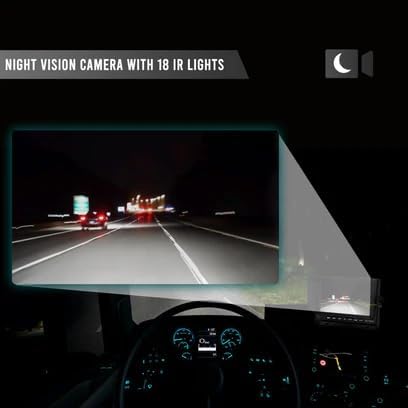
Image: Night vision camera in operation, showing clear visibility in darkness.
4.4 Wireless Range and Signal
The system offers a stable and strong wireless signal penetration, with an effective range of 200-300 feet, making it suitable for large trucks and trailers.

Image: Illustration of wireless signal range between camera and monitor.
4.5 Monitor Settings
Access the monitor's menu to adjust various settings:
- Backup Lines: Enable or disable on-screen backup guidelines.
- Image Flip: Adjust the camera view to mirror (rear view) or facing (front view) as needed.
- Brightness: The 7-inch IPS screen offers 500 CD brightness for clear visibility even in bright conditions. Adjust as desired.
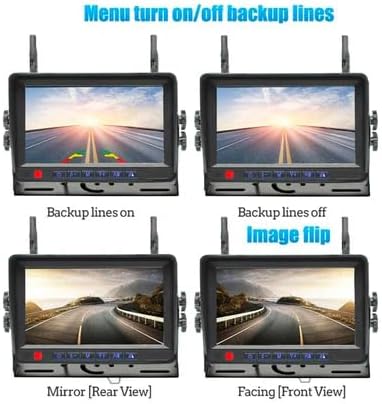
Image: Monitor menu options for backup lines and image flip.

Image: Monitor brightness and IPS screen quality.
4.6 Optional DVR Recording
An optional DVR can be added to the system for recording multiple camera views. Refer to the DVR's specific manual for installation and operation instructions.
5. Maintenance
- Cleaning: Use a soft, damp cloth to clean the monitor screen and camera lenses. Avoid abrasive cleaners.
- Weather Protection: The cameras are IP68 weatherproof and waterproof. However, regular inspection for any damage to seals or housing is recommended, especially after exposure to harsh weather conditions.
- Cable Inspection: Periodically check all power cables and connections for wear or damage.
6. Troubleshooting
| Problem | Possible Cause | Solution |
|---|---|---|
| No image on monitor |
|
|
| Poor image quality or flickering |
|
|
| Monitor not responding to controls |
|
|
7. Specifications
| Feature | Detail |
|---|---|
| Product Dimensions (Monitor) | 7"L x 7.5"W x 9.15"H |
| Item Weight | 6 pounds (total system) |
| Display Technology | LCD (7-inch TFT-LCD) |
| Wireless Range | 200-300 feet |
| Camera Resolution | 720P HD |
| Camera Sensor Technology | CCD CMOS |
| Field of View | 120 Degrees (Wide Angle) |
| Night Vision | 20 IR lights, up to 35-40 feet visibility |
| Weather Resistance | IP68 (Cameras) |
| Compatible Devices | Trucks, equipment, and vehicles of any type |
| Expandability | Supports up to 4 cameras |
| UPC | 794000400846 |
8. Warranty and Support
This FalconEye Electronics product comes with a 1-Year Manufacturer’s Warranty.
For technical support, warranty claims, or additional information, please visit the official Falcon Electronics store or contact customer service. You can find more information at: Falcon Electronics Store

