1. Introduction
This manual provides instructions for the VEVOR 166-Piece Metric HSS Helicoil Thread Repair Kit, Model XRGZ166. This kit is designed for restoring stripped, damaged, or worn threads in various materials, including aluminum, iron, carbon steel, bronze, and magnesium. Proper use of this kit ensures a strong, reliable thread repair.
2. Product Overview
The VEVOR Helicoil Thread Repair Kit is a comprehensive solution for thread restoration. It includes high-quality components designed for durability and ease of use.
2.1 Key Components
- Drill Bits: Made from premium steel, heat-treated to HRC 50-60 for superior durability. Features a 135° point angle for enhanced penetration and faster drilling, and U-shaped grooves for cleaner holes.
- Taps: Bearing steel taps with precision threads for easy repair and grinding.
- Thread Inserts: Crafted from high-strength 304 stainless steel, ensuring longevity and reliability.
- Installation Tools: Designed for simplicity, with a rubber-coated grip for comfortable and reliable hold.
- Breaking Pin Tools: For removing the tang after insert installation.
- Hex Key: Included for convenience.
- Storage Case: A durable carry case keeps all tools organized and portable.

Figure 1: VEVOR 166-Piece Metric HSS Helicoil Thread Repair Kit in its red metal case.

Figure 2: Metric sizes and quantities of components included in the kit.
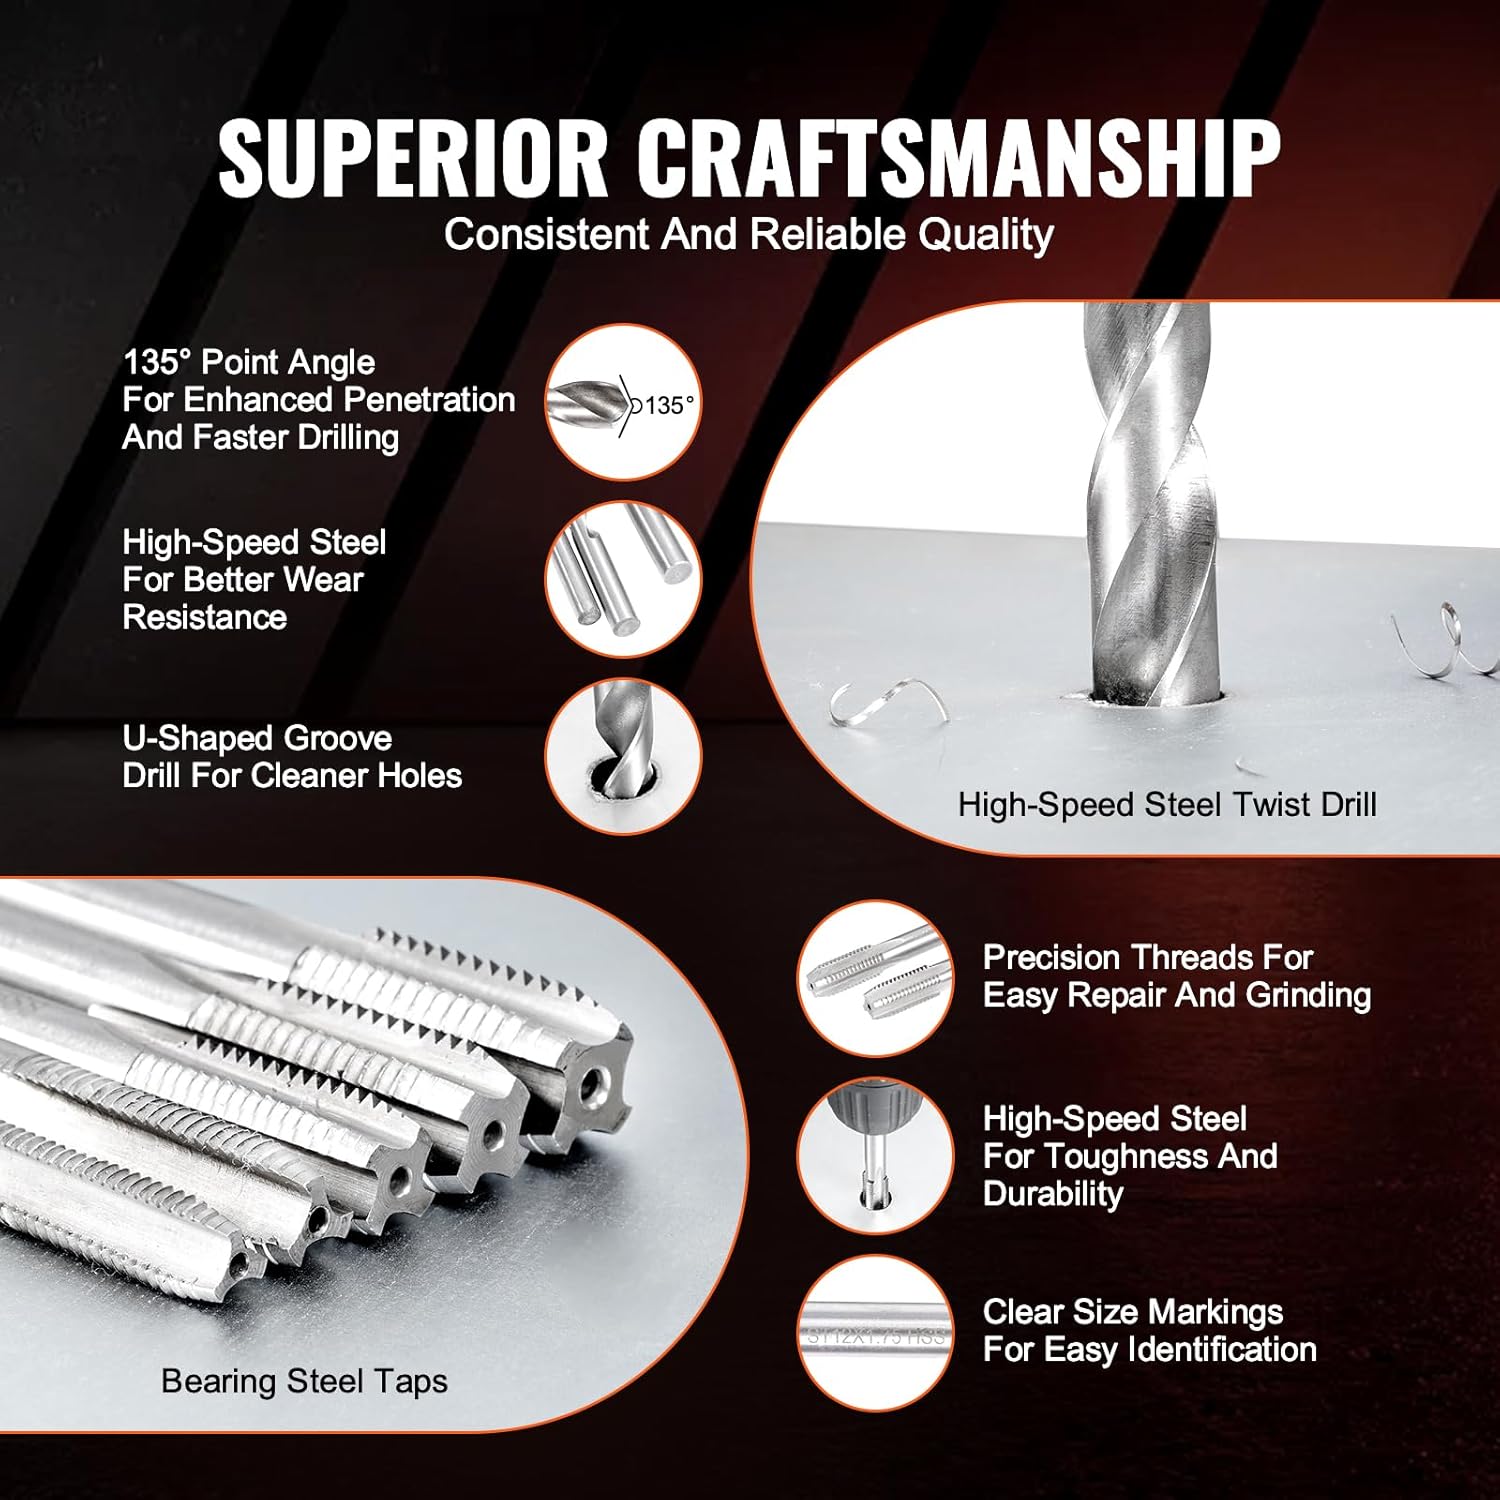
Figure 3: Details of the high-speed steel twist drill and bearing steel taps.
3. Specifications
| Feature | Detail |
|---|---|
| Model | XRGZ166 |
| Quantity | 166 Pieces |
| Metric Sizes Included | M5x0.8, M6x1.0, M8x1.25, M10x1.5, M12x1.75 |
| Thread Inserts | 145 pieces (304 Stainless Steel) |
| Twist Drills | 5 pieces (5.2mm, 6.3mm, 8.3mm, 10.5mm, 12.5mm) |
| Taps | 5 pieces (M5x0.8, M6x1.0, M8x1.25, M10x1.5, M12x1.75) |
| Breaking Pin Tools | 5 pieces |
| Installation Tools | 5 pieces |
| Hex Key | 1 piece |
| Main Material | HSS (High-Speed Steel) |
| Item Weight | 4.42 pounds (2.01 kg) |
| Product Dimensions | 14.76 x 7.28 x 1.3 inches (375 x 185 x 33 mm) |

Figure 4: Dimensions and detailed contents of the kit.
4. Setup and Preparation
Before beginning any thread repair, ensure you have a clean and well-lit workspace. Gather all necessary safety equipment, including eye protection and gloves.
4.1 Identify Damaged Thread
Carefully inspect the damaged thread to determine its size (e.g., M5x0.8, M6x1.0) and the extent of the damage. Select the corresponding drill bit, tap, thread insert, installation tool, and breaking pin tool from the kit.
4.2 Secure Workpiece
Secure the workpiece firmly in a vise or clamp to prevent movement during the repair process. This ensures accuracy and safety.
5. Operating Instructions: Helicoil Thread Repair Process
Follow these steps to repair a damaged thread using the VEVOR Helicoil Thread Repair Kit:
- Drill Out Damaged Thread: Using the correctly sized twist drill bit provided in the kit, carefully drill out the damaged thread. Ensure the hole is straight and clean.
- Tap New Thread: Select the appropriate tap for your insert size. Apply a suitable cutting oil to the tap. Using a tap wrench, carefully thread the tap into the drilled hole. Turn the tap clockwise, applying gentle pressure, and reverse it occasionally to clear chips and prevent binding. This creates new threads for the Helicoil insert.
- Install Thread Insert: Place the selected thread insert onto the installation tool, ensuring it is properly seated. Screw the insert into the newly tapped hole until it is flush with the surface of the workpiece.
- Remove Tang: Use the breaking pin tool to snap off the tang from the installed thread insert. The tang is a small piece at the end of the insert that aids in installation.

Figure 5: Step-by-step visual guide for the helicoil thread repair process.

Figure 6: Close-up of the tapping process.
5.1 Video Demonstration
Video 1: This video demonstrates the complete helicoil thread repair process, including drilling, tapping, inserting the coil, and removing the tang. It provides a visual guide to complement the written instructions.
6. Maintenance
To ensure the longevity and performance of your VEVOR Thread Repair Kit, follow these maintenance guidelines:
- Cleaning: After each use, clean all tools thoroughly to remove metal shavings, cutting oil, and debris. Use a brush and appropriate cleaning agents if necessary.
- Lubrication: Lightly oil metal components, especially taps and drill bits, before storing to prevent rust.
- Storage: Always store the kit in its original carry case in a dry, cool place to protect the tools from damage and corrosion.
7. Troubleshooting
If you encounter issues during the thread repair process, consider the following:
- Difficulty Drilling/Tapping: Ensure you are using the correct size drill bit and tap for the thread. Apply sufficient cutting oil and maintain a steady, even pressure. If the material is very hard, consider using a slower drill speed.
- Insert Not Seating Properly: Verify that the tapped hole is clean and free of debris. Ensure the installation tool is correctly engaged with the insert.
- Tang Not Breaking Off: Ensure the breaking pin tool is properly aligned with the tang and apply a sharp, firm tap with a hammer.
- Damaged Insert: If an insert is damaged during installation, it may need to be removed and replaced. Consult specialized guides for insert removal if necessary.
8. Warranty and Support
For warranty information, technical support, or replacement parts, please refer to the official VEVOR website or contact their customer service directly. Keep your purchase receipt as proof of purchase.


