1. Introduction
Thank you for choosing the VIKIO HOME Wall Mount Range Hood. This manual provides essential information for the safe installation, operation, and maintenance of your new appliance. Please read this manual thoroughly before use and retain it for future reference.

Image 1: VIKIO HOME Wall Mount Range Hood 36-inch.
2. Safety Information
Always follow basic safety precautions when using electrical appliances to reduce the risk of fire, electric shock, or injury to persons.
- Installation: Ensure proper installation by a qualified technician in accordance with all local codes and ordinances.
- Grounding: This appliance must be properly grounded.
- Cleaning: Clean grease filters regularly to prevent grease fires. Never operate the hood without filters in place.
- Ventilation: Ensure adequate ventilation in the room when the range hood is used simultaneously with appliances burning gas or other fuels.
- Children: Keep children away from the appliance.
- Flammable Materials: Do not use the range hood to exhaust flammable or explosive materials.
3. What's in the Box
Carefully unpack your range hood and check that all items are present and undamaged. If any items are missing or damaged, please contact customer service immediately.
- Wall Mount Range Hood Unit
- Stainless Steel Baffle Filter (x2)
- Round Duct Connector
- User Installation Manual
- Charcoal Filter (for ductless conversion, may be sold separately)
- Installation Screw Pack
- Duct (flexible aluminum duct)

Image 2: Components included with the range hood.
4. Setup and Installation
Proper installation is crucial for the performance and safety of your range hood. It is recommended that installation be performed by two people due to the size and weight of the unit.
4.1 Mounting the Hood
- Determine the desired mounting height. The recommended distance between the cooking surface and the bottom of the range hood is 24-32 inches.
- Mark the mounting points for the main hood bracket and the chimney bracket on the wall. Use a level to ensure accuracy.
- Drill pilot holes and secure the main hood bracket to the wall studs using appropriate fasteners.
- Carefully lift the range hood and hang it onto the main mounting bracket. Ensure it is securely seated.

Image 3: Proper installation diagram with dimensions.
4.2 Ducting Connection
Connect the flexible aluminum duct to the exhaust outlet on the range hood and extend it to your external ventilation system. Ensure all connections are sealed to prevent air leaks.
4.3 Chimney Installation
Assemble the upper and lower chimney sections. Slide the chimney over the ductwork and secure it to the wall using the provided chimney bracket and screws. Ensure the chimney is flush with the ceiling or cabinet.
4.4 Electrical Connection
Connect the range hood to a grounded electrical outlet. Ensure the power supply matches the specifications listed on the product label.
Video 1: Installation overview for the RP30 36 Range Hood. This video demonstrates the steps for setting up and installing the range hood, including mounting and connecting components.
5. Operating Instructions
Your VIKIO HOME Range Hood features advanced gesture sensing and touch control for convenient operation.
5.1 Control Panel
The control panel is located on the front of the hood and includes touch-sensitive buttons and a gesture sensor.
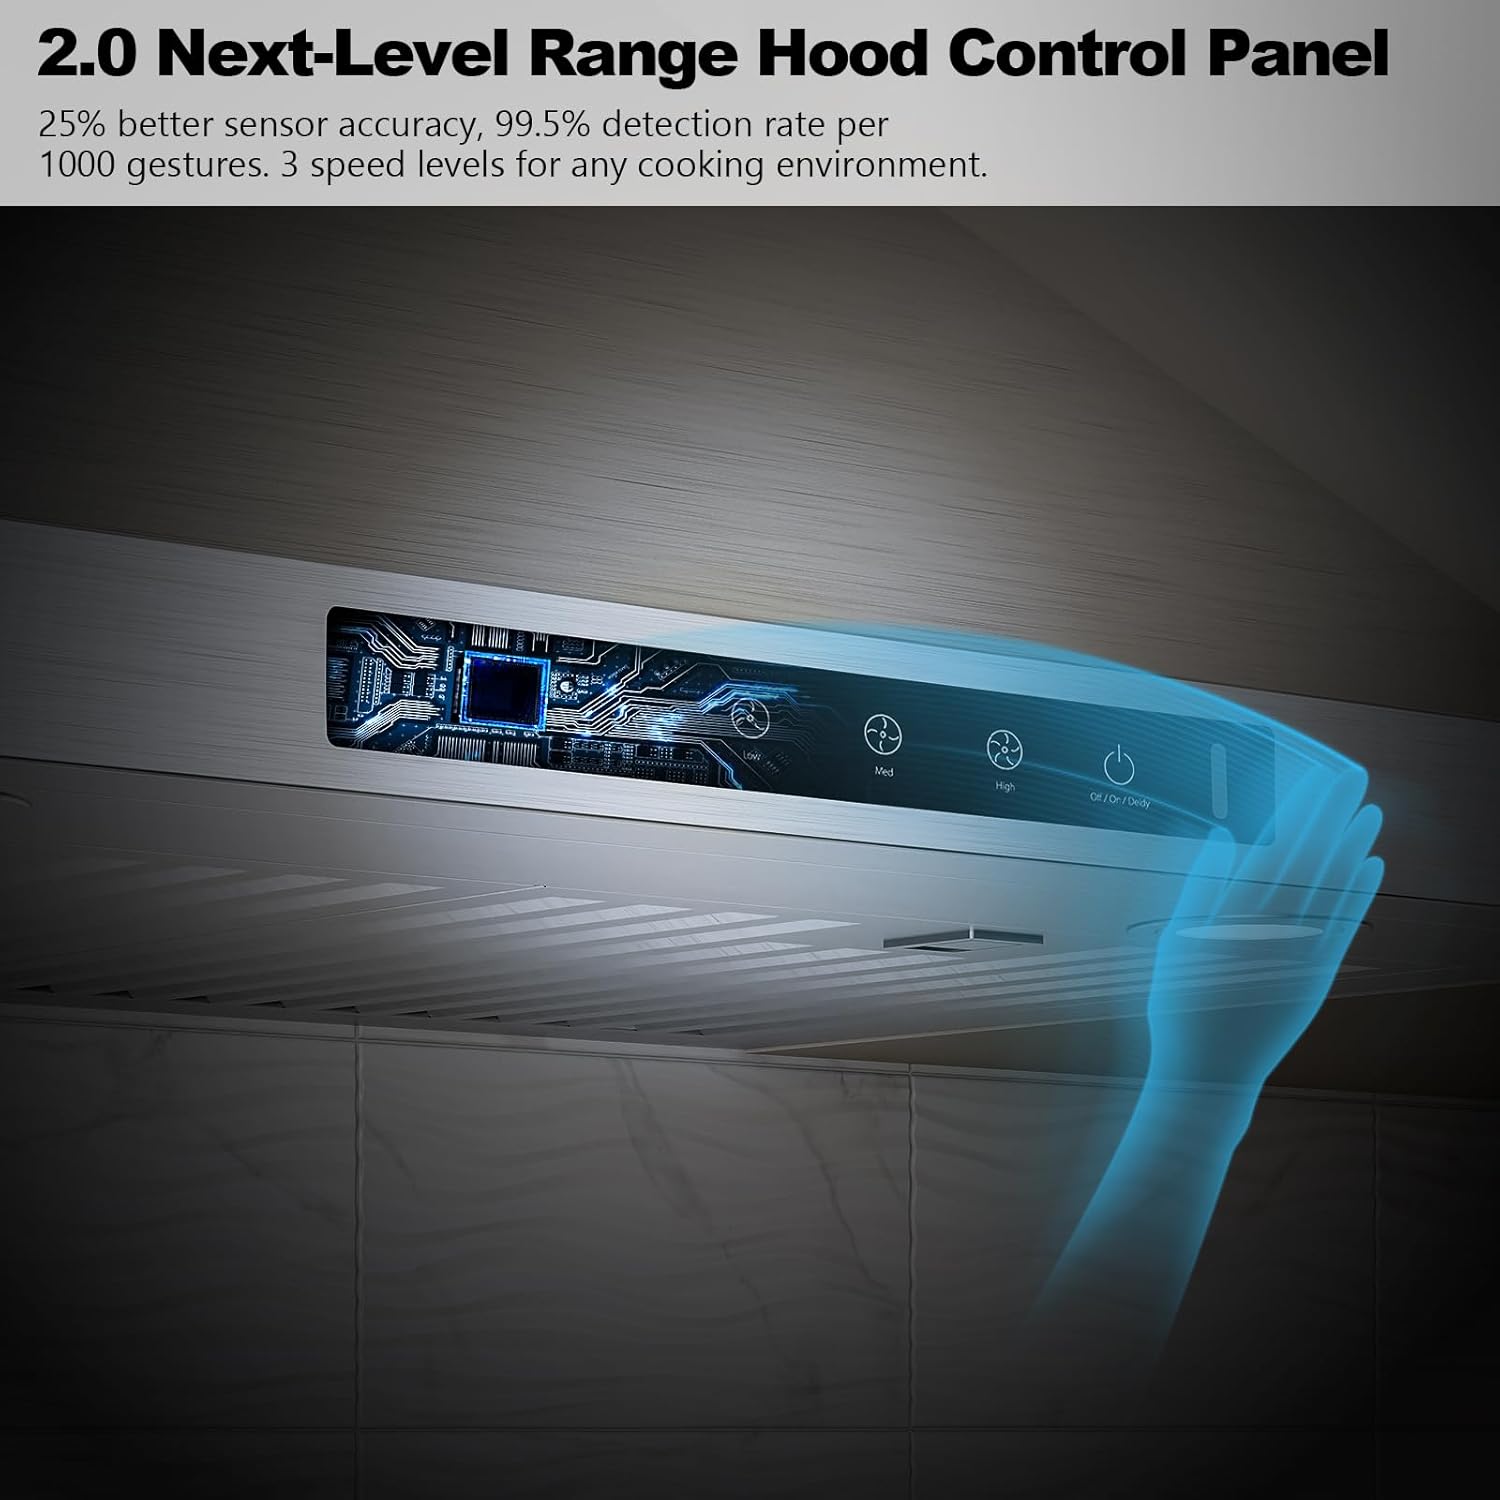
Image 4: Detailed view of the control panel.
5.2 Fan Speed Control
The range hood offers 3 adjustable fan speeds to suit various cooking needs, from light simmering to heavy frying. The 980 CFM motor ensures powerful smoke and odor removal.
- Low Speed: Ideal for light cooking and maintaining air quality.
- Medium Speed: Suitable for everyday cooking.
- High Speed: For heavy smoke and strong odors.
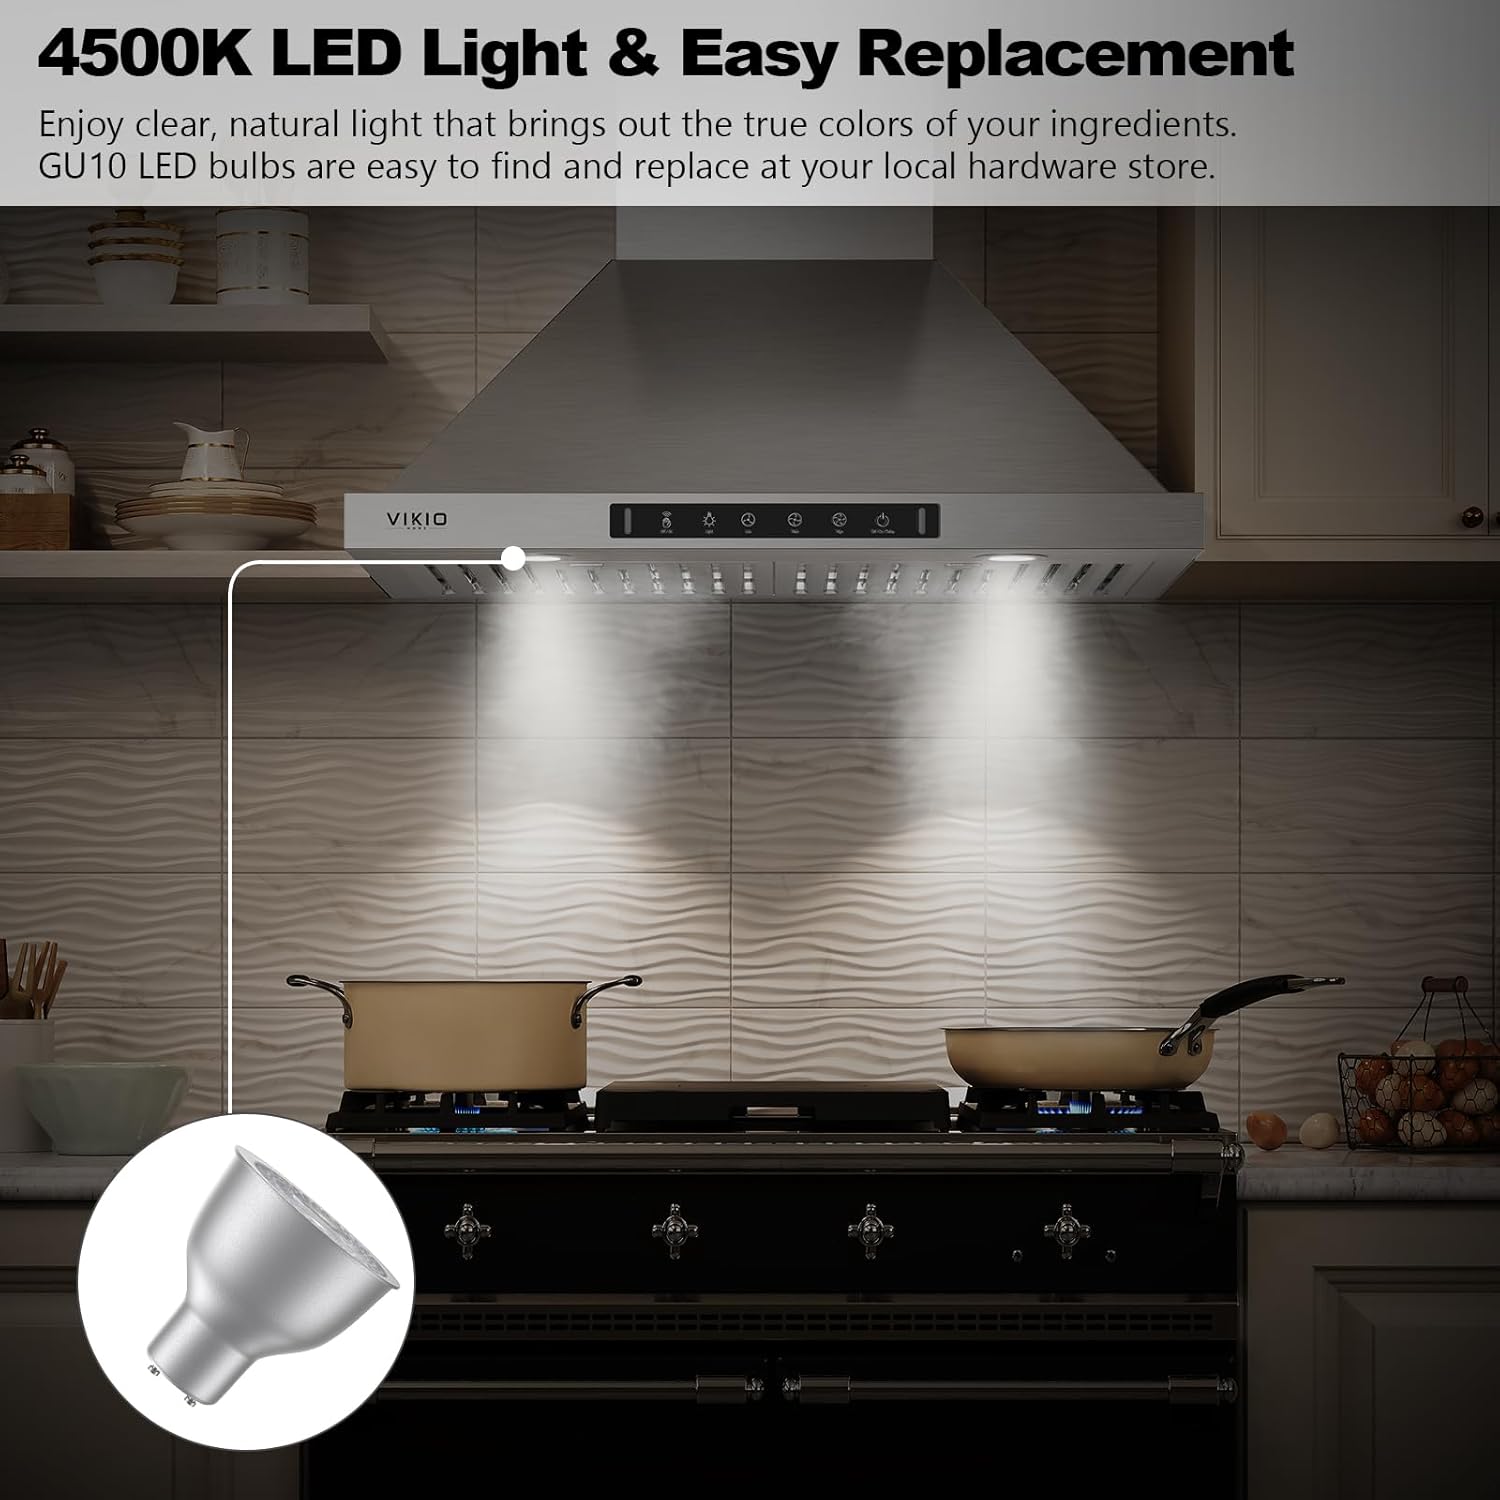
Image 5: The range hood operates quietly, with noise levels as low as 35 dBA at low speeds.
5.3 Gesture Sensing
Wave your hand in front of the gesture sensor to control the fan and lights without touching the panel. This feature can be enabled or disabled as desired.

Image 6: Gesture control allows for hands-free operation.
5.4 LED Lighting
The integrated 4500K LED lights provide clear, natural illumination for your cooking area. The bulbs are designed for easy replacement.
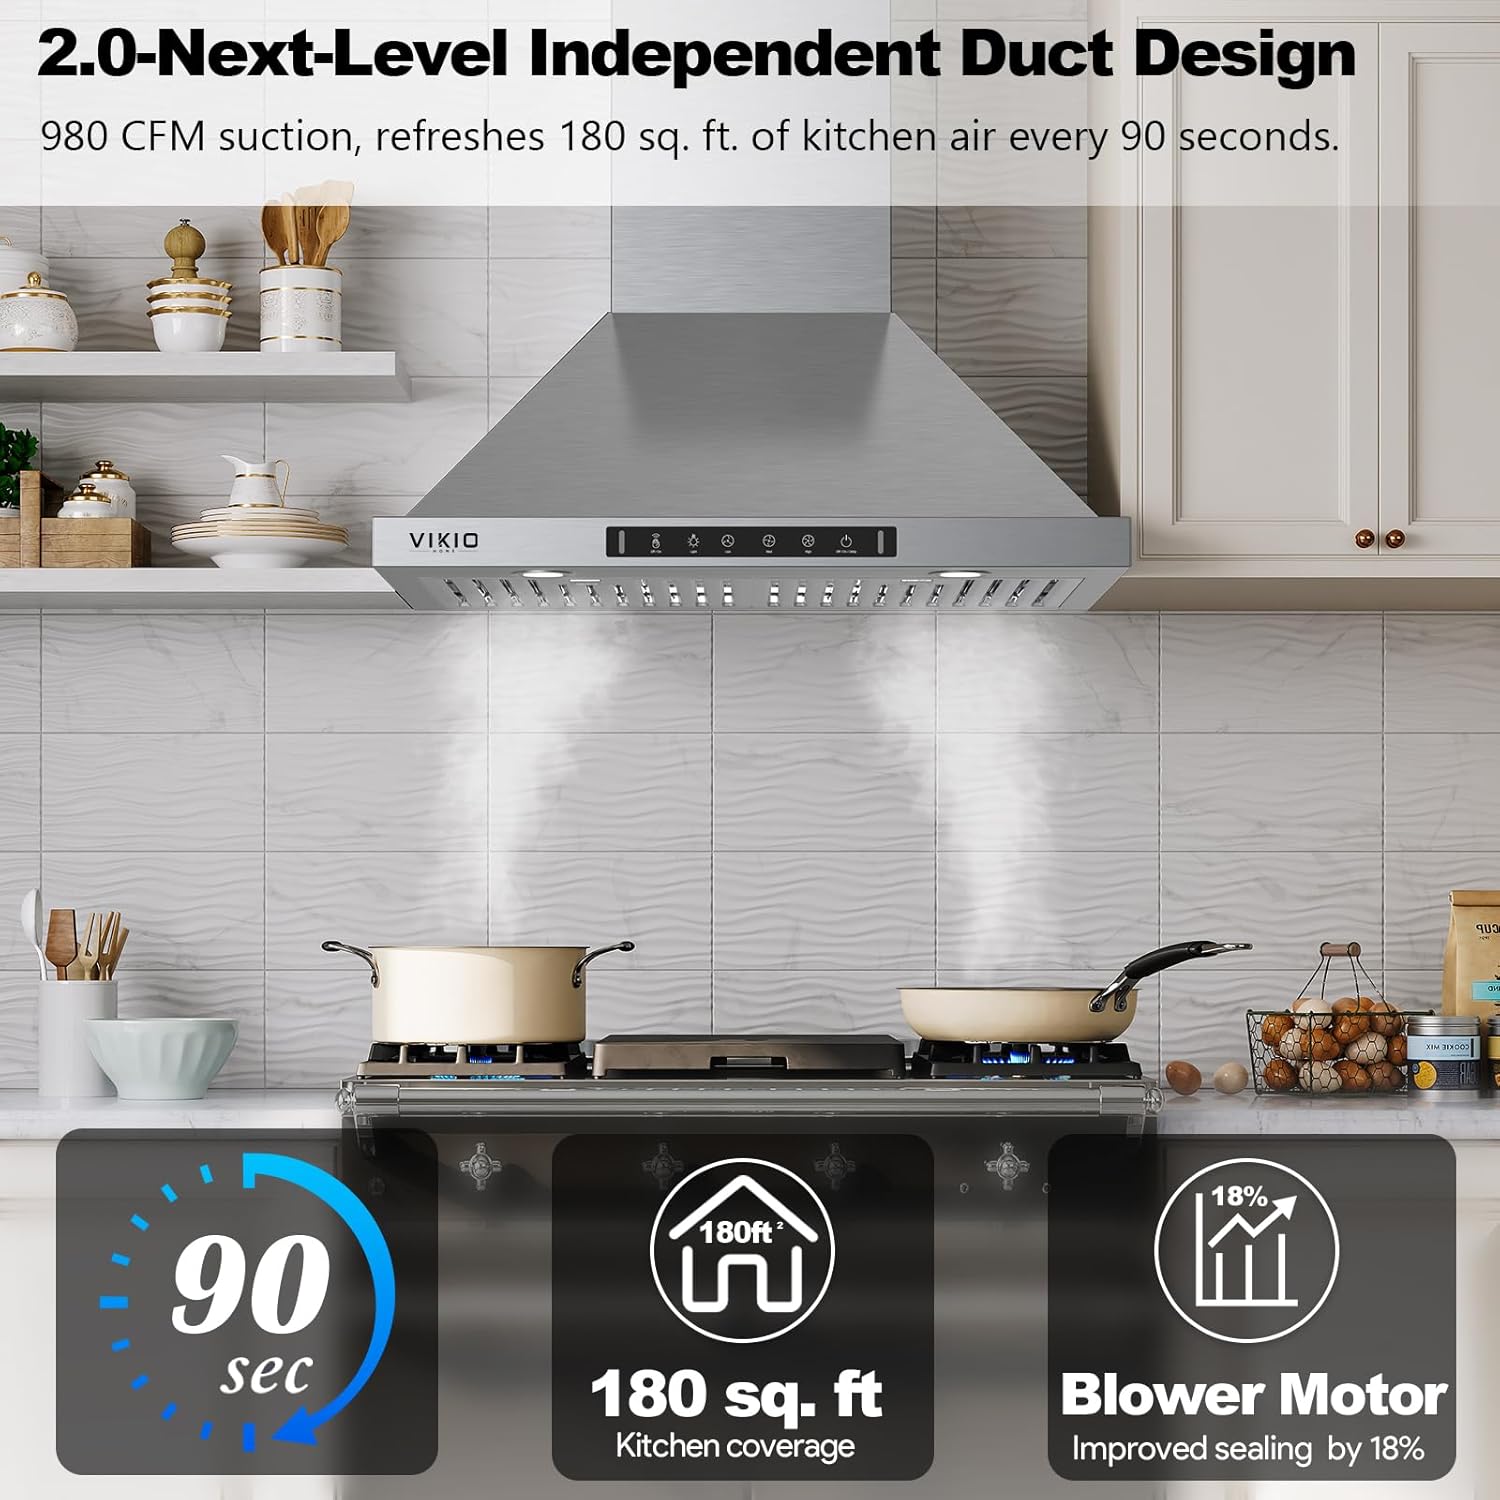
Image 7: Bright 4500K LED lighting for enhanced visibility.
5.5 Delay-Off Timer
Activate the delay-off timer to allow the fan to continue running for a set period after cooking, ensuring all residual odors are cleared from the kitchen.

Image 8: The delay-off timer feature.
6. Maintenance
Regular maintenance ensures optimal performance and longevity of your range hood.
6.1 Cleaning Baffle Filters
The permanent stainless steel baffle filters are designed to trap grease and are dishwasher safe for easy cleaning. Clean filters regularly (monthly or more frequently depending on cooking habits) to maintain suction power and prevent grease buildup.
- To remove, locate the release latches on each filter and pull down.
- Wash filters in a dishwasher or by hand with hot water and a mild detergent.
- Allow filters to dry completely before re-installing.
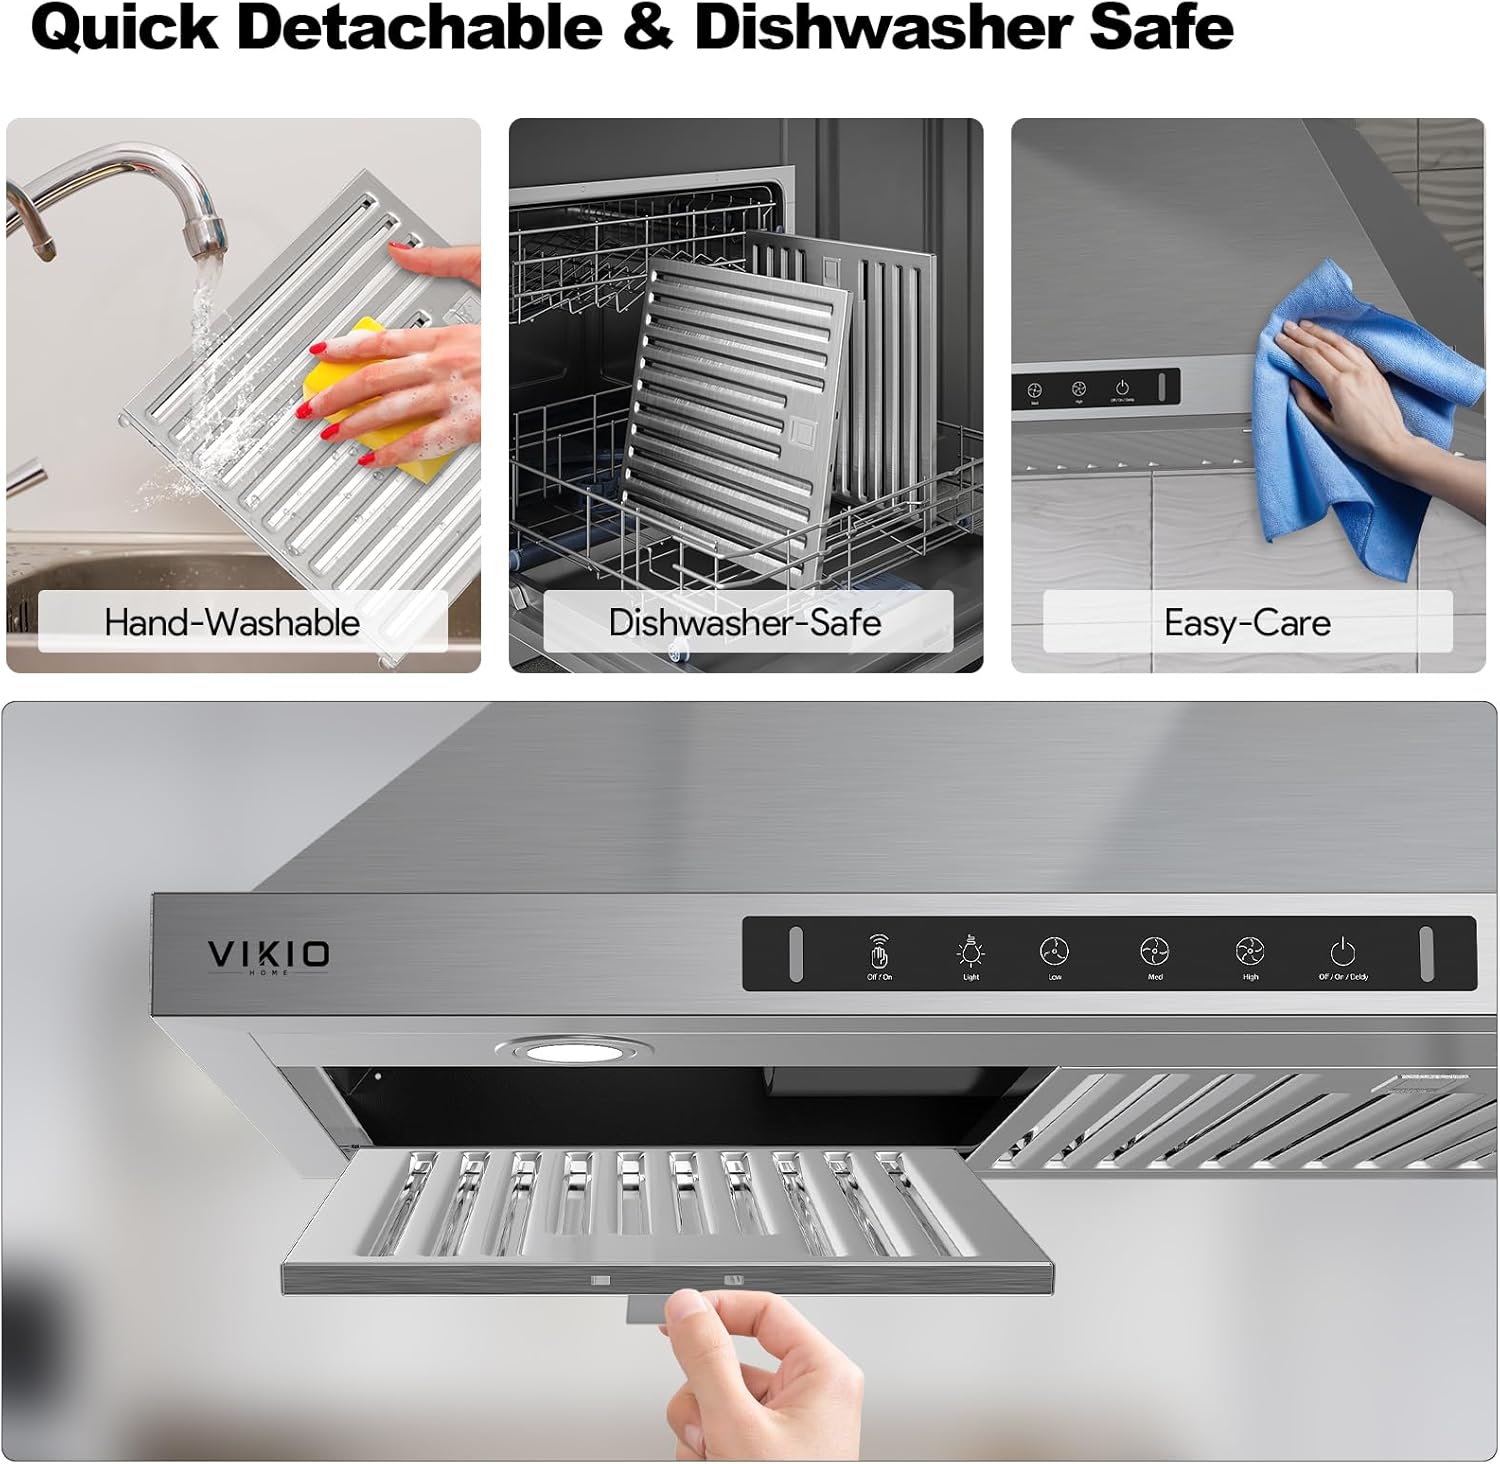
Image 9: Quick detachable and dishwasher-safe filters for easy maintenance.
6.2 Exterior Cleaning
Wipe the exterior of the range hood with a soft cloth and a non-abrasive stainless steel cleaner. Avoid using harsh chemicals or abrasive pads that could scratch the surface.
7. Troubleshooting
If you encounter issues with your range hood, refer to the following common problems and solutions:
| Problem | Possible Cause | Solution |
|---|---|---|
| Fan does not turn on | No power supply; circuit breaker tripped; control panel issue. | Check power cord connection; reset circuit breaker; contact customer service if control panel is unresponsive. |
| Poor suction | Clogged filters; improper ducting; motor issue. | Clean or replace filters; check ductwork for obstructions or leaks; contact customer service. |
| Excessive noise | Loose parts; motor imbalance; ducting issue. | Check for loose screws or components; inspect ductwork for proper installation; contact customer service. |
| Lights not working | Bulb burnt out; electrical connection issue. | Replace LED bulb; check electrical connections; contact customer service. |
For issues not listed here or if troubleshooting steps do not resolve the problem, please contact VIKIO HOME customer support.
8. Specifications
| Brand | VIKIO HOME |
| Model Info | VK-RP30-36 |
| Air Flow Capacity | 980 Cubic Feet Per Minute (CFM) |
| Material | Stainless Steel |
| Noise Level | 57 dB (max), as low as 35 dBA |
| Mounting Type | Wall Mount |
| Controls Type | Touch, Gesture Sensing |
| Number of Speeds | 3 |
| Voltage | 110.0 V |
| Light Source Type | LED (4500K) |
| Filter Type | Baffle (Permanent Stainless Steel) |
| Ventilation Type | Convertible (Ducted/Ductless) |
| Product Dimensions | 19.69"D x 35.76"W x 50.41"H |
| Item Weight | 58.1 Pounds |
| UPC | 717813999871 |
9. Warranty and Support
VIKIO HOME is committed to providing high-quality products and excellent customer service. While specific warranty details are not provided in this manual, our professional customer service team is available to assist with any needs, including replacement of accessories such as filters and lights.
For support, please refer to the contact information provided with your purchase or visit the official VIKIO HOME website.


