1. Introduction
This manual provides detailed instructions for the Innomaker 12MP Autofocus Camera Module (CAM-IMX708AF). This module features the IMX708 sensor, offering 12-megapixel resolution, autofocus capabilities, and HDR support, making it suitable for various Raspberry Pi applications including surveillance, robotics, and AI projects. Please read this manual thoroughly before use to ensure proper installation and operation.

An overview of the Innomaker 12MP Autofocus Camera Module, featuring the IMX708 sensor, designed for Raspberry Pi.
2. Safety Information
- Handle the camera module with care to avoid damage to the lens or circuit board.
- Ensure proper grounding when connecting to your Raspberry Pi to prevent electrostatic discharge.
- Do not expose the module to extreme temperatures, humidity, or direct sunlight.
- Disconnect power from the Raspberry Pi before connecting or disconnecting the camera module.
- Keep out of reach of children.
3. Package Contents
Verify that all items are present in the package:
- 1 x Innomaker 12MP Autofocus Camera Module (CAM-IMX708AF)
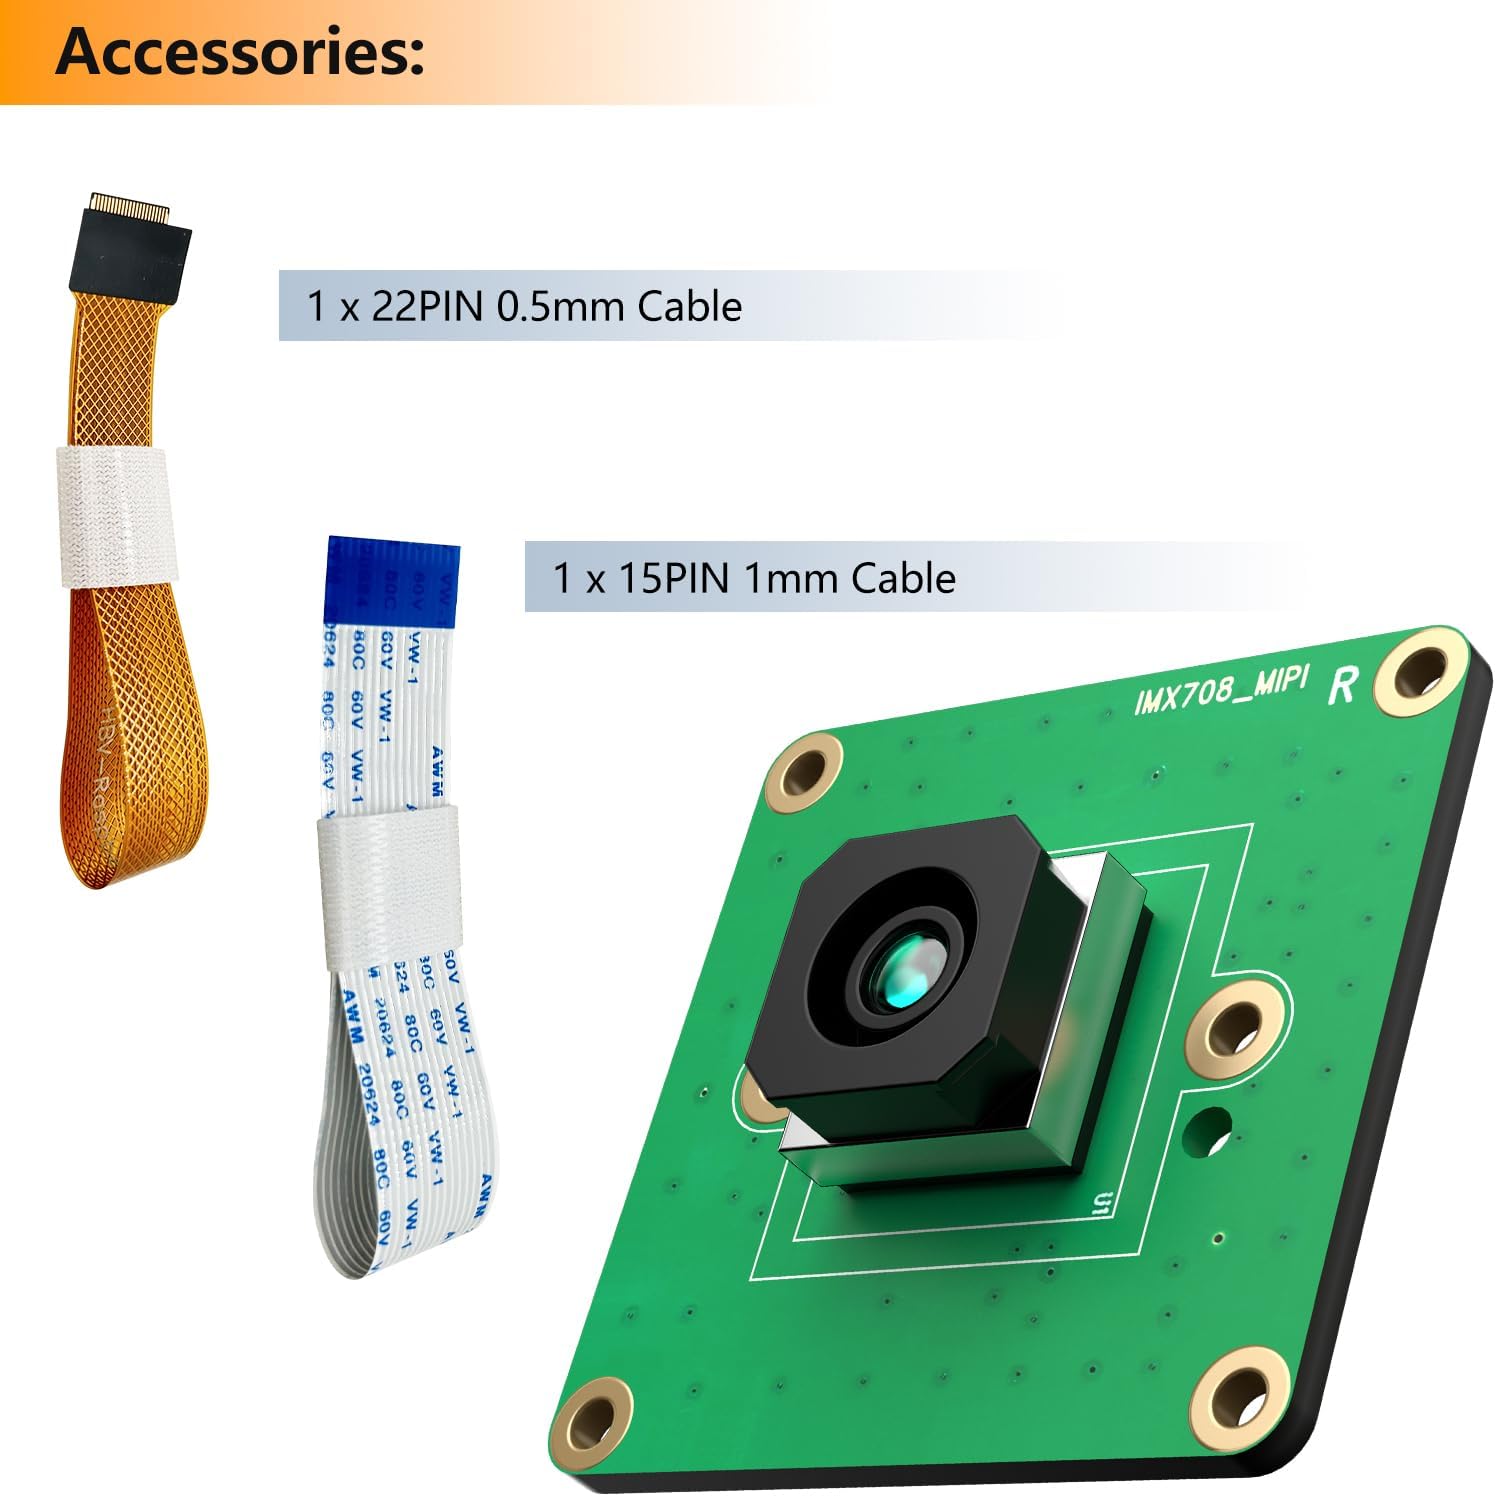
- 1 x 22-pin 0.5mm FPC cable
- 1 x 15-pin 1mm FPC cable

The camera module comes with two FPC cables: one 22-pin 0.5mm cable and one 15-pin 1mm cable, for connecting to various Raspberry Pi models.
4. Product Overview
The Innomaker CAM-IMX708AF is a high-performance camera module designed for seamless integration with Raspberry Pi boards. It features the advanced IMX708 sensor, providing excellent image quality and versatile functionality.
Key Features:
- High-Resolution IMX708 Sensor: 12MP back-illuminated stacked CMOS (4608x2592) with 1.4µm pixels, built-in 2D DPC and QBC Re-mosaic for high SNR and detailed imaging.
- Phase Detection Autofocus & HDR: Rapid PDAF for sharp focus from 10cm to infinity, HDR mode up to 3MP output, ideal for dynamic scenes.
- 75° Diagonal FOV with IR Filter: Integrated IR filter ensures accurate colors and low-light performance.
- Seamless Raspberry Pi Compatibility: MIPI CSI-2 interface with 150mm 15-pin/22-pin FPC cables, fully supported by libcamera for easy setup on Pi 5/4/3/Zero/CM4.
- Customizable Design: Supports swapping to M12 or CS lenses for specific applications like machine vision or industrial AOI, compact 32x32mm module.

Detailed features of the IMX708 sensor, including 12MP resolution, video frame rates (1080P 50FPS, 720P 100FPS, 480P 120FPS), and 75-degree autofocus field of view.

The physical dimensions of the camera module board, measuring 32mm by 32mm, indicating its compact size.
5. Setup Guide
5.1 Hardware Connection
- Ensure your Raspberry Pi is powered off and disconnected from any power source.
- Locate the MIPI CSI-2 camera connector on your Raspberry Pi board. This is typically a long, thin slot.
- Gently pull up the plastic clip on the camera connector.
- Insert the appropriate FPC cable (15-pin or 22-pin, depending on your Pi model) into the connector with the silver contacts facing the clip. Ensure the cable is fully inserted and straight.
- Push the plastic clip back down to secure the FPC cable.
- Connect the other end of the FPC cable to the camera module's connector, ensuring the contacts face the correct direction (usually towards the PCB).
- Before powering on, remove the protective film from the camera lens.

The rear side of the camera module, highlighting the MIPI CSI-2 connector for Raspberry Pi integration.
A visual guide demonstrating the importance of removing the protective film from the camera lens before use to ensure clear imaging.
5.2 Software Configuration
To enable the camera module on your Raspberry Pi, follow these steps:
- Boot your Raspberry Pi and open a terminal.
- Modify the configuration file. For older Raspberry Pi OS versions, use: sudo nano /boot/config.txt. For the latest Raspberry Pi OS, use: sudo nano /boot/firmware/config.txt.
- Add the following line to the last line of the file: dtoverlay=imx708.
- Change camera_auto_detect=1 to camera_auto_detect=0 if present.
- Save the file and exit the editor (Ctrl+X, then Y, then Enter).
- Reboot your Raspberry Pi: sudo reboot.
- After reboot, test the camera with the command: libcamera-hello -t 0 to preview the camera feed.

This image illustrates the quick start steps for configuring the camera module on a Raspberry Pi, including modifying config.txt and using the libcamera-hello command for preview.
6. Operating Instructions
6.1 Basic Image and Video Capture
Once configured, you can use the libcamera tools to capture images and videos:
- Preview: libcamera-hello -t 0 (continuous preview)
- Capture Still Image: libcamera-still -o image.jpg
- Record Video: libcamera-vid -t 10000 -o video.h264 (records for 10 seconds)
Refer to the official Raspberry Pi documentation for more advanced libcamera commands and options.
6.2 Autofocus and HDR Functionality
The camera module features Phase Detection Autofocus (PDAF) for quick and accurate focusing. In most cases, autofocus operates automatically. For specific applications, manual focus control might be available through software commands. The HDR (High Dynamic Range) mode enhances image quality in scenes with high contrast, providing more detail in both bright and dark areas. This mode can be enabled via software settings.
6.3 Customizable Lens Options
The module supports interchangeable M12 or CS mount lenses, allowing for customization based on your project's needs. To change the lens:
- Carefully unscrew the existing lens from the module.
- Gently screw in the new M12 or CS lens.
- Adjust the focus manually if using a manual focus lens, or allow the autofocus system to recalibrate.
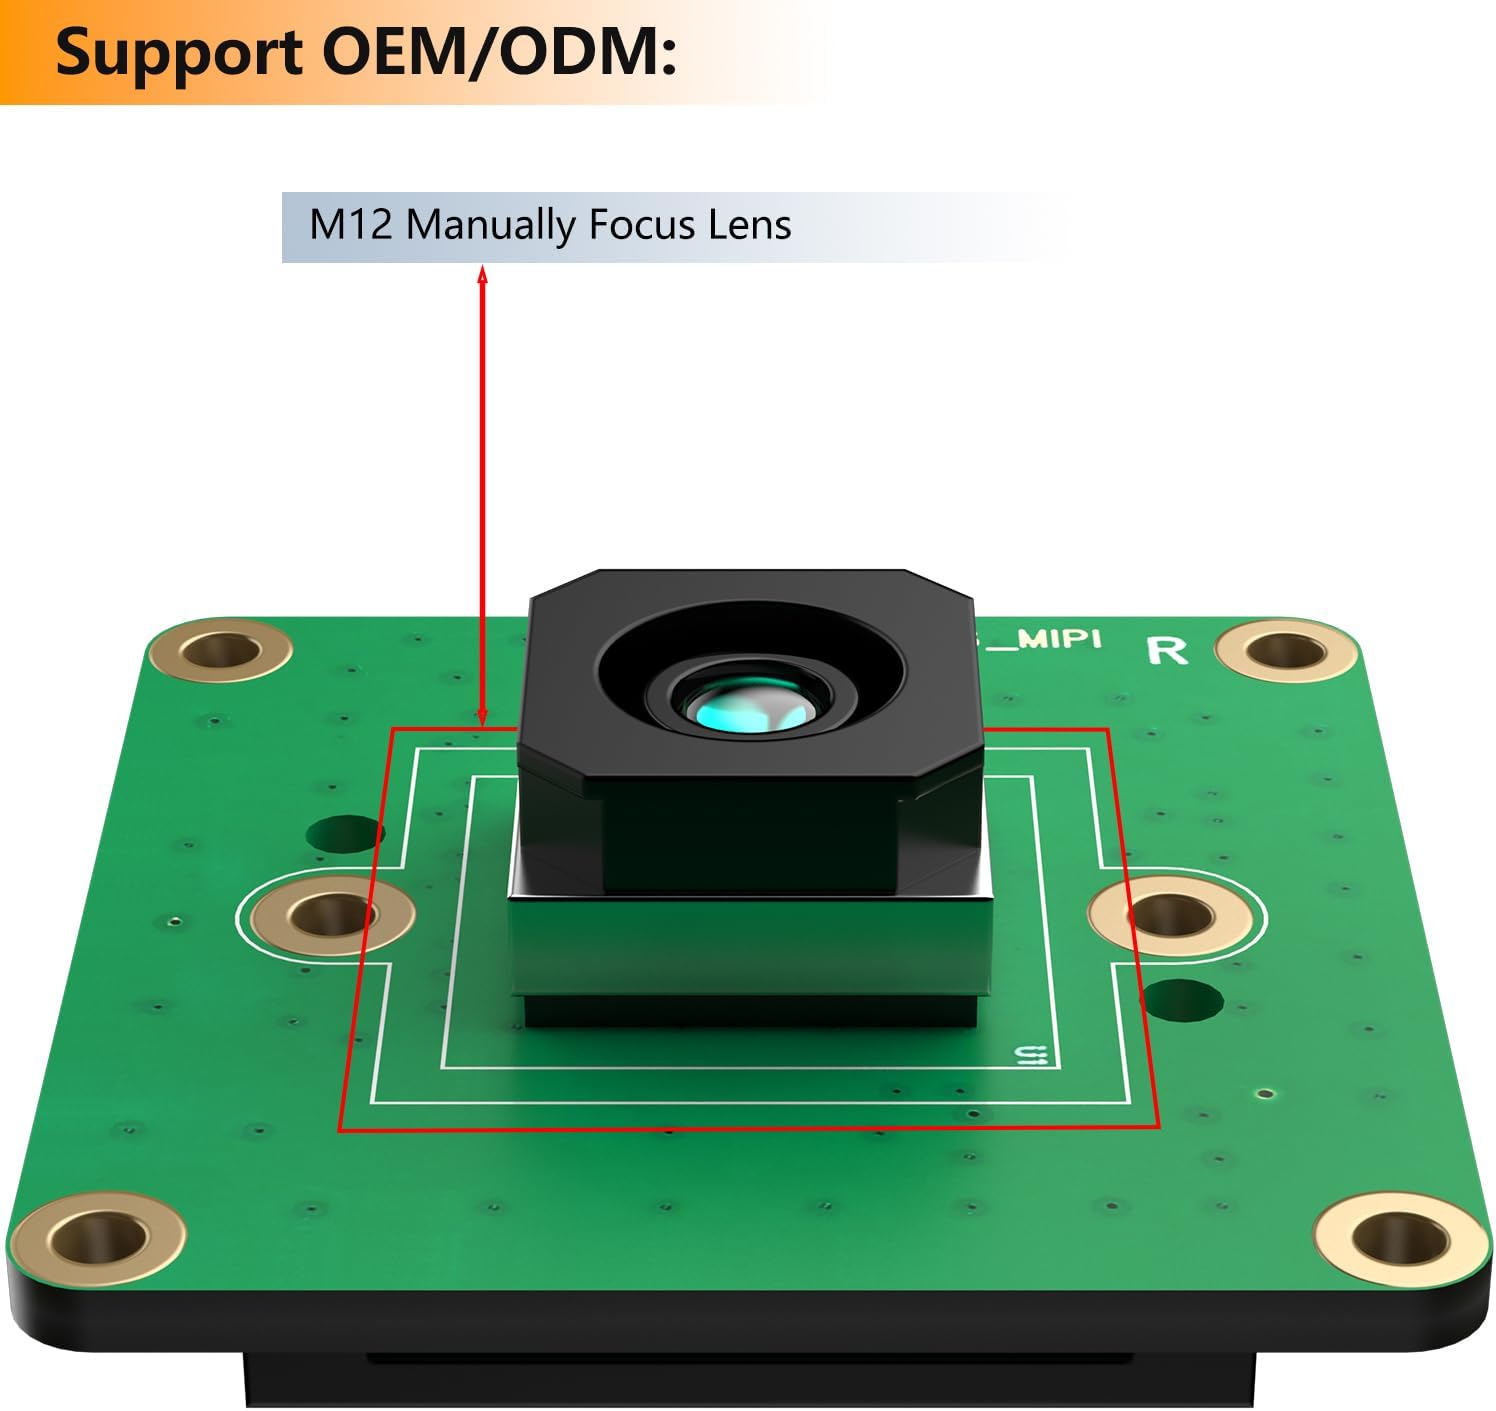
An illustration showing the camera module's support for M12 manually focus lenses, allowing for customizable optical configurations.
7. Maintenance
- Cleaning the Lens: Use a soft, lint-free cloth specifically designed for optics to gently clean the lens. Avoid abrasive materials or harsh chemicals.
- Storage: Store the camera module in a dry, dust-free environment when not in use.
- Firmware Updates: Regularly update your Raspberry Pi OS to ensure compatibility and access to the latest camera drivers and features.
8. Troubleshooting
| Problem | Possible Cause | Solution |
|---|---|---|
| Camera not detected / No image | Incorrect FPC cable connection, software configuration error, incompatible OS version. | Ensure FPC cable is securely and correctly inserted. Verify config.txt settings. Update Raspberry Pi OS to the latest version. Reboot the Pi. |
| Image is blurry or out of focus | Protective film still on lens, autofocus range limitations, manual focus lens not adjusted. | Remove any protective film from the lens. Note that autofocus may have limitations for very close objects (e.g., closer than 10cm). If using a manual lens, adjust it carefully. |
| Poor image quality / Color issues | Lighting conditions, software settings, dirty lens. | Ensure adequate lighting. Check camera software settings for white balance or exposure. Clean the lens with a suitable cloth. |
| Camera module is physically larger than expected | Design difference from official Raspberry Pi cameras. | This module has a 32x32mm footprint. Custom enclosures may be required if standard Raspberry Pi camera cases are too small. |
9. Specifications
| Feature | Detail |
|---|---|
| Sensor | Sony IMX708 (Back-illuminated stacked CMOS) |
| Resolution | 12 Megapixels (4608x2592) |
| Pixel Size | 1.4µm |
| Autofocus | Phase Detection Autofocus (PDAF), 10cm to infinity |
| HDR Support | Up to 3MP output |
| Field of View (FOV) | 75° Diagonal |
| IR Filter | Integrated |
| Interface | MIPI CSI-2 |
| Lens Options | Standard lens, interchangeable M12/CS mount support |
| Board Dimensions | 32mm x 32mm |
| Compatibility | Raspberry Pi 5, 4, 3, Zero, CM4 |
| Operating System | Linux (Raspberry Pi OS) |
| Item Weight | 1.13 ounces (approx.) |
10. Warranty Information
Innomaker products are covered by a standard limited warranty against defects in materials and workmanship. The warranty period typically lasts for 12 months from the date of purchase. This warranty does not cover damage caused by misuse, accident, unauthorized modification, or improper installation. Please retain your proof of purchase for warranty claims.
11. Customer Support
For technical assistance, troubleshooting, or warranty inquiries, please contact Innomaker customer support through the retailer's platform or visit the official Innomaker website for contact details. When contacting support, please provide your product model (CAM-IMX708AF) and a detailed description of the issue.


