Introduction
The Phomemo M250 is a portable thermal label maker designed for versatile labeling needs in business, home, and office environments. This manual provides comprehensive instructions for setting up, operating, maintaining, and troubleshooting your device to ensure optimal performance.
What's in the Box
- 1 x Phomemo M250 Label Maker
- 1 x USB Type-C Data Cable
- 1 x User Manual
- 100 Sheets x 1.57'' x 1.18'' Thermal Labels

Image: Contents of the Phomemo M250 package, including the label maker, USB-C cable, user manual, and a roll of thermal labels.
Setup
1. Charging the Device
The Phomemo M250 features an extended 2200mAh battery. Before initial use, ensure the device is fully charged using the provided USB Type-C cable. A full charge allows for printing up to 5000 labels. The device has an automatic sleep mode that activates after 5 minutes of inactivity to conserve energy.
2. Loading Labels
The label maker supports a printing width of 20-75mm. To load labels:
- Press the button to open the M250 top cover.
- Insert the label roll with the print side facing down and adjust the appropriate size using the sliding guides.
- Close the top cover securely.

Image: Visual guide demonstrating the four steps for setting up the Phomemo M250, including opening the cover, inserting labels, downloading the app, and connecting via Bluetooth.
3. App Installation & Connection
The Phomemo M250 is compatible with Android, iOS, iPad, macOS, and Windows 7 or above. For mobile devices, download the "Print Master" app. For computer connection, download the driver and "Labelife" app.
Mobile Device Connection (Bluetooth)
- Download the "Print Master" application from your device's app store.
- Turn on Bluetooth on your phone or tablet.
- Open the "Print Master" app and connect to the M250 label maker.

Image: A four-step visual guide showing how to download the Print Master app, connect via Bluetooth, create a new label, and complete the printing process.
Computer Connection (USB)
- Download drivers and the "Labelife" software from the official Phomemo website (refer to the user manual for the specific URL).
- Follow the prompts to install the driver and Labelife software.
- Connect the printer to your PC using the USB cable.
- Open the "Labelife" App and start printing.

Image: A four-step visual guide illustrating the process of connecting the Phomemo M250 to a computer via USB, including downloading drivers and using the Labelife software.
Operating the Label Maker
1. Creating Labels with "Print Master" App
The "Print Master" app offers extensive customization options:
- Create various content: QR codes, text, OCR, images, voice recognition.
- Utilize batch printing for multiple labels.
- Choose from over 1500 symbols, 200+ templates, 110+ fonts, and 20+ languages.

Image: Screenshot of the Print Master app interface, showcasing a variety of label templates and editing options like text, 1D/QR codes, icons, borders, and more.
2. Printing Labels
Once your label design is complete in the app, simply select the print option. The printer operates at a speed of 30-50mm per second.
3. Supported Label Types and Uses
The M250 supports a wide range of label types and is suitable for various applications:
- Home Use: Jar labels, food labels, organizing clothes, personal items.
- Business Use: Barcodes, QR codes, address labels, logo labels, product pricing.
- Office & School: File folder labels, cable labels, name tags, general organization.

Image: Examples of various label styles and widths (20-75mm) supported by the Phomemo M250, including round, rectangular, and custom shapes.
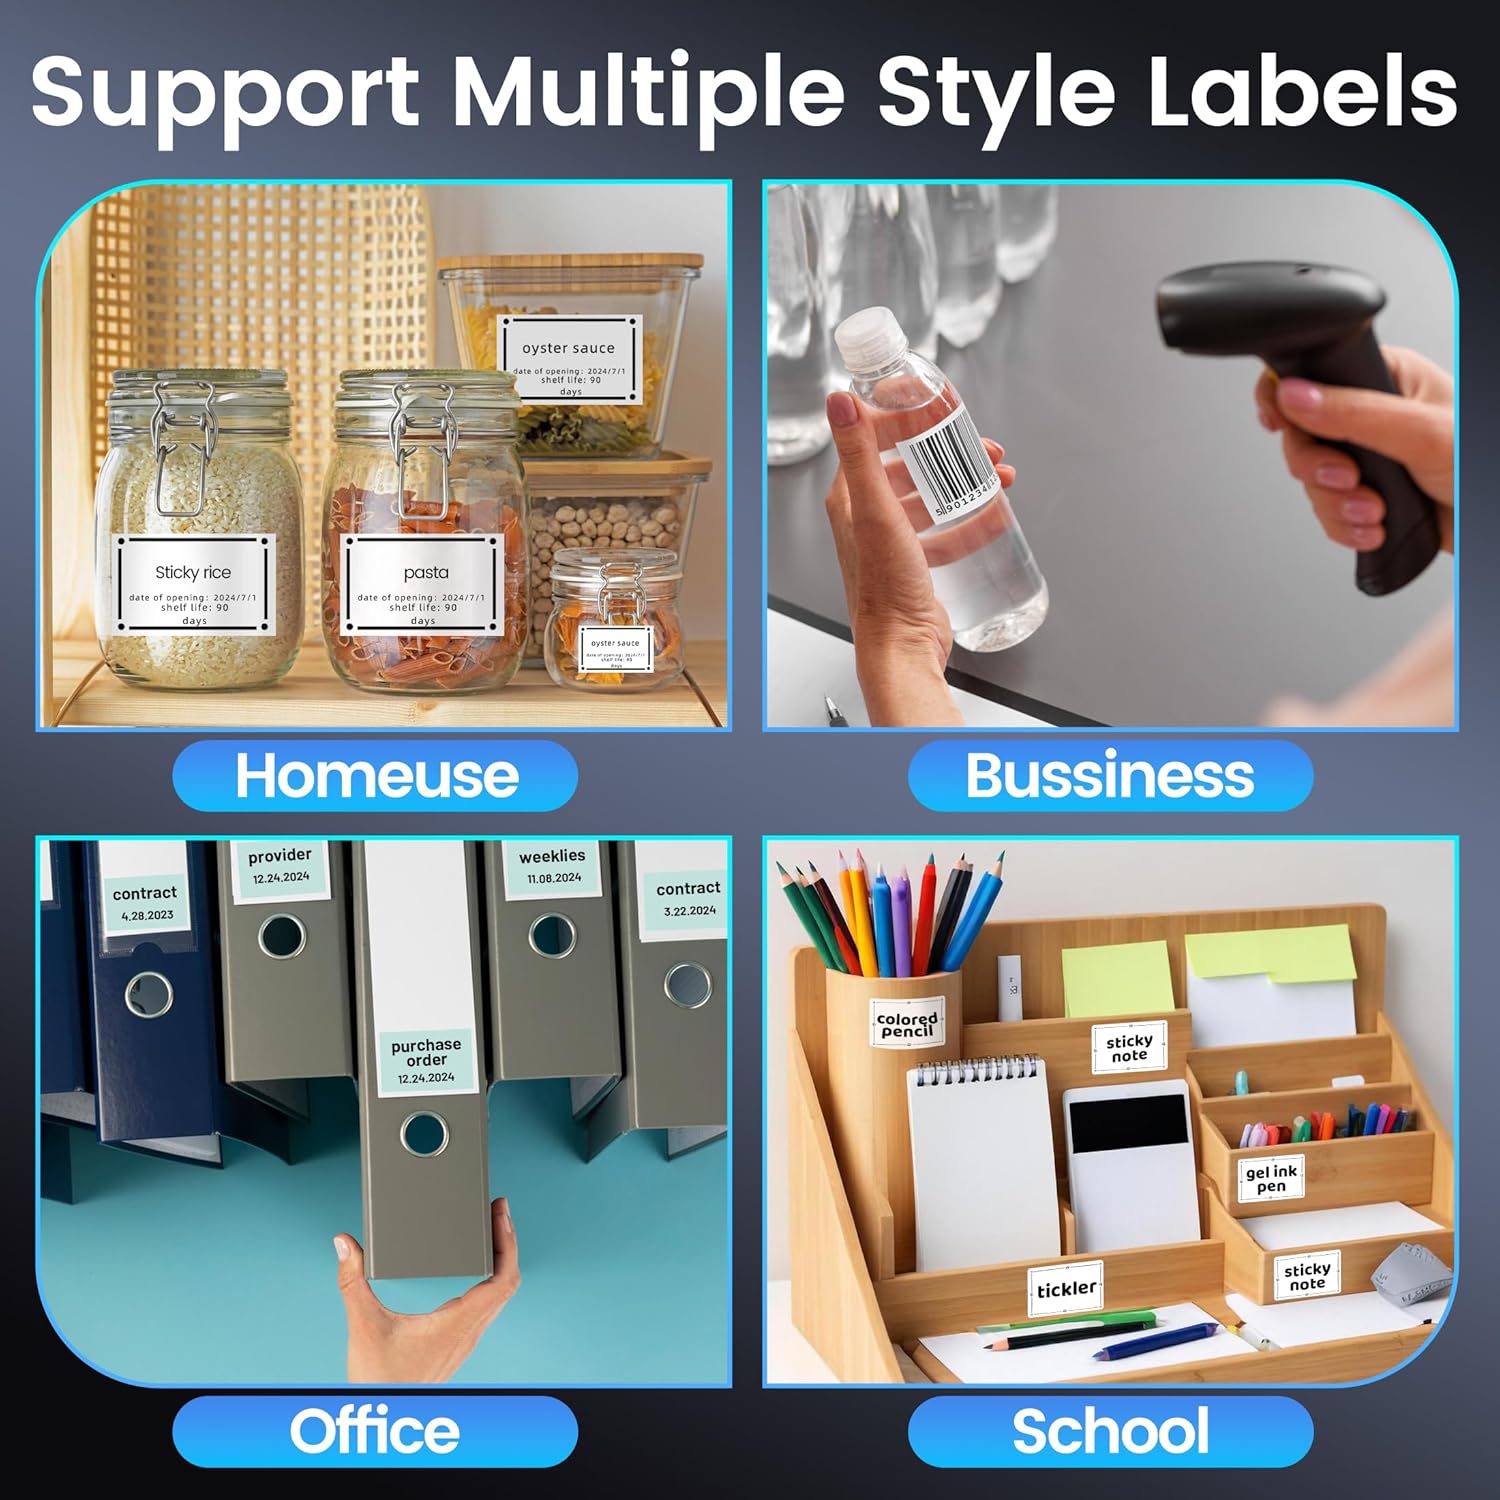
Image: Collage showing the Phomemo M250 label maker being used in various settings: home (kitchen jars), business (barcode on bottle), office (file folders), and school (desk organizer).
Maintenance
1. Cleaning the Print Head
To maintain print quality, regularly clean the thermal print head. Use a soft, lint-free cloth lightly dampened with isopropyl alcohol. Gently wipe the print head surface. Ensure the device is powered off and cool before cleaning.
2. Battery Care
The M250's 2200mAh battery provides long-lasting performance. To prolong battery life, avoid extreme temperatures and store the device in a cool, dry place when not in use. Recharge the battery when the indicator shows low power.
Troubleshooting
1. Connectivity Issues
If the device fails to connect via Bluetooth or USB:
- Ensure the label maker is powered on and fully charged.
- Verify Bluetooth is enabled on your mobile device or that the USB cable is securely connected to your computer.
- Restart both the label maker and your connecting device.
- Reinstall the "Print Master" or "Labelife" app/drivers if issues persist.
2. Print Quality Problems
If labels are printing faintly or with gaps:
- Check if the thermal label roll is inserted correctly with the print side facing down.
- Ensure the label roll is centered and the side latches are pushed in properly to prevent misalignment.
- Clean the print head as described in the Maintenance section.
- Try a different roll of Phomemo thermal labels to rule out label quality issues.
3. Automatic Shut-off
The device is designed to enter automatic sleep mode after 5 minutes of inactivity to save power. This is normal operation. Simply press the power button to wake it up.
Specifications
- Brand: Phomemo
- Model Name: Phomemo M250 Label Maker
- Item Model Number: M250-BK
- Product Dimensions: 5.05"D x 4.54"W x 2.61"H
- Item Weight: 13.8 ounces (390.3 Grams)
- Connectivity Technology: Bluetooth, USB Type C
- Printing Technology: Thermal
- Printer Output: Monochrome
- Max Print Speed Monochrome: 30-50mm/s
- Maximum Media Size: 0.78'' x 3.14'' (Supports width from 20mm-75mm)
- Max Input Sheet Capacity: 150
- Compatible Devices: Laptops, PC, Smartphones, Tablets (Android, iOS, iPad & macOS, Windows 7 or above)
- Batteries: 2 C batteries required (included)
Warranty and Support
For warranty information, technical support, or further assistance, please refer to the official Phomemo website or contact their customer service directly. Details can typically be found in the included user manual or on the product packaging.