1. Introduction
Thank you for choosing the HOOBRO Queen Size Upholstered Bed Frame with Storage Headboard and LED Lights. This manual provides detailed instructions for assembly, operation, maintenance, and troubleshooting to ensure safe and proper use of your new bed frame. Please read this manual thoroughly before beginning assembly and retain it for future reference.

Image 1.1: The HOOBRO Queen Size Bed Frame (Model GY19UDBF01) featuring its upholstered design, LED lighting, and integrated storage headboard.
2. Safety Information
- Ensure all parts are present and undamaged before assembly. Do not proceed with assembly if any parts are missing or damaged.
- Assemble the bed frame on a soft, clean surface (e.g., carpet) to prevent scratches or damage.
- It is recommended that two adults assemble this bed frame.
- Tighten all screws and bolts securely, but do not overtighten. Periodically check and re-tighten fasteners.
- Do not exceed the maximum weight capacity of the bed frame.
- Keep children and pets away from the assembly area.
- Ensure the power cord for the charging station and LED lights is routed safely to avoid tripping hazards.
3. Package Contents
Before assembly, verify that all components listed below are included in your package. Refer to the assembly diagram for part identification.
| Part | Description | Quantity |
|---|---|---|
| Headboard Components | Upholstered panels, storage shelves, charging station unit | 1 set |
| Side Rails | Left and Right upholstered side rails | 2 |
| Footboard | Upholstered footboard with LED strip | 1 |
| Center Support Beam | Metal support beam for slats | 1 |
| Wooden Slats | Individual wooden slats for mattress support | Multiple |
| Hardware Pack | Screws, bolts, Allen wrench, remote control for LED | 1 pack |

Image 3.1: Overview of the bed frame structure and main components before assembly.
4. Setup and Assembly Instructions
Follow these steps carefully for proper assembly. All pieces are numbered for easy identification.
- Unpack and Identify: Lay out all components on a soft, clean surface. Refer to the parts list and diagrams to identify each piece.
- Assemble the Headboard: Attach the upholstered panels to the headboard frame, ensuring the storage shelves and charging station unit are correctly positioned. Connect any internal wiring for the LED lights and charging station as indicated in the detailed assembly diagram (refer to included paper manual for specific steps).
- Attach Side Rails: Connect the left and right side rails to the assembled headboard using the provided hardware. Ensure a secure fit.
- Install Footboard: Attach the footboard to the side rails. The footboard contains an integrated LED strip.
- Insert Center Support Beam: Place the metal center support beam into the designated slots or brackets along the length of the bed frame.
- Lay Wooden Slats: Position the wooden slats across the bed frame, resting them on the side rails and center support beam. Secure them using the provided fasteners or Velcro strips to prevent movement.
- Final Check: Verify that all connections are tight and the frame is stable.

Image 4.1: Detail of the sturdy metal frame and wooden slat system, designed for easy assembly and mattress support.
5. Operating Instructions
5.1. LED Lighting System
The bed frame is equipped with an RGB LED light strip at both the head and foot of the bed. Use the provided remote control to operate the lighting system.
- Power On/Off: Press the power button on the remote to turn the LED lights on or off.
- Color Selection: Choose from 16 different colors using the color buttons on the remote.
- Dynamic Modes: Select from 22 dynamic modes to create various lighting effects.
- Brightness Adjustment: Adjust the brightness level (5 levels available) to your preference.
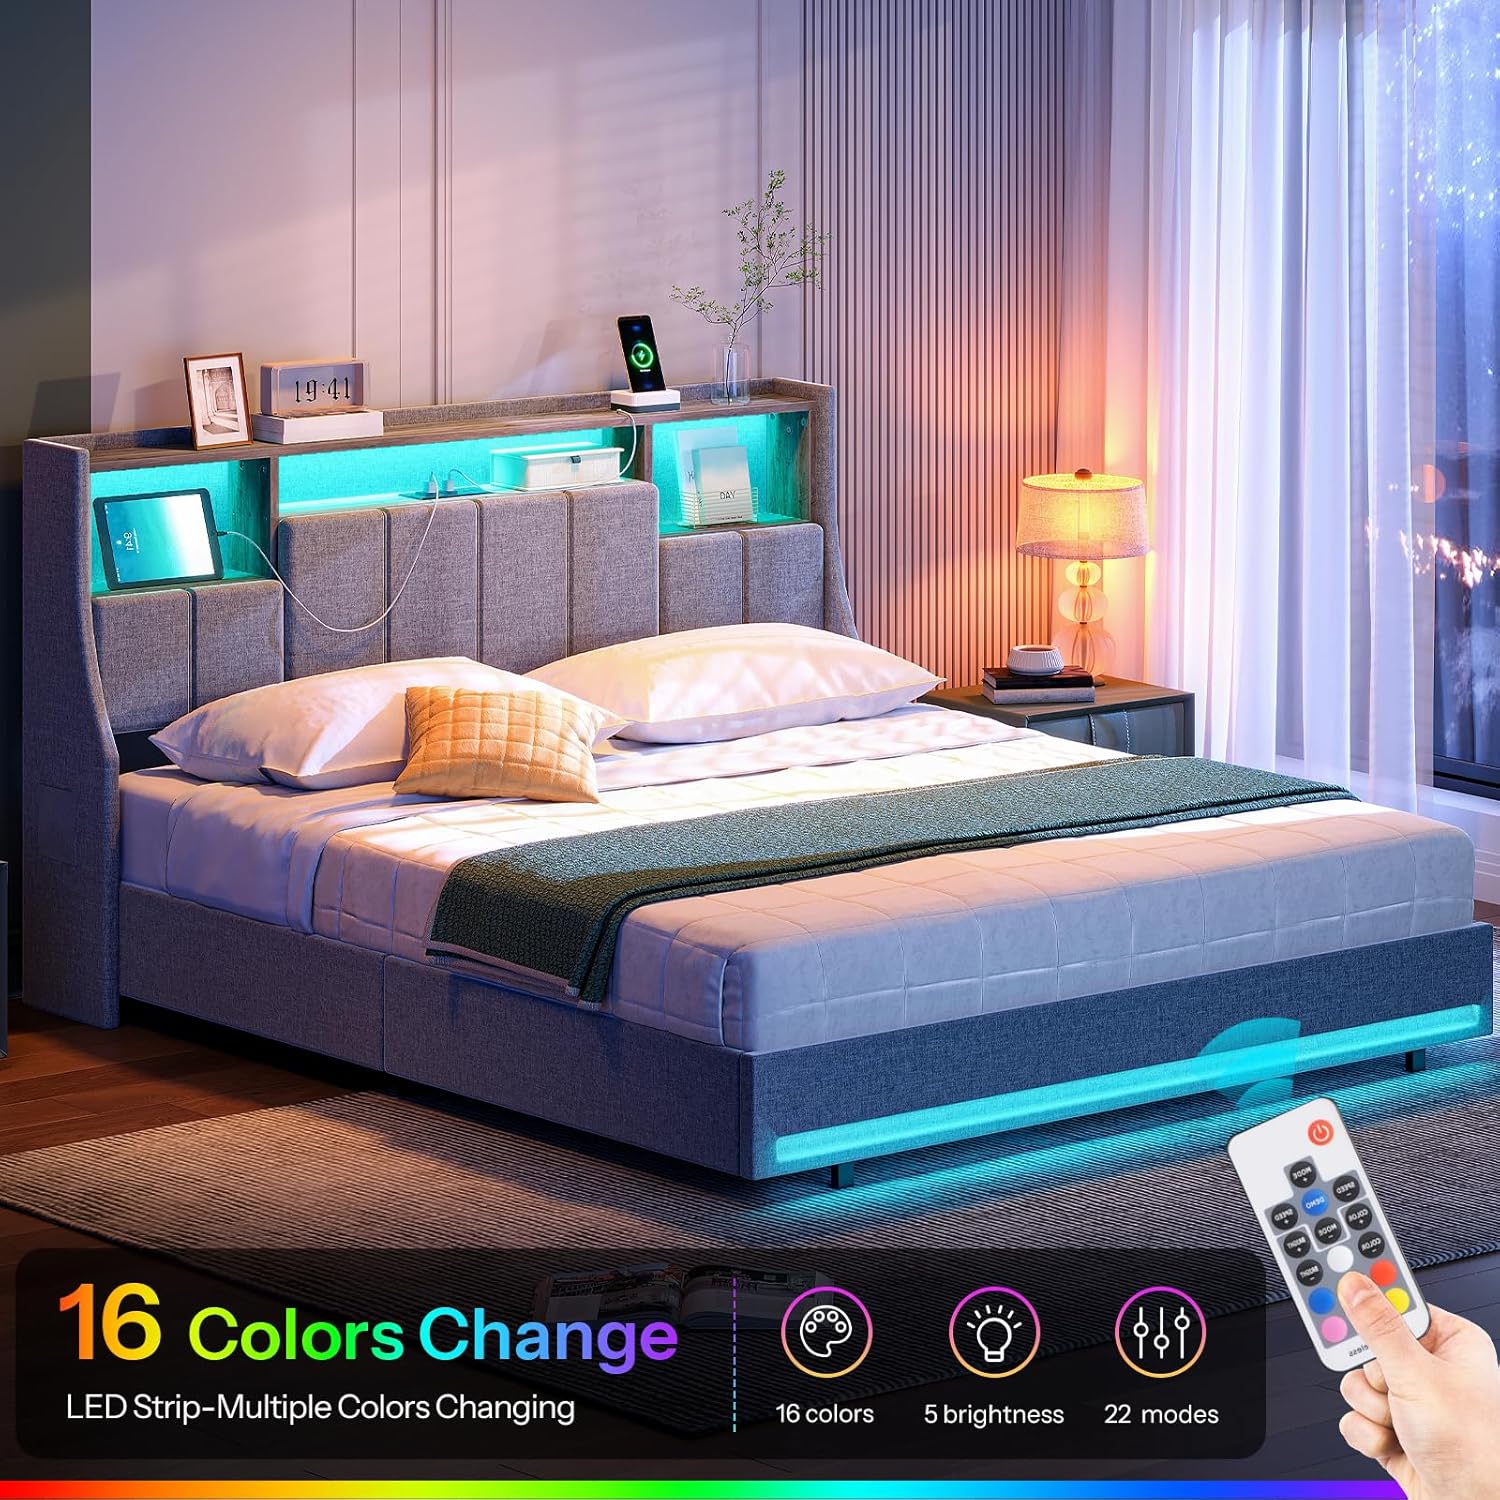
Image 5.1: The LED lighting system in operation, demonstrating color options and remote control functionality.
5.2. Charging Station
The headboard includes a built-in charging station for your electronic devices.
- AC Outlets: Two 125V/12A AC outlets are provided for standard power adapters.
- USB Ports: Two 5V/2A USB ports are available for charging smartphones, tablets, and other USB-powered devices.
- Power Connection: Ensure the bed frame's power cord (approximately 4.9 feet long) is securely plugged into a wall outlet.

Image 5.2: The integrated charging station, illustrating the AC outlets and USB ports for convenient device charging.
5.3. Storage Headboard
The headboard features practical storage solutions to keep your essentials organized.
- Open Storage Shelves: Three open compartments are available for items like books, alarm clocks, or decorative pieces.
- Hidden Storage Spaces: Three hidden compartments provide discreet storage for personal items.
- Side Pockets: Two side pockets are integrated into the headboard for easy access to smaller items like phones or glasses.

Image 5.3: The multi-functional storage headboard, highlighting its various compartments and pockets for organization.
6. Maintenance
- Cleaning the Upholstery: For general cleaning, gently vacuum the linen fabric to remove dust. For spills, blot immediately with a clean, dry cloth. For stubborn stains, use a mild fabric cleaner following the product instructions, testing on an inconspicuous area first.
- Frame Maintenance: Periodically check all bolts and screws to ensure they remain tight. Re-tighten as necessary to maintain stability.
- LED Lights: The LED lights are designed for long-term use. If issues arise, refer to the troubleshooting section. Avoid exposing the LED strips to excessive moisture.
- Charging Station: Keep the charging ports free from dust and debris. Do not insert foreign objects into the outlets or USB ports.

Image 6.1: Detail of the upholstered backrest, emphasizing the fabric texture and padding for comfort and ease of cleaning.
7. Troubleshooting
| Problem | Possible Cause | Solution |
|---|---|---|
| Bed frame is wobbly or unstable. | Loose bolts or screws. | Check and tighten all assembly hardware. Ensure the bed is on a level surface. |
| LED lights are not turning on. | Power cord not plugged in; remote control battery low; LED strip connection loose. | Ensure the bed frame's power cord is securely plugged into a working outlet. Check the remote control battery and replace if necessary. Verify all LED strip connections are firm. |
| Charging station (AC outlets/USB ports) not working. | Power cord not plugged in; internal wiring loose; device not compatible. | Confirm the bed frame's main power cord is plugged in. Check internal wiring connections if accessible (refer to assembly manual). Test with a different device and cable. |
| Mattress slips off the bed. | Mattress not properly aligned; wingback design not fully effective. | Ensure the mattress is centered on the slats. The wingback design of the headboard is intended to help prevent slipping. |
8. Specifications
- Model: GY19UDBF01
- Brand: HOOBRO
- Size: Queen
- Material: Metal frame, wooden slats, upholstered linen fabric
- Item Weight: 47 Kilograms
- Headboard Features: 3 open storage shelves, 3 hidden storage spaces, 2 side pockets
- LED Lighting: 16 colors, 22 dynamic modes, 5 brightness levels (remote controlled)
- Charging Station: 2 AC Outlets (125V/12A), 2 USB Ports (5V/2A), 4.9-foot power cord
- Box Spring Required: No

Image 8.1: Dimensional diagram of the HOOBRO Queen Size Bed Frame, including overall measurements and headboard storage details.
9. Warranty and Support
For any questions, concerns, or assistance with your HOOBRO bed frame, please contact customer support. Your product is eligible for return or refund within 30 days of receipt, subject to the retailer's return policy.
Manufacturer: HOOBRO
Place of Business: Zhengzhou Hanzhouboyang Import and Export Trade Co., Ltd.
For direct support, please refer to the contact information provided in your purchase documentation or visit the official HOOBRO website.


