
1. Introduction
This manual provides instructions for the assembly, operation, maintenance, and troubleshooting of your Spider Farmer 4-Tier Plant Stand with Grow Lights and Grow Tent. Please read all instructions carefully before use to ensure proper setup and safe operation.
Safety Information
- Always unplug the grow lights from the power source before cleaning or performing any maintenance.
- Do not expose electrical components to water. Ensure all connections are dry.
- Keep the product away from flammable materials.
- Ensure the plant stand is assembled on a stable, level surface.
- Do not exceed the maximum shelf weight capacity of 110 lbs per shelf.
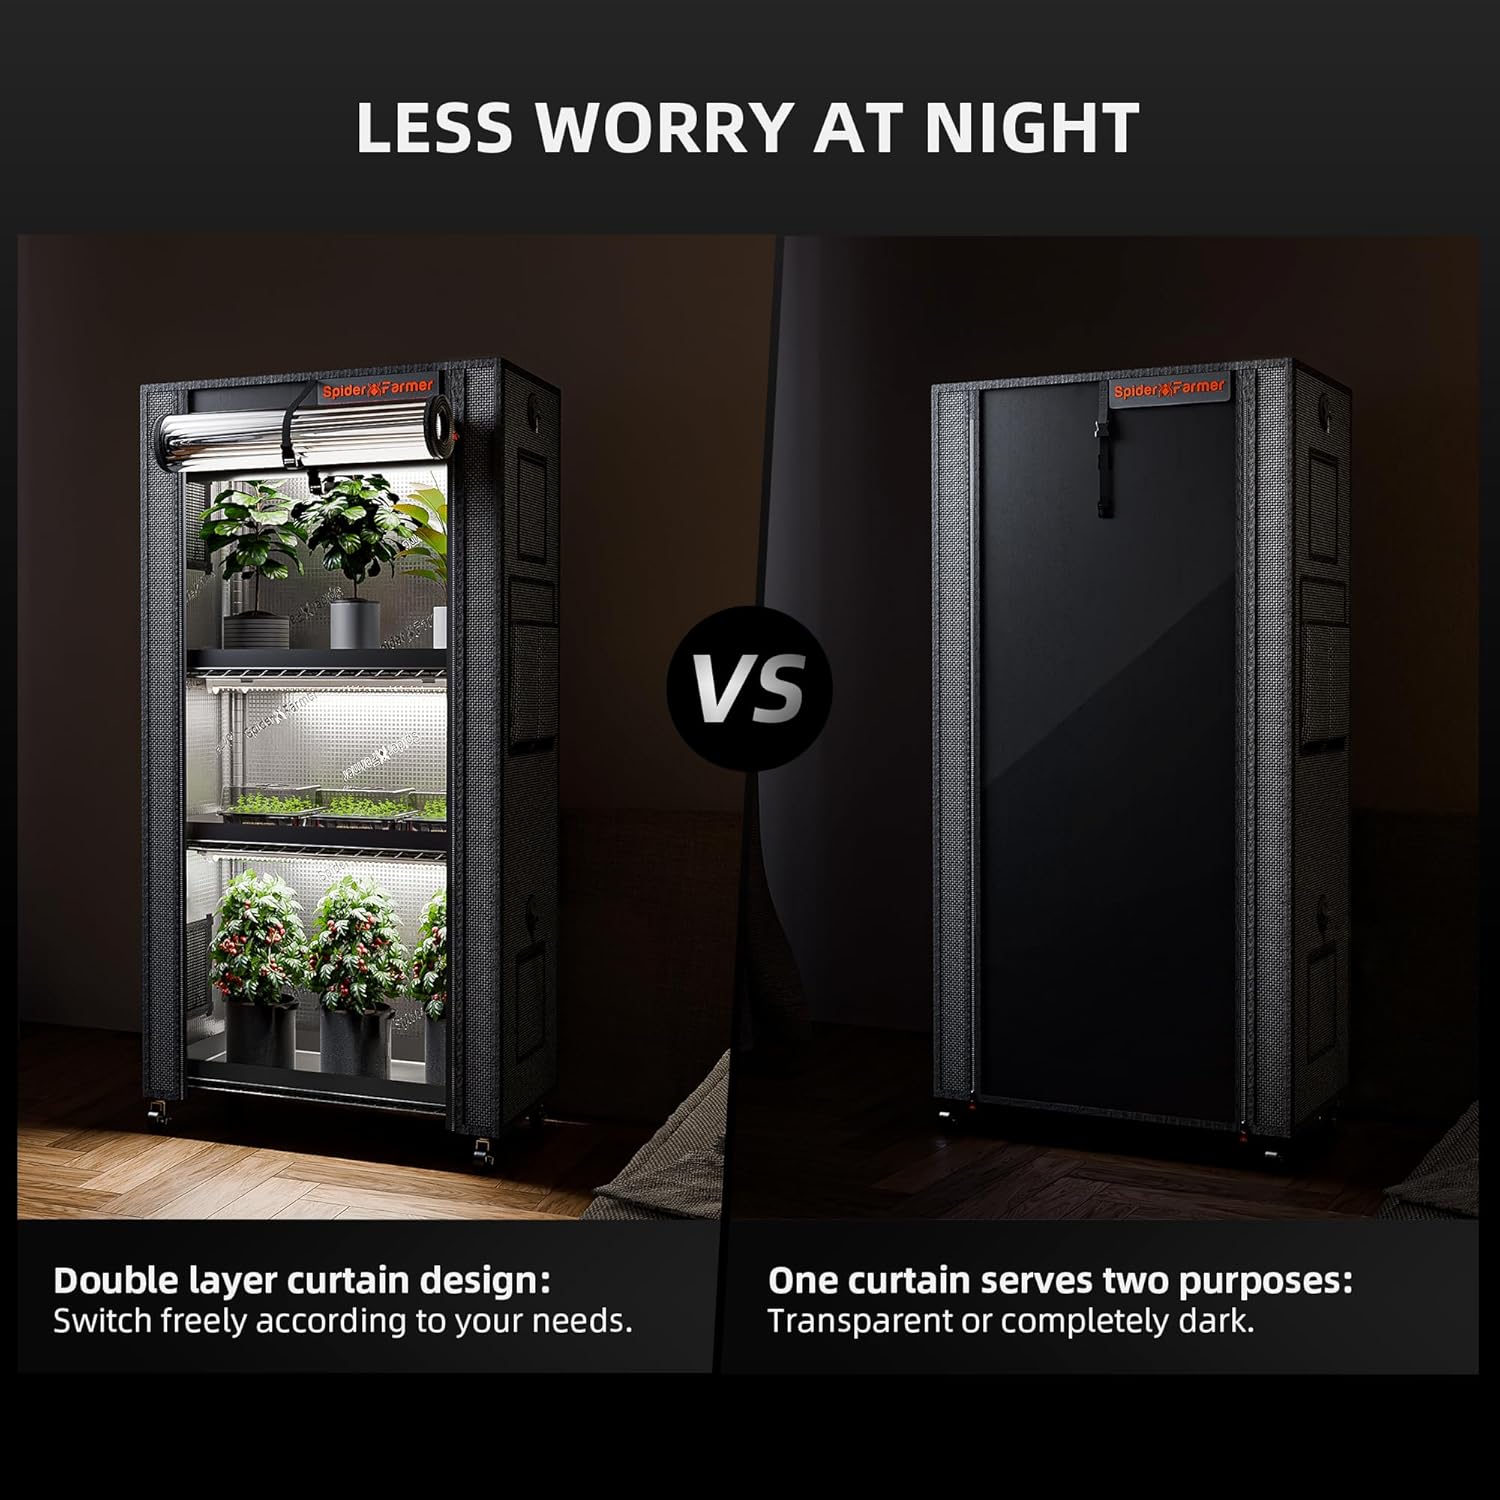
Image 1.1: Fully assembled Spider Farmer Plant Stand with Grow Tent.
2. Package Contents
Verify that all components listed below are present in your package. If any parts are missing or damaged, please contact customer support.
- 6 x 24" Grow Lights
- 3 x 13.8" Connecting Cords
- 2 x 23.6" Connecting Cords
- 1 x 59" Power Cable
- 4 x Wire Mesh Shelves
- 8 x 23.6" Support Poles
- 4 x 11.8" Support Poles
- 4 x Casters with Lock
- 1 x Semi-Transparent Tent
- 3 x Waterproof Mats
- 36 x Plastic Clips
- 12 x Metal Clips
- 16 x Plastic Ties
- 1 x Waterproof Cap
- 1 x User Manual (this document)

Image 2.1: Overview of included components.
3. Setup Instructions
Assembly of the Spider Farmer Plant Stand is designed to be straightforward and tool-free.
3.1 Frame Assembly
- Attach Casters or Leveling Feet: Screw the 4 casters with locks into the bottom of the 4 longest support poles (23.6"). Alternatively, screw in the leveling feet if mobility is not required. Ensure they are securely tightened.
- Assemble Lower Section: Insert the plastic clips onto the support poles at your desired height for the first shelf. Ensure the clips are at the same height on all four poles. Slide a wire mesh shelf down onto the clips until it rests securely.
- Extend Poles: Connect the 11.8" support poles to the top of the 23.6" poles using the pole connectors. Repeat for all four vertical supports.
- Install Remaining Shelves: Repeat step 2 for the remaining three wire mesh shelves, adjusting the height as needed. The shelves can be adjusted in 1-inch increments.

Image 3.1: Visual guide for frame assembly.
3.2 Grow Light Installation
- Attach Lights to Shelves: Use the provided metal clips to attach the 24" grow lights to the underside of each wire mesh shelf. Ensure the lights are evenly spaced for optimal coverage.
- Connect Lights: Use the 13.8" and 23.6" connecting cords to link the grow lights in series. The lights are plug-and-play.
- Power Connection: Connect the 59" power cable to the first grow light in the series.

Image 3.2: Plant stand with grow lights installed, without the tent cover.
3.3 Grow Tent Installation
- Drape Tent: Carefully drape the semi-transparent tent over the assembled plant stand frame.
- Secure Tent: Ensure the tent fits snugly around the frame. Use the heavy-duty SBS zippers to close the tent.
- Place Waterproof Mats: Place one waterproof mat on each shelf. The mats have drainage holes and raised edges to collect excess water.
Video 3.1: Product overview and assembly demonstration. This video illustrates the general setup and features of the plant stand and grow tent.
4. Operating Instructions
4.1 Grow Light Operation
The included LED grow lights are full-spectrum, suitable for all stages of plant growth. They are linkable and plug-and-play for easy setup.
- Power On/Off: Plug the power cable into a standard electrical outlet to turn on the lights. Unplug to turn off. Consider using an external timer for automated light cycles.
- Light Spectrum: The lights provide a full spectrum, including white light (5000K) for plant growth, warm white light (3000K) for germination and flowering, and deep red light (660K) to boost buds and crops.
- PPFD (Photosynthetic Photon Flux Density): The light intensity varies with distance. For optimal plant growth, refer to the PPFD map provided. For example, at 4 inches from the light, PPFD can be around 342 µmol/m²/s. Adjust shelf height to achieve desired light intensity for your plants.

Image 4.1: PPFD values at various heights from the grow lights.

Image 4.2: Details of the waterproof full spectrum LED grow light.
4.2 Grow Tent Features
The grow tent is designed to create an optimal environment for your plants.
- Double Layer Curtain Design: The tent features a double-layer curtain. The outer layer is a blackout curtain for complete darkness, while the inner layer is semi-transparent PVC, allowing you to observe plants without opening the tent. Switch between these as needed.
- Lightproof and Reflective Interior: Constructed with 420D waterproof Oxford canvas and a silver high reflective coating (100% reflective diamond Mylar) inside, the tent maximizes light efficiency and prevents light leakage.
- Air Vents: Integrated air vents allow for proper air circulation within the tent.
- Elasticated Wire Holes: These holes provide convenient access for power cables, sensors, or other equipment while maintaining lightproof integrity.
- Tool Bag: A built-in tool bag offers storage for small gardening tools.
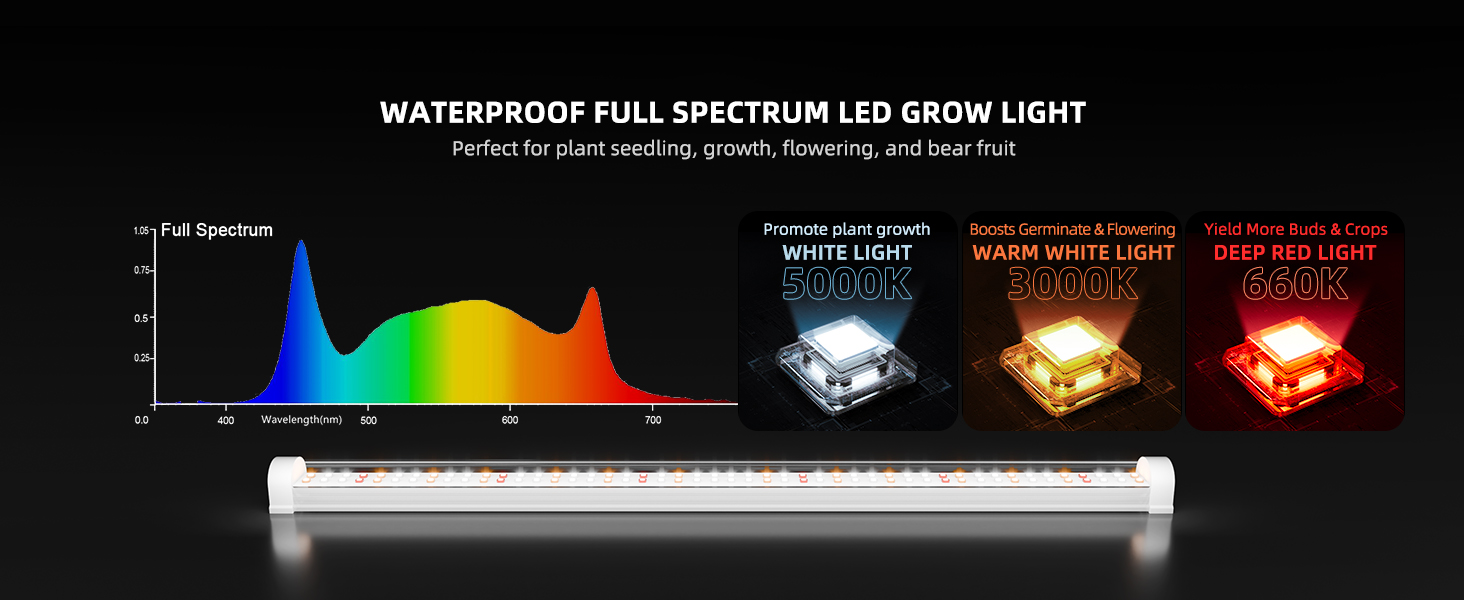
Image 4.3: Double layer curtain design for light control.

Image 4.4: Overview of convenient features for growing.
5. Maintenance
Regular maintenance ensures the longevity and optimal performance of your plant stand and grow tent.
- Cleaning the Tent: The 420D Oxford canvas and PVC material are waterproof and easy to scrub. Use a damp cloth with mild soap to clean the interior and exterior surfaces. Avoid harsh chemicals.
- Cleaning Waterproof Mats: The included waterproof mats are made of PVC and can be easily cleaned with water and mild soap. Ensure they are dry before placing them back on the shelves.
- Cleaning Grow Lights: Gently wipe the LED grow lights with a dry, soft cloth to remove dust. Ensure the lights are unplugged before cleaning. Do not use liquid cleaners directly on the lights.
- Frame Inspection: Periodically check all pole connections and shelf clips to ensure they remain secure. Tighten caster locks if the stand is moved frequently.
6. Troubleshooting
Here are solutions to common issues you might encounter:
- Lights Not Turning On:
- Ensure the power cable is securely plugged into both the grow light and the electrical outlet.
- Check all connecting cords between the grow lights for secure connections.
- Verify the electrical outlet is functional by plugging in another device.
- Stand Instability:
- Ensure all support poles are fully inserted into their connectors.
- Check that all plastic clips are correctly positioned and supporting the shelves evenly.
- If using casters, ensure they are locked when the stand is stationary. If using leveling feet, adjust them to ensure the stand is level on uneven surfaces.
- Water Leakage:
- Ensure the waterproof mats are correctly placed on each shelf with their raised edges upright.
- Check for any tears or damage to the waterproof mats.
- Avoid overwatering plants to prevent excess water accumulation.
- Tent Not Fully Lightproof:
- Ensure all zippers are fully closed.
- Check that the tent is properly aligned and stretched over the frame.
- Verify that the elasticated wire holes are sealed around any cables passing through.
7. Specifications
| Feature | Detail |
|---|---|
| Model Number | SF-PlantStand110-EU |
| Product Dimensions | 27.5"D x 59"W x 13.5"H (M-28x14x59in) |
| Material | High-intense Carbon Steel (Frame), 420D Oxford Canvas with Mylar (Tent) |
| Color | Black |
| Number of Shelves | 4 |
| Shelf Weight Capacity | 110 Pounds per shelf |
| Total Weight Capacity | 440 Pounds |
| Grow Lights | 6 x 18W Full Spectrum LED Bars |
| Special Features | Detachable and Portable, Dust Resistant and Waterproof Tent, Revolving Casters, Full Spectrum Grow Lights, Adjustable Shelf Height |
| Included Components | Waterproof Mats, LED Grow Light Bars, Plant Stand with Wheels, Semi-transparent Grow Tent |
| Item Weight | 28.6 pounds (13.02 Kilograms) |

Image 7.1: Solid and sturdy frame construction.

Image 7.2: High load-bearing capacity of the shelves.
8. Warranty and Support
Your Spider Farmer Plant Stand comes with 2 Years Support Services. For any questions, technical assistance, or warranty claims, please contact Spider Farmer customer support through the retailer where you purchased the product or visit the official Spider Farmer website.
Contact Information:
- Website: www.spider-farmer.com (Please check for the most current contact details)
- Email: support@spider-farmer.com (Example, please verify on official website)