
1. Important Safety Instructions
Read and understand all safety warnings and instructions before operating this welding machine. Failure to follow these instructions may result in electric shock, fire, serious injury, or death. Keep this manual for future reference.
- Electric Shock Can Kill: Do not touch live electrical parts. Wear dry welding gloves and protective clothing. Ensure the workpiece is properly grounded.
- Fumes and Gases Can Be Dangerous: Keep your head out of the fumes. Use enough ventilation or exhaust at the arc to keep fumes and gases away from the breathing zone.
- Arc Rays Can Burn Eyes and Skin: Wear a welding helmet with a proper shade filter. Wear protective clothing to protect skin.
- Fire and Explosion Hazard: Remove all flammable materials from the welding area. Have a fire extinguisher readily available.
- Hot Parts Can Cause Severe Burns: Allow the welding machine and workpiece to cool before handling.
- Pacemakers and Electronic Devices: Consult your doctor before welding. Electromagnetic fields may interfere with pacemakers.
- General Safety: Always disconnect power before servicing. Do not operate in damp or wet conditions. Keep children and unauthorized personnel away.
2. Product Overview
The Promax PW-160 is a 160A professional inverter welder designed for efficient and stable welding performance. It is suitable for various materials including mild steel and stainless steel, offering a compact and portable solution for welding tasks.
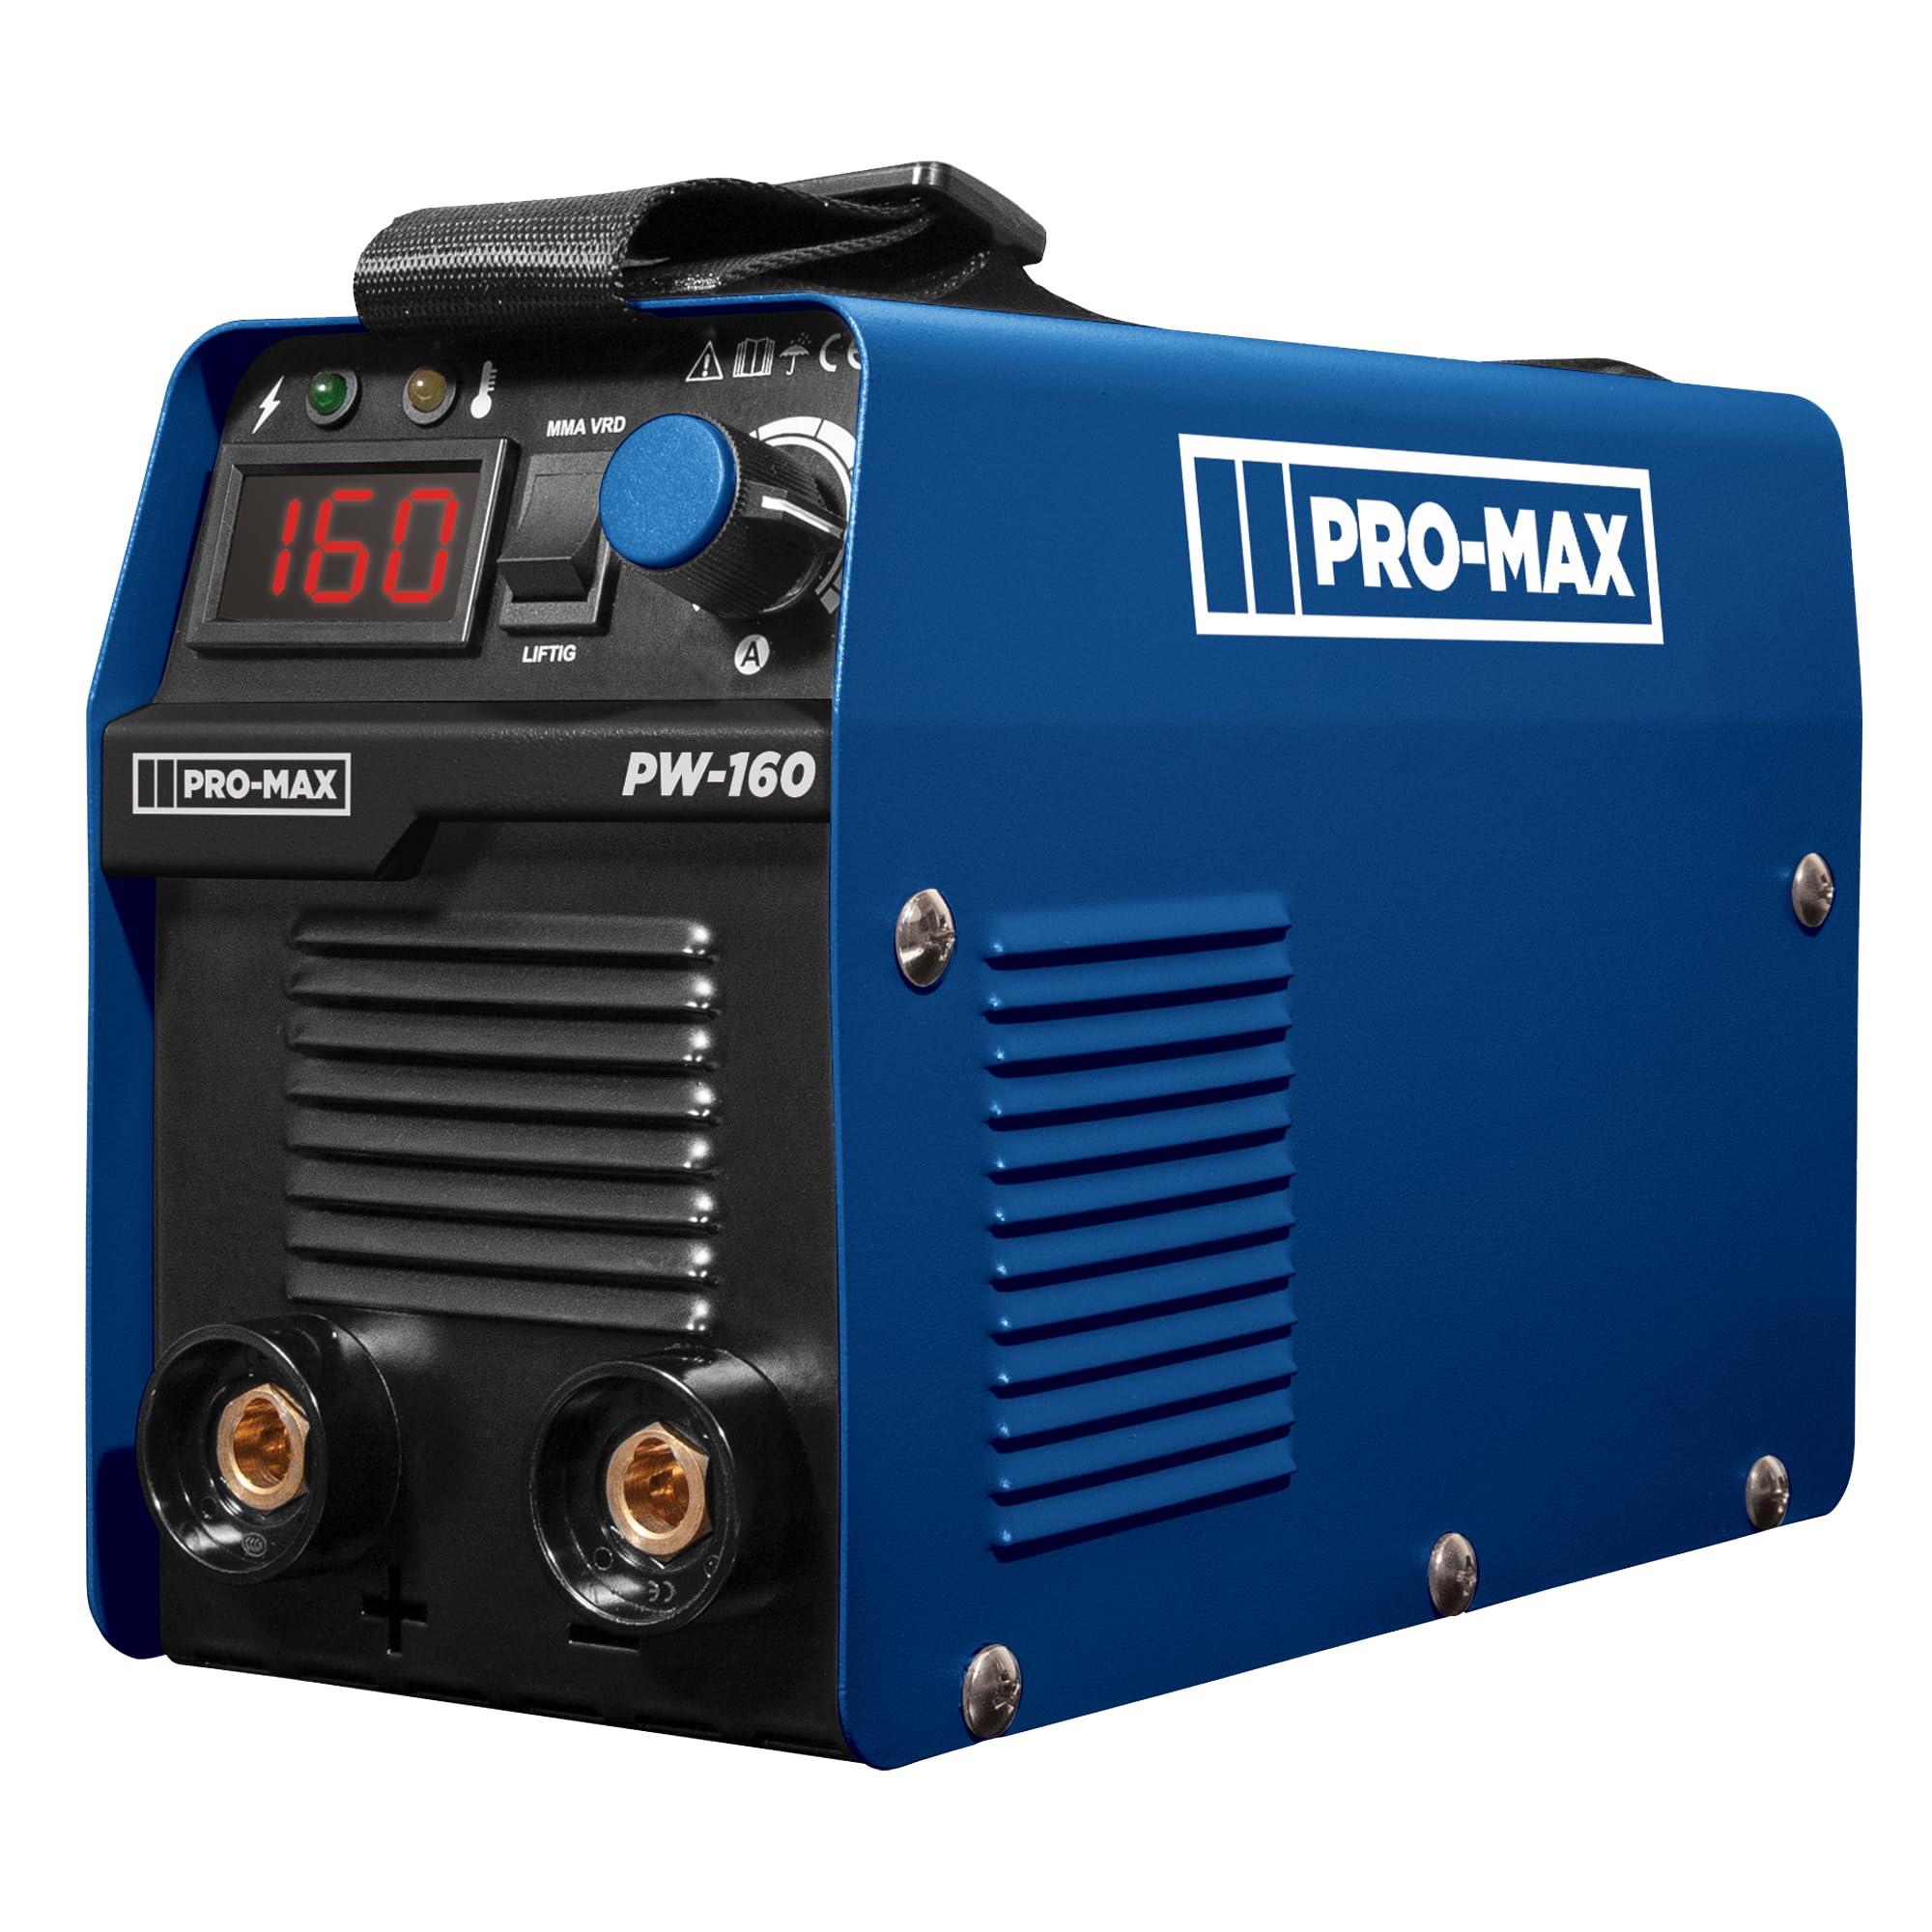
Figure 1: Promax PW-160 Inverter Welder with included accessories. The front panel shows the digital display, control knob, and output terminals.
2.1. Main Components
- Digital Display: Shows current welding amperage (e.g., "160").
- Current Adjustment Knob: Used to set the welding current.
- MMA/VRD/LIFTIG Switch: Selects welding mode (MMA for stick welding, VRD for Voltage Reduction Device, LIFTIG for TIG welding if applicable).
- Output Terminals: Positive (+) and Negative (-) connections for welding cables.
- Power Indicator Light: Indicates when the machine is powered on.
- Overheat Indicator Light: Illuminates if the machine exceeds safe operating temperature.
- Cooling Fan: Located at the rear, ensures proper cooling during operation.
2.2. Included Accessories
- Welding cable with electrode holder (x1)
- Earth cable with earth clamp (x1)
3. Setup
- Unpacking: Carefully remove the welder and all accessories from the packaging. Inspect for any shipping damage.
- Placement: Place the welder on a stable, level surface, ensuring adequate ventilation around the machine. Do not block air vents.
- Power Connection: Ensure the welder's power switch is in the OFF position. Connect the power cord to a suitable 230V-50Hz power outlet. Verify the outlet can supply the rated input current (23.8A).
- Connecting Welding Cables:
- Connect the earth clamp cable to the negative (-) output terminal. Securely attach the earth clamp to the workpiece or welding table, ensuring good electrical contact.
- Connect the electrode holder cable to the positive (+) output terminal. Insert the welding electrode into the electrode holder.
- Electrode Selection: Choose an electrode appropriate for the material thickness and type. The Promax PW-160 supports electrode sizes from 1.6mm to 3.2mm.
4. Operating Instructions
- Power On: Turn the main power switch on the welder to the ON position. The power indicator light should illuminate, and the digital display will show the current setting.
- Adjust Welding Current: Rotate the current adjustment knob to set the desired amperage. Refer to electrode manufacturer guidelines for recommended current settings.
- Select Welding Mode: Use the MMA/VRD/LIFTIG switch to select the appropriate mode for your welding task. For standard stick welding, MMA is typically used.
- Begin Welding: With proper personal protective equipment (PPE) in place, strike an arc by lightly touching the electrode to the workpiece and quickly lifting it slightly to establish the arc. Maintain a consistent arc length and travel speed.
- Duty Cycle: The Promax PW-160 has a rated duty cycle of 30% at 160A. This means it can weld continuously for 3 minutes out of every 10-minute period at maximum output. Exceeding the duty cycle will cause the machine to overheat, and the overheat indicator light will illuminate. Allow the machine to cool down before resuming operation.
- Power Off: After welding, turn the main power switch to the OFF position. Disconnect the power cord from the outlet.
5. Maintenance
Regular maintenance ensures the longevity and safe operation of your welding machine. Always disconnect the welder from the power supply before performing any maintenance.
- Cleaning: Periodically clean the inside of the machine using dry compressed air to remove dust and metal particles. Ensure air vents are clear of obstructions.
- Cable Inspection: Regularly inspect welding cables, electrode holder, and earth clamp for damage, fraying, or loose connections. Replace damaged components immediately.
- Terminal Connections: Ensure all cable connections to the welder's output terminals are tight and free from corrosion.
- Storage: Store the welder in a clean, dry, and well-ventilated area, away from direct sunlight, moisture, and corrosive substances.
6. Troubleshooting
| Problem | Possible Cause | Solution |
|---|---|---|
| Welder does not power on | No power from outlet; Power switch off; Faulty power cord. | Check power supply; Turn power switch on; Inspect/replace power cord. |
| No welding arc | Poor earth connection; Incorrect current setting; Wet/damaged electrode; Loose cable connections. | Ensure good earth contact; Adjust current; Use dry electrode; Tighten all cable connections. |
| Unstable or weak arc | Low current setting; Poor electrode quality; Incorrect arc length. | Increase current; Use quality electrodes; Maintain proper arc length. |
| Overheat indicator on | Exceeded duty cycle; Blocked ventilation; High ambient temperature. | Allow machine to cool; Clear vents; Operate in cooler environment. |
If problems persist after attempting these solutions, contact qualified service personnel.
7. Technical Specifications
| Input Power | 230V-50Hz |
| Phase | 1 |
| Rated Input Current | 23.8A |
| Rated No-Load Voltage | 70V DC |
| Rated Input Capacity | 7.4kVA |
| Duty Cycle | 30% @ 160A |
| Output Current Range | 10-160A |
| Peak Current | 160A |
| Efficiency | 87.8% |
| Cooling Type | Fan Cooled |
| Case Protection Class | IP21S |
| Electrode Sizes | 1.6-3.2mm |
| Package Dimensions | 29.5 x 22.5 x 20 cm |
| Weight | 4 kg |
8. Warranty and Support
For warranty information, please refer to the documentation provided with your purchase or contact your retailer. Keep your proof of purchase for warranty claims.
For technical support or service inquiries, please contact Promax customer service through their official website or the contact details provided in your purchase documentation.