1. Introduction
This manual provides detailed instructions for the operation and maintenance of your FNIRSI NVS40 4K Night Vision Goggles. Please read this manual thoroughly before using the device to ensure proper function and to maximize your viewing experience. The NVS40 is designed for both day and night observation, offering 4K video recording and 36MP photo capture capabilities.
2. Safety Information
- Do not look directly at strong light sources (e.g., the sun) through the device, as this can cause permanent eye damage and damage to the device's sensor.
- Keep the device away from water and moisture. If it gets wet, power it off immediately and allow it to dry completely before use.
- Avoid dropping or subjecting the device to strong impacts.
- Do not attempt to disassemble or repair the device yourself. Contact authorized service personnel for assistance.
- Use only the specified charging cable and power adapter.
- Store the device in a cool, dry place when not in use.
3. Package Contents
Verify that all items are present in the package:
- FNIRSI NVS40 Night Vision Goggles
- USB Cable
- Portable Bag (Storage Case)
- 32GB Memory Card (MicroSD)
- User Manual (this document)
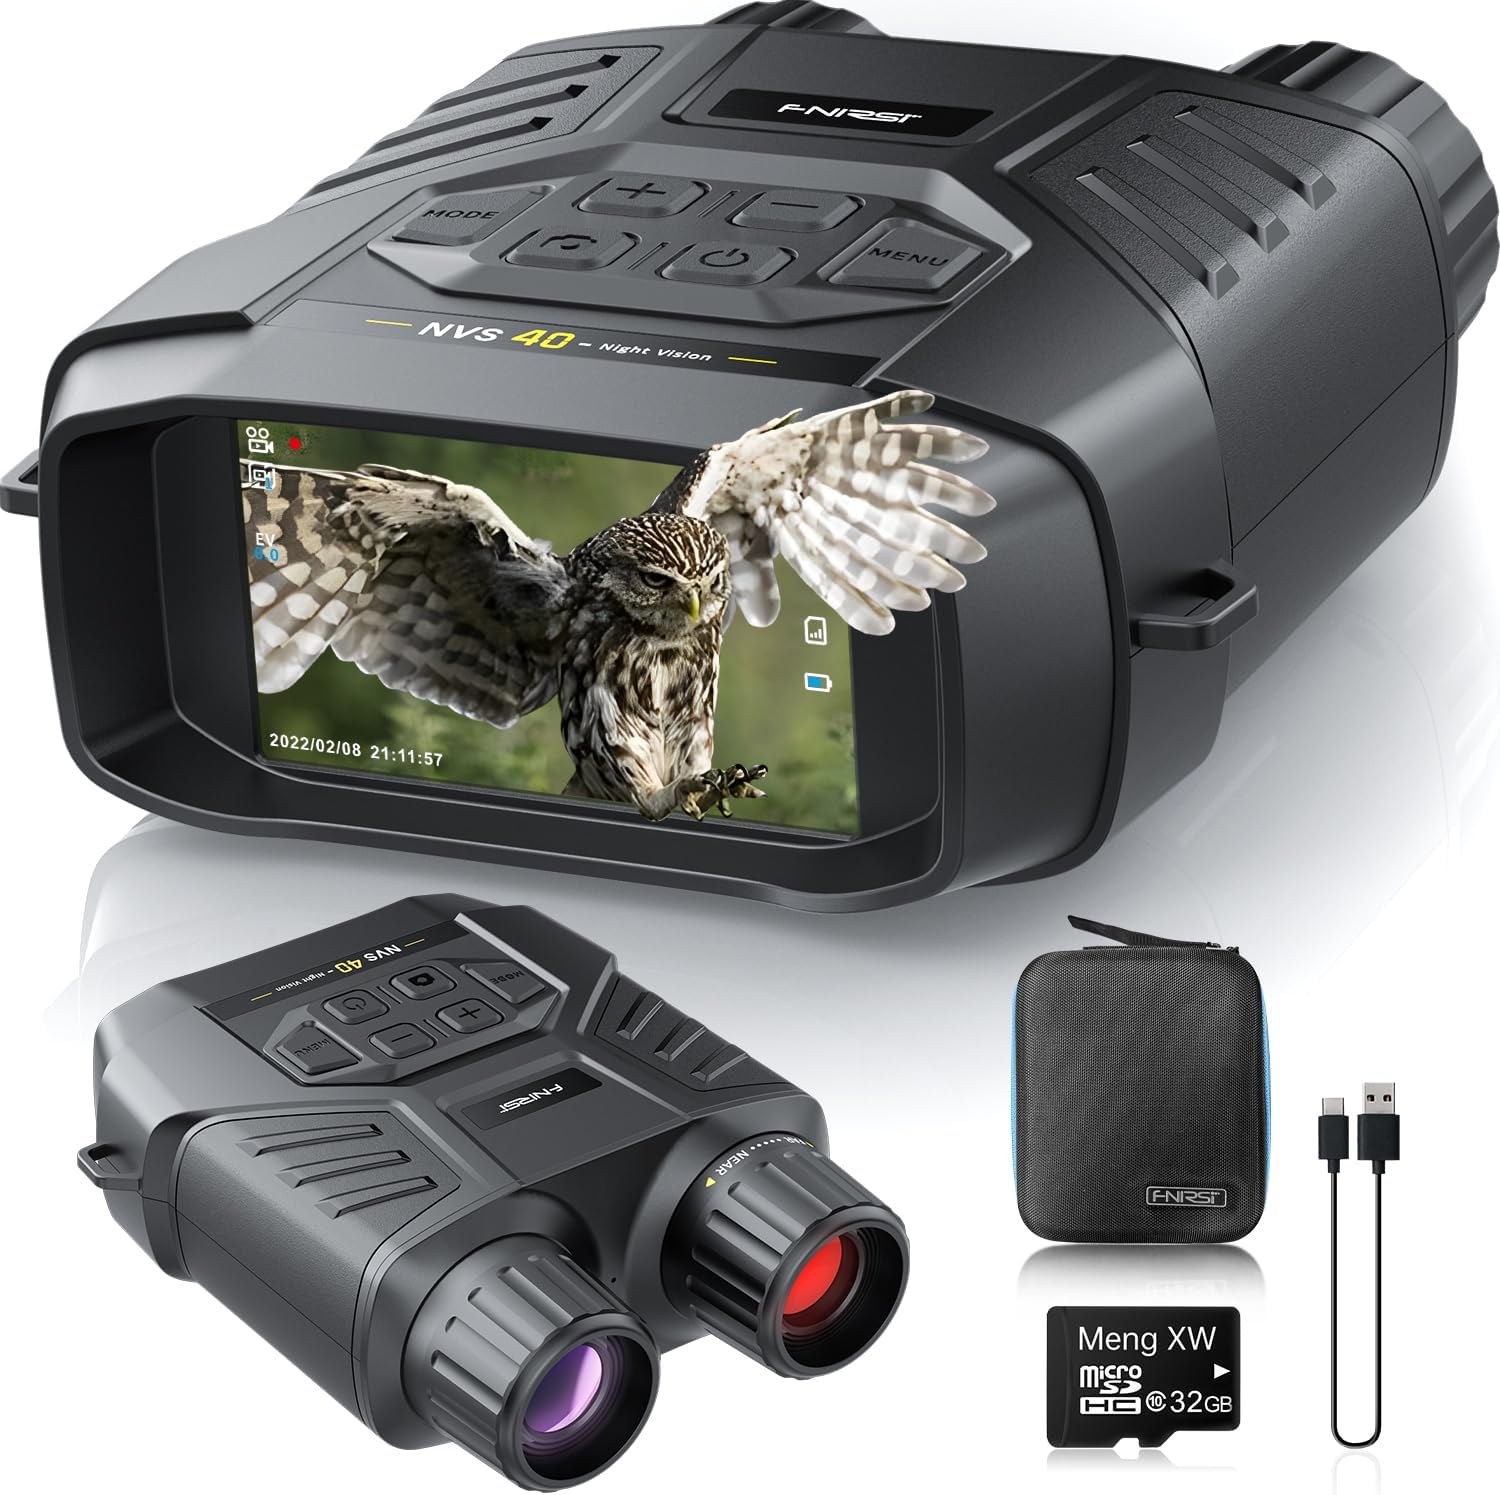
Image: FNIRSI NVS40 Night Vision Goggles, including the device, USB cable, portable bag, and 32GB MicroSD card.
4. Product Overview
Familiarize yourself with the components and controls of the NVS40 device.

Image: Diagram illustrating the various parts of the FNIRSI NVS40, including the objective focus knob, USB/TF/Reset ports, function mode button, power switch, photo/record/playback button, screen, menu button, up/IR increase/digital zoom in button, down/IR reduction/digital zoom out button, infrared illuminator, lens, wrist strap hole, battery compartment, and tripod mounting interface.
Component Identification:
- Objective Focus Knob: Adjusts focus for clear images.
- USB, TF, Reset Port Interface: Ports for charging, memory card, and resetting the device.
- Function Mode Button: Switches between photo, video, and playback modes.
- Power Switch: Turns the device on or off.
- Take Photo/Record Video/Playback Button: Initiates photo capture, video recording, or playback in respective modes.
- Screen: 3.0-inch IPS HD display for viewing.
- Menu Button: Accesses device settings.
- Up Adjustment Button / Infrared Light Increase Button / Digital Zoom In Button: Navigates menus, increases IR level, or zooms in.
- Down Adjustment Button / Infrared Light Reduction Button / Digital Zoom Out Button: Navigates menus, decreases IR level, or zooms out.
- Infrared Illuminator: Emits infrared light for night vision.
- Lens: Captures images and video.
- Wrist Strap Hole: Attachment point for a wrist strap.
- Battery Compartment: Houses the rechargeable battery.
- Tripod Mounting Interface: Standard thread for attaching to a tripod.
5. Setup
5.1. Battery Charging
The NVS40 is equipped with a rechargeable battery. Before first use, fully charge the device.
- Locate the USB Type-C port on the device.
- Connect the provided USB cable to the device and a compatible USB power adapter (not included) or computer USB port.
- The charging indicator will show the charging status. A full charge typically takes several hours.
- Once fully charged, disconnect the USB cable. The device can operate for up to 8 hours on a full charge.

Image: The FNIRSI NVS40 connected via a Type-C USB cable for charging, illustrating the 2500mAh rechargeable battery and 8-hour operating time.
5.2. MicroSD Card Installation
A 32GB MicroSD card is included for storing photos and videos.
- Locate the TF card slot (MicroSD card slot) on the side of the device.
- Gently insert the MicroSD card into the slot with the gold contacts facing down until it clicks into place.
- To remove, push the card in slightly until it springs out.
6. Operating Instructions
6.1. Power On/Off
- Power On: Press and hold the Power Switch button until the screen illuminates.
- Power Off: Press and hold the Power Switch button until the screen turns off.
6.2. Focus Adjustment
To achieve a clear image, adjust the objective focus knob.
- While viewing through the screen, rotate the Objective Focus Knob (located on the front of the device) until the image appears sharp.
6.3. Mode Selection (Photo/Video/Playback)
Press the Function Mode button to cycle through the available modes:
- Photo Mode: For capturing still images.
- Video Mode: For recording video footage.
- Playback Mode: For reviewing captured photos and videos.

Image: The FNIRSI NVS40 display showing icons for Photograph, Video, and Playback modes, indicating the device's ability to capture 4K video and 36MP photos.
6.4. Digital Zoom
The device features up to 6x digital zoom.
- In Photo or Video mode, press the Up Adjustment Button (labeled with '+') to zoom in.
- Press the Down Adjustment Button (labeled with '-') to zoom out.

Image: The FNIRSI NVS40 displaying a scene with a lion, illustrating the 6X digital zoom capability for night vision up to 300m/984ft.
6.5. Infrared (IR) Adjustment (Night Vision)
For optimal night vision, adjust the infrared illuminator level.
- In low light or darkness, the device automatically activates night vision.
- Press the Up Adjustment Button (labeled with '+') to increase the IR intensity (Levels 1-7).
- Press the Down Adjustment Button (labeled with '-') to decrease the IR intensity or turn it off.
- Higher IR levels provide brighter illumination but may consume more battery.

Image: The FNIRSI NVS40 demonstrating different infrared (IR) levels (IR Off, IR 3, IR 7) for night vision, highlighting the 850nm infrared light and manual focus capability for up to 300 meters in darkness.
6.6. Capturing Photos and Recording Videos
- To Take a Photo: Switch to Photo Mode using the Function Mode button. Frame your subject and press the Take Photo/Record Video/Playback Button once.
- To Record Video: Switch to Video Mode using the Function Mode button. Press the Take Photo/Record Video/Playback Button once to start recording. Press it again to stop recording.
6.7. Playback
- Switch to Playback Mode using the Function Mode button.
- Use the Up and Down Adjustment Buttons to navigate through your captured files.
- Press the Take Photo/Record Video/Playback Button to view a photo or play a video.
6.8. Menu Settings
- Press the Menu Button to access device settings.
- Use the Up and Down Adjustment Buttons to navigate menu options.
- Press the Take Photo/Record Video/Playback Button to select an option.
- Press the Menu Button again to exit the menu.
7. Data Transfer
To transfer photos and videos to a computer:
- Connect the NVS40 to your computer using the provided USB Type-C cable.
- The device should appear as a removable storage device on your computer.
- Navigate to the device's storage to access and copy your files.
- Alternatively, you can remove the MicroSD card and insert it into a card reader connected to your computer.

Image: The FNIRSI NVS40 connected to a laptop via a Type-C USB cable, demonstrating convenient data transfer of videos and photos to a computer.
8. Maintenance
- Cleaning: Use a soft, dry cloth to clean the device's body. For lenses, use a specialized lens cleaning cloth and solution. Do not use abrasive cleaners.
- Storage: When not in use for extended periods, store the device in its portable bag in a cool, dry environment. Ensure the battery is partially charged (around 50%) before long-term storage.
- Battery Care: Avoid fully discharging the battery frequently. Recharge regularly to maintain battery health.
9. Troubleshooting
| Problem | Possible Cause | Solution |
|---|---|---|
| Device does not power on. | Low battery; device malfunction. | Charge the battery. If problem persists, contact support. |
| Image is blurry. | Incorrect focus; dirty lens. | Adjust the objective focus knob. Clean the lens. |
| Poor night vision performance. | IR illuminator level too low; too far from subject. | Increase IR intensity. Ensure subject is within effective range (up to 300m). |
| Cannot record photos/videos. | No MicroSD card; MicroSD card full or corrupted. | Insert MicroSD card. Delete old files or format the card (backup data first). |
| Device freezes or becomes unresponsive. | Software glitch. | Press the Reset button (if available) or hold the Power button to force a restart. |
10. Specifications
- Model: NVS40
- Video Resolution: 4K
- Photo Resolution: 36 Megapixels
- Objective Lens Diameter: 25 mm
- Digital Zoom: Up to 6x
- Infrared Illuminator: 850nm, 7 adjustable levels
- Viewing Range (Night): Up to 300 meters (984 feet) in pitch black
- Screen: 3.0-inch IPS HD Display
- Storage: Supports MicroSD card (32GB included)
- Battery: Rechargeable (approx. 8 hours operating time)
- Connectivity: USB Type-C
- Weight: Approximately 1.37 pounds
- Dimensions: 7.6 x 6.57 x 3.31 inches (Package Dimensions)
11. Warranty and Support
FNIRSI products are designed for reliability and performance. For warranty information, technical support, or service inquiries, please refer to the warranty card included with your product or visit the official FNIRSI website. Keep your purchase receipt as proof of purchase for warranty claims.
For further assistance, you may contact FNIRSI customer service through their official channels.