
VIKIO HOME VK-RB12-30
VIKIO HOME Range Hood Insert User Manual
Model: VK-RB12-30 | Brand: VIKIO HOME
1. Introduction
Thank you for choosing the VIKIO HOME 30-inch Range Hood Insert. This manual provides essential information for the safe and efficient installation, operation, and maintenance of your new kitchen appliance. Please read this manual thoroughly before installation and use, and keep it for future reference.

Figure 1.1: VIKIO HOME 30-inch Range Hood Insert, showcasing its sleek stainless steel design and integrated lighting.
2. Important Safety Information
To reduce the risk of fire, electric shock, or injury, observe the following:
- Read all instructions before operating this appliance.
- Installation work and electrical wiring must be done by qualified person(s) in accordance with all applicable codes and standards, including fire-rated construction.
- Sufficient air is needed for proper combustion and exhausting of gases through the flue (chimney) of fuel burning equipment to prevent back-drafting.
- When cutting or drilling into wall or ceiling, do not damage electrical wiring and other hidden utilities.
- Ducted fans must always be vented to the outdoors.
- Do not use this unit with any solid-state speed control device.
- This unit must be grounded.
- Clean grease filters frequently. Grease should not be allowed to accumulate on fan or filter.
- Never leave surface units unattended at high settings. Boilovers cause smoking and greasy spillovers that may ignite.
- Always turn hood ON when cooking at high heat or when flaming foods.
- Use appropriate pan size. Always use cookware appropriate for the size of the surface element.
3. What's in the Box
Verify that all components are present before beginning installation:
- VIKIO HOME Range Hood Insert Unit
- 2 x Stainless Steel Baffle Filters
- Ducting Adapter (if applicable for ducted setup)
- Mounting Hardware (screws, anchors)
- User Manual
- Power Cord
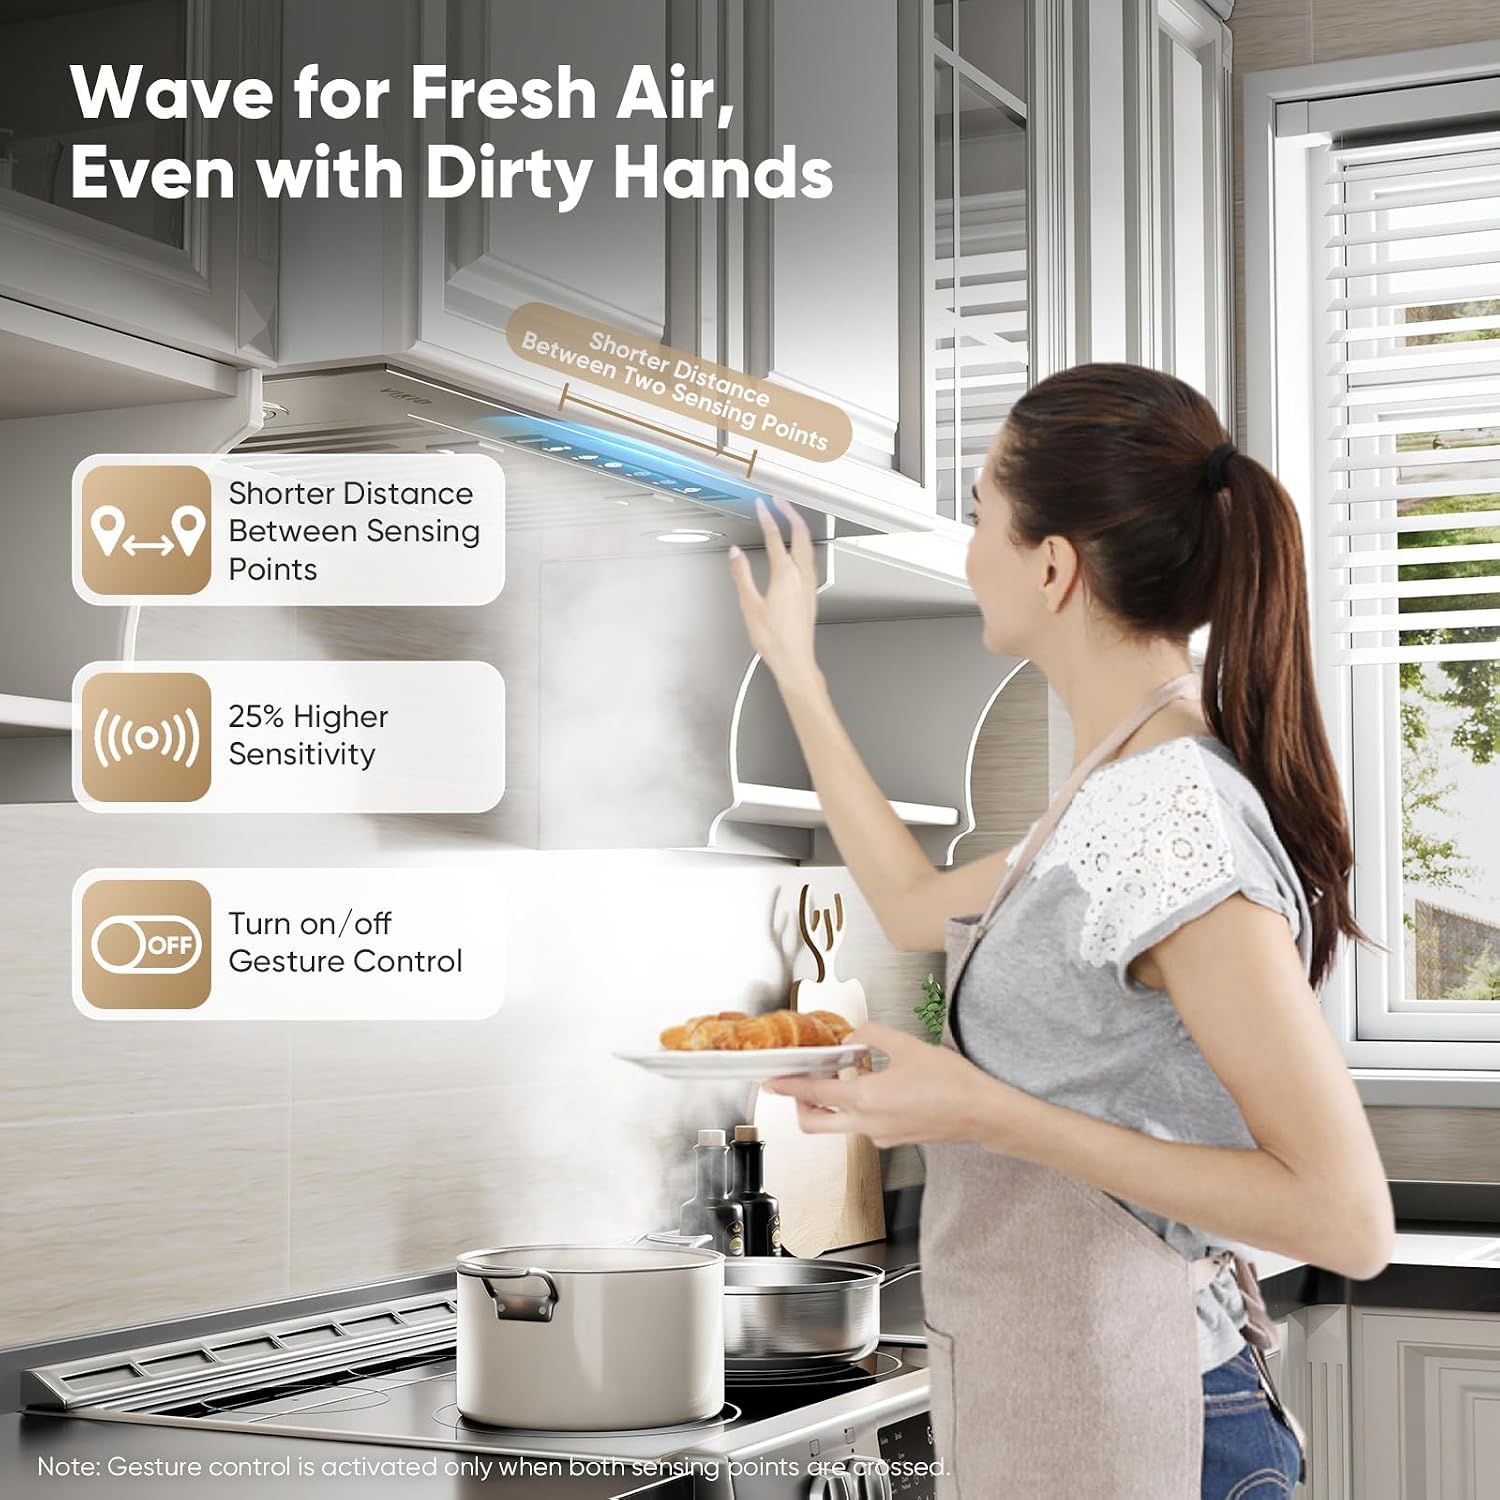
Figure 3.1: Example of the power plug included with the range hood unit.
4. Setup and Installation
This range hood insert is designed for built-in installation within a cabinet. Ensure you have the necessary tools and that the installation area meets the required dimensions (refer to Section 7: Specifications).
4.1 Pre-Installation Checks
- Confirm cabinet opening dimensions are suitable for a 30-inch insert.
- Ensure electrical supply is available and meets product requirements (110 Volts).
- Decide between ducted or ductless (recirculating) ventilation. For ductless operation, charcoal filters (not included) are required.
4.2 Installation Steps
- Prepare the cabinet opening according to the provided dimensions.
- Carefully lift the range hood insert into the prepared opening.
- Secure the unit using the provided mounting hardware. Ensure it is level and firmly attached to the cabinet structure.
- For ducted installation, connect the ducting to the top exhaust outlet and vent to the outside. For ductless, install charcoal filters (sold separately) and ensure the top vent is clear for air recirculation.
- Connect the power cord to a grounded electrical outlet.

Figure 4.1: The range hood insert seamlessly integrated into kitchen cabinetry, demonstrating a typical installation scenario.
4.3 Installation Demonstration Video
Video 4.1: An official demonstration video from VIKIO HOME showing the step-by-step process for installing the range hood insert. This video covers the built-in installation procedure, including placement and securing the unit.
5. Operating Instructions
Your VIKIO HOME Range Hood Insert features both gesture and touch controls for convenient operation.
5.1 Control Panel Overview
The control panel is located on the front of the unit and includes icons for power, light, fan speed, and gesture control activation.
5.2 Gesture Control
The advanced gesture control allows for hands-free operation. Simply wave your hand in front of the sensor to turn the unit on/off or adjust fan speeds. The sensor detection is highly accurate to prevent accidental triggers.

Figure 5.1: Illustration of the gesture control feature, allowing users to operate the range hood with a simple hand wave, ideal for maintaining hygiene during cooking.
5.3 Fan Speed Adjustment
The range hood offers 3 fan speed levels to accommodate various cooking needs. Use the touch controls or gesture control to cycle through low, medium, and high speeds. The powerful 980 CFM dual-intake motor ensures efficient smoke and odor removal.

Figure 5.2: Visual representation of the range hood's powerful suction, effectively clearing smoke and steam from the cooking area.
5.4 Lighting
The integrated LED lights provide bright illumination for your cooking surface. Activate or deactivate the lights using the dedicated touch button on the control panel.

Figure 5.3: The range hood's LED lights illuminating the stovetop, ensuring clear visibility while cooking.
6. Maintenance
Regular maintenance ensures optimal performance and longevity of your range hood.
6.1 Cleaning the Baffle Filters
The stainless steel baffle filters are dishwasher-safe and designed for easy removal and cleaning. It is recommended to clean them regularly, depending on cooking frequency, to maintain effective grease capture.
- Turn off the range hood and disconnect power.
- Locate the filter release latches and carefully remove the filters.
- Place filters in a dishwasher or wash by hand with warm, soapy water.
- Allow filters to dry completely before re-installing.

Figure 6.1: The removable, dishwasher-safe stainless steel filters, designed for easy cleaning and maintenance.
6.2 Cleaning the Exterior Surface
Wipe the exterior stainless steel surface with a soft cloth and a non-abrasive cleaner designed for stainless steel. Avoid harsh chemicals or abrasive pads that could scratch the finish.
7. Troubleshooting
If you encounter issues with your range hood, refer to the following common problems and solutions:
| Problem | Possible Cause | Solution |
|---|---|---|
| Hood does not operate | No power supply; Circuit breaker tripped; Power cord not plugged in. | Check power connection; Reset circuit breaker; Ensure plug is fully inserted. |
| Low suction power | Grease filters are dirty; Ducting is obstructed or too long; Incorrect fan speed. | Clean filters; Check ducting for obstructions; Select a higher fan speed. |
| Excessive noise | Loose parts; Obstruction in fan; Improper installation. | Check for loose screws or components; Remove any obstructions; Verify proper installation. |
| Lights not working | Light bulb faulty; Electrical connection issue. | Replace LED bulb (GU10 LED); Check wiring connections. |
| Gesture control unresponsive | Sensor obstructed or dirty; Incorrect gesture. | Clean sensor area; Ensure proper hand motion as described in manual. |
8. Product Specifications
| Feature | Specification |
|---|---|
| Model Number | VK-RB12-30 |
| Air Flow Capacity | 980 Cubic Feet Per Minute (CFM) |
| Material | Stainless Steel |
| Noise Level | 35 dBA (low speed) to under 65 dBA (high speed) |
| Mounting Type | Insert Mount |
| Controls Type | Gesture & Touch |
| Voltage | 110 Volts |
| Number of Speeds | 3 |
| Item Weight | 25.4 Pounds |
| Light Source Type | LED (GU10) |
| Filter Type | Baffle (Dishwasher-Safe Stainless Steel) |
| Ventilation Type | Ducted/Ductless Convertible |
| Product Dimensions (D x W x H) | 11.75" x 27.7" x 13.63" |
9. Warranty and Customer Support
VIKIO HOME is committed to providing high-quality products and excellent customer service. Your range hood insert comes with a hassle-free purchase guarantee, including free replacements for accessories like filters and lights whenever needed.
For any questions, concerns, or technical assistance, please do not hesitate to contact our professional and friendly customer service team. Refer to your purchase documentation for specific contact details or visit the official VIKIO HOME website.
Related documentsVK-RB12-30


Ask a question about this manual
Ask about setup, troubleshooting, compatibility, parts, safety, or missing instructions. Manuals+ will review the question and use this page’s manual context to help answer it.