
1. Introduction
The Poafamx 7.5L Oil Extractor Pump (Model POA-18) is a versatile tool designed for efficient fluid extraction from various vehicles and machinery. It features both pneumatic and manual operating modes, offering flexibility for different user needs and environments. This pump is ideal for changing engine oil, gear oil, power steering fluid, brake fluid, and other non-corrosive mechanical liquids in cars, boats, trucks, yachts, lawnmowers, and tractors.
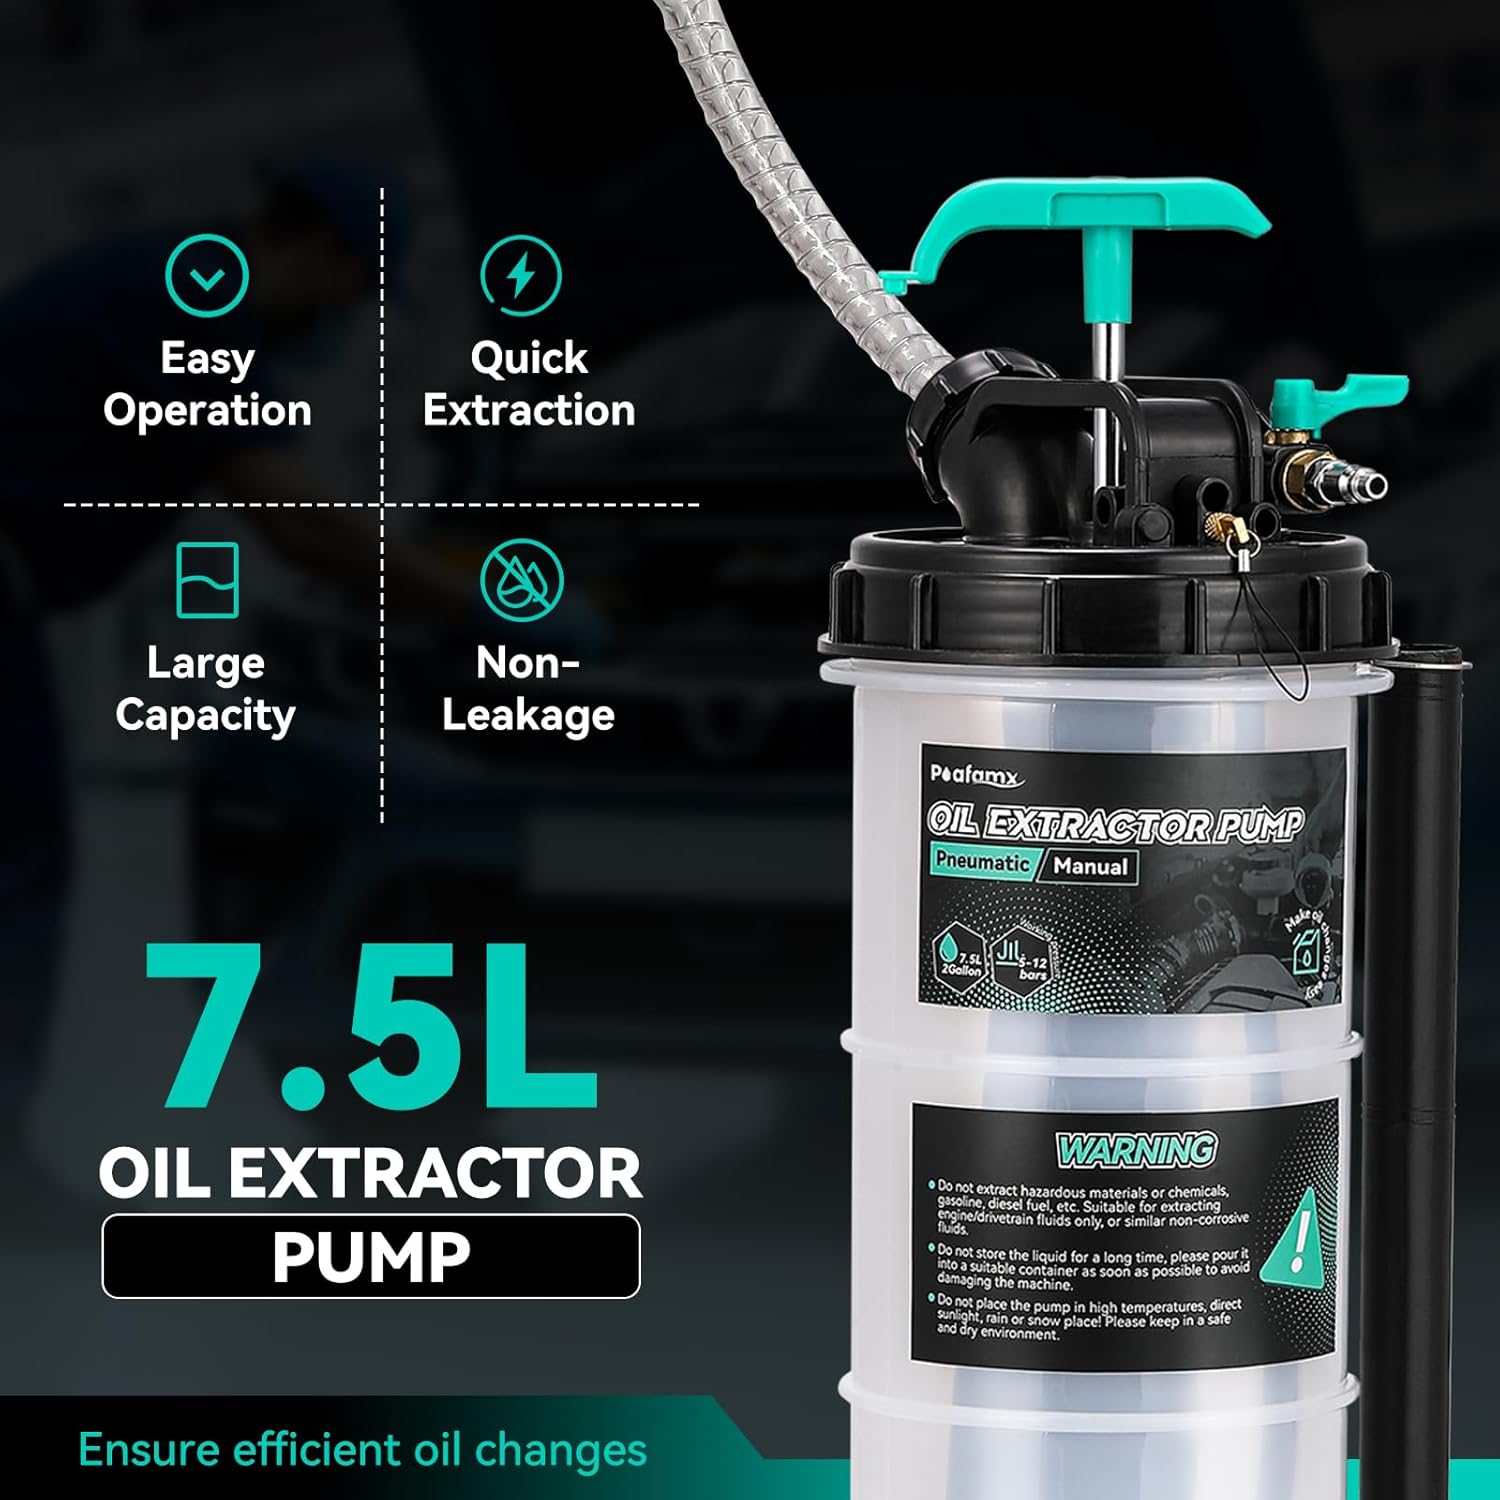
Figure 1.1: Poafamx 7.5L Oil Extractor Pump with key features.
Key features include a 7.5-liter (2-gallon) capacity, a comprehensive kit with multiple extension tubes for reaching fluid reservoirs, and an organized hose storage design to prevent tangles and extend hose life. The dual-mode functionality allows for quick, efficient extraction when connected to an air compressor (pneumatic mode) or convenient operation without external power (manual mode).

Figure 1.2: Versatile compatibility of the Poafamx Oil Extractor Pump.
2. Safety Information
Read and understand all safety warnings and instructions before operating the Poafamx Oil Extractor Pump. Failure to follow these instructions may result in property damage or injury.
- WARNING: Do not extract flammable liquids such as gasoline, diesel fuel, or other volatile chemicals. This pump is suitable only for extracting engine/drivetrain fluids or similar non-corrosive liquids.
- Do not store extracted liquids in the pump for extended periods. Always transfer waste fluids to a suitable, clearly labeled container for recycling as soon as possible after extraction.
- Avoid placing the pump in high temperatures, direct sunlight, rain, or snow. Store the pump in a safe, dry, and clean environment when not in use.
- Ensure all connections are secure before operation to prevent leaks.
- Wear appropriate personal protective equipment, such as gloves and eye protection, when handling fluids.
- Keep out of reach of children and pets.
3. Product Components
The Poafamx 7.5L Oil Extractor Pump comes with the following components:

Figure 3.1: Included components in the package.
- 7.5L Oil Extractor Pump Unit: The main reservoir and pump assembly.
- Main Tube (A): Diameter 16mm (0.63"), Length 1.5m (59").
- Extension Tube 1 (B): Diameter 10mm (0.39"), Length 0.5m (19.69").
- Extension Tube 2 (C): Diameter 8mm (0.31"), Length 1m (39.37").
- Extension Tube 3 (D): Diameter 6mm (0.24"), Length 1m (39.37").
- Extension Tube with Wire Dipstick (E): Diameter 4mm (0.16"), Length 1m (39.37").
- Brake Bleeder Hose (F): Diameter 8mm (0.31"), Length 1.2m (47.24").
- Seal Rings (H): Spare O-rings for maintenance.
- Extended Tube Storage (I): Integrated storage for hoses.

Figure 3.2: Detailed view of various extension tubes.
The pump also features an integrated storage design for hoses, including an extra storage hole in the lid for shorter tubes and an extended hose storage design to keep hoses organized and prevent bending.

Figure 3.3: Tube storage features.
4. Setup
Follow these steps to prepare your oil extractor pump for use:
- Assemble Main Tube: Connect the main tube (A) to the pump's inlet port. Ensure it is securely fastened to prevent air leaks.
- Select Extension Tube: Choose an appropriate extension tube (B, C, D, or E) that fits your vehicle's dipstick tube and can reach the bottom of the fluid reservoir. Connect the selected extension tube to the main tube.
- Prepare Vehicle: Ensure the vehicle's engine is warm (but not hot) to allow for easier fluid extraction. Turn off the engine and allow it to cool for a few minutes.
- Locate Dipstick: Remove the engine oil dipstick or the fluid reservoir cap from your vehicle.
- Insert Suction Tube: Carefully insert the assembled suction tube (main tube + extension tube) deep into the dipstick tube until it reaches the bottom of the oil pan or fluid reservoir. Ensure the tube is not obstructed.

Figure 4.1: Easy installation and operation steps.
5. Operating Instructions
The Poafamx Oil Extractor Pump offers two operating modes: Manual and Pneumatic.

Figure 5.1: Manual and Pneumatic dual operating modes.
5.1 Manual Mode Operation
- Ensure the air control valve (if present) is in the 'OFF' position or disconnected from an air source.
- With the suction tube inserted into the fluid reservoir, grasp the sturdy pump handle.
- Pump the handle up and down vigorously several times (typically 15-25 pumps) to create a vacuum inside the extractor.
- Once a vacuum is established, the fluid will begin to flow into the reservoir. Continue to pump as needed to maintain suction until all desired fluid is extracted.
- Monitor the clear capacity scale on the pump to avoid overfilling.
5.2 Pneumatic Mode Operation
This mode requires an air compressor.
- With the suction tube inserted into the fluid reservoir, connect your air compressor hose to the air inlet on the extractor.
- Set your air compressor to deliver pressure between 5 and 12 bars (73 to 174 psi).
- Turn the air control valve on the pump to the 'ON' position. The vacuum will automatically begin to extract the fluid.
- Monitor the fluid level through the clear capacity scale.
- Once extraction is complete, turn the air control valve to the 'OFF' position and disconnect the air compressor.
- If the pump becomes overloaded or you need to stop suction, remove the pressure relief valve to release pressure.

Figure 5.2: Key operational components: pump handle, air control valve, and pressure relief valve.
5.3 Post-Extraction
After extracting the fluid:
- Carefully remove the suction tube from the vehicle's dipstick tube.
- Pour the extracted waste fluid into a suitable, clearly marked container for proper recycling. Do not store waste fluids in the extractor pump.
- Replace the vehicle's dipstick or fluid reservoir cap.
6. Maintenance
Proper maintenance ensures the longevity and optimal performance of your Poafamx Oil Extractor Pump.
- Cleaning: After each use, clean the tubes and the pump reservoir. Flush with a small amount of clean, non-corrosive liquid if necessary, then ensure all components are dry before storage.
- Storage: Store the pump in a clean, dry, and safe environment, away from direct sunlight, extreme temperatures, and moisture. Utilize the integrated hose storage features to keep tubes neat and prevent damage.
- Seal Inspection: Regularly inspect all seals and O-rings for wear or damage. Replace worn seals with the provided spare seal rings (H) to maintain proper vacuum and prevent leaks.
- Capacity Scale: The clear capacity scale allows you to monitor the internal capacity and clean up waste oil in a timely manner, preventing overflow.
- Stable Base: Ensure the pump is placed on a stable, flat surface during operation and storage to prevent tipping.

Figure 6.1: Clear capacity scale and stable base for easy monitoring and secure placement.
7. Troubleshooting
If you encounter issues with your Poafamx Oil Extractor Pump, refer to the following common problems and solutions:
| Problem | Possible Cause | Solution |
|---|---|---|
| No suction or very weak suction |
|
|
| Fluid leaks from pump |
|
|
| Slow fluid extraction |
|
|
| Pump does not hold vacuum |
|
|
8. Specifications
| Feature | Specification |
|---|---|
| Model Number | POA-18 |
| Capacity | 7.5 Liters (2 Gallons) |
| Operating Modes | Pneumatic / Manual |
| Pneumatic Pressure Range | 5-12 bars (73-174 psi) |
| Main Tube Length | 1.5m (59") |
| Total Extension Tube Length | Up to 98.4" (2.5m) |
| Item Weight | 3.65 kg (8.05 lbs) |
| Parcel Dimensions | 60.32 x 22.86 x 22.22 cm (23.75 x 9 x 8.75 inches) |
| Compatibility | Automotive, Truck, Boats, Yachts, Lawnmowers, Tractors (for non-corrosive fluids) |
9. Warranty and Support
Specific warranty information for the Poafamx 7.5L Oil Extractor Pump (Model POA-18) is not provided within this manual. For warranty details, technical support, or replacement parts, please contact Poafamx customer service directly through their official website or the retailer from whom the product was purchased. Please have your model number (POA-18) and purchase date available when contacting support.