Introduction
This manual provides detailed instructions for the setup, operation, maintenance, and troubleshooting of your ciciglow WL Electronic Eyepiece Telescope Camera. This device is designed to capture 16MP photos and HD videos through compatible optical instruments, enhancing your viewing and recording experience.
Safety Information
- Do not expose the device to extreme temperatures, moisture, or direct sunlight for extended periods.
- Avoid dropping or subjecting the device to strong impacts.
- Keep the device away from strong magnetic fields.
- Do not attempt to disassemble or modify the device. This will void the warranty.
- Use only the provided USB cable for charging.
- Ensure the device is securely attached to your telescope or other optical instrument to prevent accidental falls.
Package Contents
Verify that all items are present in your package:
- 1 x WL Electronic Eyepiece Telescope Camera
- 1 x USB Type-C Charging Cable
- 1 x Instruction Manual (this document)
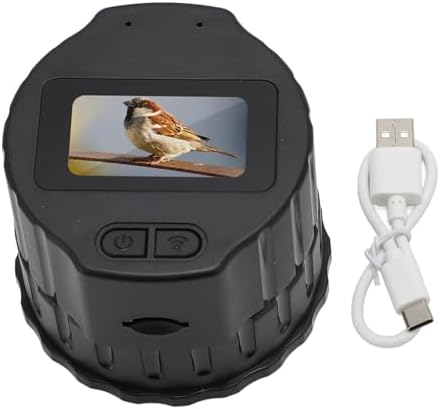
Image: The electronic eyepiece camera shown next to its USB Type-C charging cable, representing the typical package contents.
Product Overview
The ciciglow WL Electronic Eyepiece is a compact digital camera designed to attach to various optical instruments. It features a 1.5-inch screen for direct viewing and can connect to smartphones via Wi-Fi for remote control, live viewing, and sharing.
Key Features:
- High-Resolution Capture: Records 16MP photos and HD videos.
- Wide Compatibility: Fits 28mm to 50mm monocular, binoculars, microscopes, and astronomical telescopes.
- Wireless Connectivity: Built-in Wi-Fi for smartphone connection via the Viidure app.
- Dual Device Viewing: Supports simultaneous viewing on up to two mobile phones.
- Portable Design: Lightweight and compact for easy transport.
- Long Battery Life: Integrated 1000mAh battery provides up to 150 minutes of continuous use.
- Expandable Storage: Supports memory cards up to 256GB (not included).

Image: A visual representation of the electronic eyepiece camera in use, connected to a telescope, with the live feed displayed on two mobile phones simultaneously. This highlights its photo and video recording capabilities.
Setup
1. Charging the Device
Before first use, fully charge the electronic eyepiece camera. Connect the provided USB Type-C cable to the camera's power port and the other end to a standard USB power adapter (not included) or a computer USB port.
- Charging time: Approximately 1 hour.
- The device can be used while charging with an external power source like a power bank for extended operation.

Image: The electronic eyepiece camera with its USB Type-C port highlighted, indicating where to connect the charging cable. A battery icon suggests charging status.
2. Inserting a Memory Card
The device supports a memory card (MicroSD, not included) up to 256GB for storing photos and videos. Locate the memory card slot and gently insert the card until it clicks into place.
3. Attaching to an Optical Instrument
The electronic eyepiece is compatible with optical instruments (monoculars, binoculars, microscopes, astronomical telescopes) that have an eyepiece diameter between 28mm and 50mm.
- Ensure your optical instrument's eyepiece falls within the 28mm to 50mm range.
- Gently rotate the electronic eyepiece onto the optical instrument's eyepiece until it is securely fitted. Do not overtighten.
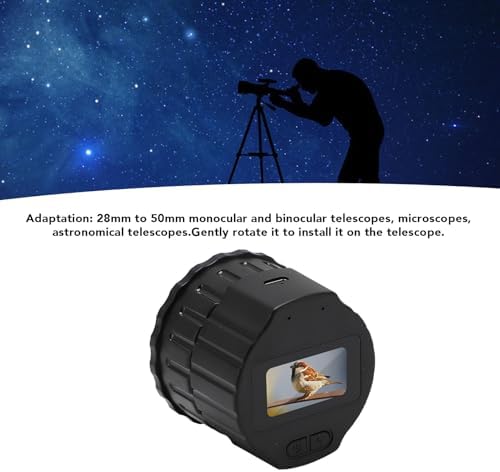
Image: The electronic eyepiece camera positioned to be attached to a telescope, illustrating the installation process and compatibility range.
4. App Installation and Wi-Fi Connection
To utilize advanced features and remote control, download the 'Viidure' application on your smartphone.
- Scan the QR code provided in the original product packaging or search for 'Viidure' in your smartphone's application store (e.g., Google Play Store, Apple App Store).
- Install the application.
- On the electronic eyepiece camera, power on the device and enable its Wi-Fi function.
- On your smartphone, enable Wi-Fi and connect to the camera's Wi-Fi network (SSID will typically start with 'Viidure' or similar).
- Open the Viidure app. Ensure your phone has internet permissions enabled for the app to function correctly.
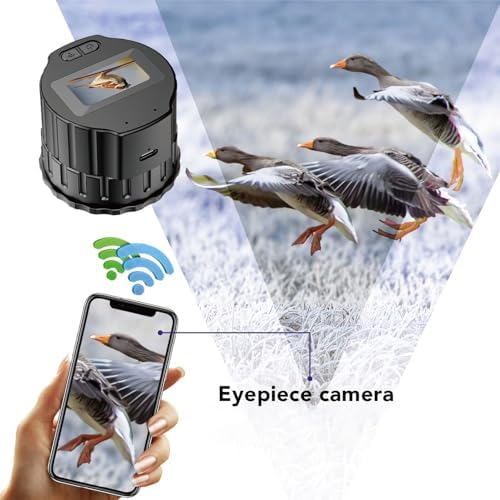
Image: The electronic eyepiece camera transmitting a live image to a smartphone via Wi-Fi, demonstrating the app connectivity.
Operating Instructions
Power On/Off
Press and hold the power button on the device to turn it on or off. The 1.5-inch screen will activate upon power-on.
Capturing Photos and Videos
Once connected to your smartphone via the Viidure app:
- Open the Viidure app to view the live feed from the camera.
- Use the controls within the app to capture photos or start/stop video recording.
- Captured media will be saved to the inserted memory card and can be accessed through the app.

Image: The 1.5-inch screen of the electronic eyepiece camera showing a clear image, indicating its direct viewing capability.
Simultaneous Viewing
The Viidure app allows up to two smartphones to connect and view the live feed from the electronic eyepiece simultaneously. Follow the Wi-Fi connection steps on both devices.

Image: A person observing the night sky through a telescope equipped with the electronic eyepiece, demonstrating its use for astronomical photography.
Maintenance
- Cleaning: Use a soft, dry cloth to clean the exterior of the device. For the lens and screen, use a specialized lens cleaning cloth and solution if necessary. Avoid abrasive materials.
- Storage: When not in use, store the device in a cool, dry place, away from dust and direct sunlight.
- Battery Care: To prolong battery life, avoid fully discharging the battery frequently. If storing for an extended period, charge the battery to about 50% every few months.
Troubleshooting
Device Not Powering On
- Ensure the battery is charged. Connect the device to a power source using the USB-C cable.
- Press and hold the power button for a few seconds.
Cannot Connect to Wi-Fi / App
- Verify that the camera's Wi-Fi is enabled.
- Ensure your smartphone's Wi-Fi is on and connected to the camera's network.
- Check if the 'Viidure' app has necessary permissions (e.g., internet access) on your phone.
- Restart both the camera and your smartphone, then try connecting again.
Poor Image Quality
- Ensure the optical instrument (telescope, etc.) is properly focused.
- Check if the camera lens or the optical instrument's eyepiece is clean.
- Verify that the camera is securely attached and aligned with the optical instrument's eyepiece.
Device Does Not Fit My Optical Instrument
- Confirm that your optical instrument's eyepiece diameter is between 28mm and 50mm. This device is not compatible with eyepieces outside this range.
Specifications
| Item Type | WL Electronic Eyepiece |
| Material | ABS |
| Color | Black |
| Battery | Built-in Li Battery 1000mAh |
| Sensor | CMOS |
| Pixels | 16MP |
| Screen | 1.5 inch |
| Lens Horizontal Angle | 5° |
| Memory Card Slot | Maximum 256GB (memory card not included) |
| Power Port | USB Type-C |
| Usage Time | 150 Minutes |
| Charging Time | Approximately 1 hour |
| Weight | 4.9 ounces (approx. 139g) |
| Dimensions | 3.94 x 3.94 x 2.76 inches (approx. 10 x 10 x 7 cm) |
| Compatibility | 28mm to 50mm Monocular, Binoculars, Microscopes, Astronomical Telescopes |
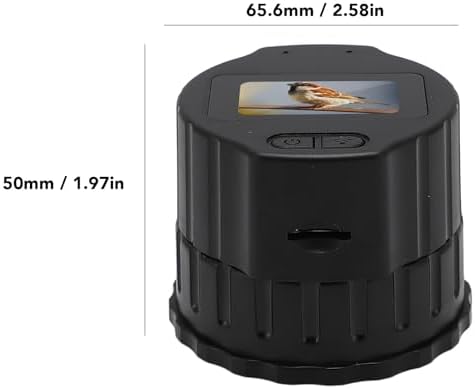
Image: A diagram illustrating the physical dimensions of the electronic eyepiece camera.
Warranty Information
This product comes with a standard manufacturer's warranty. Please refer to the warranty card included in your original packaging for specific terms and conditions, including warranty period and coverage details. Keep your proof of purchase for warranty claims.
Customer Support
For technical assistance, troubleshooting not covered in this manual, or warranty inquiries, please contact ciciglow customer support through the retailer's platform where you purchased the product or visit the official ciciglow website for contact information.