1. Product Overview
The LMFLXOFD 1200W SDS Brushless Rotary Hammer Drill is a versatile power tool designed for heavy-duty tasks such as concrete drilling, wall grooving, and tile removal. It features a powerful brushless motor, a safety clutch, and two distinct operating modes for various applications.

Image: The LMFLXOFD Rotary Hammer Drill shown with its main body, auxiliary handle, and various included accessories such as gloves, grease, and carbon brushes.
Key Features:
- 1200W High-Power Brushless Motor: Provides up to 2 joules of impact energy, 880r/min speed, and 3900bpm/min impact frequency.
- Two Operating Modes: Electric Hammer for concrete drilling and Electric Pick for cement wall tile removal.
- Humanized Design: Features a three-dimensional heat dissipation system, dust-proof design, 360° rotating sub-handle, and anti-leakage oil cover.
- Robust Drilling Capacity: Maximum drill diameter of 32mm for concrete, 13mm for steel, and 13mm for wood.
- Fine Steel Chuck: Ensures secure and easy bit changes.

Image: A detailed diagram labeling the main components of the rotary hammer drill, including the anti-slip handle, lubricating oil injection port, aluminum body housing, electric hammer/pick selector, power switch, drill chuck, 360° auxiliary handle, copper core motor (inside), and ventilation/heat dissipation port.
2. Safety Instructions
Always observe basic safety precautions to reduce the risk of fire, electric shock, and personal injury when operating this power tool.
- Work Area Safety: Keep the work area clean and well-lit. Do not operate power tools in explosive atmospheres, such as in the presence of flammable liquids, gases, or dust.
- Electrical Safety: Power tool plugs must match the outlet. Never modify the plug in any way. Avoid body contact with earthed or grounded surfaces. Do not expose power tools to rain or wet conditions.
- Personal Safety: Always wear eye protection, hearing protection, and appropriate work gloves. Dress properly; avoid loose clothing or jewelry. Secure long hair.
- Tool Use and Care: Do not force the power tool. Use the correct power tool for your application. Disconnect the plug from the power source before making any adjustments, changing accessories, or storing power tools.
- Kickback and Binding: Be aware of potential kickback. Always hold the tool firmly with both hands. If the drill bit binds, release the trigger immediately.
- Dust Management: Drilling operations can create dust. Use dust extraction facilities if available and wear a dust mask.
3. Package Contents
Upon opening the package, please verify that all the following items are included and in good condition:
- LMFLXOFD 1200W SDS Brushless Rotary Hammer Drill (Main Unit)
- Auxiliary Handle (360° Rotating)
- Gloves
- Lubricating Grease
- Carbon Brush (Spare)
- Protective Cover
- Plastic Storage Box
Note: Drill bits are not included with this specific model.
4. Setup
4.1 Attaching the Auxiliary Handle
- Loosen the auxiliary handle by rotating it counter-clockwise.
- Slide the handle onto the front of the drill body.
- Adjust the handle to a comfortable and secure position for optimal control.
- Tighten the handle by rotating it clockwise until it is firmly secured.

Image: The rotary hammer drill showing the fine steel chuck, the mode selection switch, and the 360° rotating secondary handle, illustrating how these components are adjusted and used.
4.2 Inserting SDS Bits
- Ensure the drill is unplugged from the power source.
- Clean the shank of the SDS bit.
- Pull back the chuck collar (as indicated by arrows in the image).
- Insert the SDS bit into the chuck until it clicks into place.
- Release the chuck collar. Pull on the bit to ensure it is securely locked. There will be a slight play, which is normal for SDS systems.
Image: A close-up view of the fine steel chuck, demonstrating the mechanism for inserting and securing SDS drill bits. Arrows indicate the direction to pull the collar for bit insertion.
5. Operating Instructions
This rotary hammer drill offers two primary operating modes: Electric Hammer and Electric Pick. Select the appropriate mode for your task using the mode selector switch.
Image: The mode selection switch on the top of the drill, showing the two settings: Electric Hammer and Electric Pick. This switch allows for quick adjustment between functions.
5.1 Electric Hammer Mode (Drilling and Hammering)
This mode is ideal for drilling into concrete, masonry, and other hard materials. It combines rotary action with a powerful hammering mechanism.
- Set the mode selector to the "Electric Hammer" icon (often depicted as a hammer and drill bit).
- Ensure the correct SDS drill bit for your material is securely inserted.
- Hold the drill firmly with both hands, maintaining a stable stance.
- Place the tip of the drill bit on the desired drilling point.
- Press the power switch to begin drilling. Apply steady, even pressure.

Image: The rotary hammer drill actively drilling into a wall, demonstrating its use in Electric Hammer mode for concrete or masonry applications.
5.2 Electric Pick Mode (Hammering Only)
This mode provides hammering action without rotation, making it suitable for tasks like chipping, chiseling, and removing tiles or plaster.
- Set the mode selector to the "Electric Pick" icon (often depicted as a chisel).
- Insert an SDS chisel or point bit securely into the chuck.
- Hold the drill firmly and position the chisel bit against the material to be removed.
- Press the power switch to activate the hammering action.

Image: The rotary hammer drill being used to break up concrete, illustrating its function in Electric Pick mode for demolition or chipping tasks.
5.3 Applicable Scenarios and Bit Types
The drill's versatility allows for various applications:
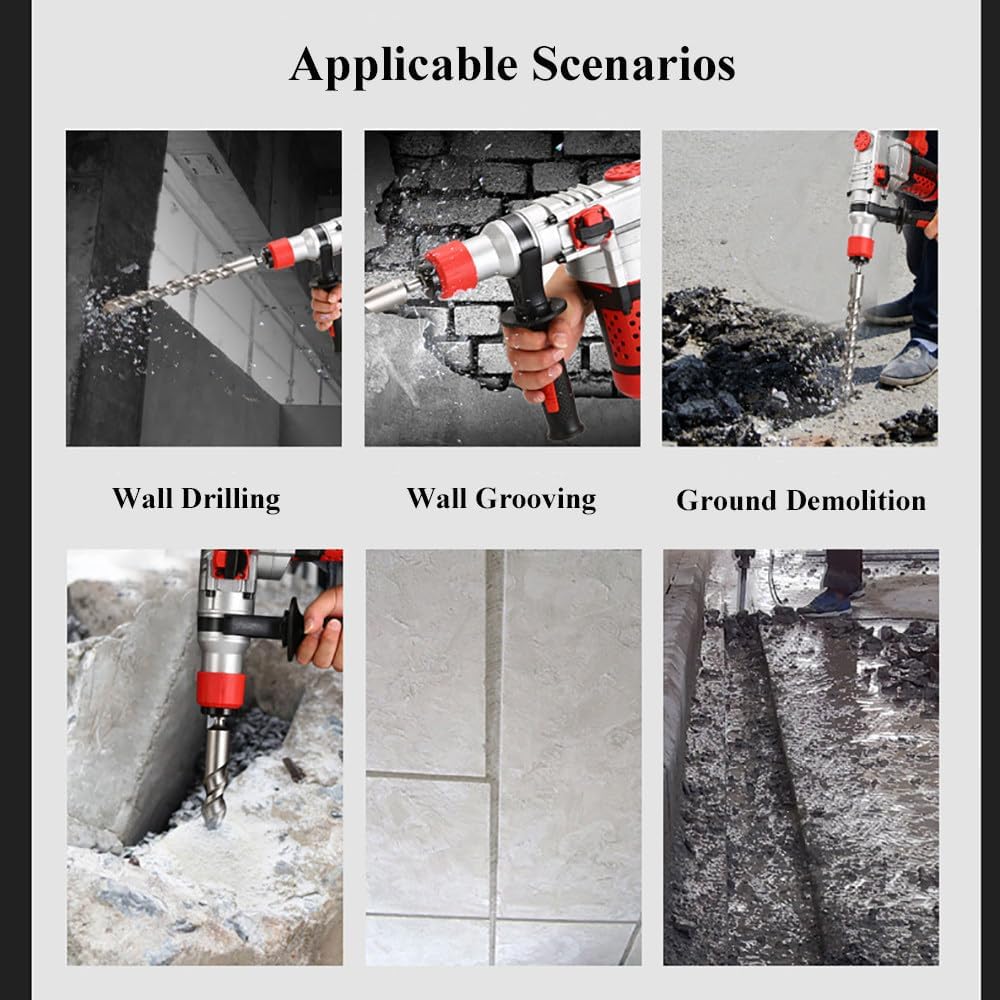
Image: A collage showing the rotary hammer drill being used in various scenarios: Wall Drilling, Wall Grooving, and Ground Demolition, highlighting its multi-functional capabilities.

Image: An illustration of different SDS bit types and their corresponding functions: Drill (for electric hammer function), Hammer (for electric drill function with adapter), Pick (for electric pick function - hammering only), and Trough (for chiseling/grooving).
6. Maintenance
Regular maintenance ensures the longevity and optimal performance of your rotary hammer drill.
- Cleaning: After each use, wipe down the tool with a clean, dry cloth. Use compressed air to clear dust from ventilation openings. Do not use harsh chemicals or abrasive cleaners.
- Lubrication: The drill requires periodic lubrication. Refer to the lubricating oil injection port (as shown in the product overview diagram) for adding grease. Use the provided lubricating grease or a suitable equivalent.
- Carbon Brushes: The drill comes with spare carbon brushes. If the motor performance degrades or sparks excessively, the carbon brushes may need replacement. Consult a qualified technician if unsure.
- Chuck Maintenance: Keep the SDS chuck clean and free of debris. Apply a small amount of grease to the SDS bit shank before insertion to reduce wear.
- Storage: Store the drill in its plastic storage box in a dry, secure location, away from direct sunlight and extreme temperatures.

Image: An internal view of the drill highlighting the high-precision copper core motor, precision cylinder, and the three-dimensional cooling system, emphasizing the importance of proper ventilation and heat dissipation for motor longevity.
7. Troubleshooting
If you encounter issues with your rotary hammer drill, refer to the following common problems and solutions:
| Problem | Possible Cause | Solution |
|---|---|---|
| Drill does not start. | No power supply; faulty power cord/plug; worn carbon brushes. | Check power outlet and connections. Inspect power cord for damage. Replace carbon brushes if worn. |
| Reduced hammering/drilling power. | Worn drill bit; insufficient lubrication; worn internal components. | Replace worn drill bit. Apply lubricating grease. If problem persists, seek professional service. |
| Overheating. | Blocked ventilation slots; continuous heavy use; motor overload. | Clear ventilation slots. Allow tool to cool down. Avoid excessive pressure during operation. |
| Bit not locking in chuck. | Debris in chuck; damaged chuck mechanism; incorrect bit type. | Clean chuck thoroughly. Ensure you are using SDS bits. If damaged, chuck may need replacement. |
If the problem persists after attempting these solutions, please contact customer support.
8. Specifications
| Specification | Value |
|---|---|
| Model | 30 Heavy-Duty Electric Hammer |
| Load Power | 1200W |
| No-Load Speed | 880 rpm |
| Number of Blows (Impact Frequency) | 3900 bpm/min |
| Maximum Single Impact Energy | 2 Joules |
| Chuck Type | SDS Square Handle |
| Modes | Electric Hammer, Electric Pick |
| Maximum Drilling Capacity (Concrete) | 32mm |
| Maximum Drilling Capacity (Steel) | 13mm |
| Maximum Drilling Capacity (Wood) | 13mm |
| Optimal Drilling Range | 26mm |
| Item Weight | 13.64 pounds |
| Package Dimensions | 17.72 x 13.78 x 5.91 inches |
9. Warranty and Support
9.1 Return Policy
This product is eligible for a return within 30 days of purchase, offering a refund or replacement. Please refer to the retailer's specific return policy for detailed terms and conditions.
9.2 Customer Support
For any questions, technical assistance, or warranty claims, please contact the seller directly. The seller for this product is YingXianDuanDuanBanGongYongPinDian. You can typically find their contact information through your purchase history on the platform where the product was acquired.
Our professional after-sales team is always at your service to assist with any inquiries you may have.


