1. Introduction
This manual provides comprehensive instructions for setting up, operating, and maintaining your GOLOZA 7'' Digital Dementia Clock. Designed with clarity and ease of use in mind, this clock offers multiple display modes, customizable reminders, and a talking clock feature to assist users, particularly seniors and those with memory challenges.
2. Package Contents
- 1 x GOLOZA 7'' Digital Dementia Clock
- 1 x Power Adapter
- 1 x 1.5-meter/59-inch USB Cable
- 1 x Remote Control
- 1 x Instruction Manual (this document)
3. Product Overview

Figure 3.1: GOLOZA 7'' Digital Dementia Clock and Remote Control
The image shows the GOLOZA 7-inch Digital Dementia Clock, which features a large, clear display showing the day of the week, time, AM/PM, full date, and a special event countdown. A remote control is also visible, used for easy navigation and setting adjustments.
Key Features:
- 7-inch LCD Display: Large, clear display for easy readability.
- Talking Clock Function: Announces the time with a button press or hourly chime.
- Multiple Display Modes: 6 distinct display views, including a flip clock design.
- 10 Color Modes: Customizable display colors for personal preference.
- Auto Dimmable: Automatic brightness adjustment based on ambient light.
- Unlimited Alarms: Set multiple alarms for daily routines.
- 3 Pill Reminders: Dedicated reminders for medication schedules.
- Birthday & Holiday Reminders: Countdown and alerts for special occasions.
- Remote Control: Convenient operation from a distance.
- Battery Backup: Retains settings during power outages.
4. Setup
4.1 Initial Power-Up
- Unpack all components from the box.
- Connect the USB cable to the clock's power input port.
- Plug the power adapter into a standard electrical outlet.
- The clock will power on automatically and display the current time and date.
4.2 Setting Time and Date
The clock typically sets the time and date automatically upon initial power-up. If adjustments are needed, use the remote control:
- Press the "Settings" button on the remote.
- Navigate to "Time" or "Date" using the arrow keys.
- Press "OK" to select and use arrow keys to adjust values.
- Press "OK" again to confirm.
4.3 Mounting Options

Figure 4.1: Mounting Options
This image illustrates the two primary ways to position the clock: using the integrated clock stand for tabletop placement or utilizing the two wall-mounting holes on the back for hanging on a wall.
- Tabletop: Use the built-in stand to place the clock on any flat surface.
- Wall-Mount: The clock features two keyhole slots on the back for secure wall mounting. Ensure appropriate hardware (screws, anchors) is used for your wall type.
5. Operating Instructions
5.1 Remote Control Functions
The remote control provides full functionality for adjusting settings and features. Point the remote directly at the clock for optimal response.
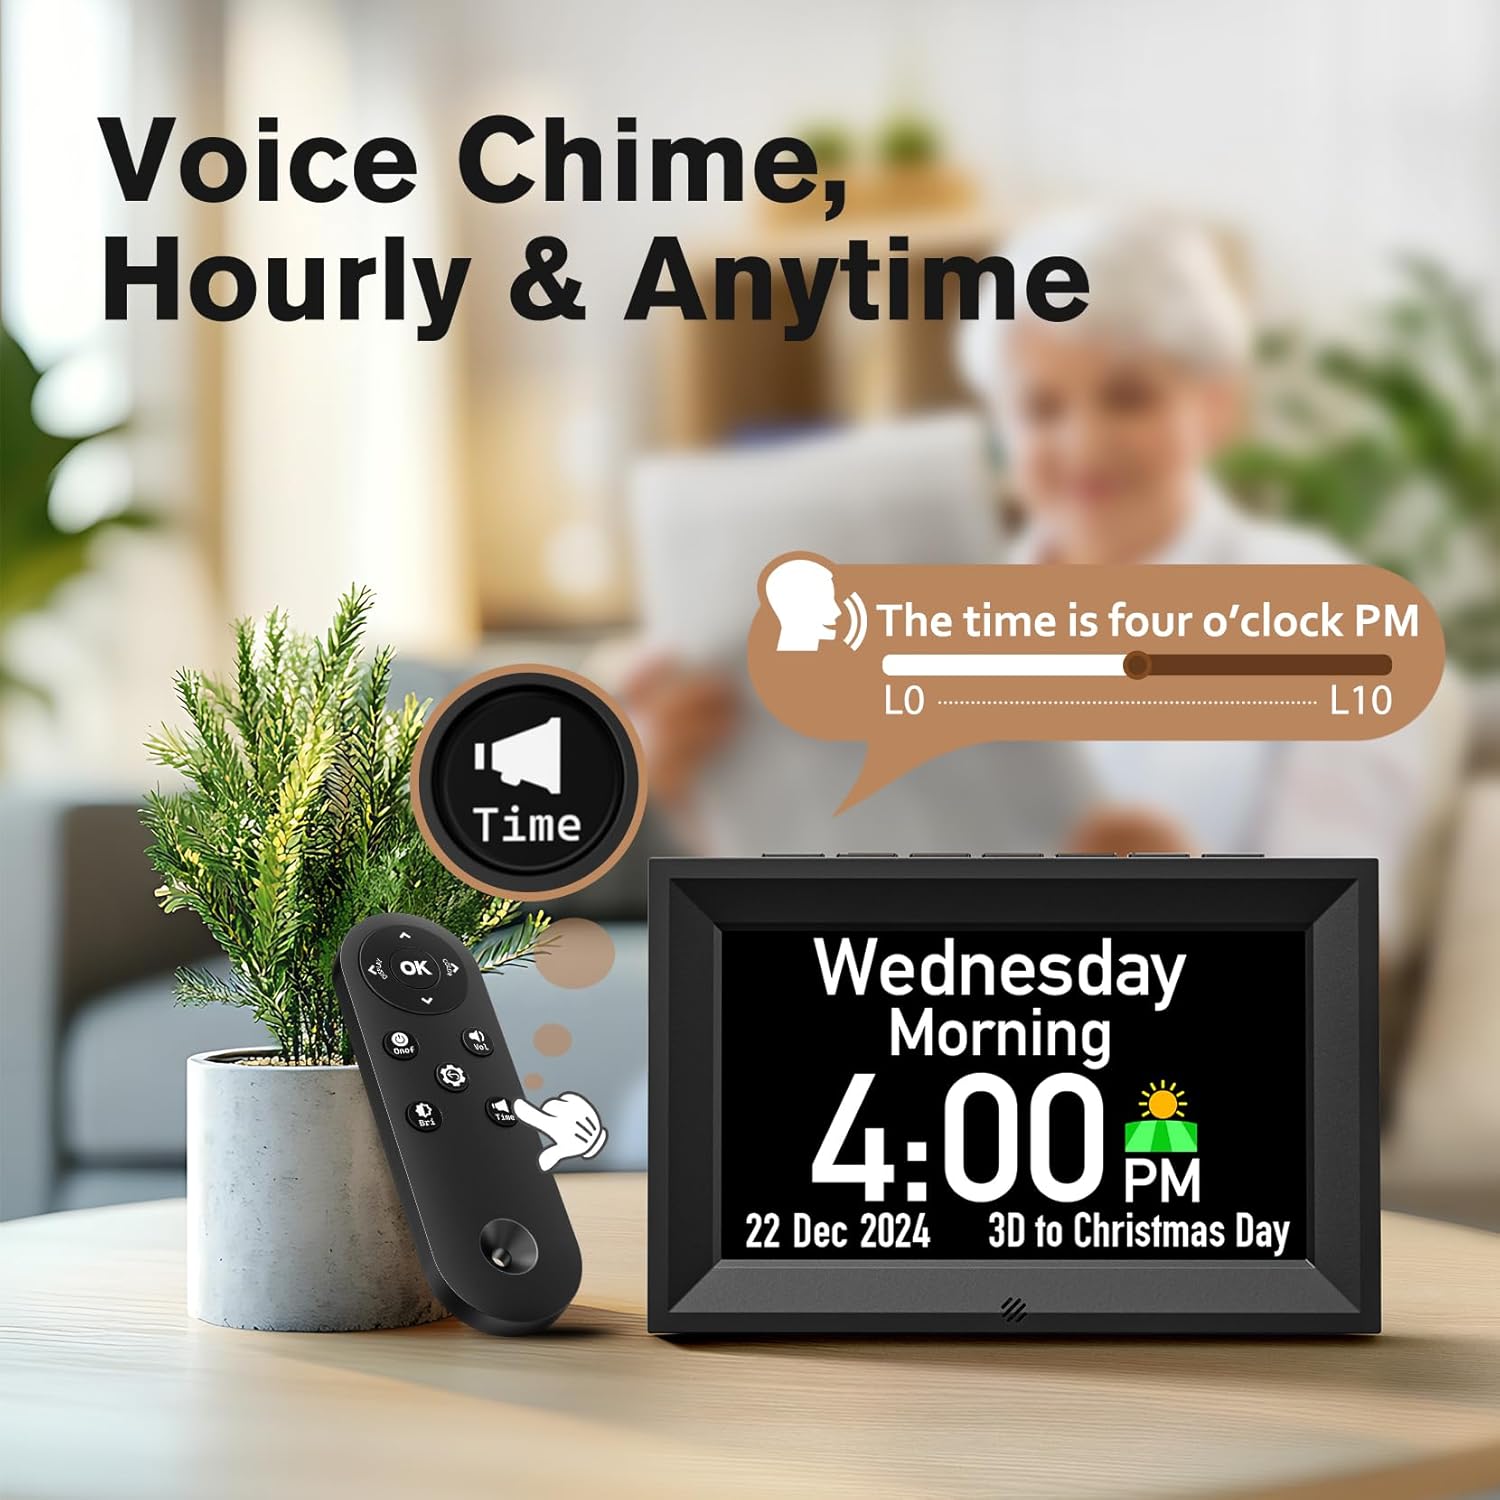
Figure 5.1: Voice Chime and Remote Control
This image highlights the clock's voice chime feature, showing a remote control being used to activate the "Time" button, which prompts the clock to audibly announce the current time. A volume slider from L0 to L10 is also depicted, indicating adjustable sound levels.
- OK Button: Confirms selections and enters menus.
- Arrow Keys: Navigate through menus and adjust values.
- Display Button: Cycles through different display modes.
- Settings Button (Gear Icon): Accesses the main settings menu.
- Time Button (Speaker Icon): Activates the talking clock feature to announce the current time.
5.2 Setting Alarms and Reminders
The clock supports unlimited alarms and specific reminders for medicine, birthdays, and holidays.
Video 5.1: Steps to set up the alarm
This video demonstrates the process of setting an alarm on the GOLOZA Digital Dementia Clock using the remote control. It shows navigating through the menu from "Reminder" to "Alarm," selecting the alarm time, frequency (e.g., weekday), and customizing the alarm tip (e.g., "Breakfast").

Figure 5.2: Reminder Examples
The image illustrates the clock's reminder capabilities, showing a birthday reminder with a cake graphic and a medicine reminder with pill icons, both featuring customizable text and time settings.
- Press the "Settings" button on the remote.
- Navigate to "Reminder" and press "OK".
- Select "Alarms", "Medicine", "Birthdays", or "Holiday Reminder".
- Press "OK" to add a new reminder or edit an existing one.
- Follow the on-screen prompts to set the time, frequency (e.g., Weekday, Weekend, Everyday, Specific Day), ringtone, and custom tips using the soft keyboard.
- Press the "Settings" button again to exit the menu.
5.3 Adjusting Display Modes and Colors

Figure 5.3: Display Views and Color Modes
This image showcases the clock's versatility with six distinct display views, including traditional and flip clock styles, and illustrates the availability of ten different color modes (five single colors, four dual-tone colors, and one multicolor option) to customize the screen appearance.
- Press the "Display" button on the remote to cycle through the 6 available display views.
- To change display colors, go to "Settings" and navigate to "Color Mode". Select your preferred color or dynamic mode.
5.4 Auto Dimmer and Brightness Adjustment

Figure 5.4: Auto Dimmer and Brightness
The image demonstrates the clock's auto-dimmer feature, which adjusts brightness automatically between day (Default 7:00 AM-7:00 PM) and night (Default 7:00 PM-7:00 AM) settings. It also highlights the 10-level brightness adjustment capability.
- The clock features an automatic dimmer that adjusts brightness based on the time of day (default 7:00 AM - 7:00 PM for day, 7:00 PM - 7:00 AM for night).
- You can manually adjust the brightness level (10 levels) via the "Settings" menu under "Brightness".
- The night mode timings can be personalized in the settings.
6. Maintenance
- Cleaning: Use a soft, dry cloth to clean the display and casing. Avoid abrasive cleaners or sprays directly on the screen.
- Power: Ensure the clock is connected to a stable power source. In case of power outage, the internal memory battery will preserve settings.
- Placement: Place the clock on a stable surface or securely mount it to a wall. Avoid direct sunlight or extreme temperatures.
7. Troubleshooting
| Problem | Possible Cause | Solution |
|---|---|---|
| Clock not turning on. | No power connection. | Check if the power adapter is securely plugged into the clock and the wall outlet. |
| Display is too dim or too bright. | Auto-dimmer active or manual brightness setting. | Adjust brightness levels in the "Settings" menu. Check night mode timings if applicable. |
| Alarms not sounding. | Alarm not set correctly or volume too low. | Verify alarm settings (time, frequency) and ensure volume is set to an audible level (L1-L10). |
| Remote control not working. | Line of sight blocked or battery low. | Ensure no obstructions between remote and clock. Replace remote battery if necessary. |
| Time/Date is incorrect. | Manual adjustment needed or DST setting. | Manually adjust time/date in "Settings". Check Daylight Saving Time (DST) setting. |
8. Specifications
- Model: GE904
- Display Type: LCD
- Screen Size: 7 inches
- Product Dimensions: 7.7"W x 5"H
- Power Source: Corded Electric
- Material: Acrylonitrile Butadiene Styrene (ABS)
- Watch Movement: Quartz
- Item Weight: 1.04 pounds
- UPC: 647697055304
9. Warranty and Support
GOLOZA provides a 24-month product warranty, 6 months free return, and lifetime support for this product.
For any questions or support, please contact GOLOZA customer service through your purchase platform. Typically, this can be done by navigating to your account, then "Orders", "Order Detail", and selecting "Ask a question" from the seller "GOLOZA".
Figure 9.1: GOLOZA Customer Support
This image provides contact information for GOLOZA support, emphasizing the 24-month warranty and outlining the steps to contact them via the order details page.

