1. Introduction
Thank you for choosing the DNM USD-8S Mountain Bike Downhill Fork. This manual provides essential information for the proper installation, adjustment, maintenance, and safe operation of your new suspension fork. Please read this manual thoroughly before use to ensure optimal performance and rider safety.
The DNM USD-8S is an inverted coil spring downhill fork designed for aggressive riding, offering 203mm of travel and compatibility with 26-inch and 27.5-inch wheels. It features adjustable preload, rebound, and air pressure for fine-tuning performance.
2. Safety Information
WARNING: Improper installation, adjustment, or maintenance can lead to serious injury or death. If you are unsure about any procedure, seek assistance from a qualified bicycle mechanic.
- Always wear appropriate safety gear when riding.
- Regularly inspect your fork for any signs of damage, wear, or loose components before each ride.
- Do not modify the fork. Unauthorized modifications can compromise structural integrity and void the warranty.
- Ensure all bolts and fasteners are tightened to the manufacturer's specified torque settings.
- Familiarize yourself with the fork's adjustments in a safe, controlled environment before riding on challenging terrain.
3. Package Contents
The DNM USD-8S Downhill Fork package typically includes:
- DNM USD-8S Suspension Fork
- 20 x 110mm Thru Axle
- Instruction Manual (this document)
4. Specifications
| Feature | Specification |
|---|---|
| Model | USD-8S-203 |
| Wheel Size Compatibility | 26" and 27.5" |
| Steerer Tube | 1-1/8" Straight |
| Travel | 203mm |
| Spring Type | Coil Spring |
| Adjustments | Preload, Rebound, Air Pressure |
| Fork Type | Inverted Fork |
| Crown Material | Forging AL-6061 |
| Outer Tube Diameter | 42 mm AL-6061 |
| Inner Tube Diameter | 35mm AL-7075 Hard Anodized |
| Axle Type | 20 x 110mm Thru Axle |
| Brake Type | Disc Brake (Post mount) |
| Weight | 4070g (8.97lbs) |
| Material | Aluminum |

Figure 1: DNM USD-8S Fork Dimensions
5. Setup and Installation
Professional installation by a qualified bicycle mechanic is highly recommended. Incorrect installation can lead to serious injury or damage to your bicycle.
5.1 Steerer Tube Preparation
- Measure the required steerer tube length for your frame and stem combination.
- Carefully cut the steerer tube to the appropriate length using a hacksaw guide. Ensure the cut is straight and clean.
- Install the crown race onto the steerer tube. Use a proper crown race setting tool to avoid damage.
5.2 Fork Installation into Frame
- Grease the headset bearings and install them into the head tube according to your headset manufacturer's instructions.
- Insert the steerer tube through the head tube.
- Install the stem and any necessary spacers. Ensure there is a small gap (2-3mm) between the top of the steerer tube and the top of the stem/spacer stack.
- Install the top cap and bolt, tightening it to remove play from the headset.
- Align the stem with the front wheel and tighten the stem clamp bolts to the manufacturer's specified torque.
5.3 Brake Caliper Installation
The USD-8S fork uses a post-mount disc brake standard.
- Mount your disc brake caliper directly to the fork's post mounts or use appropriate adapters for your rotor size.
- Ensure the brake hose is routed correctly and secured to the fork using the integrated hose guides.
- Tighten all brake mounting bolts to the brake manufacturer's specified torque.

Figure 2: Lower Fork with Thru-Axle Dropout and Brake Mounts
5.4 Wheel Installation
- Insert the front wheel into the fork dropouts, ensuring the disc rotor is correctly seated in the brake caliper.
- Slide the 20x110mm thru-axle through the fork and wheel hub.
- Tighten the thru-axle securely according to the manufacturer's specifications.
6. Operating Instructions: Adjustments
The DNM USD-8S fork offers several adjustments to fine-tune its performance to your riding style and terrain.
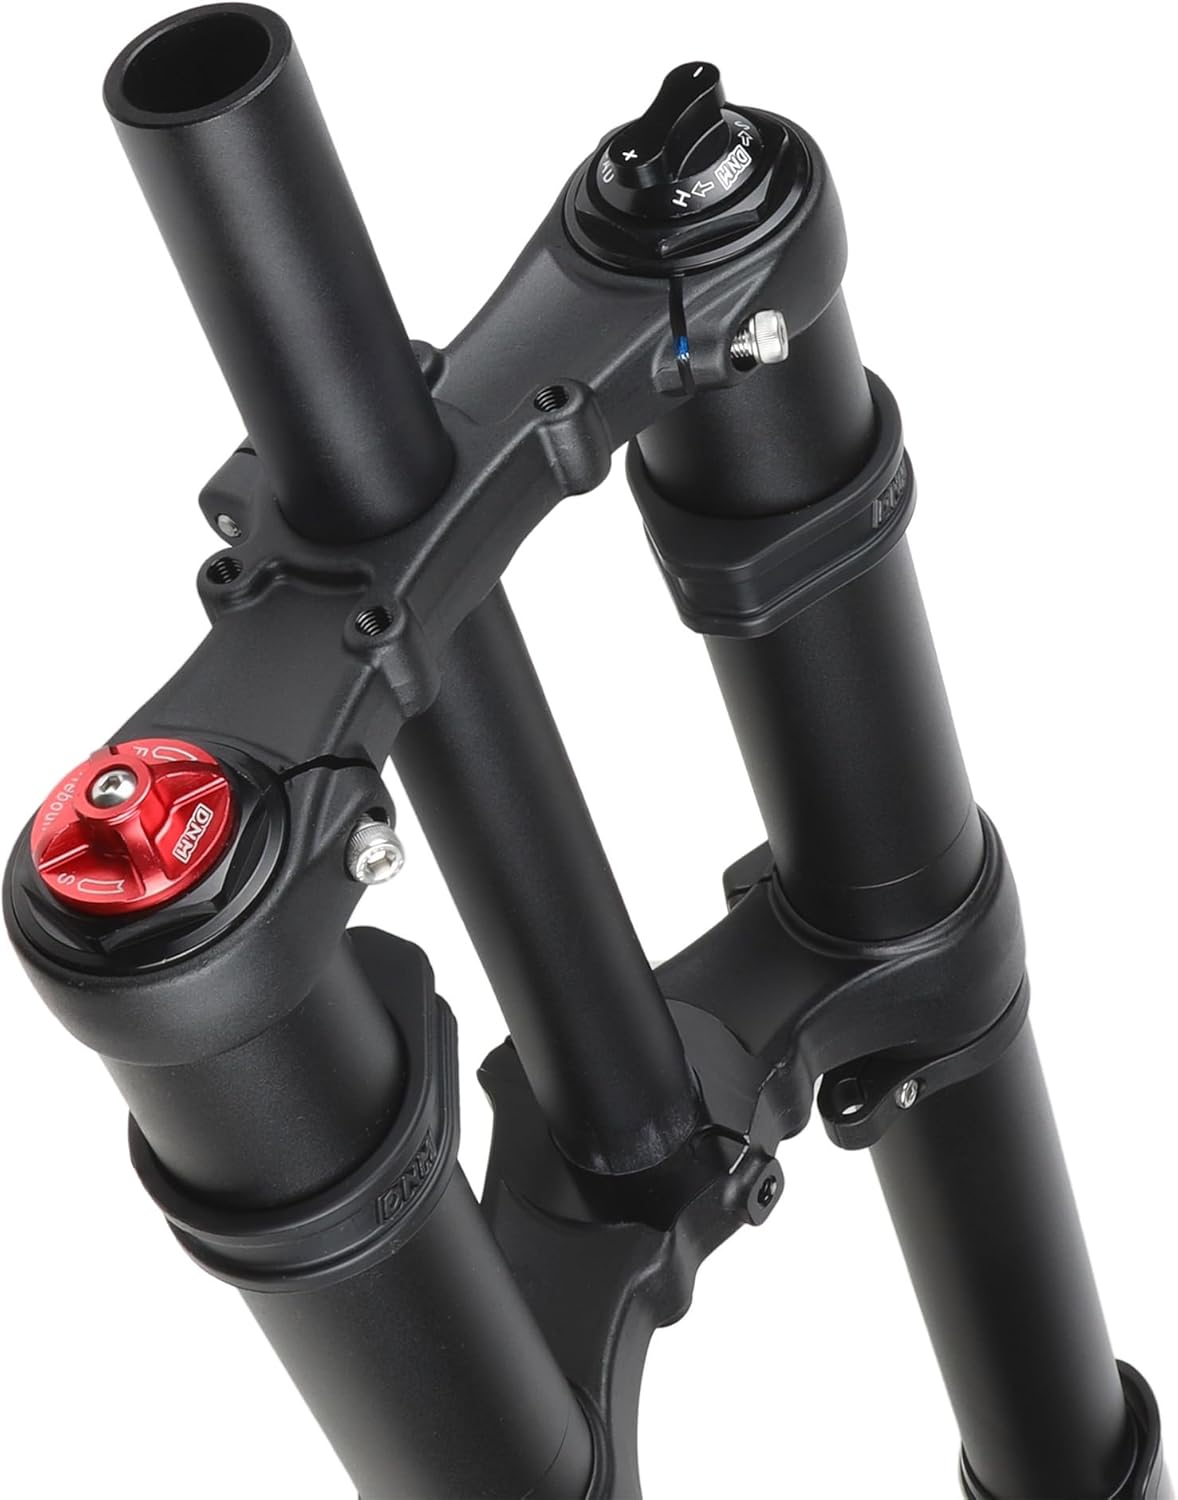
Figure 3: Top Adjustments (Preload and Rebound)
6.1 Preload Adjustment
The preload adjustment (often a red knob on the top of one fork leg, see Figure 3) allows you to adjust the initial compression of the coil spring. Turning the knob clockwise increases preload, making the fork feel stiffer and reducing sag. Turning it counter-clockwise decreases preload, making the fork feel softer and increasing sag.
- To increase preload: Turn the red knob clockwise.
- To decrease preload: Turn the red knob counter-clockwise.
6.2 Rebound Adjustment
The rebound adjustment (often a black knob on the top of the other fork leg, marked 'H' and 'L', see Figure 3) controls the speed at which the fork extends after compression. This is crucial for maintaining tire contact with the ground and preventing the fork from 'pogo-sticking'.
- Slower Rebound (more damping): Turn the knob towards 'H' (Hard/Slow). This is generally preferred for larger impacts and faster riding to prevent the fork from extending too quickly.
- Faster Rebound (less damping): Turn the knob towards 'L' (Light/Fast). This is suitable for smaller, rapid bumps to allow the fork to recover quickly.
6.3 Air Pressure Adjustment
While the primary spring is coil, the fork may feature an air assist or air damping system. Consult a qualified mechanic or the specific technical manual for detailed instructions on adjusting air pressure. Incorrect air pressure can damage the fork or affect performance.
7. Maintenance
Regular maintenance is crucial for the longevity and performance of your DNM USD-8S fork.
7.1 After Every Ride
- Clean the outer tubes and seals with a soft cloth and mild soap and water. Avoid high-pressure washers directly on seals.
- Inspect for any visible damage, scratches on stanchions, or oil leaks.
- Check all bolts (axle, brake caliper, crown bolts) for proper tightness.
7.2 Monthly / Every 20-30 Hours of Riding
- Perform a more thorough cleaning and inspection.
- Check for play in the bushings.
- Lightly lubricate the stanchions with a suspension-specific lubricant (if recommended by DNM).
7.3 Annually / Every 100 Hours of Riding
- It is recommended to have a full service performed by a qualified mechanic, including oil change and seal replacement.
8. Troubleshooting
If you experience issues with your fork, refer to the following common problems and solutions:
- Fork feels too stiff/soft: Adjust preload. Check air pressure if applicable.
- Fork 'pogo-sticks' or extends too quickly: Increase rebound damping (turn towards 'H').
- Fork packs down or extends too slowly: Decrease rebound damping (turn towards 'L').
- Unusual noises (creaking, clunking): Check all bolts for tightness. Inspect for loose components or damage. A full service may be required.
- Oil leaks: Small amounts of oil on stanchions are normal. Excessive leakage indicates worn seals, requiring professional service.
For persistent issues, contact DNM customer support or a certified service center.
9. Warranty and Support
The DNM USD-8S Mountain Bike Downhill Fork comes with a 2-Year Manufacturer Warranty. This warranty covers defects in materials and workmanship under normal use. It does not cover damage resulting from improper installation, abuse, neglect, accidents, or unauthorized modifications.
For warranty claims, technical support, or service inquiries, please contact your retailer or the official DNM distributor in your region. Keep your proof of purchase for warranty validation.