
1. Introduction
Thank you for choosing the Canslab Turbo Rechargeable Can Opener. This advanced electric can opener is designed for effortless and safe can opening, featuring a professional-grade blade, auto-stop functionality, and a convenient LED battery life display. Its side-cut technology ensures smooth edges, and the USB-C charging provides portability and long-lasting power. Please read this manual thoroughly before first use to ensure proper operation and maintenance.
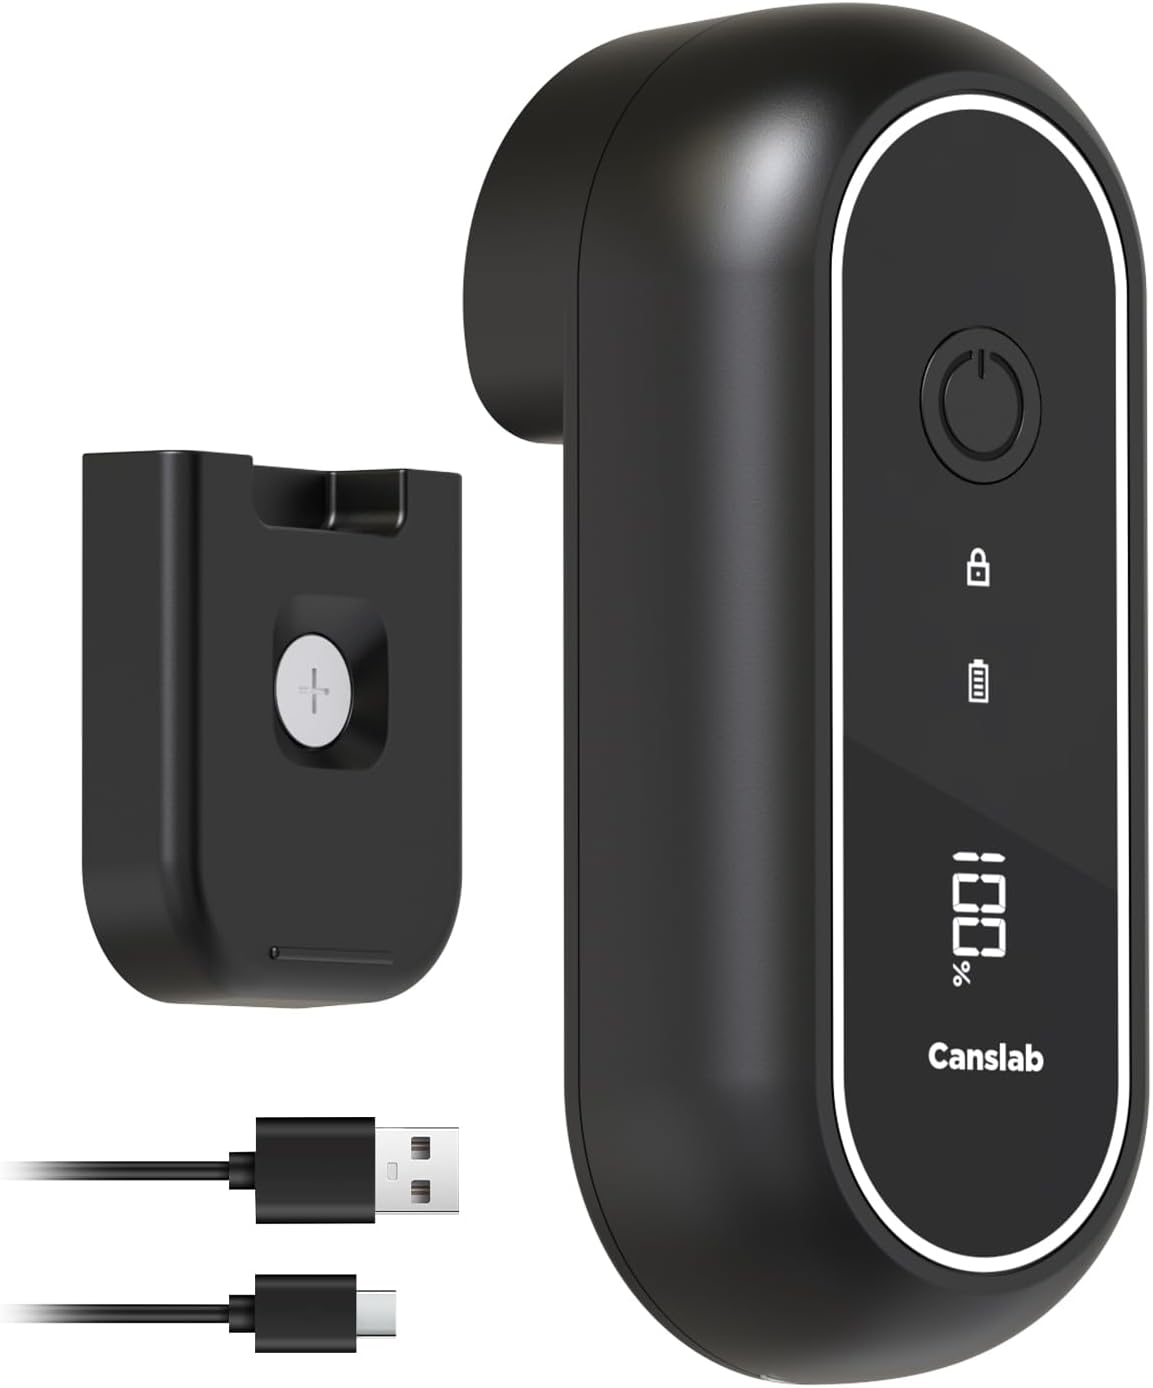
Image 1.1: Canslab Turbo Rechargeable Can Opener and accessories.
2. Product Components
The package includes the following items:
- 1 x Canslab TURBO Can Opener
- 1 x Magnetic Holder
- 1 x USB-C Charging Cable (wall plug not included)
- 1 x Use Instructions Manual (this document)
3. Setup
3.1 Charging the Can Opener
Before first use, fully charge the can opener. The device features a built-in 2000mAh rechargeable battery.
- Connect the provided USB-C charging cable to the can opener's charging port.
- Connect the other end of the cable to a USB power adapter (not included) or a computer USB port.
- The Charging Indicator will show a solid white light during charging.
- The Battery Life Indicator (LED display) provides a real-time reading of the battery percentage.
- A full charge takes approximately 1.5 hours and can open up to 100 standard-sized cans (data from Canslab lab, can sized 10.75oz).
- When the battery is low, the charging indicator will flash white.

Image 3.1: USB-C charging port location.

Image 3.2: Real-time battery life display.
3.2 Mounting the Magnetic Holder
The included magnetic holder allows for easy wall-mounting, keeping your can opener clean and accessible.
- Choose a clean, flat surface on your kitchen wall.
- Peel off the adhesive backing from the magnetic holder.
- Press the holder firmly onto the desired location for at least 30 seconds.
- Allow the adhesive to set for 24 hours before hanging the can opener.
- Once mounted, the can opener can be easily attached and removed from the holder.
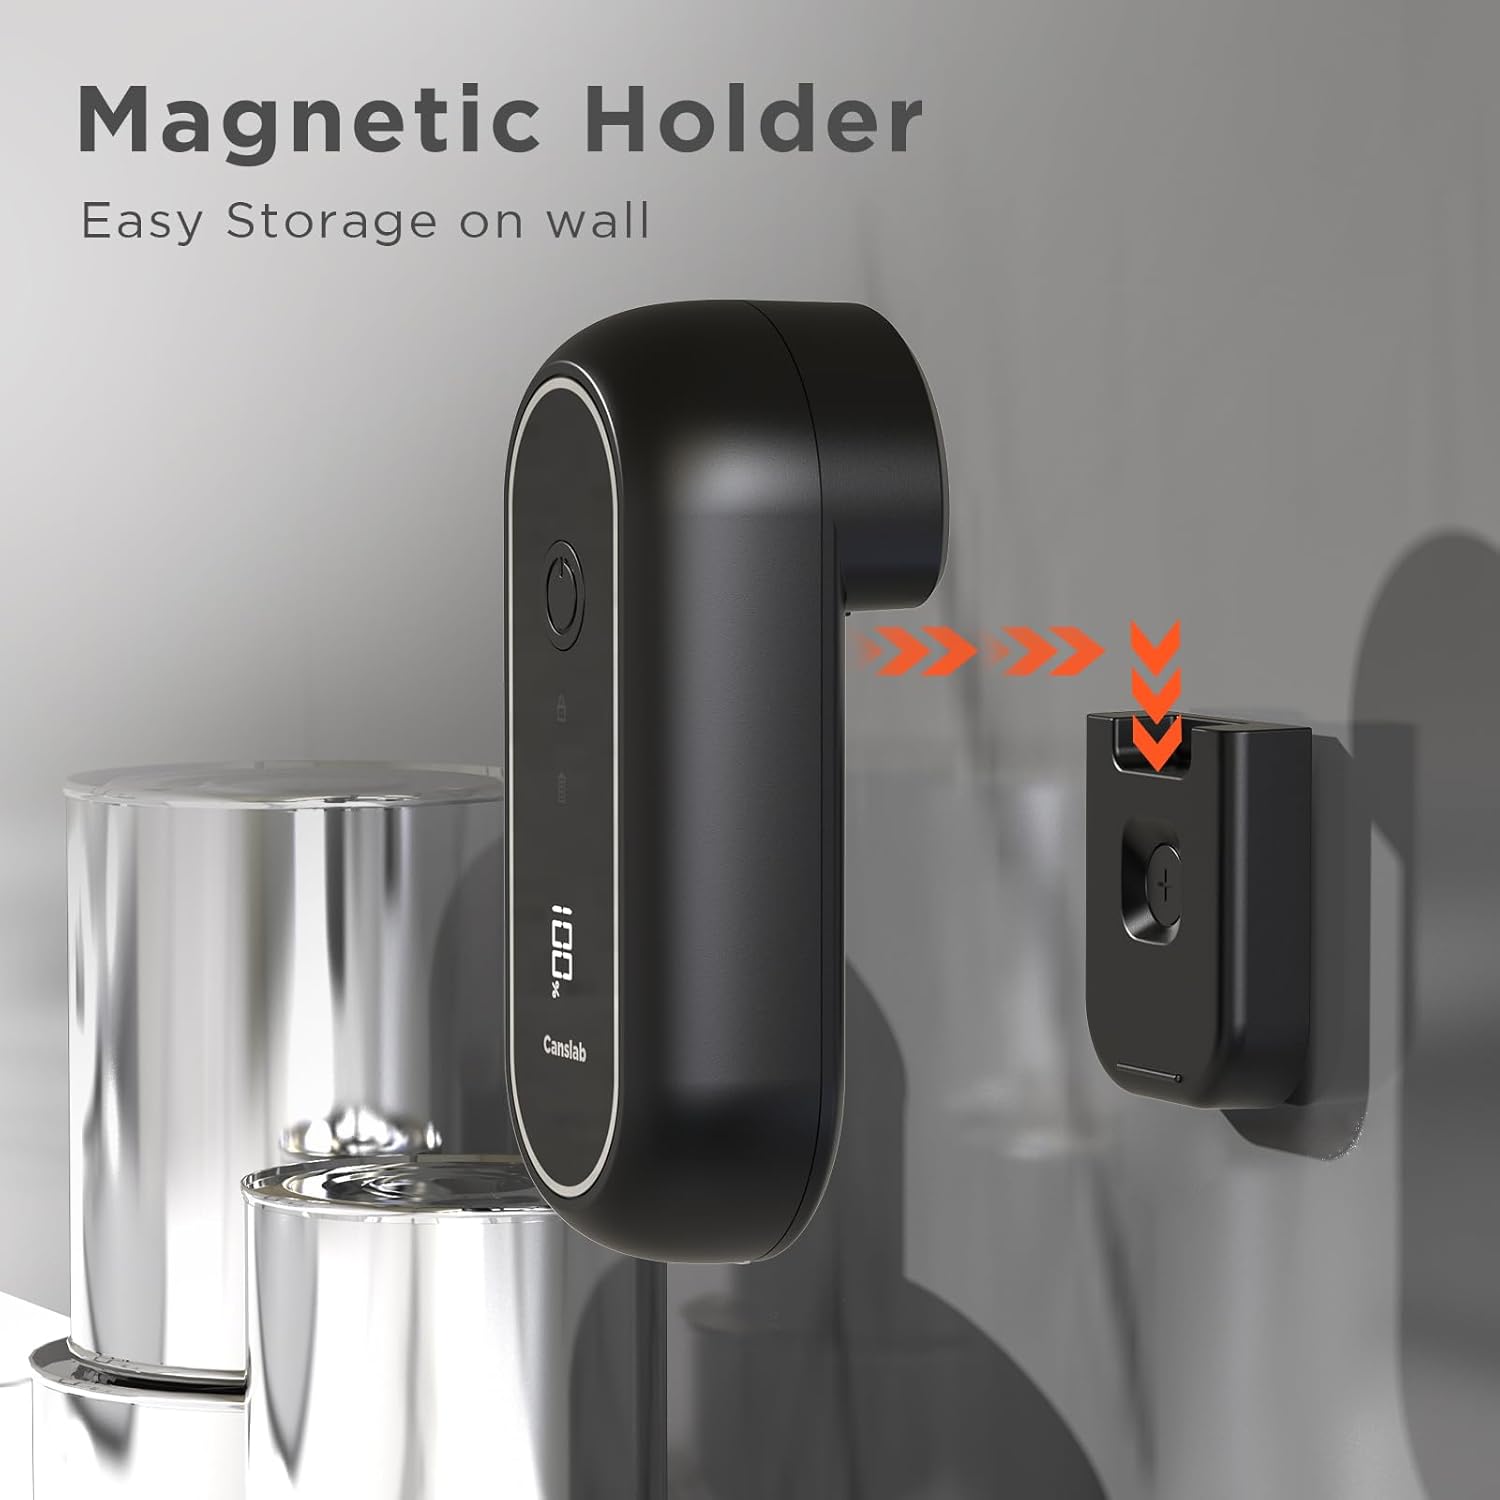
Image 3.3: Magnetic holder for easy storage.
4. Operating Instructions
4.1 Basic Operation (One-Touch with Auto Shut-off)
The Canslab Turbo Can Opener features a true one-touch operation for convenience.
- Place the can opener on top of the can, aligning the cutting wheel with the can's rim.
- Press the power button once. The can opener will automatically grip the can and begin cutting.
- The upgraded smart chip allows the opener to automatically shut off once the cut is complete.
- Once the cutting stops, the can opener will release the can.

Image 4.1: One-touch operation with smart chip auto shut-off.
4.2 Side Cut Technology for Smooth Edges
This can opener cuts along the side of the lid, leaving a safe, smooth edge without touching the food inside.
- After the cutting process is complete, the lid will remain attached to the can opener via an underside magnet.
- Carefully lift the can opener away from the can. The lid will come with it.
- To remove the lid from the can opener, use the built-in retractable lid picker. Simply extend the picker and gently pry the lid off.

Image 4.2: Retractable lid picker and smooth edge result.

Image 4.3: Demonstrating the safe, smooth edge after opening.
4.3 Can Compatibility
The Canslab Turbo Can Opener is suitable for practically any size can, including small and extra-large cans. It is not designed for rimless soda cans.
4.4 Lock Mode
The device includes a lock mode to prevent unintended startup. Refer to the device's interface for the lock indicator and instructions on how to activate/deactivate this feature.
5. Maintenance
To ensure the longevity and optimal performance of your Canslab Turbo Can Opener, follow these maintenance guidelines:
- Cleaning: After each use, wipe the cutting wheel and exterior of the can opener with a damp cloth. Do not submerge the unit in water or rinse it under running water, as this can damage the electronic components.
- Storage: Store the can opener in a dry place. Utilize the magnetic holder for convenient and clean storage on your kitchen wall.
- Battery Care: To maintain battery health, avoid completely draining the battery frequently. Recharge the unit when the battery indicator shows a low charge.
6. Troubleshooting
If you encounter issues with your Canslab Turbo Can Opener, please refer to the following common problems and solutions:
| Problem | Possible Cause | Solution |
|---|---|---|
| Can opener does not turn on. | Low battery or unit is in lock mode. | Charge the can opener fully. Check if the lock mode is activated and deactivate it if necessary. |
| Can opener stops mid-operation. | Battery is low or can is not properly aligned. | Recharge the unit. Ensure the can opener is correctly positioned on the can's rim. |
| Lid is difficult to remove after opening. | Lid is stuck or not fully detached. | Use the built-in retractable lid picker to gently pry off the lid. Ensure the cutting cycle completed fully. |
| Can opener does not grip the can. | Improper alignment or can type. | Reposition the can opener to ensure the cutting wheel is flush with the can's rim. Confirm the can is not a rimless soda can. |
If the problem persists after attempting these solutions, please contact Canslab customer support for further assistance.
7. Specifications
| Model Number | Turbo |
| Color | Black |
| Material | Stainless Steel |
| Blade Material | Stainless Steel |
| Operation Mode | Automatic |
| Product Dimensions | 2.48"W x 1.97"H |
| Item Weight | 15.2 ounces |
| Battery Type | 1 Lithium Ion battery (included) |
| Charging Time | Approx. 1.5 hours |
| Cans per Charge | Up to 100 standard cans |
8. Warranty and Support
Canslab products are designed for quality and durability. For information regarding warranty coverage, product support, or to purchase protection plans, please refer to the documentation included with your purchase or visit the official Canslab website. For direct assistance, you may contact Canslab customer service through the contact information provided on the product packaging or website.