
SONICAKE QCS-01
SONICAKE Sonic One Loop Multifunctional Pedal
Model: QCS-01
Introduction
The SONICAKE Sonic One Loop is a versatile 3-in-1 guitar and bass effects pedal designed to enhance your signal chain with AB line selection, a dedicated effects loop, and switchable buffer functions. Its true bypass design ensures your instrument's original tone is preserved when the pedal is disengaged. This manual provides detailed instructions for setup, operation, and maintenance to help you get the most out of your Sonic One Loop pedal.
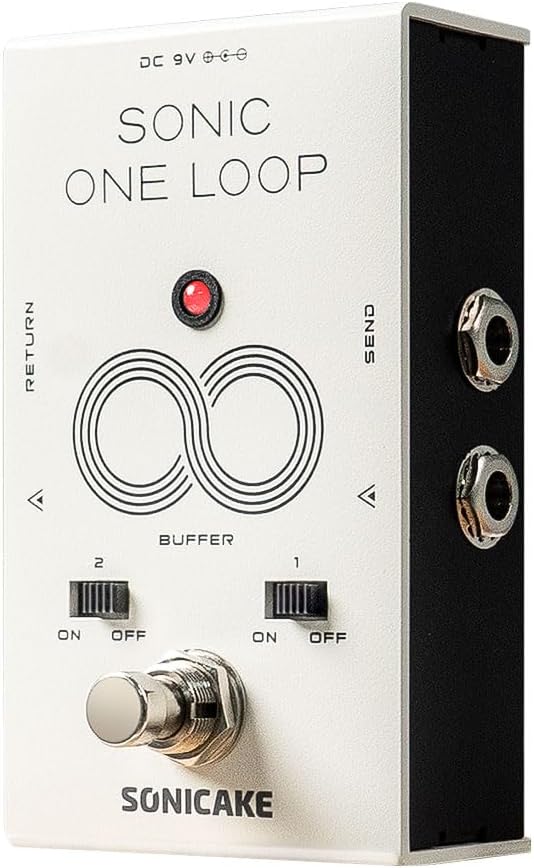
Figure 1: Front view of the SONICAKE Sonic One Loop pedal, showing the footswitch, buffer switches, and input/output jacks.
Setup
Power Requirements
The Sonic One Loop pedal requires a standard 9V DC power supply with a center-negative polarity. Ensure your power supply meets these specifications to prevent damage to the unit.
Connecting Your Pedal
- Connect your instrument (guitar or bass) to the INPUT jack on the pedal using a standard 1/4-inch instrument cable.
- Connect the OUTPUT jack of the pedal to your amplifier or the next pedal in your signal chain.
- For the effects loop function, connect the SEND jack to the input of the effects pedals you wish to include in the loop.
- Connect the output of the last pedal in your effects loop chain to the RETURN jack on the Sonic One Loop pedal.
- Plug in the 9V DC center-negative power supply to the DC 9V input jack.

Figure 2: Overview of the Sonic One Loop pedal highlighting its AB, Loop, and Buffer functionalities.
Operating Instructions
AB Line Selection Function
The Sonic One Loop allows you to select between two distinct signal paths (A or B) by tapping the main footswitch. This is useful for switching between different effects chains or routing your signal to different destinations.

Figure 3: Visual representation of the AB Line Selection function, showing how the footswitch toggles between output paths A and B.
Loop Function
The integrated loop function enables you to engage or disengage an external chain of effects pedals with a single tap of the footswitch. This is ideal for bringing multiple effects in and out of your signal path simultaneously.
- To activate the loop, tap the footswitch. The indicator LED will change color (e.g., from red to green) to show the loop is active.
- To bypass the loop, tap the footswitch again. The signal will then pass directly through the pedal via true bypass.

Figure 4: Diagram showing how to connect and utilize the Loop Function for external effects pedals.
Buffer Function
The Sonic One Loop features two independent buffer switches (Buffer 1 and Buffer 2) that can be toggled ON or OFF. Buffers help maintain signal integrity over long cable runs or through complex pedalboards, preventing tone loss due to capacitance.
- Buffer 1: Controls the buffer for the input/output line.
- Buffer 2: Controls the buffer for the loop line.
- Use the small toggle switches located above the footswitch to activate or deactivate each buffer independently.
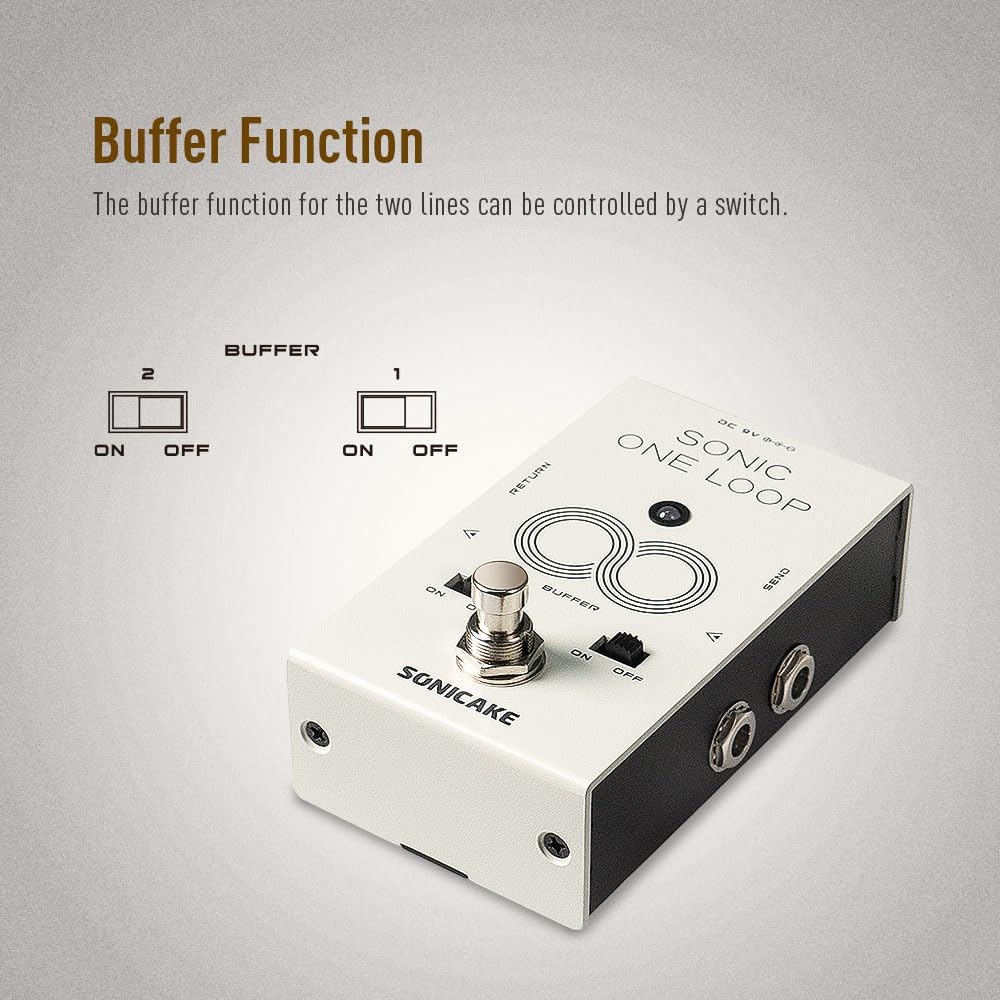
Figure 5: Close-up view of the buffer switches (1 and 2) and their ON/OFF positions.
True Bypass
The Sonic One Loop is equipped with true bypass circuitry. When the pedal's effect or loop is disengaged, the signal passes directly through the pedal without any electronic interference, ensuring your instrument's original, uncolored tone is maintained.

Figure 6: Representation of True Bypass, indicating a clean signal path when the effect is off.
Maintenance
- Cleaning: Use a soft, dry cloth to clean the pedal's exterior. Avoid using abrasive cleaners or solvents, which may damage the finish.
- Storage: Store the pedal in a dry environment, away from extreme temperatures and direct sunlight. Disconnect the power supply when not in use for extended periods.
- Connections: Periodically check all cable connections for tightness and wear. Ensure instrument cables are in good condition to prevent signal loss or noise.
Troubleshooting
| Problem | Possible Cause | Solution |
|---|---|---|
| No sound or weak signal | Incorrect power supply; faulty cables; incorrect connections; buffer switches off when needed. |
|
| Unwanted noise or hum | Ground loop; faulty power supply; interference from other electronics. |
|
| Footswitch not responding | No power; internal issue. |
|
Specifications
| Feature | Detail |
|---|---|
| Model Number | QCS-01 |
| Item Weight | 10.6 ounces (300 Grams) |
| Package Dimensions | 4.76 x 3.27 x 2.52 inches |
| Power Requirement | 9V DC, Center-Negative |
| Hardware Interface | 1/4-inch Audio Jacks |
| Functions | AB Line Selection, Effects Loop, Buffer |
| Bypass Type | True Bypass |
| Country of Origin | China |
Note: Specifications are subject to change without notice for product improvement.
Warranty and Support
For warranty information and technical support, please refer to the official SONICAKE website or contact your authorized dealer. Keep your purchase receipt as proof of purchase for any warranty claims.
For further assistance, you may visit the SONICAKE Store on Amazon: SONICAKE Store.
Ask a question about this manual
Ask about setup, troubleshooting, compatibility, parts, safety, or missing instructions. Manuals+ will review the question and use this page’s manual context to help answer it.