
LiftMaster 41A6102
LiftMaster 41A6102 Power Door Lock Instruction Manual
Model: 41A6102
Product Overview
The LiftMaster 41A6102 is a genuine replacement power door lock kit designed for use with various LiftMaster and Chamberlain Wall Mount Residential Jackshaft Openers. This kit enhances the security of your garage door by providing an automatic locking mechanism.
Compatible Models:
- LiftMaster 3800
- LiftMaster 3800P
- LiftMaster 3800PLD
- LiftMaster 8500
- LiftMaster RJO20
- LiftMaster RJO20C
The complete kit includes the power door lock unit, necessary installation screws, and a mounting template to facilitate proper installation.
Package Contents
- 1 x LiftMaster 41A6102 Power Door Lock
- Installation Screws
- Mounting Template
Safety Information
WARNING:
- Always disconnect power to the garage door opener before installing or servicing the power door lock.
- Ensure all connections are secure to prevent electrical hazards.
- Keep hands and clothing clear of moving parts during operation.
- This device is intended for use with compatible garage door openers only. Refer to your opener's manual for specific compatibility and safety guidelines.
Setup and Installation
Follow these steps to properly install your LiftMaster 41A6102 Power Door Lock. It is recommended to consult your garage door opener's manual for specific instructions related to accessory installation.
Tools Required:
- Drill
- Screwdriver (Phillips head recommended)
- Pencil or Marker
- Measuring Tape
Installation Steps:
- Disconnect Power: Ensure the garage door opener is unplugged from the power outlet or the circuit breaker is turned off.
- Position the Lock: Using the provided mounting template, determine the optimal location for the power door lock on your garage door track. The lock should be positioned to engage with the door when closed.
- Mark Drilling Points: Use a pencil or marker to mark the drilling points through the mounting template.
- Drill Pilot Holes: Carefully drill pilot holes at the marked locations. Ensure the drill bit size is appropriate for the provided installation screws.
- Mount the Lock: Align the power door lock with the drilled holes and secure it using the provided installation screws. Do not overtighten.
- Connect Wiring: Route the power door lock's wiring to your garage door opener. Refer to your opener's manual for the correct terminal connections for accessories or a power door lock. Typically, this involves connecting to specific terminals on the opener's logic board.
- Secure Wiring: Use cable ties or clips (not included) to secure the wiring along the garage door track or ceiling to prevent it from interfering with moving parts.
- Restore Power: Once the lock is securely mounted and wired, restore power to the garage door opener.
- Test Operation: Close the garage door. The power door lock should automatically engage, securing the door. Open the garage door, and the lock should disengage.
If the lock does not operate as expected, refer to the Troubleshooting section.
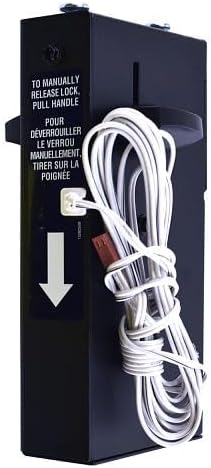
Figure 1: LiftMaster 41A6102 Power Door Lock. This image shows the side profile of the lock unit, highlighting the manual release cable and the "TO MANUALLY RELEASE LOCK, PULL HANDLE" instruction.
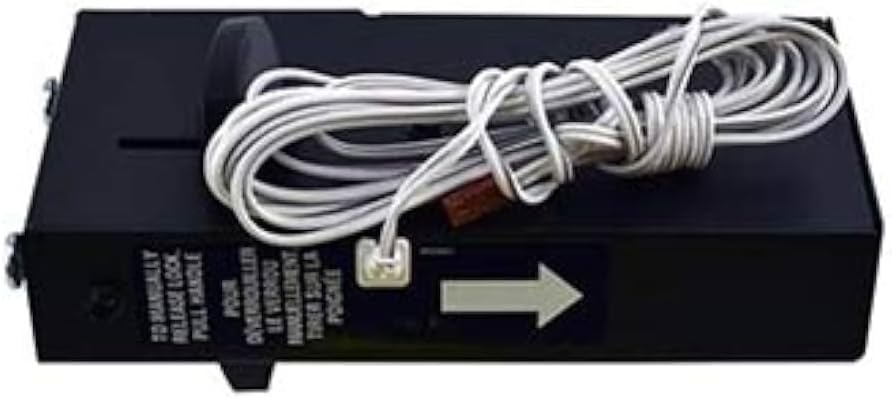
Figure 2: LiftMaster 41A6102 Power Door Lock. This image provides a top-down view of the lock, showing the overall compact design and the coiled wiring.
Operating the Power Door Lock
The LiftMaster 41A6102 Power Door Lock operates automatically in conjunction with your compatible garage door opener.
- When the garage door is fully closed, the power door lock will automatically engage, securing the door in the locked position.
- When the garage door opener is activated to open the door, the power door lock will automatically disengage before the door begins to move.
Manual Release:
In case of a power outage or opener malfunction, the power door lock can be manually disengaged. Locate the manual release handle (often a red cord or lever) on the power door lock unit. Pull the handle firmly to disengage the lock. This will allow you to manually open or close your garage door.
Maintenance
The LiftMaster 41A6102 Power Door Lock is designed for minimal maintenance. However, periodic checks can ensure its continued reliable operation:
- Visual Inspection: Annually inspect the lock unit and its mounting hardware for any signs of wear, damage, or loose connections.
- Cleanliness: Keep the lock mechanism free from dirt, dust, and debris. A soft, dry cloth can be used for cleaning. Do not use harsh chemicals or abrasive cleaners.
- Lubrication: The internal mechanism is generally self-lubricating. Do not apply grease or oil unless specifically instructed by LiftMaster support, as this can attract dirt and hinder operation.
- Wiring Check: Ensure all wiring connections remain secure and that the wire is not pinched or damaged.
Troubleshooting
If you encounter issues with your LiftMaster 41A6102 Power Door Lock, refer to the following common problems and solutions:
| Problem | Possible Cause | Solution |
|---|---|---|
| Lock does not engage/disengage. |
|
|
| Lock makes unusual noises. |
|
|
| Manual release is stiff or stuck. |
|
|
If problems persist after attempting these solutions, contact LiftMaster customer support or a qualified garage door technician.
Specifications
| Attribute | Detail |
|---|---|
| Model Number | 41A6102 |
| Part Number | 41A6102 |
| Item Weight | 3 pounds |
| Product Dimensions | 6 x 3 x 1 inches |
| Included Components | Door Lock |
| Batteries Required? | No |
| Manufacturer | Liftmaster |
| Compatible Openers | 3800, 3800P, 3800PLD, 8500, RJO20, RJO20C |
Warranty and Support
As a genuine LiftMaster replacement part, the 41A6102 Power Door Lock is covered by LiftMaster's standard warranty for replacement parts. Please refer to the official LiftMaster website or your original product documentation for specific warranty terms and conditions.
For technical assistance, troubleshooting beyond this manual, or to inquire about warranty claims, please contact LiftMaster Customer Support:
- Website: www.liftmaster.com/support (or visit the official LiftMaster website and navigate to their support section)
- Phone: Refer to the LiftMaster website for regional contact numbers.
When contacting support, please have your product model number (41A6102) and details of your garage door opener readily available.
Related documents41A6102

Ask a question about this manual
Ask about setup, troubleshooting, compatibility, parts, safety, or missing instructions. Manuals+ will review the question and use this page’s manual context to help answer it.