
1. Introduction
This manual provides essential information for the proper installation, operation, and maintenance of your JIARUIXIN HY2027M-24V Ride On Module Mainboard Control Box. This product is designed as a replacement part for specific children's 24-volt ride-on toys. Please read these instructions carefully before proceeding with installation or use to ensure safety and optimal performance.
2. Safety Information
- For external use only. This control box is an internal component of a ride-on toy and should not be exposed to external elements or handled unnecessarily once installed.
- Keep away from naked flame or direct heat sources. High temperatures can damage the electronic components.
- Ensure the ride-on toy's power is disconnected before attempting any installation or replacement.
- Installation should only be performed by an adult or under adult supervision.
- Verify correct voltage (24V) compatibility with your ride-on toy to prevent damage.
3. Product Overview
The HY2027M-24V is a mainboard control box designed to manage the electrical functions of a 24-volt children's ride-on toy. It serves as the central processing unit for various commands, including motor control and other electronic features. Its compact design allows for integration into the toy's internal structure.
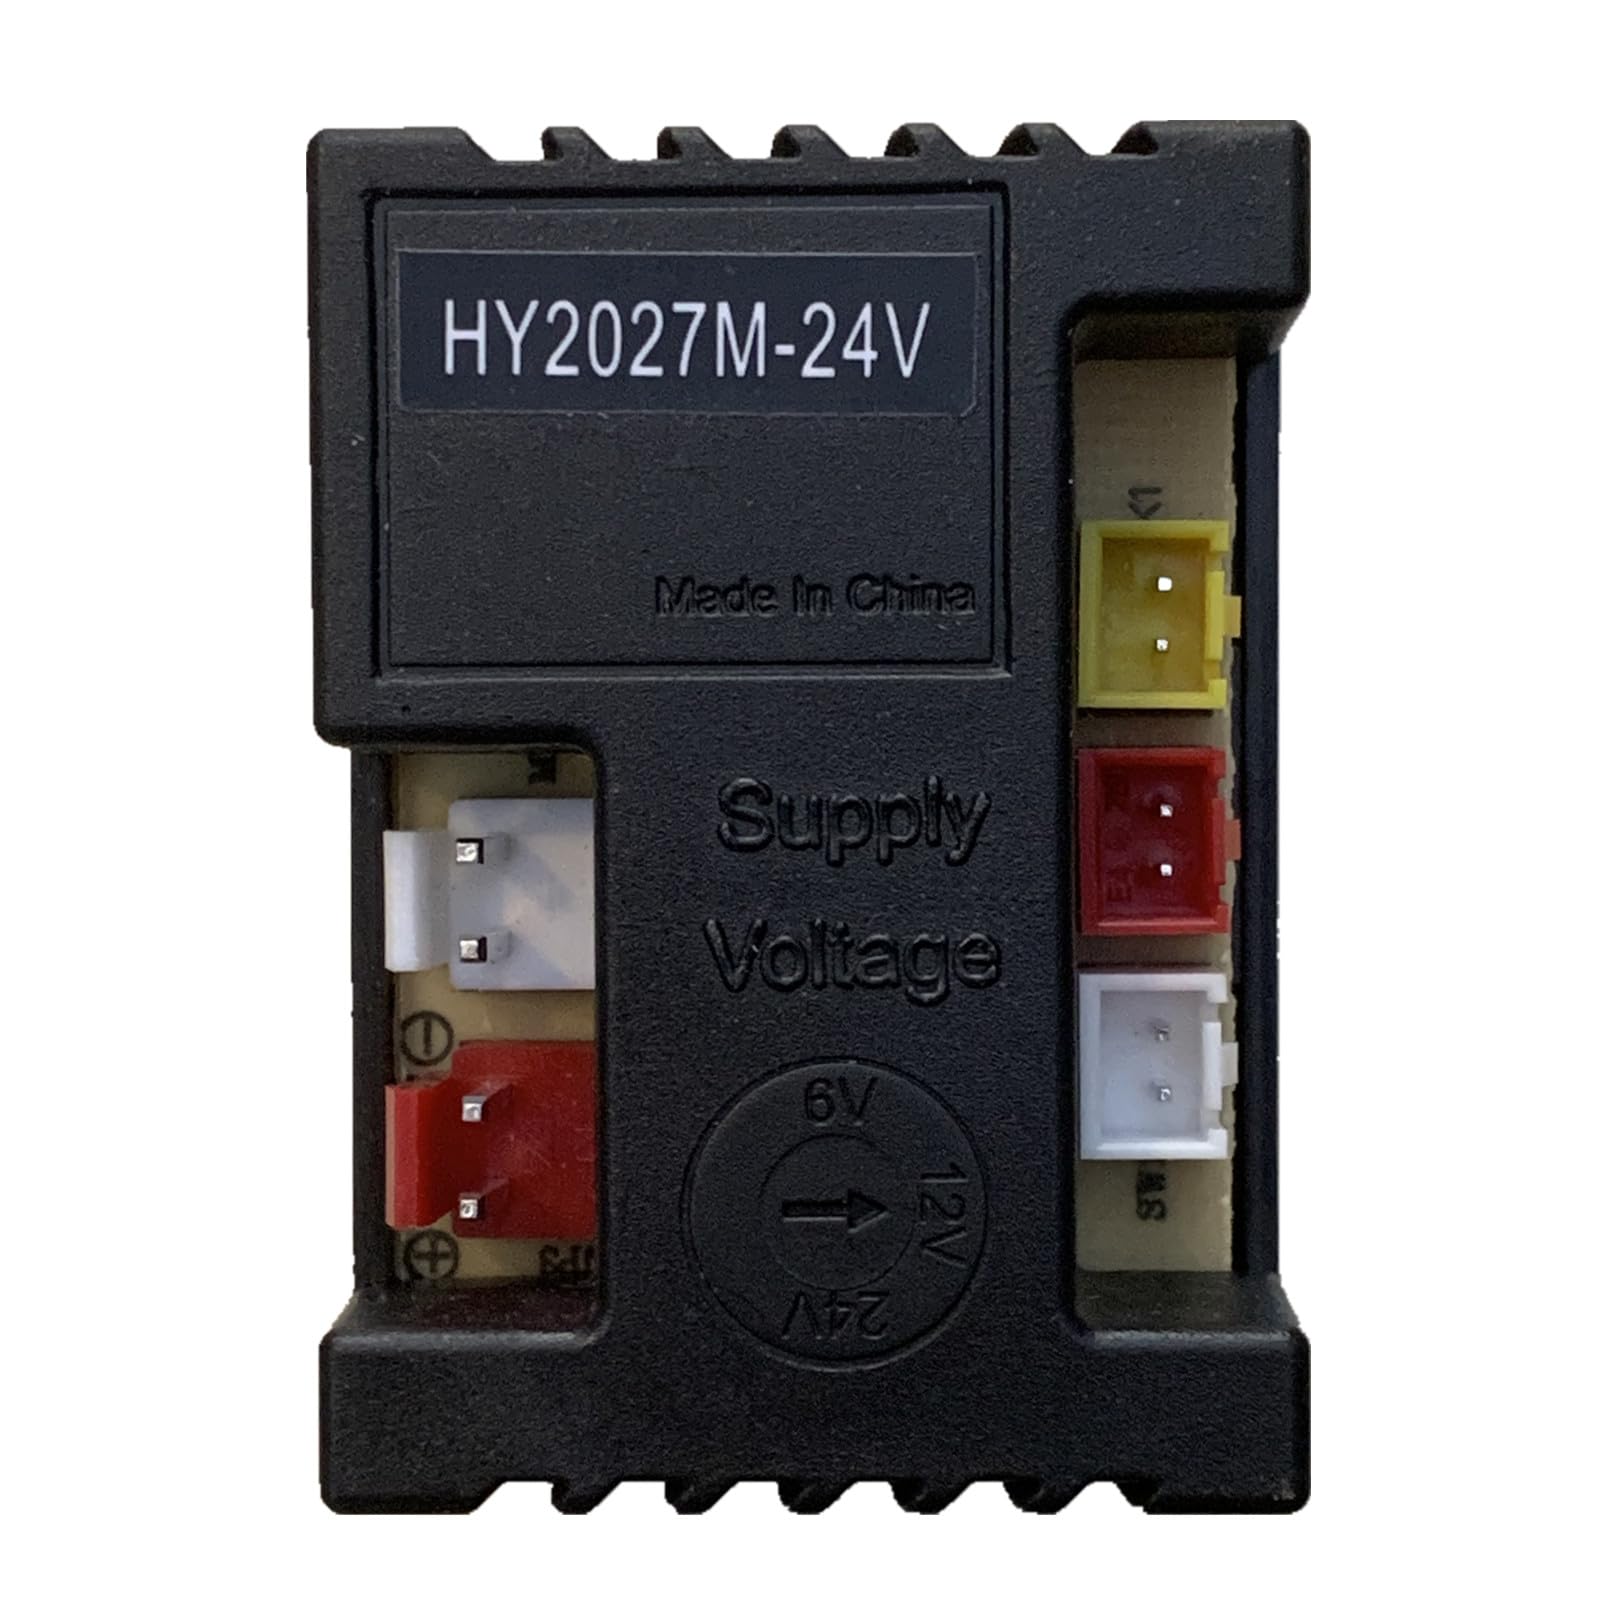
Figure 1: Top view of the HY2027M-24V Control Box, displaying the model number and connection ports.

Figure 2: Angled view of the HY2027M-24V Control Box, showing voltage indicators and connectors.

Figure 3: Alternative angled view of the HY2027M-24V Control Box, detailing additional connectors.
4. Compatibility Check
Before installing this replacement part, it is crucial to verify its compatibility with your specific ride-on toy. Follow these steps:
- Locate Your Existing Control Box: Open your broken electric ride-on car and identify the current control box.
- Compare Appearance: Carefully compare the appearance of your existing control box with the images provided in this manual (Figures 1, 2, and 3). The replacement part should have the same physical form factor and connector layout.
- Verify Model Number: Check the model number printed on your original control box. It must match HY2027M-24V exactly. Purchasing a control box with a different model number may result in incompatibility or damage.
- Confirm Voltage: Ensure your ride-on toy operates on a 24-volt system, as this control box is specifically designed for 24V supply voltage.
If the appearance and model number match, this part should be compatible with your ride-on toy.
5. Installation Guide
This section outlines the general steps for replacing the control box. Specific ride-on toy models may have slight variations in their internal layout. Always proceed with caution.
- Disconnect Power: Before beginning any work, ensure the ride-on toy is completely powered off and disconnected from its battery or any charging source. This is a critical safety step.
- Access the Control Box: Carefully open the ride-on toy's chassis to gain access to the existing control box. This may involve removing screws or clips.
- Document Connections: Before disconnecting anything, take clear photos or make a diagram of all existing wire connections to the old control box. Note the color and position of each wire and its corresponding port.
- Disconnect Old Control Box: Gently unplug all wires and connectors from the old control box. Remove any mounting screws or clips securing it in place.
- Install New Control Box: Position the new HY2027M-24V control box in the same location as the old one. Secure it using the original mounting hardware.
- Reconnect Wires: Refer to your photos or diagram and carefully connect all wires and connectors to the new control box. Ensure each connection is firm and correctly seated. Do not force connectors.
- Initial Test: Before fully reassembling the toy, reconnect the battery and perform a brief test to ensure basic functions (e.g., power on, motor response) are working. If issues arise, immediately disconnect power and re-check connections.
- Reassemble Toy: Once confirmed operational, carefully reassemble the ride-on toy's chassis, ensuring all screws and clips are securely fastened.
6. Operation
The HY2027M-24V control box functions as the brain of your ride-on toy. Once correctly installed, its operation is integrated with the toy's existing controls (e.g., accelerator pedal, steering wheel, gear shifter). There are no direct user controls on the control box itself. Ensure all connections are secure for reliable operation.
7. Maintenance
The HY2027M-24V control box is designed for durability and requires minimal maintenance. To ensure its longevity:
- Keep Dry: Avoid exposing the control box to moisture or liquids, as this can cause short circuits and damage.
- Avoid Extreme Temperatures: Do not operate or store the ride-on toy in environments with extreme heat or cold, which can affect electronic components.
- Regular Inspection: Periodically inspect the wiring connections to the control box to ensure they remain secure and free from corrosion or damage.
- Cleanliness: If the control box becomes dusty, gently wipe it with a dry, soft cloth. Do not use cleaning solvents.
8. Troubleshooting
If your ride-on toy is not functioning correctly after installing the HY2027M-24V control box, consider the following troubleshooting steps:
- No Power:
- Check if the battery is fully charged and properly connected.
- Verify all power connections to the control box are secure.
- Inspect the main fuse (if applicable) in the ride-on toy.
- Intermittent Operation:
- Ensure all wire connections to the control box are tight and not loose.
- Check for any signs of damaged or frayed wires.
- Incorrect Functionality:
- Double-check that all wires are connected to their correct ports on the control box, referring to your installation diagram or photos.
- Confirm that the model number of the installed control box (HY2027M-24V) matches the original part.
- Overheating:
- Ensure the control box has adequate ventilation within the toy's chassis.
- Avoid continuous heavy load operation if the toy is struggling.
If these steps do not resolve the issue, it may indicate a problem with another component of the ride-on toy or a faulty replacement part. Contact customer support for further assistance.
9. Specifications
| Feature | Specification |
|---|---|
| Model Number | HY2027M-24V |
| Supply Voltage | 24V |
| Material Type | Plastic |
| Item Dimensions (L x W x H) | 3 x 2 x 1 inches (approximately) |
| Included Components | Electronic component chips |
10. Package Contents
The package for the HY2027M-24V Control Box typically includes:
- 1 x HY2027M-24V Control Box (with integrated electronic component chips)
11. Warranty and Support
For warranty information or technical support regarding your JIARUIXIN HY2027M-24V Control Box, please refer to the retailer or contact the seller directly through your purchase platform. Keep your proof of purchase for any warranty claims.