
Proscenic P-AMZ-CZZ-US-P11 Pro
Contents
Proscenic P11 Pro Mopping Cordless Vacuum Cleaner
User Manual
1. Introduction
Thank you for choosing the Proscenic P11 Pro Mopping Cordless Vacuum Cleaner. This versatile appliance is designed to provide powerful and efficient cleaning for your home and car, combining vacuuming and mopping functionalities. This manual will guide you through the assembly, operation, maintenance, and troubleshooting of your new vacuum cleaner to ensure optimal performance and longevity.

Image 1.1: Proscenic P11 Pro Mopping Cordless Vacuum Cleaner and Included Accessories
2. Safety Information
Please read all safety warnings and instructions carefully before using this appliance. Failure to follow the warnings and instructions may result in electric shock, fire, and/or serious injury.
- This appliance is for household use only. Do not use it for commercial or industrial purposes.
- Do not use the vacuum cleaner to pick up water or other liquids, hot ashes, or sharp objects.
- Keep hair, loose clothing, fingers, and all parts of the body away from openings and moving parts.
- Do not operate the vacuum cleaner if it has been dropped, damaged, left outdoors, or dropped into water.
- Always turn off the appliance before connecting or disconnecting the motorized brush, charging, or performing maintenance.
- Use only the charger supplied by the manufacturer to recharge.
- Do not allow children to play with the appliance. Close supervision is necessary when used by or near children.
3. What's in the Box?
Verify that all components are present and in good condition upon opening the package:
- Main Body
- Telescopic Pipe
- Floor Brush
- Battery (x1)
- 2-in-1 Dusting Brush (x1)
- Crevice Tool (x1)
- User Manual (x1)
- Air Inlet HEPA (x2)
- Wall Mount (x1)
- Power Adapter (x1)
- Roller Brush (x1)
- Mopping Pad (x1)
- Water Tank (x1)

Image 3.1: All Included Components
4. Product Overview
The Proscenic P11 Pro is a powerful and versatile cleaning solution with several key features:
- Detachable Mopping Base: Elevates functionality beyond vacuuming with a 340 mL water tank for thorough floor mopping.
- Deep & Ultra-Quiet Cleaning: High-performance, ultra-quiet digital motor delivering 550W power and 45kPa strong suction for various surfaces.
- 50-Minute Runtime: Features 2,200 mAh *8 detachable battery packs, offering extended cleaning time.
- LED Touchscreen: Monitors battery level, three cleaning modes, and error messages for a smart cleaning experience.
- Powerful LED Lights: Illuminates hidden debris, enhancing cleaning efficiency.
- Replaceable Battery: Detachable design allows easy charging and extended runtime with an additional battery (sold separately).
- Five-Layer Filtration: Captures 99.99% of dust particles for cleaner air.

Image 4.1: 45Kpa Powerful Suction

Image 4.2: Detachable Mopping Base

Image 4.3: Detachable Battery

Image 4.4: Powerful LED Lights

Image 4.5: LED Touchscreen Display

Image 4.6: Five-Layer Filtration System
5. Setup
Follow these steps to assemble and prepare your vacuum cleaner for first use:
- Assemble the Vacuum: Connect the telescopic pipe to the main body, then attach the floor brush to the other end of the telescopic pipe. Ensure all connections click securely into place.
- Charge the Battery: Before first use, fully charge the battery. You can charge the battery while it is attached to the main body or separately. Connect the power adapter to the charging port and plug it into a wall outlet. The LED display will indicate charging status.
- Install Wall Mount (Optional): If desired, install the wall mount in a convenient location for storage and charging.

Image 5.1: Telescopic Pipe Adjustment

Image 5.2: Wall Mount Charging
6. Operating
Learn how to effectively use your Proscenic P11 Pro for various cleaning tasks:
- Power On/Off: Press the power button on the handle to turn the vacuum on or off.
- Select Cleaning Mode: Use the LED touchscreen to cycle through the three cleaning modes: Eco, Standard, and Max. Choose the appropriate mode based on the cleaning intensity required.
- Vacuuming: Guide the vacuum over the desired surface. The LED headlights on the floor brush will illuminate hidden dust and debris.
- Mopping Function: Attach the mopping base with a filled water tank and a clean mopping pad. The vacuum will simultaneously vacuum and mop hard floors.
- Handheld Conversion: Detach the telescopic pipe and floor brush to convert the unit into a handheld vacuum. Attach the 2-in-1 dusting brush or crevice tool for cleaning upholstery, car interiors, or tight spaces.
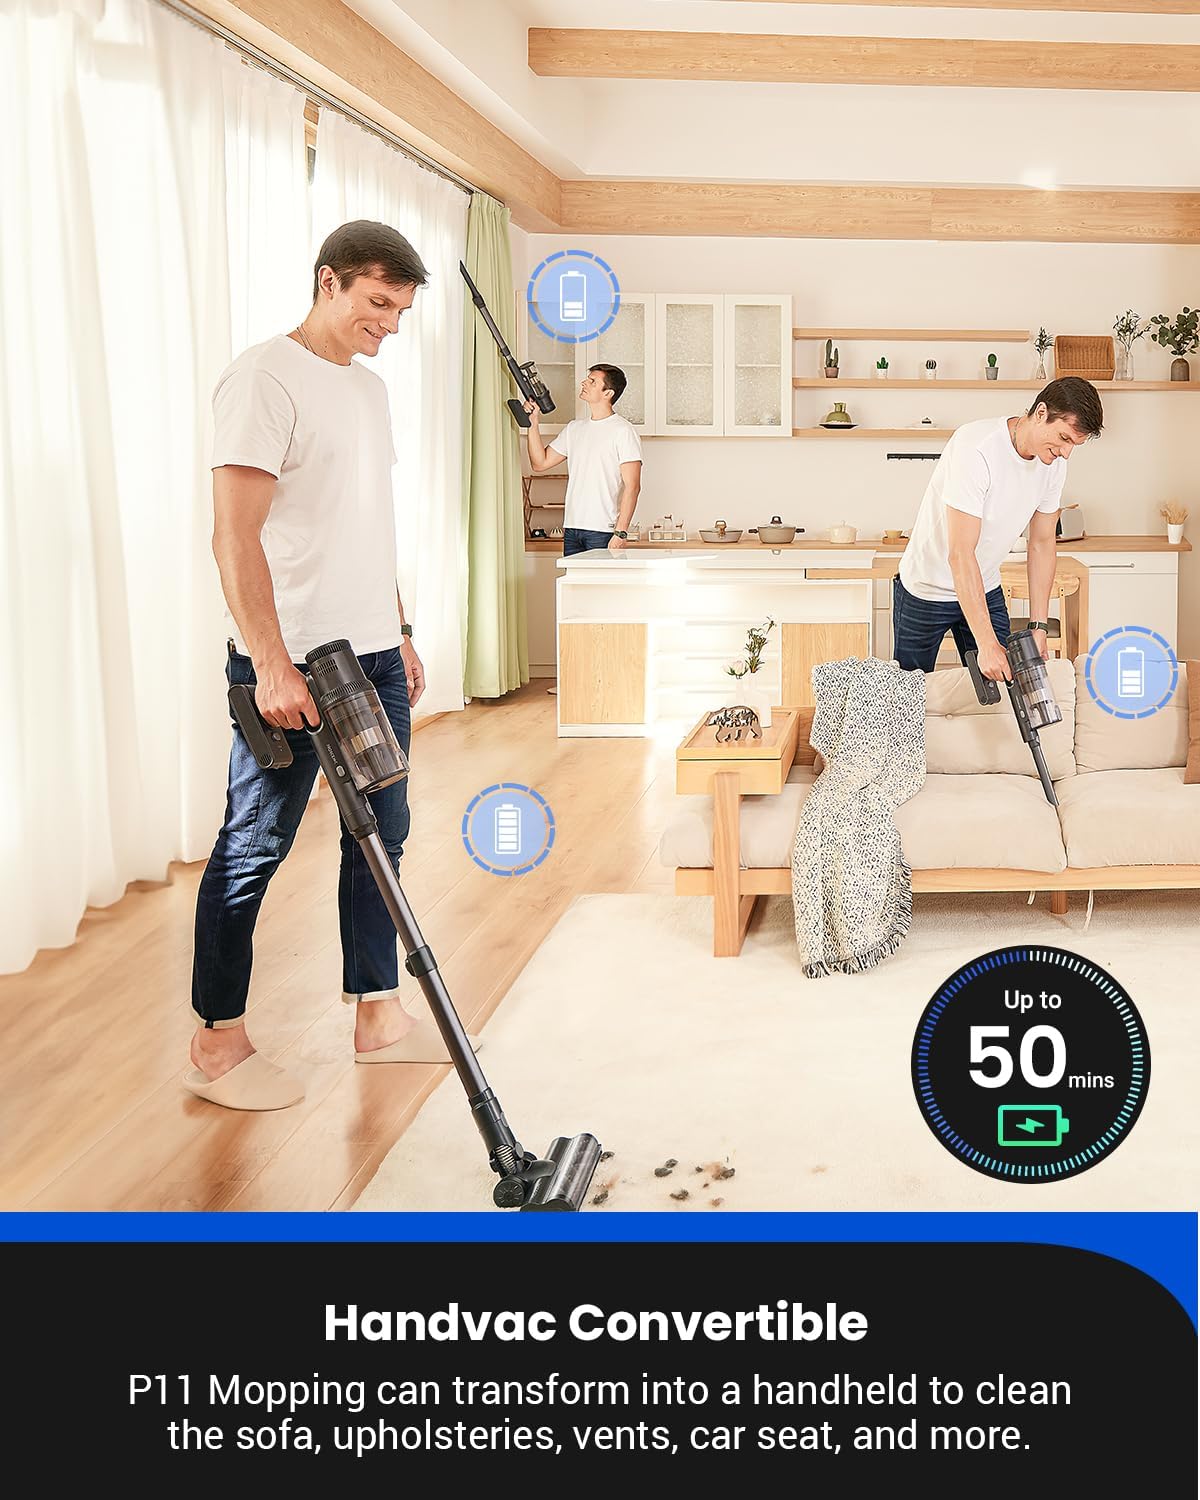
Image 6.1: Handheld Vacuuming

Image 6.2: Simultaneous Vacuuming and Mopping
7. Maintenance
Regular maintenance ensures your vacuum cleaner operates efficiently and extends its lifespan:
- Emptying the Dustbin: Press the dustbin release button to detach it from the main body. Open the dustbin lid and empty contents into a trash can.
- Cleaning Filters: The HEPA filter and other filters should be cleaned regularly. Tap off loose dust or rinse under running water. Ensure filters are completely dry before reinserting.
- Cleaning the Roller Brush: Remove the roller brush from the floor head. Use scissors to cut away any tangled hair or debris. Rinse if necessary and allow to air dry completely.
- Cleaning the Mopping Pad & Water Tank: After each mopping session, remove and wash the mopping pad. Empty and rinse the water tank.

Image 7.1: Emptying the Dustbin

Image 7.2: Cleaning the HEPA Filter

Image 7.3: Removing the Roller Brush
8. Troubleshooting
If you encounter any issues with your Proscenic P11 Pro, refer to the following common problems and solutions:
| Problem | Possible Cause | Solution |
|---|---|---|
| Vacuum does not turn on | Battery is not charged or not properly installed. | Ensure battery is fully charged and securely clicked into place. |
| Weak suction power | Dustbin is full, filters are clogged, or brush roll is obstructed. | Empty dustbin, clean filters, remove obstructions from brush roll. |
| Brush roll not spinning | Hair or debris tangled in brush roll, or brush roll is not properly installed. | Clean brush roll, ensure it is correctly reinstalled. |
| Mopping function not working | Water tank is empty, mopping pad is dry, or water outlet is blocked. | Fill water tank, wet mopping pad, check for blockages. |
If the problem persists after trying these solutions, please contact Proscenic customer support.
9. Specifications
| Feature | Specification |
|---|---|
| Brand | Proscenic |
| Model Name | P11 Pro |
| Special Feature | Cordless, HEPA, Headlight, Lightweight, Rechargeable |
| Filter Type | HEPA Filter |
| Is Cordless? | Yes |
| Dustbin Capacity | 650 Milliliters |
| Wattage | 550 watts |
| Runtime | 50 minutes |
| Recommended Uses | Car, Home, Mop, Pet Hair |
| Form Factor | Stick |
| Color | Black |
| Product Dimensions | 13"L x 4.7"W x 9"H |
| Battery Type | Lithium-Ion |
| Item Weight | 4.29 pounds |
| Controller Type | Touchpad Control |
10. Warranty and Support
Proscenic products come with a standard manufacturer's warranty. Please refer to the warranty card included in your packaging for specific terms and conditions. For technical support, troubleshooting assistance, or warranty claims, please contact Proscenic customer service through their official website or the contact information provided in your product documentation.

Image 10.1: Proscenic Expert Support Team
Documents and downloads
Ask a question about this manual
Ask about setup, troubleshooting, compatibility, parts, safety, or missing instructions. Manuals+ will review the question and use this page’s manual context to help answer it.