
WOLFBOX G850 PRO
WOLFBOX G850 PRO & OEM Bracket User Manual
Model: G850 PRO | Brand: WOLFBOX
Introduction
This manual provides comprehensive instructions for the installation, operation, and maintenance of your WOLFBOX G850 PRO mirror dashcam and its accompanying OEM bracket. Please read this manual thoroughly before use to ensure proper functionality and safety.
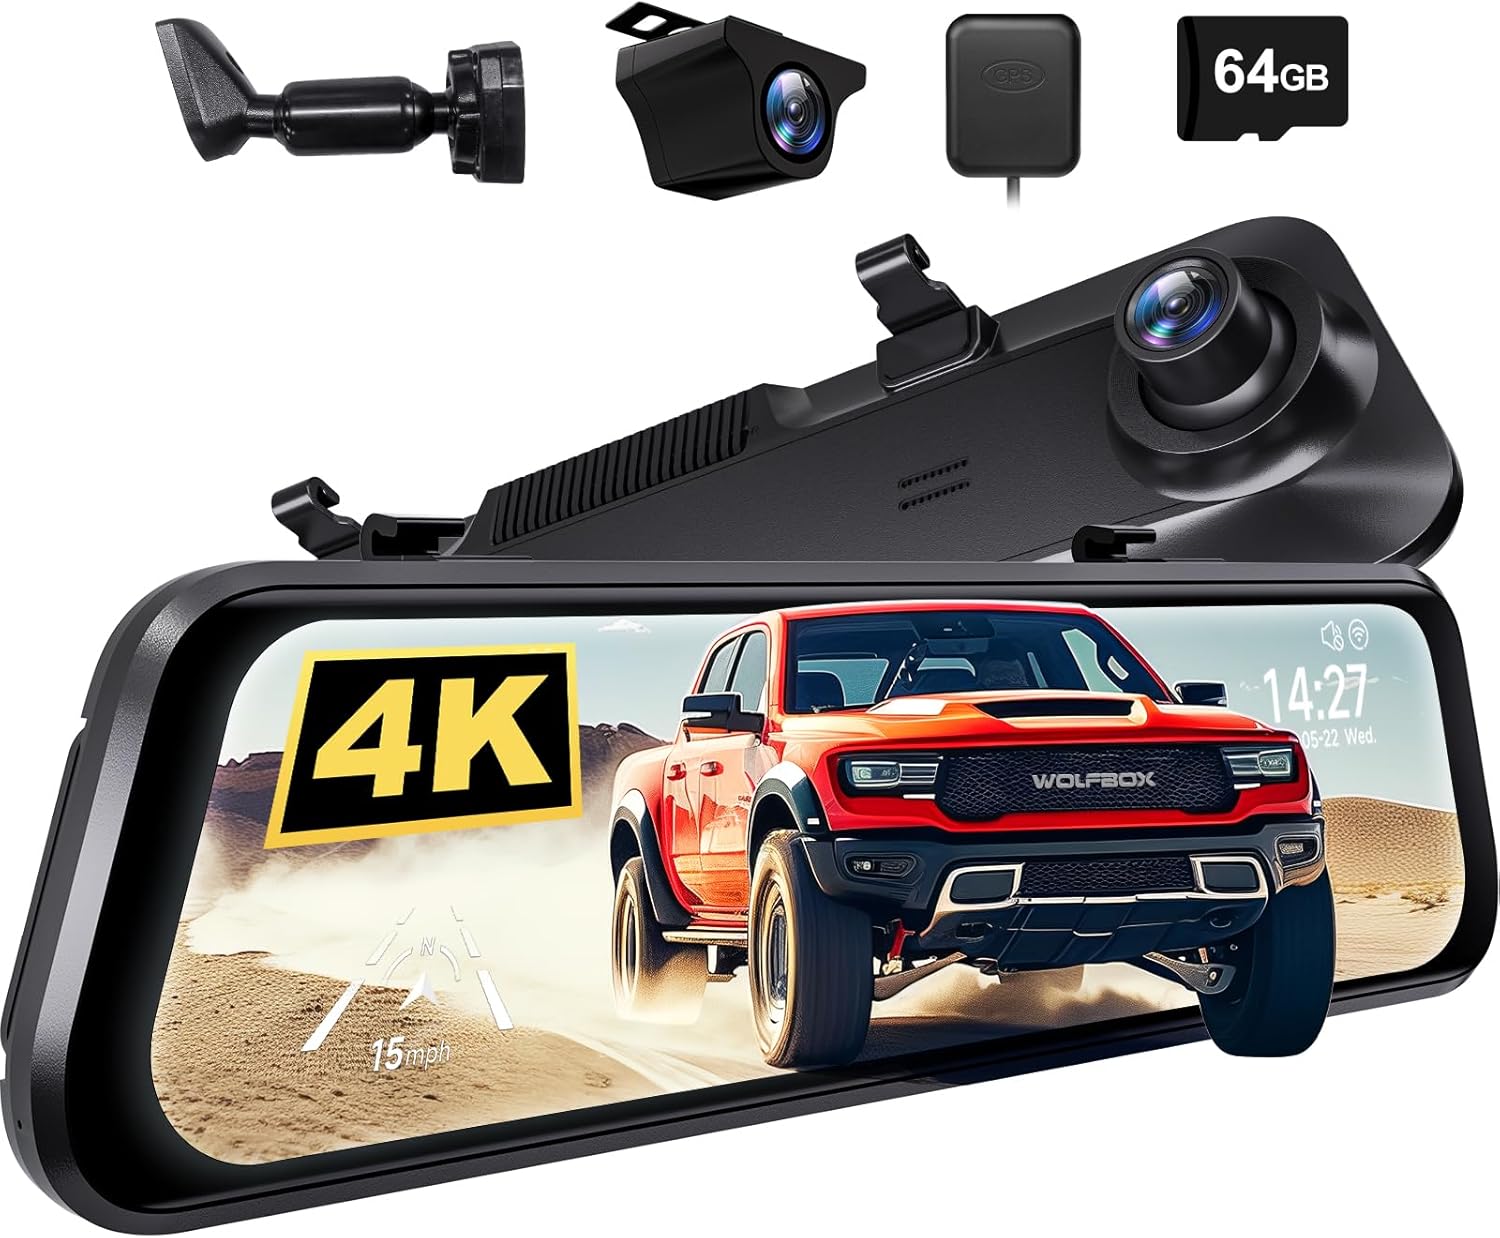
Image: Overview of the WOLFBOX G850 PRO mirror dashcam system, including the main unit, rear camera, GPS module, and 64GB SD card.
Safety Information
- Ensure the dashcam and bracket are securely installed to prevent obstruction of driver's view or airbag deployment.
- Do not operate the device or adjust settings while driving. Perform all adjustments when the vehicle is safely parked.
- Keep the device away from extreme temperatures, direct sunlight for prolonged periods, and moisture.
- Use only original or certified accessories provided by WOLFBOX to avoid damage and ensure proper operation.
- Consult a professional for installation if you are unsure about any steps, especially regarding vehicle electrical systems.
Package Contents
Please verify that all items listed below are included in your package:
- WOLFBOX G850 PRO Mirror Dashcam Unit
- OEM Bracket
- Power Cable
- Rear Camera (if included in your specific package)
- GPS Module (if included)
- User Manual (this document)
- Mounting Screws for OEM Bracket

Image: The OEM bracket and its accompanying mounting screws, with dimensions indicated.
Setup and Installation
The WOLFBOX OEM bracket provides a more secure installation compared to standard straps, reducing dashcam shaking during driving. Please ensure the bracket is compatible with your vehicle model before proceeding.
Part 1: Attaching the OEM Bracket to the Dashcam
- Remove the four protective tapes from the back of the mirror dashcam unit.
- Loosen all four screws on the dashcam's mounting area. Keep these screws for step 4.
- Align the four grooves on the OEM bracket with the corresponding slots on the dashcam and press to secure the bracket.
- Fasten the four corners of the bracket to the dashcam using the small screws previously loosened.
- Fasten the bracket handle to the backplate of the dashcam using the included screws.
- Verify that the bracket is firmly attached and looks correct.

Image: Step-by-step visual guide for attaching the OEM bracket to the WOLFBOX G850 PRO dashcam.
Part 2: Installing the Dashcam with OEM Bracket on the Front Glass
- Carefully remove your vehicle's original rearview mirror.
- Leave the existing mirror base attached to the windshield.
- Attach the OEM bracket onto the existing mirror base on the windshield. Ensure it clicks or slides into place securely.
- Tighten the screw on the OEM bracket to firmly fix it onto the base.

Image: Visual instructions for mounting the dashcam with the OEM bracket onto the vehicle's front windshield.

Image: Illustrates the secure 360-degree rotation capability with the OEM bracket compared to traditional strap mounting methods.
Operating Instructions
The WOLFBOX G850 PRO mirror dashcam is equipped with advanced features to enhance your driving safety and recording capabilities.
Advanced Driver Assistance System (ADAS)
The ADAS technology provides real-time alerts to help prevent accidents. Key ADAS features include:
- Forward Collision Warning: Alerts you if you are approaching a vehicle too quickly.
- Pedestrian Collision Warning: Warns of potential collisions with pedestrians.
- Lane Departure Warning: Notifies you if your vehicle drifts out of its lane without signaling.
- Lead Vehicle Start Alert: Informs you when the vehicle in front of you starts moving from a stop.
- Distance Monitoring: Helps maintain a safe following distance from the vehicle ahead.

Image: Visual representation of the Advanced Driver Assistance System (ADAS) alerts, showing how the system detects potential hazards.
Enhanced Blind Spot Detection (BSD)
The enhanced BSD algorithm effectively monitors your vehicle's blind spots, providing timely alerts for approaching vehicles and potential collisions.
- Blind Spot Monitoring: Detects vehicles in your blind spots during lane changes.
- Rear Collision Alerts: Warns of potential rear-end collisions.
- Side Collision Warning: Alerts to potential side impacts.

Image: Visual explanation of the Blind Spot Detection (BSD) system, highlighting its ability to detect vehicles in blind spots and warn of potential collisions.
General Operation
- Power On/Off: The device typically powers on automatically when the vehicle starts and off when the ignition is turned off.
- Recording: Continuous loop recording begins automatically upon power-on. Ensure a compatible SD card is inserted.
- Display Modes: Switch between front camera view, rear camera view, or split-screen view using the touch screen interface.
- Settings: Access the settings menu to adjust resolution, loop recording duration, G-sensor sensitivity, parking monitor, and other preferences.

Image: The WOLFBOX G850 PRO display showing a clear rear camera view with time and date overlay.

Image: The WOLFBOX G850 PRO dashcam alongside a smartphone showing its companion application, indicating connectivity and remote viewing capabilities.
Maintenance
- Cleaning: Use a soft, dry cloth to clean the dashcam screen and lens. Do not use abrasive cleaners or solvents.
- SD Card: Regularly format the SD card (at least once a month) within the dashcam's settings to ensure optimal performance and prevent data corruption. Replace the SD card if it shows signs of wear or error.
- Firmware Updates: Check the official WOLFBOX website periodically for firmware updates to ensure your device has the latest features and bug fixes.
Troubleshooting
| Problem | Possible Cause / Solution |
|---|---|
| Device does not power on. | Check power cable connection. Ensure vehicle ignition is on. Test power source. |
| Recording stops or freezes. | SD card may be full or corrupted. Format the SD card. Use a high-speed, reputable brand SD card. |
| Poor video quality. | Clean the camera lens. Ensure protective film is removed. Check resolution settings. |
| ADAS/BSD alerts are inaccurate. | Ensure camera lens is clean and unobstructed. Calibrate the system if a calibration option is available in settings. |
| OEM bracket feels loose. | Re-tighten all mounting screws. Ensure the bracket is correctly seated on the vehicle's mirror base. |
Specifications
| Feature | Detail |
|---|---|
| Model Name | G850 PRO |
| Brand | WOLFBOX |
| Video Capture Resolution | 1080p |
| Mounting Type | Rearview Mirror Mount (with OEM Bracket) |
| Optical Sensor Technology | CMOS |
| Vehicle Service Type | Car, Van, Minivan |
| Color | Black |
| Included Components | OEM Bracket |
Warranty and Support
WOLFBOX products are designed for reliability and performance. For any issues or inquiries, please refer to the following information:
- Return Policy: This product is eligible for a refund or replacement within 30 days of purchase, as per standard return policies.
- Customer Service: For technical support, warranty claims, or compatibility questions, please contact WOLFBOX customer service directly. You can often find contact information on the official WOLFBOX website or through your purchase platform.
- Compatibility Note: It is recommended to contact WOLFBOX customer service before purchasing to confirm the OEM bracket's compatibility with your specific vehicle model.
For more information, visit the official WOLFBOX Store on Amazon.
Related documentsG850 PRO


Ask a question about this manual
Ask about setup, troubleshooting, compatibility, parts, safety, or missing instructions. Manuals+ will review the question and use this page’s manual context to help answer it.