
1. Introduction
This manual provides detailed instructions for the installation, operation, and maintenance of your Retevis MB3 Dual-Mode AM/FM CB Radio. Please read this manual thoroughly before operating the device to ensure proper function and safety.
2. Safety Information
- Do not operate the radio in explosive atmospheres (e.g., near flammable gas, dust, or powders).
- Ensure the power supply voltage matches the radio's requirements (12-13.8V DC).
- Do not expose the radio to extreme temperatures, direct sunlight, or moisture.
- Avoid disassembling or modifying the radio, as this voids the warranty and may cause damage.
- Use only approved accessories and replacement parts.
- Maintain a safe distance from the antenna during transmission to minimize RF exposure.
3. Package Contents
Verify that all items are present in the package:
- 1X MB3 CB Radio & Speaker Microphone
- 1X Mounting Bracket
- 2X Bracket Knob & Stop Pad
- 4X Non-slip Mat & Screw
- 1X Spare fuse

This image displays the Retevis MB3 CB Radio, speaker microphone, mounting bracket, bracket knobs, stop pads, screws, non-slip mats, and a spare fuse, which are all included in the product package.
4. Product Overview
The Retevis MB3 is a compact and portable dual-mode AM/FM CB radio designed for reliable communication. It features a clear LCD display and intuitive controls.

This image shows the Retevis MB3 CB Radio unit connected to its speaker microphone, highlighting its compact design and front panel controls.
4.1 Front Panel Controls
- CH (Channel) Up/Down Buttons: Used to select desired channels.
- MENU Button: Accesses various radio settings and functions.
- AM/FM/PA Button: Toggles between AM, FM, and Public Address modes.
- SCAN/RB Button: Initiates channel scanning or activates Roger Beep.
- EMG/Lock Button: Quickly switches to emergency channels (9/19) or locks the keypad.
- SQUELCH (SQ/ASQ) Knob: Adjusts the squelch level to reduce background noise. Turning fully counter-clockwise activates Automatic Squelch (ASQ).
- VOLUME/OFF Knob: Turns the radio on/off and adjusts the audio output volume.

This image provides a view of the rear panel of the Retevis MB3 CB Radio, showing the antenna connector, power input, and external speaker jack, along with product identification labels.
4.2 Rear Panel Connections
- Antenna Connector: For connecting an external CB antenna.
- Power Input: For connecting the 12-13.8V DC power supply.
- EXT. SP. (External Speaker) Jack: 3.5mm jack for connecting an optional external speaker.
5. Installation
5.1 Mounting the Radio
- Choose a suitable location in your vehicle that does not obstruct driving or airbags.
- Use the provided mounting bracket as a template to mark drilling locations.
- Drill pilot holes and secure the mounting bracket using the supplied screws.
- Attach the radio to the mounting bracket using the bracket knobs and stop pads.

This image illustrates the compact dimensions of the Retevis MB3 CB Radio, making it suitable for installation in various vehicle spaces.
5.2 Power Connection
- Connect the red wire from the radio to a 12-13.8V DC positive power source (e.g., vehicle battery positive terminal).
- Connect the black wire from the radio to a negative ground point (e.g., vehicle chassis).
- Ensure connections are secure and properly insulated.

This image shows the power input wires for the Retevis MB3 CB Radio, indicating the required 12.4-13.8V power supply range.
5.3 Antenna Connection
Connect a properly tuned CB antenna to the antenna connector on the rear of the radio. A well-tuned antenna is crucial for optimal performance and to prevent damage to the radio.
5.4 Microphone Connection
Plug the speaker microphone's 6-pin connector into the corresponding port on the front panel of the radio.

This image provides a close-up view of the 6-pin connector for the microphone, ensuring correct connection to the radio.
5.5 External Speaker Connection
If desired, connect an external speaker (not included) to the 3.5mm EXT. SP. jack on the rear panel for louder audio output.

This image highlights the 3.5mm external speaker port located on the rear of the Retevis MB3 CB Radio.
6. Operating Instructions
6.1 Power On/Off and Volume Adjustment
Rotate the VOLUME/OFF knob clockwise to turn the radio on. Continue rotating to increase the volume. Rotate counter-clockwise to decrease volume and turn off the radio.
6.2 Channel Selection
Use the CH Up and CH Down buttons on the front panel to select the desired operating channel (1-40).
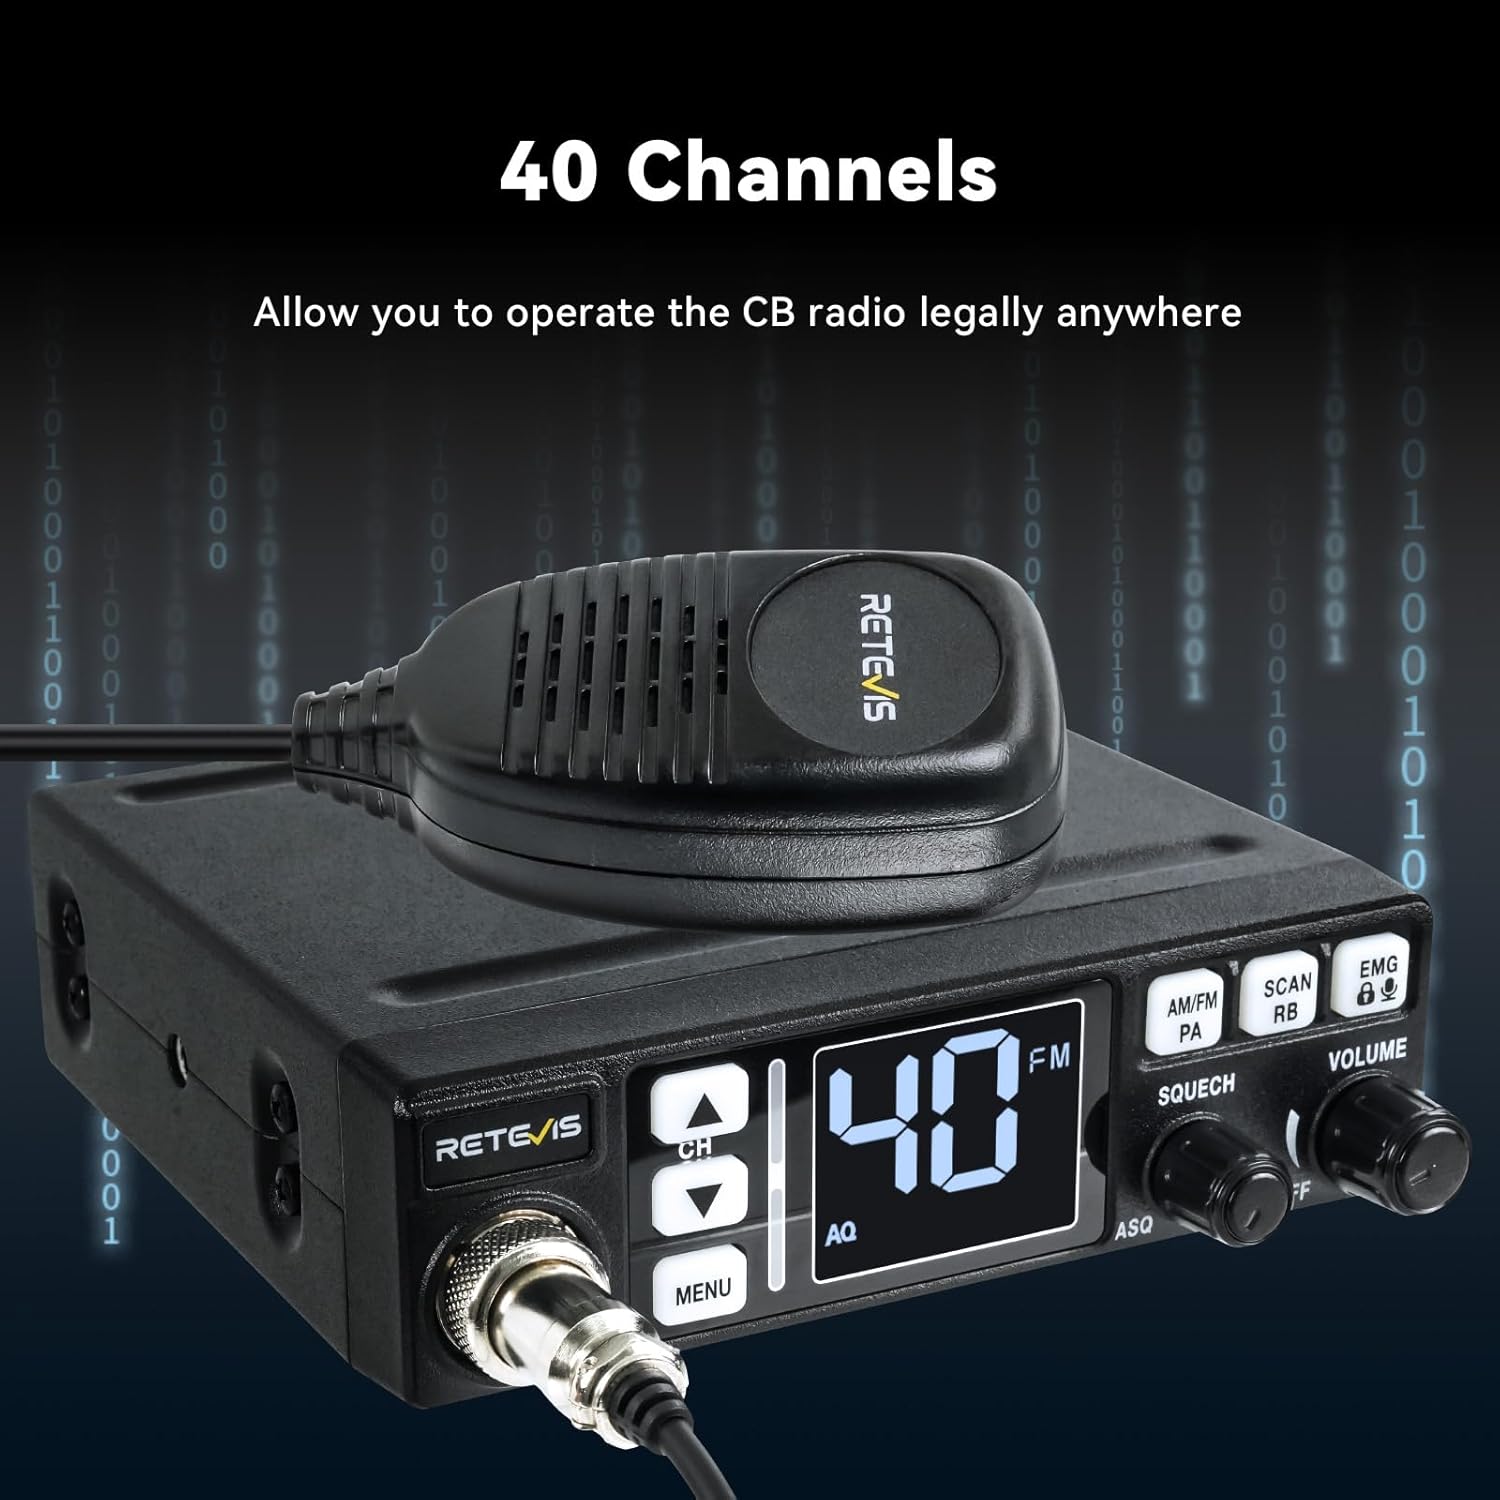
This image shows the Retevis MB3 CB Radio's display indicating channel 40, demonstrating the channel selection capability.
6.3 AM/FM Mode Selection
Press the AM/FM/PA button to cycle through AM, FM, and Public Address modes. AM mode is suitable for longer communication distances, while FM mode provides clearer sound at closer ranges.
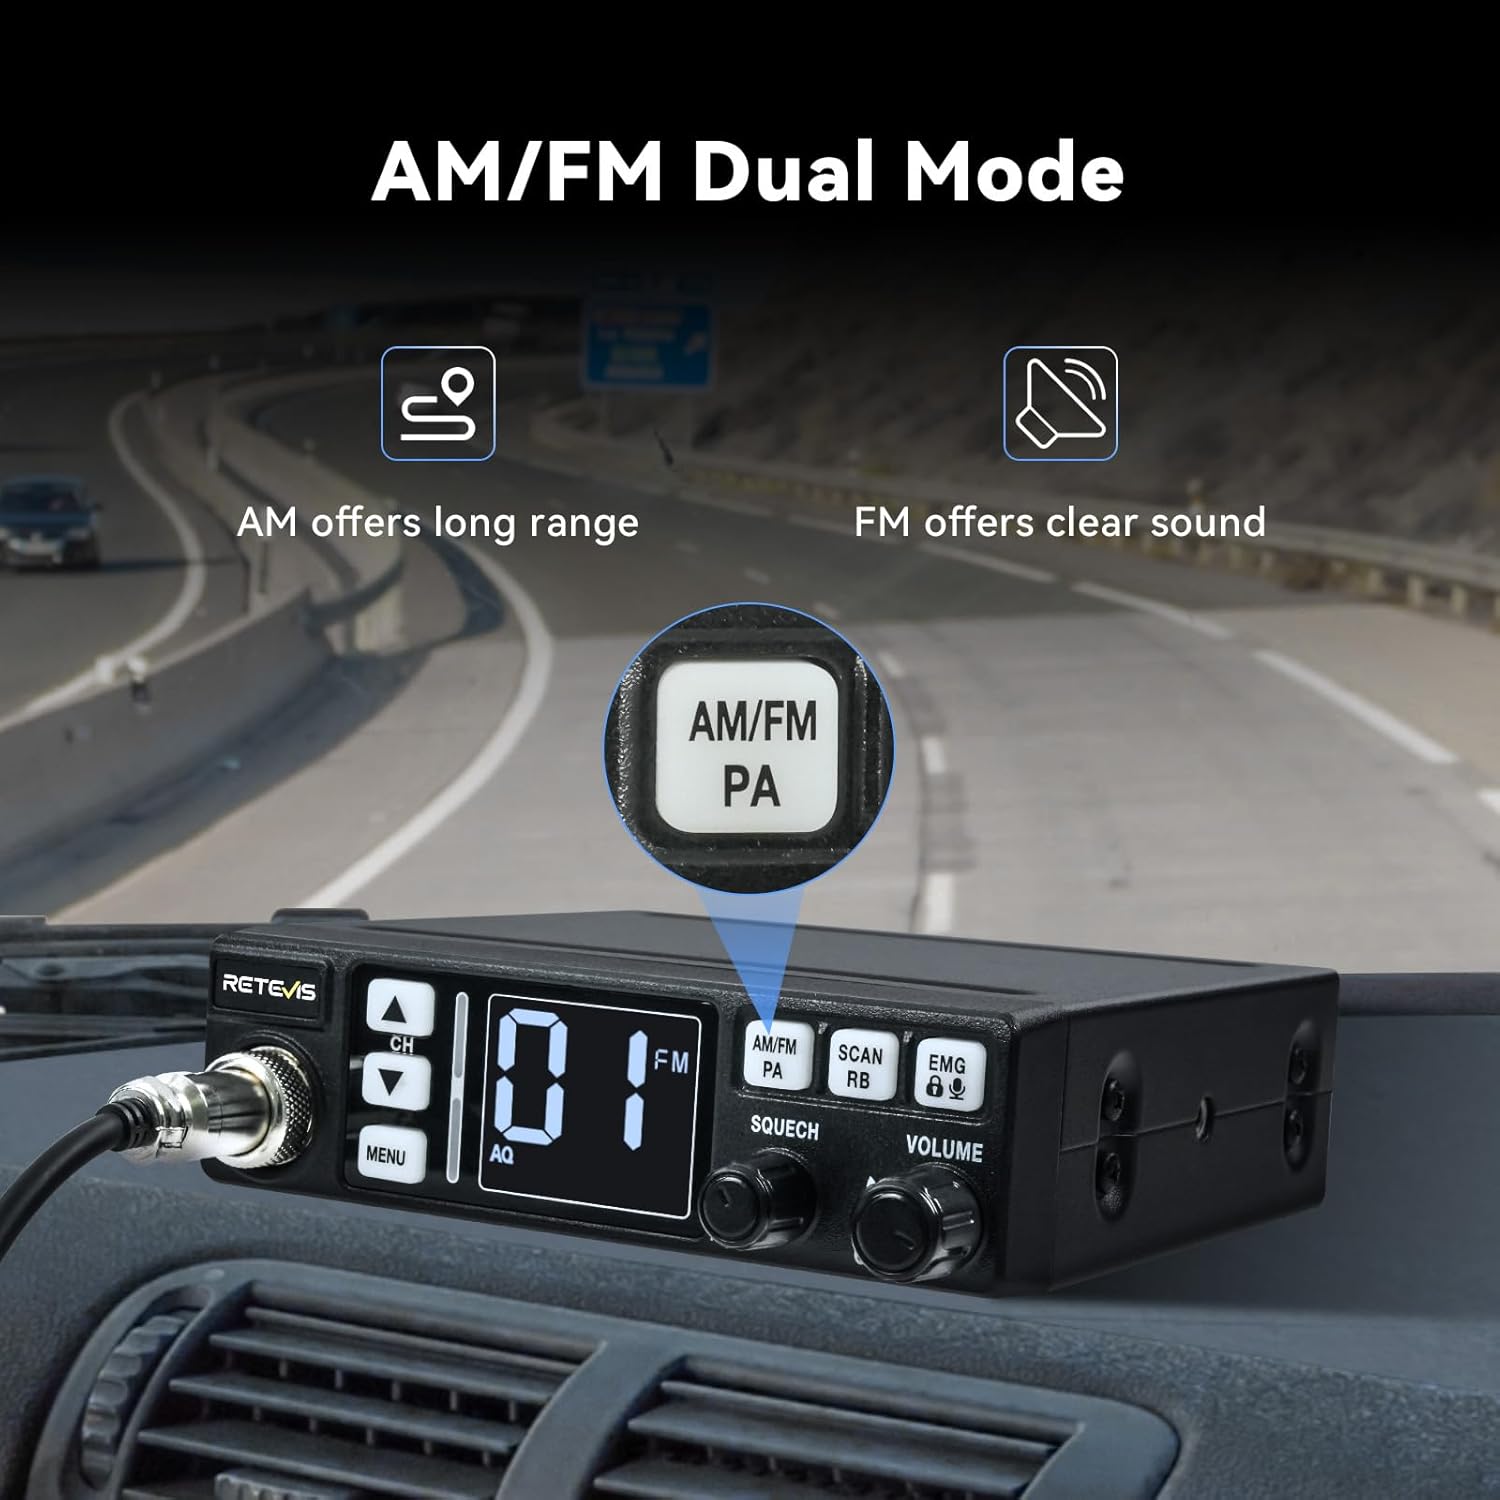
This image illustrates the AM/FM dual mode feature of the Retevis MB3 CB Radio, showing the button used to switch between modes.
6.4 Squelch (SQ) and Automatic Squelch (ASQ)
The SQUELCH knob controls the squelch level, which filters out weak signals and background noise. Rotate clockwise to increase the squelch level (reducing noise but potentially missing weak signals). Rotate fully counter-clockwise to activate Automatic Squelch (ASQ) for automatic noise reduction.

This image visually represents the Squelch (SQ) and Automatic Squelch (ASQ) functions, demonstrating how they reduce background noise for clearer communication.
6.5 Public Address (PA) Function
When an external PA speaker (not included) is connected, press the AM/FM/PA button until 'PA' is displayed. The radio will then function as a public address system.
6.6 Emergency Channels (EMG 9/19)
Press the EMG/Lock button to quickly switch to emergency channel 9 (for emergencies) or channel 19 (commonly used for trucker communication).

This image shows the Retevis MB3 CB Radio's display indicating emergency channels 9 and 19, accessible via the EMG button.
6.7 VOX (Voice Operated Transmit) Function
The VOX function allows hands-free transmission. When activated, the radio will transmit automatically when it detects your voice, eliminating the need to press the PTT (Push-To-Talk) button on the microphone. Refer to the MENU settings for VOX activation and sensitivity adjustment.

This image depicts the Retevis MB3 CB Radio in a vehicle, illustrating the convenience of VOX hands-free operation, allowing the user to focus on driving.
6.8 Key Lock Function
To prevent accidental channel changes or function activation, press and hold the EMG/Lock button to activate the key lock. Repeat the action to unlock.

This image displays the Retevis MB3 CB Radio with a lock icon on its display, indicating that the key lock function is active.
6.9 Scan Function
Press the SCAN/RB button to initiate channel scanning. The radio will scan through active channels. Press again to stop scanning.
6.10 Backlight Adjustment
The display backlight has 3 adjustable levels for clear visibility in various lighting conditions. Adjust this setting via the MENU.

This image shows the Retevis MB3 CB Radio's display with its adjustable backlight feature, ensuring readability day or night.
6.11 Key Beep
The radio provides an audible beep when keys are pressed. This feature can typically be enabled or disabled through the radio's menu settings.

This image visually represents the key beep function of the Retevis MB3 CB Radio, indicating audible feedback upon button presses.
7. Maintenance
- Cleaning: Use a soft, dry cloth to clean the radio's exterior. Do not use harsh chemicals or solvents.
- Connections: Periodically check all connections (power, antenna, microphone) to ensure they are secure and free from corrosion.
- Storage: If storing the radio for an extended period, disconnect it from power and store it in a dry, cool place.
8. Troubleshooting
| Problem | Possible Cause | Solution |
|---|---|---|
| Radio does not power on | No power connection; Blown fuse; Incorrect voltage. | Check power cables; Replace fuse (use spare); Verify 12-13.8V DC supply. |
| No sound from speaker | Volume too low; Squelch too high; Speaker disconnected. | Increase volume; Lower squelch; Check speaker connection. |
| Poor reception/transmission | Antenna issue; Incorrect mode (AM/FM); High interference. | Check antenna connection and tuning; Switch AM/FM mode; Move away from interference sources. |
| Cannot transmit | Microphone disconnected; PTT button faulty; Key lock active. | Check microphone connection; Test PTT button; Deactivate key lock. |
9. Specifications
| Feature | Detail |
|---|---|
| Brand | Retevis |
| Model Number | MB3 |
| Product Dimensions | 4.88 x 3.97 x 1.42 inches (124 x 101 x 36 mm) |
| Item Weight | 1.04 pounds (470 Grams) |
| Display Type | LCD |
| Number of Channels | 40 |
| Frequency Range | 26.965 MHz - 27.405 MHz |
| Voltage | 12-13.8 Volts DC |
| Special Features | AM/FM mode, Emergency Channel 9/19, VOX, Public Address (PA), Automatic Noise Limiter (ANL), Squelch (SQ), Automatic Squelch (ASQ), Key Lock, 3-level adjustable backlight, External Speaker Jack |
| Water Resistance Level | Not Water Resistant |
10. Warranty Information
Retevis provides a 2-year warranty for the radio body and a 1-year warranty for accessories. A 30-day no-reason return policy is also offered. Beyond the warranty period, maintenance services are available, with buyers responsible for associated costs. For warranty claims or service, please contact Retevis customer support on Amazon. Responses are typically provided within 12 hours.
11. Customer Support
For any questions, technical assistance, or support regarding your Retevis MB3 CB Radio, please contact Retevis customer service through the Amazon platform where the product was purchased. Ensure you have your product model (MB3) and purchase details available when contacting support.


