
1. Introduction
This manual provides detailed instructions for the installation, operation, and maintenance of your Ibergrif MA001W PC Monitor Arm. Please read this manual thoroughly before installation to ensure correct setup and safe operation. Keep this manual for future reference.
2. Safety Information
- Ensure your monitor's weight and size are within the specified limits (13-32 inches, 2-9 kg / 4.4-19.8 lbs). Exceeding these limits may result in instability or damage.
- Verify that your monitor has VESA 75x75mm or 100x100mm mounting holes.
- Do not attempt to disassemble the gas spring mechanism. It is under high pressure.
- Install the monitor arm on a stable desk surface that can support the combined weight of the arm and monitor.
- Always adjust the gas spring tension after the monitor is mounted to prevent the monitor from suddenly dropping or springing up.
- Keep children and pets away during installation.
3. Package Contents
Before installation, please check that all components are present and undamaged. If any parts are missing or damaged, contact customer support.
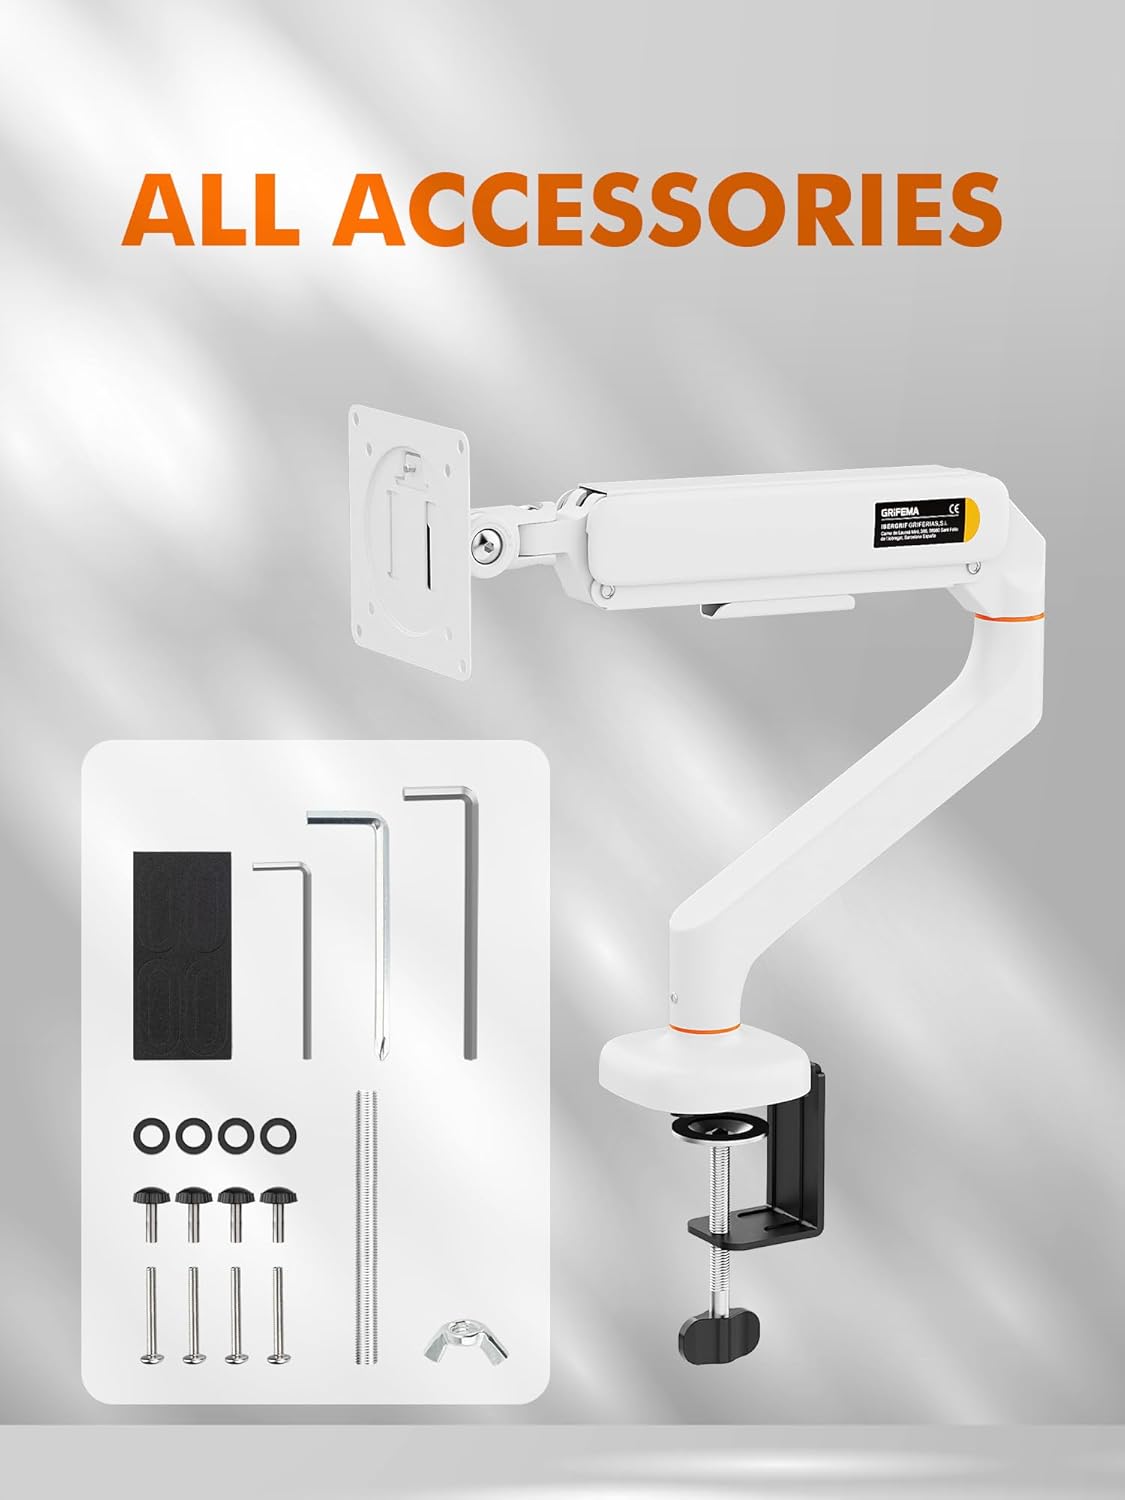
Image: All accessories included with the Ibergrif MA001W monitor arm, showing the arm, VESA plate, C-clamp, through-hole mount, various screws, washers, and Allen wrenches.
- Monitor Arm Assembly
- VESA Plate
- C-Clamp Mounting Hardware
- Through-Hole Mounting Hardware
- Monitor Mounting Screws (M4, M5)
- Washers and Spacers
- Allen Wrenches (various sizes)
- EVA Protective Pads
4. Specifications
| Feature | Specification |
|---|---|
| Model | MA001W |
| Screen Size Compatibility | 13 - 32 inches |
| Weight Capacity | 2 - 9 kg (4.4 - 19.8 lbs) |
| VESA Compatibility | 75x75mm, 100x100mm |
| Tilt Range | ±65° |
| Swivel Range | ±70° |
| Rotation | 360° (Landscape to Portrait) |
| Max Arm Height | 435mm |
| Max Arm Extension | 600mm |
| Desk Thickness (C-Clamp) | 10 - 65mm |
| Desk Thickness (Through-Hole) | 10 - 60mm |
| Material | Alloy Steel, Aluminum |

Image: Detailed size description of the Ibergrif MA001W monitor arm, showing dimensions for arm height, extension, VESA plate, and desk clamp compatibility.
5. Setup
5.1 Pre-Installation Check
- Confirm your monitor's size and weight are within the arm's specifications.
- Check your monitor's VESA mounting pattern (75x75mm or 100x100mm).
- Measure your desk thickness to ensure compatibility with the chosen mounting method.
5.2 Choose Your Mounting Method
The Ibergrif MA001W offers two installation options: C-clamp or through-hole mount.

Image: Diagram illustrating two easy installation methods for the monitor arm: C-clamp to the edge of the tabletop and installation through existing desk holes.
5.2.1 C-Clamp Installation
- Attach the C-clamp base to the main pole of the monitor arm.
- Place the protective EVA pads on the clamp surfaces that will contact your desk.
- Position the clamp on the edge of your desk (compatible with 10-65mm thickness).
- Tighten the clamp screw until the arm is securely fastened to the desk. Do not overtighten.
5.2.2 Through-Hole Installation
- If your desk has an existing grommet hole (10-60mm diameter), remove the grommet cover.
- Assemble the through-hole base with the main pole.
- Insert the pole through the desk hole.
- From underneath the desk, secure the base plate and tighten the nut until the arm is firmly attached.
5.3 Attaching the Monitor
- Carefully remove your monitor from its original stand and place it face down on a soft, clean surface.
- Attach the VESA plate to the back of your monitor using the appropriate M4 or M5 screws and washers. Ensure a snug fit.
- Slide the VESA plate with the attached monitor onto the arm's mounting head. Ensure it clicks into place or is secured with the provided locking mechanism.
5.4 Gas Spring Tension Adjustment
The gas spring is pre-set to medium tension. After mounting your monitor, you will need to adjust the tension to match your monitor's weight for optimal movement and stability.

Image: Diagram showing how to adjust the gas spring support force on the monitor arm using an Allen wrench to tighten or loosen the mechanism.
- Use the provided Allen wrench to access the tension adjustment screw on the arm.
- If the monitor sags or drops, turn the screw clockwise (+) to increase tension.
- If the monitor springs up or is difficult to push down, turn the screw counter-clockwise (-) to decrease tension.
- Adjust gradually and test the arm's movement until the monitor stays at any desired height effortlessly.
5.5 Cable Management
Utilize the integrated cable management clips along the arm to route your monitor's power and video cables. This helps maintain a tidy workspace.

Image: The monitor arm in use, demonstrating how it frees up desk space and features integrated cable management.
6. Operating the Monitor Arm
Once installed and adjusted, your Ibergrif MA001W monitor arm provides full flexibility for optimal viewing comfort.

Image: Diagram illustrating the full adjustability of the Ibergrif MA001W monitor arm, including 360-degree rotation, tilt up to 65 degrees, and swivel up to 70 degrees.
- Height Adjustment: Gently push or pull the monitor up or down to your desired ergonomic height. The gas spring will hold it in place.
- Tilt: Tilt the monitor screen up or down by up to ±65° to reduce glare and find your preferred viewing angle.
- Swivel: Swivel the monitor left or right by up to ±70° for collaborative work or to adjust your viewing position.
- Rotation: Rotate the monitor 360° to switch between landscape and portrait orientations.
7. Maintenance
- Regularly check all screws and connections to ensure they remain tight. Re-tighten if necessary.
- Clean the monitor arm with a soft, damp cloth. Avoid abrasive cleaners or solvents.
- Periodically check the gas spring tension and adjust if the monitor no longer holds its position correctly.
8. Troubleshooting
8.1 Monitor Sags or Drops
- Solution: The gas spring tension is too low for your monitor's weight. Increase the gas spring tension by turning the adjustment screw clockwise (+) with the provided Allen wrench.
8.2 Monitor Springs Up or is Hard to Push Down
- Solution: The gas spring tension is too high for your monitor's weight. Decrease the gas spring tension by turning the adjustment screw counter-clockwise (-) with the provided Allen wrench.
8.3 Arm is Loose on the Desk
- Solution: Re-tighten the C-clamp or through-hole mounting screws. Ensure the desk surface is stable and the clamp/mount is properly seated.
8.4 Monitor Does Not Fit VESA Plate
- Solution: Verify your monitor's VESA pattern is 75x75mm or 100x100mm. If it's different, your monitor is not compatible with this arm.
9. Warranty and Support
Ibergrif products are manufactured with quality and durability in mind. For warranty information or technical support, please refer to the contact details provided with your purchase documentation or visit the official Ibergrif website.
Please retain your proof of purchase for warranty claims.