
1. Introduction
This manual provides essential information for the safe and effective operation, maintenance, and troubleshooting of your Ginour 21V Brushless Cordless Hammer Drill, Model CD1308. Please read this manual thoroughly before using the tool and retain it for future reference.
The Ginour CD1308 is a versatile 21V lithium-ion cordless power drill equipped with a high-efficiency brushless motor. It features 23+3 torque settings, two variable speeds, and three working modes: screwdriving, drilling, and impact drilling. Designed for various tasks, it includes two 1.5Ah batteries, a charger, and a comprehensive set of accessories for working with metal, wood, and brick walls.
2. General Safety Information
WARNING: Read all safety warnings, instructions, illustrations, and specifications provided with this power tool. Failure to follow all instructions listed below may result in electric shock, fire, and/or serious injury.
2.1. Work Area Safety
- Keep work area clean and well lit. Cluttered or dark areas invite accidents.
- Do not operate power tools in explosive atmospheres, such as in the presence of flammable liquids, gases, or dust. Power tools create sparks which may ignite the dust or fumes.
- Keep children and bystanders away while operating a power tool. Distractions can cause you to lose control.
2.2. Electrical Safety
- Power tool plugs must match the outlet. Never modify the plug in any way.
- Do not expose power tools to rain or wet conditions. Water entering a power tool will increase the risk of electric shock.
2.3. Personal Safety
- Always wear eye protection. Use safety glasses or goggles.
- Dress properly. Do not wear loose clothing or jewelry. Keep your hair and clothing away from moving parts.
- Stay alert, watch what you are doing, and use common sense when operating a power tool.
2.4. Power Tool Use and Care
- Do not force the power tool. Use the correct power tool for your application.
- Disconnect the battery pack from the power tool before making any adjustments, changing accessories, or storing power tools.
- Store idle power tools out of the reach of children and do not allow persons unfamiliar with the power tool or these instructions to operate the power tool.
2.5. Battery Tool Use and Care
- Recharge only with the charger specified by the manufacturer.
- Use power tools only with specifically designated battery packs.
- When battery pack is not in use, keep it away from other metal objects.
- Under abusive conditions, liquid may be ejected from the battery; avoid contact. If contact accidentally occurs, flush with water. If liquid contacts eyes, additionally seek medical help.
3. Product Components and Package Contents
Your Ginour 21V Brushless Cordless Hammer Drill package includes the following items:

Image: The Ginour 21V Brushless Cordless Hammer Drill shown with its two batteries, charger, carry case, and a wide array of drill bits, screwdriver bits, sockets, a flexible shaft, and gloves.

Image: A visual breakdown of the 48-piece package contents, including the brushless power drill, 2 lithium-ion batteries, 1 charger, 1 carry case, 1 flexible shaft, 5 tungsten carbide tip drill bits, 3 flat drill bits, 10 screwdriver bits, 3 wood drill bits, 6 screwdriver bits, 9 sockets, 3 HSS twist drill bits, 1 connecting extension bar, 1/4" socket adapter, and 1 pair of gloves.
- 1 x Ginour Brushless Power Drill
- 2 x 1.5Ah Lithium-ion Batteries
- 1 x Battery Charger
- 1 x Carry Case
- 1 x Flexible Shaft
- 5 x Tungsten Carbide Tip Drill Bits (Ø4/5/6/8/10mm)
- 3 x Flat Drill Bits (Ø10/12/14mm)
- 3 x Wood Drill Bits (Ø4/5/6mm)
- 3 x HSS Twist Drill Bits (Ø4/5/6mm)
- 16 x Screwdriver Bits (various types including 5mm/6mm/PH1/PH2/T20/T25)
- 9 x Sockets (Ø5-13mm)
- 1 x Connecting Extension Bar
- 1 x 1/4" Socket Adapter
- 1 x Pair of Gloves
- 1 x Instruction Manual (this document)
4. Product Features and Controls Overview
Familiarize yourself with the various parts and controls of your Ginour drill for optimal use.

Image: A diagram illustrating the key components of the Ginour 21V Cordless Brushless Power Drill, labeled A through J.
- Variable-Speed Trigger Switch: Controls the rotation speed.
- Forward/Reverse Control Button: Selects rotation direction and acts as a safety lock.
- 3/8" Keyless Chuck: Holds drill bits and screwdriver bits.
- Torque Adjustment Collar: Sets the torque level (1-23) for screwdriving.
- Mode Selection Collar: Selects between Screwdriving, Drilling, and Impact Drilling modes.
- Speed Selector: Switches between low speed (1) and high speed (2).
- Battery Pack: Removable 21V Lithium-ion battery.
- Battery Release Button: Used to detach the battery pack.
- LED Work Light: Illuminates the work area.
- Battery Capacity Indicator: Displays the remaining battery charge.
5. Setup
5.1. Charging the Battery
- Insert the battery pack into the charger. Ensure it clicks into place.
- Plug the charger into a standard power outlet.
- The battery indicator lights on the charger will show the charging status. A full charge is indicated when all lights are solid green.
- Once fully charged, disconnect the charger from the power outlet and remove the battery.
- The battery level indicator on the drill (J) provides real-time charge status during use.
5.2. Installing and Removing Drill Bits/Accessories

Image: A four-step visual guide demonstrating how to install a drill bit: 1. Release the chuck, 2. Place the bit, 3. Grip the chuck, 4. Select torque setting.
- Release the Chuck: Rotate the chuck (C) counter-clockwise until the jaws are open wide enough to accept the desired bit.
- Place the Bit: Insert the shank of the drill bit or accessory fully into the chuck.
- Grip the Chuck: Rotate the chuck clockwise to tighten the jaws securely around the bit. Ensure the bit is centered and firmly held.
- Select Torque Setting: After installing the bit, adjust the torque adjustment collar (D) to the appropriate setting for your task.
To remove a bit, rotate the chuck counter-clockwise until the jaws open, then pull the bit out.
6. Operating Instructions
6.1. Selecting Operating Mode
The drill offers three operating modes via the Mode Selection Collar (E):

Image: A visual representation of the drill's 3-in-1 system, showing icons for Screwdriving, Drilling, and Impact Drilling modes, with examples of each application.
- Screwdriving Mode: For driving and removing screws. Use with appropriate torque settings.
- Drilling Mode: For drilling holes in wood, metal, and plastic.
- Impact Drilling Mode: For drilling into masonry, brick, and concrete.
Rotate the Mode Selection Collar (E) to align the desired mode icon with the indicator mark on the drill body.
6.2. Adjusting Torque Settings
The Torque Adjustment Collar (D) provides 23+3 settings (50 Nm Max) to prevent over-tightening or damaging materials. This is primarily used in Screwdriving mode.

Image: A diagram illustrating the 23+3 torque settings, showing recommended ranges for different materials such as plastic, wood, metal, brick, and cement.
- Lower torque settings (1-6) are suitable for softer materials or smaller screws.
- Higher torque settings (7-23) are for harder materials or larger screws.
- The "Drill" and "Impact Drill" settings bypass the clutch for maximum power.
Rotate the Torque Adjustment Collar (D) to select the desired torque level.
6.3. Selecting Speed
The Speed Selector (F) allows you to choose between two variable speeds:

Image: A visual comparison of the two variable speed settings: 0-450 RPM (recommended for impact drilling) and 0-1450 RPM (recommended for screw drilling).
- Speed 1 (0-450 RPM): Low speed, high torque. Ideal for screwdriving, larger drilling diameters, and impact drilling.
- Speed 2 (0-1450 RPM): High speed, lower torque. Ideal for smaller drilling diameters and faster screwdriving.
Slide the Speed Selector (F) to the desired position (1 or 2). Do not change speed while the drill is running.
6.4. Forward/Reverse Operation and Safety Lock
The Forward/Reverse Control Button (B) serves three functions:
- Forward (Clockwise Rotation): Push the button to the left side of the drill. Used for driving screws and drilling.
- Reverse (Counter-Clockwise Rotation): Push the button to the right side of the drill. Used for removing screws or backing out drill bits.
- Safety Lock (Center Position): When the button is in the center, the trigger switch is locked, preventing accidental startup. Always engage the safety lock when changing bits, performing maintenance, or storing the tool.
6.5. Drilling and Screwdriving Techniques
Always ensure the workpiece is securely clamped or held. Apply steady, even pressure. The integrated LED work light (I) will illuminate your work area when the trigger is pressed.
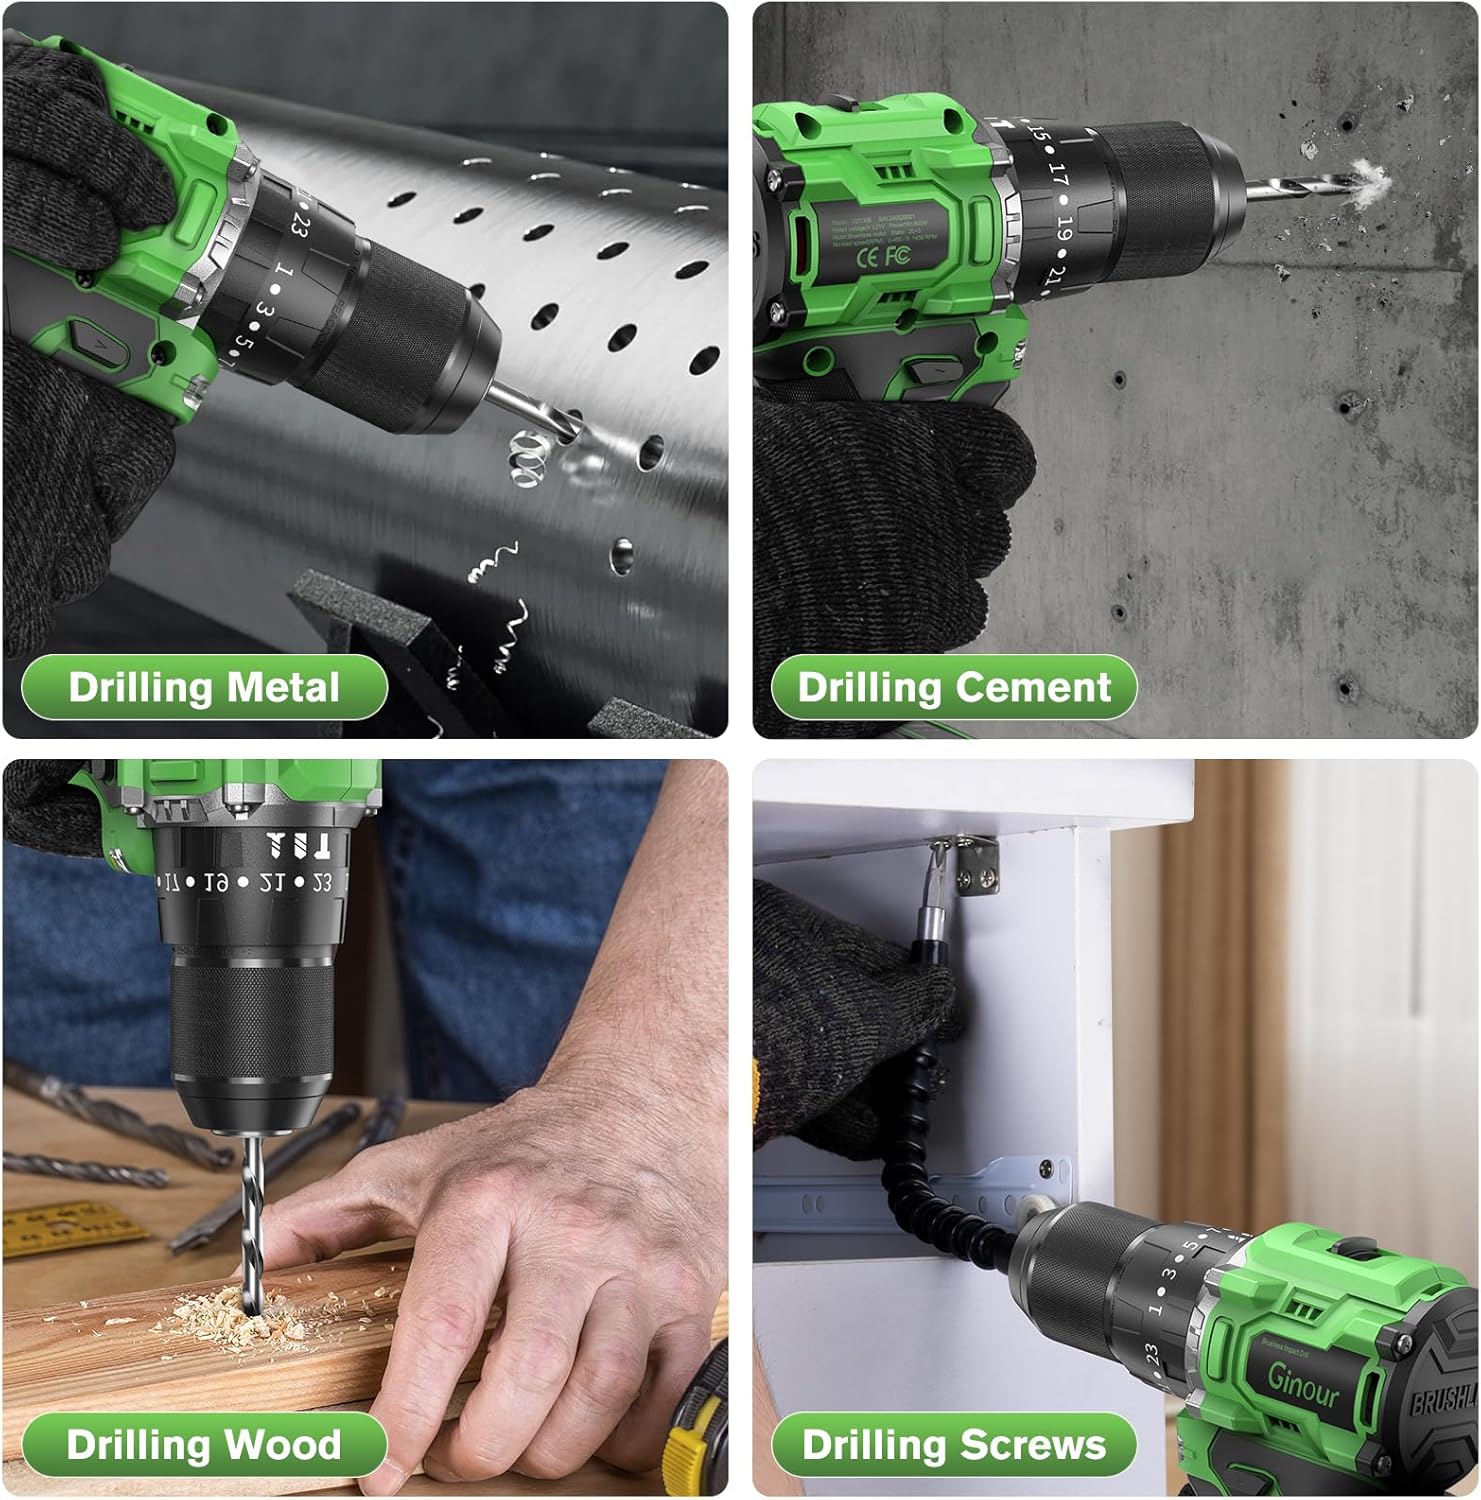
Image: A collage showing the Ginour drill being used for various applications: drilling into metal, drilling into cement, drilling into wood, and driving screws with a flexible shaft.
The included drill bits are suitable for various materials:
- Wood Drilling: Use wood drill bits or HSS twist drill bits. Start with a lower speed for larger holes.
- Metal Drilling: Use HSS twist drill bits. Apply cutting oil for better results and to prolong bit life.
- Brick/Concrete Drilling (Impact Mode): Use tungsten carbide tip drill bits. Ensure the drill is set to Impact Drilling mode and Speed 1.
- Screwdriving: Select Screwdriving mode and an appropriate torque setting. Use Speed 1 for more control, or Speed 2 for faster driving of smaller screws.
7. Maintenance
7.1. Cleaning
- Always disconnect the battery pack before cleaning.
- Use a soft, damp cloth to wipe down the exterior of the drill. Do not use harsh chemicals or abrasive cleaners.
- Clear any dust or debris from the ventilation openings using compressed air or a soft brush.
- Keep the chuck jaws clean and free of debris to ensure proper bit gripping.
7.2. Battery Care and Storage
- Store batteries in a cool, dry place, away from direct sunlight and extreme temperatures.
- Do not store batteries in a discharged state for extended periods. Charge them periodically if not in use.
- Do not short-circuit battery terminals.
- If the battery pack is damaged, do not use it. Contact customer support for replacement.
7.3. Accessory Care
- Clean drill bits and screwdriver bits after use.
- Store accessories in the provided carry case to prevent loss and damage.
8. Troubleshooting
If you encounter issues with your Ginour drill, refer to the following common problems and solutions:
| Problem | Possible Cause | Solution |
|---|---|---|
| Drill does not start | Battery not charged Battery not properly inserted Forward/Reverse switch in center (safety lock) | Charge battery Ensure battery is fully seated Move switch to forward or reverse position |
| Reduced power or speed | Low battery charge Incorrect speed setting Overload protection activated | Recharge battery Switch to higher speed (Speed 2) Reduce pressure, allow tool to cool |
| Battery not charging | Charger not plugged in Faulty battery or charger Battery too hot/cold | Check power connection Contact customer support Allow battery to reach room temperature |
| Bit slips in chuck | Chuck not tightened sufficiently Bit shank is dirty or damaged | Retighten chuck firmly Clean or replace bit |
If the problem persists after attempting these solutions, please contact Ginour customer support.
9. Specifications
| Feature | Specification |
|---|---|
| Brand | Ginour |
| Model Number | CD1308 |
| Power Source | Battery Powered |
| Voltage | 21 Volts |
| Motor Type | Brushless |
| Maximum Torque | 50 Newton Meters (442 in.lbs) |
| No-Load Speed (Speed 1) | 0-450 RPM |
| No-Load Speed (Speed 2) | 0-1450 RPM |
| Impact Rate | 18000 BPM (Beats Per Minute) |
| Chuck Size | 3/8" Keyless Chuck |
| Clutch Settings | 23+3 (Screwdriving, Drilling, Impact Drilling) |
| Battery Capacity | 1.5 Ah (Lithium-ion) |
| Maximum Power | 800 Watts |
| Product Dimensions (L x W x H) | 12.8" x 3.94" x 11.61" |
| Item Weight | 6.96 pounds |
| Color | Green |
10. Warranty and Support
For warranty information and customer support, please refer to the documentation included with your purchase or contact Ginour directly through their official website or customer service channels. Keep your purchase receipt as proof of purchase.