1. Important Safety Information
- Ensure proper anchoring to withstand heavy snow and harsh weather conditions.
- Handle with care during severe weather events, as flexible panels disperse impact and reduce exposure to potential damage.
- Exercise caution during assembly to avoid potential hazards.
- Install the gazebo against a wall for maximum stability.
- The gazebo comes in 2 packages and may have different arrival times. If anything is missing, contact customer support for assistance.
2. Package Contents
Before beginning assembly, verify that all components are present and undamaged. Refer to the included parts list in your physical manual for detailed identification. Key components include:
- Aluminum Frame Components (Pillars, Beams, Ridge Beams, Brackets)
- Flexible Roof Panels
- Hardware (Screws, Nuts, Washers, Anchors)
- Tools (Basic assembly tools may be included, but a power drill is recommended)
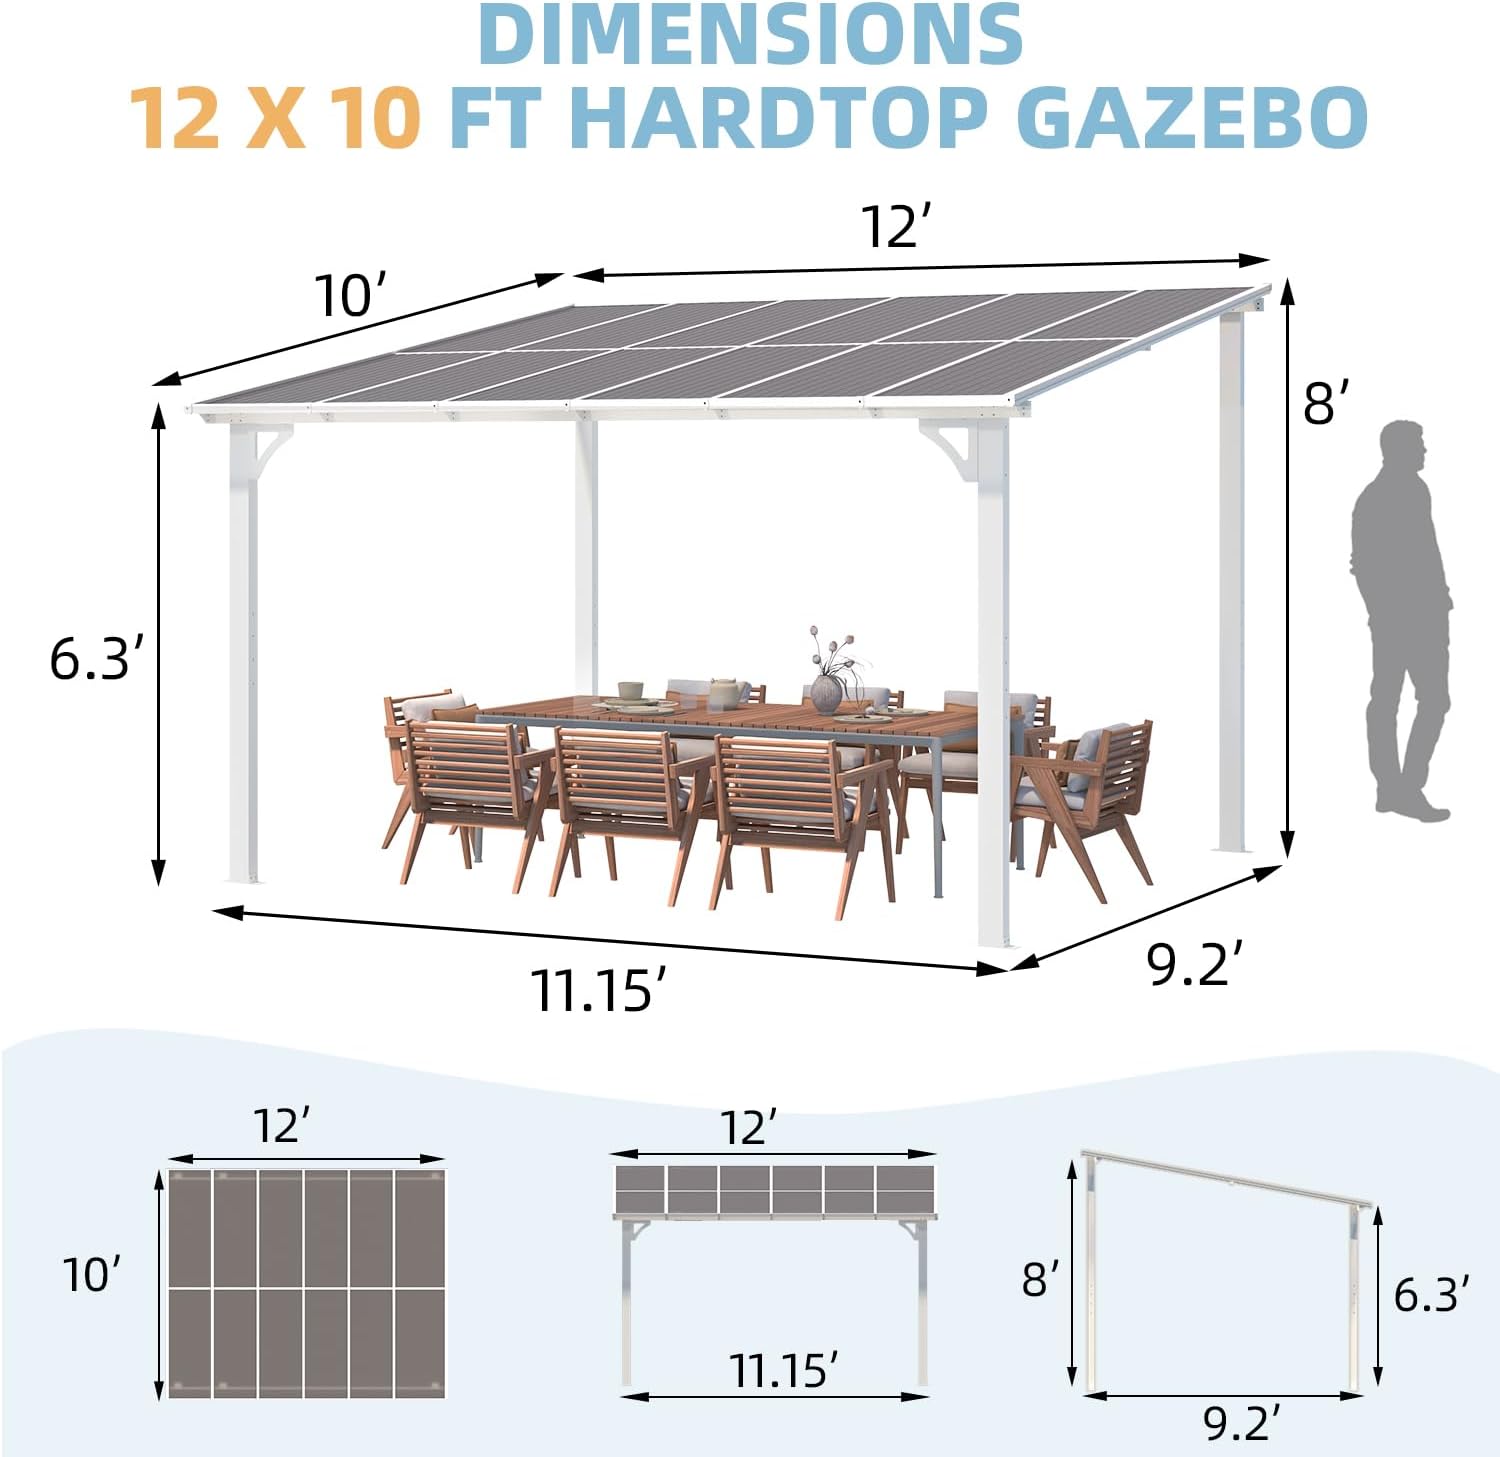
Image: Detailed dimensions and components of the AECOJOY 12' x 10' Pergola Gazebo.
3. Setup and Assembly Instructions
Assembly requires careful attention to detail. It is recommended to have at least two people for installation. Do not fully tighten screws until all components are aligned.
3.1. Pillar Installation
Connect the pillar sections using the provided hardware. Refrain from tightening the screws initially to allow for easier alignment of all screw holes.
Video: Step-by-step guide for pillar installation, demonstrating initial loose fitting of screws for alignment.
3.2. Beam Installation
Assemble the main beams, ensuring screw holes on both sides face the same direction. Insert all screws before tightening them completely.
Video: Detailed instructions for beam assembly, highlighting the importance of screw hole orientation.
3.3. Beam-to-Column Connection
Connect the assembled beams to the columns. For easier installation, flip the assembly upside down if necessary. Ensure all screws are inserted before final tightening.
Video: Demonstrates connecting beams to columns, including a tip for easier assembly by inverting the structure.
3.4. Ridge Beam Installation
Install the ridge beam components. Ensure the two triangular brackets face the same direction for proper support. Tighten all four nuts securely.
Video: Instructions for installing the ridge beam and ensuring correct orientation of triangular brackets.
3.5. Panel Installation
Carefully slide the roof panels into place. Note that Part G panels have a water leakage hole which must be installed facing upward to ensure proper drainage. Remove any protective stickers from the panels during installation.
Video: Guide for installing roof panels, emphasizing the correct orientation of panels with drainage holes.
3.6. Front Beam Installation
Attach the front beam to complete the roof structure. Ensure all connections are secure.
Video: Final steps for installing the front beam and completing the gazebo structure.
3.7. Anchoring
For maximum stability and to withstand wind and snow, securely fasten the gazebo to both the wall and the ground using the provided nails/anchors. The base of each post has four holes for anchoring.

Image: A fully assembled AECOJOY Pergola Gazebo, demonstrating its wall-mounted design and overall structure.
4. Operating Instructions
The AECOJOY Pergola Gazebo is designed to enhance your outdoor living space with durable shelter and protection.
- UV and Rain Protection: The roof covers an area of 120 sq. ft., providing effective protection against UV rays and rainwater.
- Weather Resistance: The gazebo has a static pressure rating of 66 lbs/㎡, capable of withstanding heavy snow and harsh weather. Flexible panels disperse impact from events like hailstorms. It can handle wind speeds of 40-50 mph and snow accumulation of 2.4 inches when properly anchored.
- Versatile Use: Ideal for various outdoor settings such as patios, decks, porches, backyards, near pools, hot tubs, or as an outdoor dining and entertainment space.
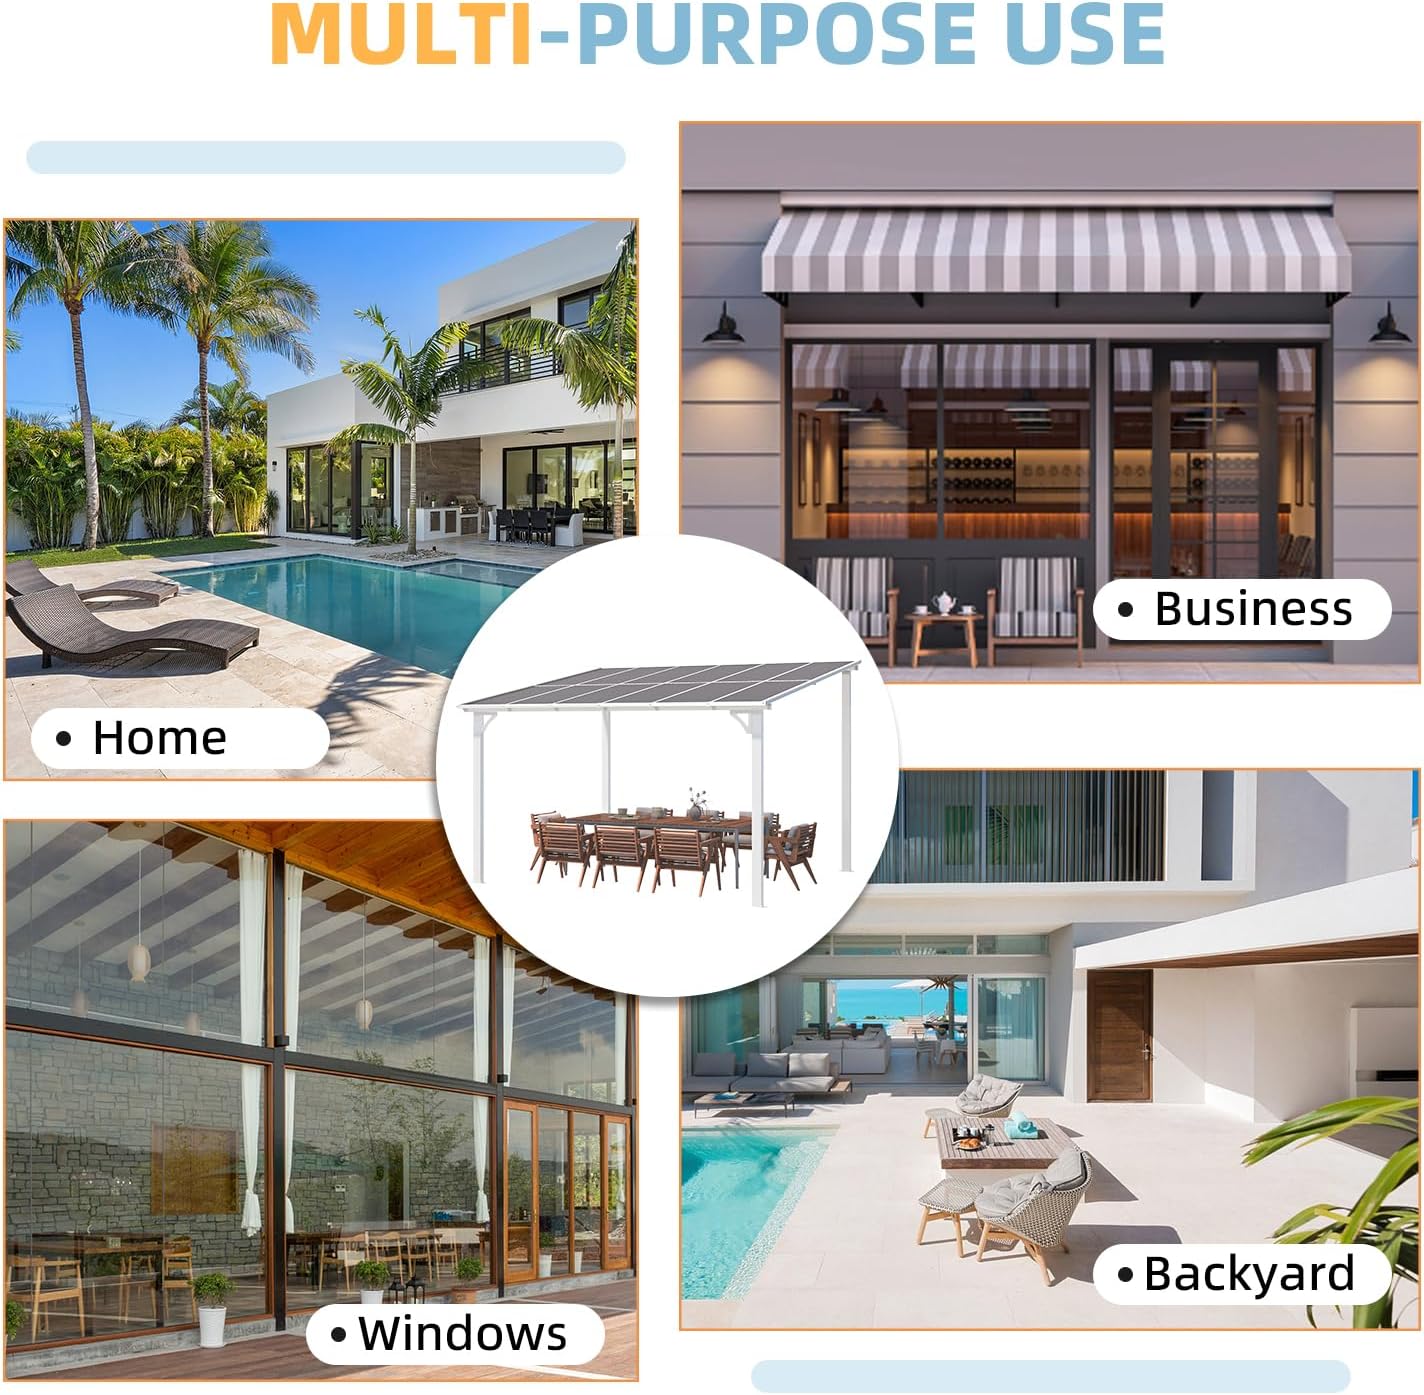
Image: Examples of the gazebo's versatile applications in different outdoor environments.

Image: Visual representation of the gazebo's key protective features and robust construction.

Image: Demonstrates the gazebo's performance in both summer (UV protection) and winter (snow load capacity).
5. Maintenance
Regular maintenance will ensure the longevity and optimal performance of your AECOJOY Pergola Gazebo.
- Cleaning: Clean the frame and roof panels periodically with mild soap and water. Avoid abrasive cleaners or tools that could scratch the surfaces.
- Fastener Check: Periodically inspect all screws and bolts to ensure they remain tight. Re-tighten as necessary to maintain structural integrity.
- Drainage: Ensure the water leakage holes in the panels (Part G) remain clear of debris to facilitate proper water runoff.
- Winter Care: While designed for snow load, it is advisable to clear excessive snow accumulation to prolong the life of the roof panels.
6. Troubleshooting
If you encounter any issues during assembly or use, refer to the following common solutions:
- Missing Parts: If any parts are missing upon delivery, please contact customer support immediately.
- Misaligned Holes: During assembly, ensure screws are loosely fitted first to allow for adjustment and proper alignment of all holes before final tightening.
- Water Leakage: Verify that roof panels, especially Part G with the designated water leakage hole, are installed with the hole facing upward. Ensure all panel connections are secure and sealed.
- Stability Concerns: Double-check that the gazebo is securely anchored to both the wall and the ground as per installation instructions. Ensure all frame connections are tightly fastened.
7. Specifications
| Attribute | Value |
|---|---|
| Brand | AECOJOY |
| Model Number | 12' x 10' Pergola Gazebo |
| Product Dimensions | 120"L x 144"W x 96"H |
| Floor Area | 120 Square Feet |
| Item Weight | 160 Pounds |
| Material | Aluminum |
| Frame Material | Aluminum |
| Color | White |
| Water Resistance Level | Waterproof |
| Ultraviolet Light Protection | UPF 70++ |
| Assembly Required | Yes |
8. Warranty and Support
Your AECOJOY Pergola Gazebo comes with a 1-year warranty. Enjoy peace of mind with lifelong customer-friendly service available 24/7. For any questions, concerns, or assistance, please contact AECOJOY customer support.