Introduction
Thank you for choosing the RPNB Smart Touchscreen Fireproof Safe. This manual provides detailed instructions for the safe's setup, operation, programming, and maintenance. Please read this manual thoroughly before using your safe to ensure proper function and security.

Image: The RPNB Smart Touchscreen Fireproof Safe, designed to protect valuables from both fire and water damage.
Safety Precautions
- Do not store emergency keys inside the safe. Keep them in a secure, separate location.
- Ensure the safe is securely mounted to prevent unauthorized removal.
- Avoid exposing the safe to extreme temperatures or humidity.
- Do not use abrasive cleaners or solvents on the safe's surface.
- Keep children away from the safe and its locking mechanisms.
Setup
1. Battery Installation
- Locate the battery compartment on the back of the touchscreen panel.
- Press the tab on the left side of the lock cover and remove the cover.
- Connect a 9V alkaline battery (not included) to the battery connector.
- Carefully place the battery into the compartment and reattach the cover.

Image: Detail of the safe's handle, showing the battery compartment behind the touchscreen panel and the adjustable shelf inside.
2. Handle Installation
- Insert the three-spoke handle into the handle hub on the safe door.
- Rotate the handle clockwise to secure it.
3. Initial Opening with Default Passcode
- Touch the screen to activate the keypad.
- Enter the default passcode: 1234.
- Rotate the handle clockwise to open the safe door.
Video: This video demonstrates the initial setup steps, including battery installation, handle attachment, and opening the safe with the default passcode. It also shows how to set a new passcode and register fingerprints, as well as activating silent mode and the vibration alarm.
Programming
1. Setting a New Passcode
- With the safe door open, locate and press the red "SET" button on the inside of the door.
- Within 10 seconds, touch the screen to activate the keypad and enter your new 4-digit passcode.
- Press the "SET" button again to confirm.
- Test the new passcode with the door open before closing it.

Image: A visual guide to the three unlocking methods: emergency key, biometric fingerprint, and 4-digit intelligent touchscreen keypad.
2. Registering Fingerprints
The safe supports up to 20 fingerprints.
- With the safe door open, locate and press the red "SET" button on the inside of the door.
- Place your finger on the fingerprint sensor and scan it 4 times, lifting your finger slightly between each scan.
- The safe will confirm successful registration.
- Test the registered fingerprint with the door open before closing it.
Operating the Safe
Unlocking Methods
- Emergency Key: Insert the emergency key into the keyhole, turn it, and rotate the handle clockwise to open.
- Passcode: Touch the screen, enter your programmed passcode, and rotate the handle clockwise to open.
- Fingerprint: Place your registered finger on the sensor. Once recognized, rotate the handle clockwise to open.
Silent Mode
To activate or deactivate silent mode (which mutes keypad sounds):
- Touch the screen to activate the keypad.
- Press and hold the number 1 for 3 seconds until the pilot lamp illuminates.
- Silent mode is now activated/deactivated.
Vibration Alarm System
To enhance security, the safe features a vibration alarm:
- To activate the alarm, touch the screen to activate the keypad, then press and hold the number 3 for 3 seconds until the pilot lamp illuminates.
- If the safe experiences violent shaking, the alarm will sound for 1 minute.
- During an alarm, the keypad and fingerprint sensor will be temporarily disabled.
- To deactivate the alarm, use the emergency key to open the safe.

Image: The alarm system is activated by violent shaking, triggering a 1-minute buzzer. It can be deactivated using the emergency key.
Features Overview
- Robust Fireproof Construction: Constructed from solid anti-theft steel with a 16mm heat-resistant fireproof board and five 20mm diameter solid steel bolts. UL72 fire standard compliant, offering 30 minutes of fire resistance at 1200°F.
- Spacious Interior: 36L capacity with internal dimensions of 45.5 cm (H) x 32 cm (W) x 25 cm (D). Features an adjustable shelf with 8 possible height levels to accommodate various item sizes.
- Multiple Locking Methods: Offers three ways to unlock: emergency key, 4-digit intelligent touchscreen keypad, and 500DPI biometric fingerprint sensor. An external battery box design allows for emergency battery replacement.
- Internal Protection: The interior is fully covered with thick felt to protect valuables from scratches and damage.
- Convenient Mounting: Includes one pre-drilled hole at the bottom and one expansion bolt for easy and secure floor mounting to prevent theft.
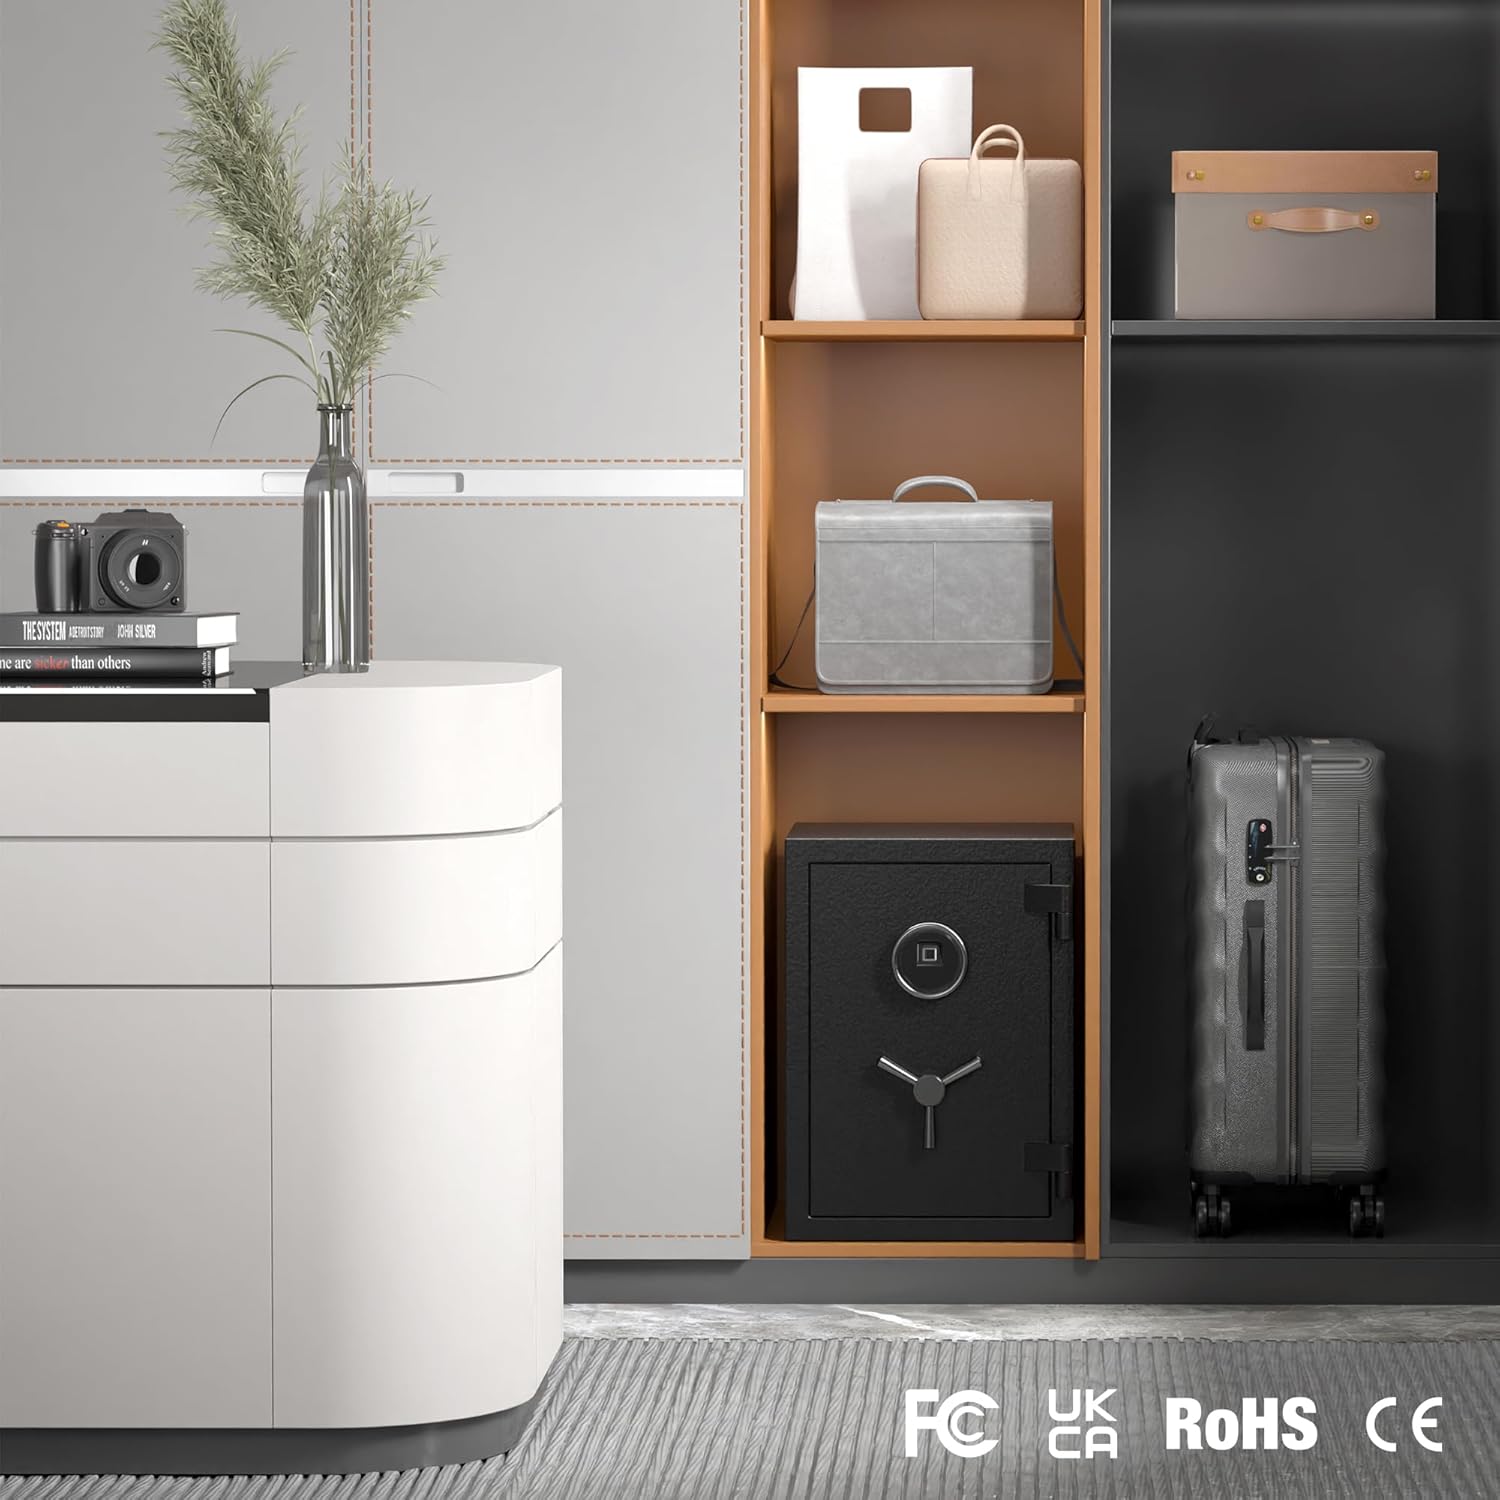
Image: The RPNB safe blends seamlessly into a home environment, providing secure storage without compromising aesthetics.
Video: This short video highlights key features of the RPNB safe, including the touchscreen keypad, fingerprint sensor, durable handle, solid steel bolts, fireproof board, and adjustable interior shelf.
Specifications
| Attribute | Detail |
|---|---|
| Brand | RPNB |
| Model Number | FSJP50/RPFS50 |
| Product Dimensions | 35.05 x 36.05 x 50.05 cm (D x W x H) |
| Internal Dimensions | 45.5 cm (H) x 32 cm (W) x 25 cm (D) |
| Color | Black |
| Material | Alloy Steel |
| Included Components | Spoke Handle, Emergency Keys (2) |
| Battery Included | No |
| Item Weight | 30.4 Kilograms |
| Lock Type | Electronic |
| Capacity | 36 Liters |

Image: Detailed dimensions of the 36L RPNB safe, showing external measurements of 50x36x35cm (HxWxD) and internal measurements of 45.5x32x25cm (HxWxD), with a weight of 30.4kg.
Troubleshooting
- Safe does not open with passcode/fingerprint:
- Ensure batteries are correctly installed and have sufficient power. Replace with new 9V alkaline batteries if needed.
- Verify the correct passcode is being entered.
- Ensure your finger is clean and properly placed on the fingerprint sensor.
- Use the emergency key to open the safe if electronic access fails.
- Keypad is unresponsive:
- Check battery power.
- If the vibration alarm was triggered, the keypad may be temporarily disabled. Use the emergency key to reset.
- Alarm sounds unexpectedly:
- The vibration alarm may have been triggered by movement. Use the emergency key to silence it.
- Review the alarm activation steps to ensure it was not accidentally enabled.
- Lost emergency keys:
- Contact RPNB customer support for assistance. Proof of ownership may be required.
Warranty and Support
RPNB provides a 12-month warranty from the date of purchase. If you encounter any issues with your product, please contact our after-sales service. We are committed to resolving any problems you may have.
For further assistance, please visit the RPNB Store on Amazon or refer to the contact information provided with your purchase.


