
Memorex MX-BCCD50
Memorex AM/FM Top Loading Cassette CD Player
Model: MX-BCCD50 | Brand: Memorex
Introduction
This manual provides essential information for the safe and efficient operation of your Memorex Portable Cassette CD Player. Please read this manual thoroughly before using the unit and retain it for future reference.
Important Safety Information
- Power Source: Use only the specified power adapter or batteries. Ensure the voltage matches the unit's requirements.
- Ventilation: Do not block ventilation openings. Allow adequate space around the unit for proper airflow.
- Water and Moisture: Do not expose the unit to rain, moisture, or dripping/splashing liquids. Keep away from water sources.
- Heat: Do not place near heat sources such as radiators, heat registers, stoves, or other apparatus (including amplifiers) that produce heat.
- Cleaning: Clean only with a dry cloth. Avoid liquid cleaners or aerosol sprays.
- Servicing: Do not attempt to service this product yourself. Refer all servicing to qualified service personnel.
- Battery Safety: Do not mix old and new batteries. Do not mix alkaline, standard (carbon-zinc), or rechargeable (nickel-cadmium) batteries. Remove batteries if the unit is not used for extended periods.
Package Contents
Verify that all items are present upon unpacking:
- Memorex Portable Cassette CD Player (Blue)
- AC Power Adapter
- Instruction Manual (this document)
Product Overview
Familiarize yourself with the main components and controls of your unit.
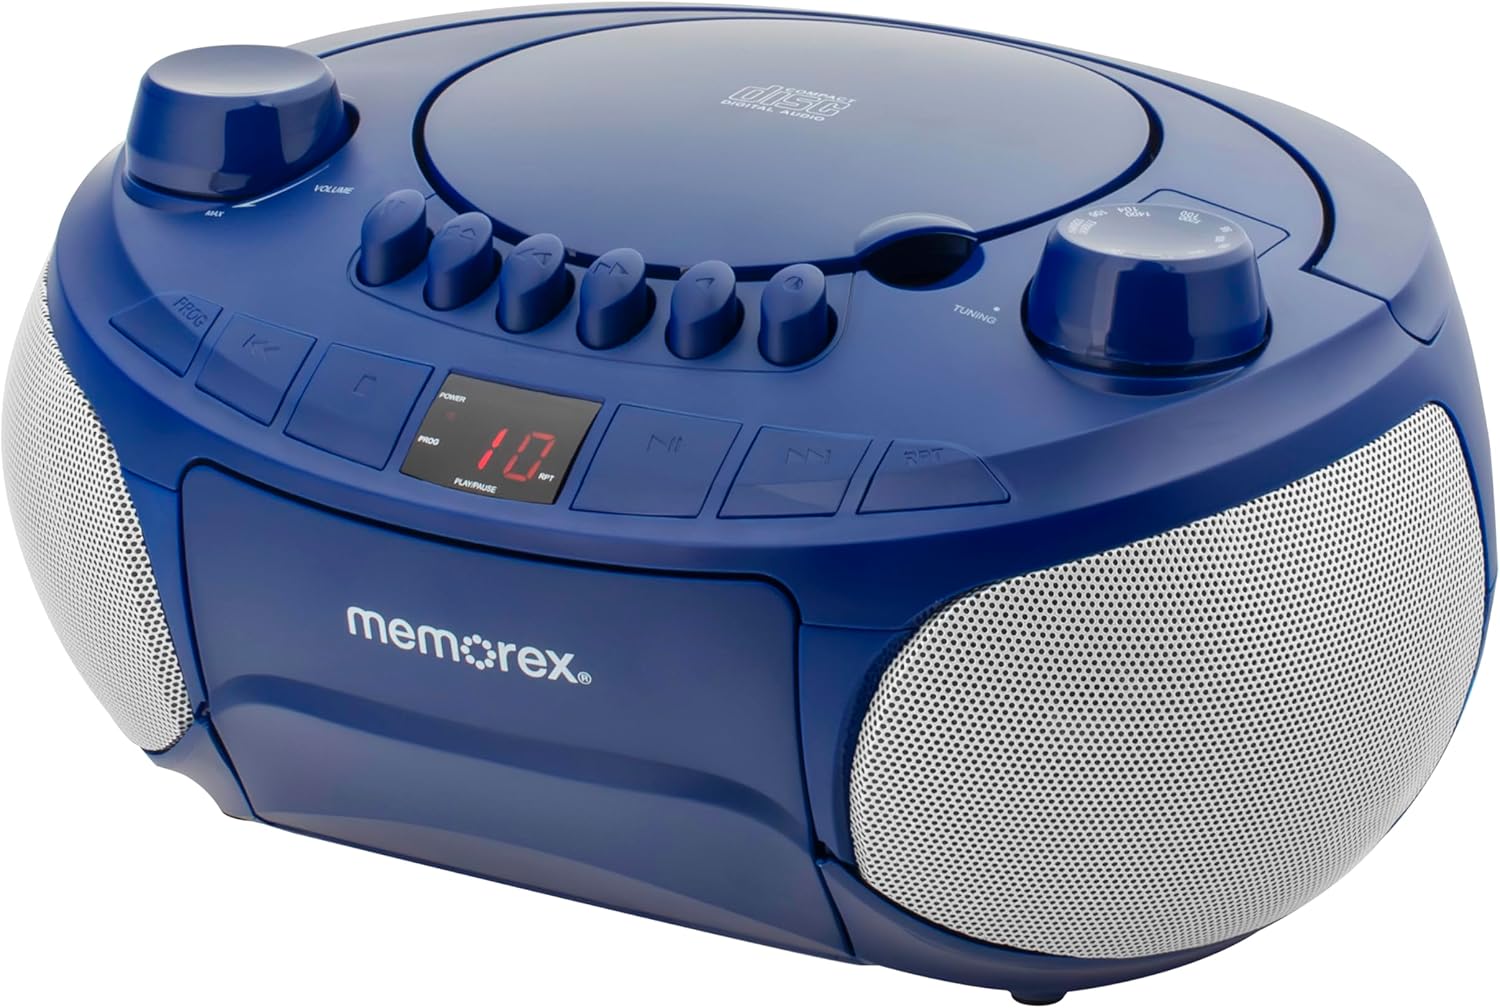
Figure 1: Front view of the Memorex Portable Cassette CD Player. This image displays the main controls, including volume, tuning, and playback buttons, along with the CD compartment and cassette deck.

Figure 2: Top-down view of the Memorex Portable Cassette CD Player. This perspective highlights the top-loading CD player, the various control buttons, and the tuning dial for radio functions.

Figure 3: The Memorex Portable Cassette CD Player with both the top-loading CD compartment and the front-loading cassette deck open, illustrating how media is inserted.
Controls and Features:
- Volume Knob: Adjusts the audio output level.
- Tuning Knob: Selects AM/FM radio frequencies.
- Function Selector: Switches between CD, Cassette, AM, and FM modes.
- CD Compartment: Top-loading tray for compact discs.
- Cassette Deck: Front-loading compartment for audio cassettes.
- Playback Controls: Buttons for Play/Pause, Stop, Fast Forward, Rewind, Skip Track (CD), and Program (CD).
- LED Display: Shows track number for CD playback and other status indicators.
- Telescopic Antenna: Extends for improved FM radio reception.
- Auxiliary Input (3.5mm): Connect external audio devices.
- Power Input: For connecting the AC adapter.
- Battery Compartment: Located on the bottom for optional battery power.
Setup
Powering the Unit:
Your Memorex player can be powered by either AC power or batteries.
AC Power:
- Ensure the unit's power switch is in the OFF position.
- Insert the small end of the AC power adapter into the DC IN jack on the back of the unit.
- Plug the other end of the AC power adapter into a standard wall outlet (AC 120V ~ 60Hz).
Battery Power:
For portable use, the unit requires 6 'C' size batteries (not included).
- Locate the battery compartment on the bottom of the unit.
- Open the battery compartment cover.
- Insert 6 'C' size batteries, ensuring correct polarity (+/-) as indicated inside the compartment.
- Close the battery compartment cover securely.

Figure 4: Rear view of the Memorex Portable Cassette CD Player showing the battery compartment and the AC power input. This image also highlights features like CD-R/RW compatibility and auto-stop cassette deck.
Antenna Setup:
For optimal FM radio reception, fully extend the telescopic antenna. For AM reception, rotate the unit for the best signal.
Operating Instructions
CD Playback:
- Set the Function Selector to "CD".
- Open the CD compartment cover by gently lifting it.
- Place a CD (or CD-R/RW) onto the center spindle with the label side facing up.
- Close the CD compartment cover firmly until it clicks.
- Press the PLAY/PAUSE button to begin playback. The track number will appear on the LED display.
- Use the SKIP/SEARCH buttons (◀◀ / ▶▶) to navigate between tracks. Press and hold to fast forward or rewind within a track.
- Press the STOP button to stop playback.
- Press the RPT (Repeat) button to repeat the current track or all tracks.
- Programmable Memory: While in STOP mode, press the PROG button. Select desired tracks using SKIP/SEARCH, then press PROG again to confirm. Repeat for up to 20 tracks. Press PLAY/PAUSE to start the programmed sequence.
Cassette Playback:
- Set the Function Selector to "TAPE".
- Press the STOP/EJECT button to open the cassette deck door.
- Insert a cassette tape with the open edge facing upwards and the side to be played facing you.
- Close the cassette deck door gently.
- Press the PLAY button to begin playback.
- Use the FAST FORWARD (▶▶) or REWIND (◀◀) buttons to quickly advance or rewind the tape. Press PLAY to resume playback or STOP/EJECT to stop.
- The unit features an Auto-Stop function, which automatically stops playback when the tape reaches its end.
AM/FM Radio Operation:
- Set the Function Selector to "AM" or "FM".
- Extend the telescopic antenna for FM reception. For AM, rotate the unit for optimal signal.
- Rotate the TUNING knob to select your desired radio station.
- Adjust the VOLUME knob to your preferred listening level.

Figure 5: The Memorex Portable Cassette CD Player in a home setting, highlighting its radio functionality with the telescopic antenna extended.
Auxiliary Input:
- Set the Function Selector to "AUX".
- Connect one end of a 3.5mm audio cable (not included) to the AUX IN jack on the unit.
- Connect the other end of the audio cable to the headphone jack or audio output of your external device (e.g., smartphone, MP3 player).
- Play audio from your external device. The sound will be output through the Memorex player's speakers.
- Adjust the volume using the unit's VOLUME knob and/or your external device's volume controls.
Maintenance
Cleaning the Unit:
- Disconnect the unit from the power source before cleaning.
- Wipe the exterior of the unit with a soft, dry cloth.
- Do not use abrasive cleaners, waxes, or solvents as they may damage the finish.
CD Lens Care:
To ensure optimal CD playback, occasionally clean the CD lens using a commercially available CD lens cleaner disc.
Cassette Head Cleaning:
Regularly clean the cassette heads, pinch rollers, and capstans with a cotton swab lightly dampened with isopropyl alcohol to prevent sound distortion and ensure proper tape movement.
Troubleshooting
Before seeking service, please refer to the following table for common issues and their solutions.
| Problem | Possible Cause | Solution |
|---|---|---|
| No power | AC adapter not connected properly / Batteries depleted or incorrectly inserted. | Ensure AC adapter is securely plugged in. If using batteries, check polarity and replace if necessary. |
| No sound | Volume too low / Incorrect function mode selected / Headphones connected (if applicable). | Increase volume. Select the correct function (CD, TAPE, AM, FM, AUX). Disconnect headphones. |
| CD skips or does not play | Dirty or scratched CD / CD inserted incorrectly / CD lens dirty. | Clean or replace CD. Insert CD with label side up. Clean CD lens. |
| Poor radio reception | Antenna not extended / Unit position. | Fully extend FM antenna. Rotate unit for better AM reception. |
| Cassette tape not playing or distorted | Tape inserted incorrectly / Dirty tape heads / Tape tangled. | Ensure tape is inserted correctly. Clean tape heads. Do not use damaged tapes. |
Specifications
| Feature | Detail |
|---|---|
| Model Number | MX-BCCD50 |
| Power Source | AC 120V ~ 60Hz or 6 x 'C' Batteries (not included) |
| Product Dimensions (L x W x H) | 10 x 10 x 6 inches |
| Item Weight | 2.14 pounds |
| Connectivity Technology | Auxiliary |
| Color | Blue |
| Speaker Type | Stereo |
| CD Compatibility | CD, CD-R/RW |
| Cassette Deck | Auto-Stop |
Warranty and Support
For warranty information or technical support, please refer to the contact details provided with your purchase documentation or visit the official Memorex website. Do not attempt to repair the unit yourself.
Related documentsMX-BCCD50


Ask a question about this manual
Ask about setup, troubleshooting, compatibility, parts, safety, or missing instructions. Manuals+ will review the question and use this page’s manual context to help answer it.