1. Safety Information
Please read and understand all instructions before attempting installation or operation. Failure to follow these instructions may result in property damage, personal injury, or death. This remote control system is designed for use with millivolt gas valve systems only. Do not use with electromagnetic lockout gas valve systems or servo-motor controlled natural gas valves.
Always ensure the gas supply to the appliance is turned off before performing any wiring connections. Installation should be performed by a qualified professional if you are unsure about any steps.
2. Package Contents
Verify that all items are present and undamaged upon opening the package. If any items are missing or damaged, please contact customer support.
- 1 x Thermostat Remote Control
- 1 x Receiver Box
- 1 x Plug-In Wiring Assembly (18-inch power cord with connectors)
- Screws and Wall Anchors
- Installation Instruction Manual

Image: The complete Bxmgr Fireplace Remote Control Kit, showing the remote, receiver box, wiring, wall plate, and mounting hardware.
3. Setup and Installation
3.1. Battery Installation
The remote control requires two 'AAA' alkaline batteries. The receiver box requires four 'AA' alkaline batteries. Batteries are not included.
- Open the battery compartment on the back of the remote control and insert two 'AAA' batteries, observing polarity.
- Open the battery compartment on the receiver box and insert four 'AA' batteries, observing polarity.
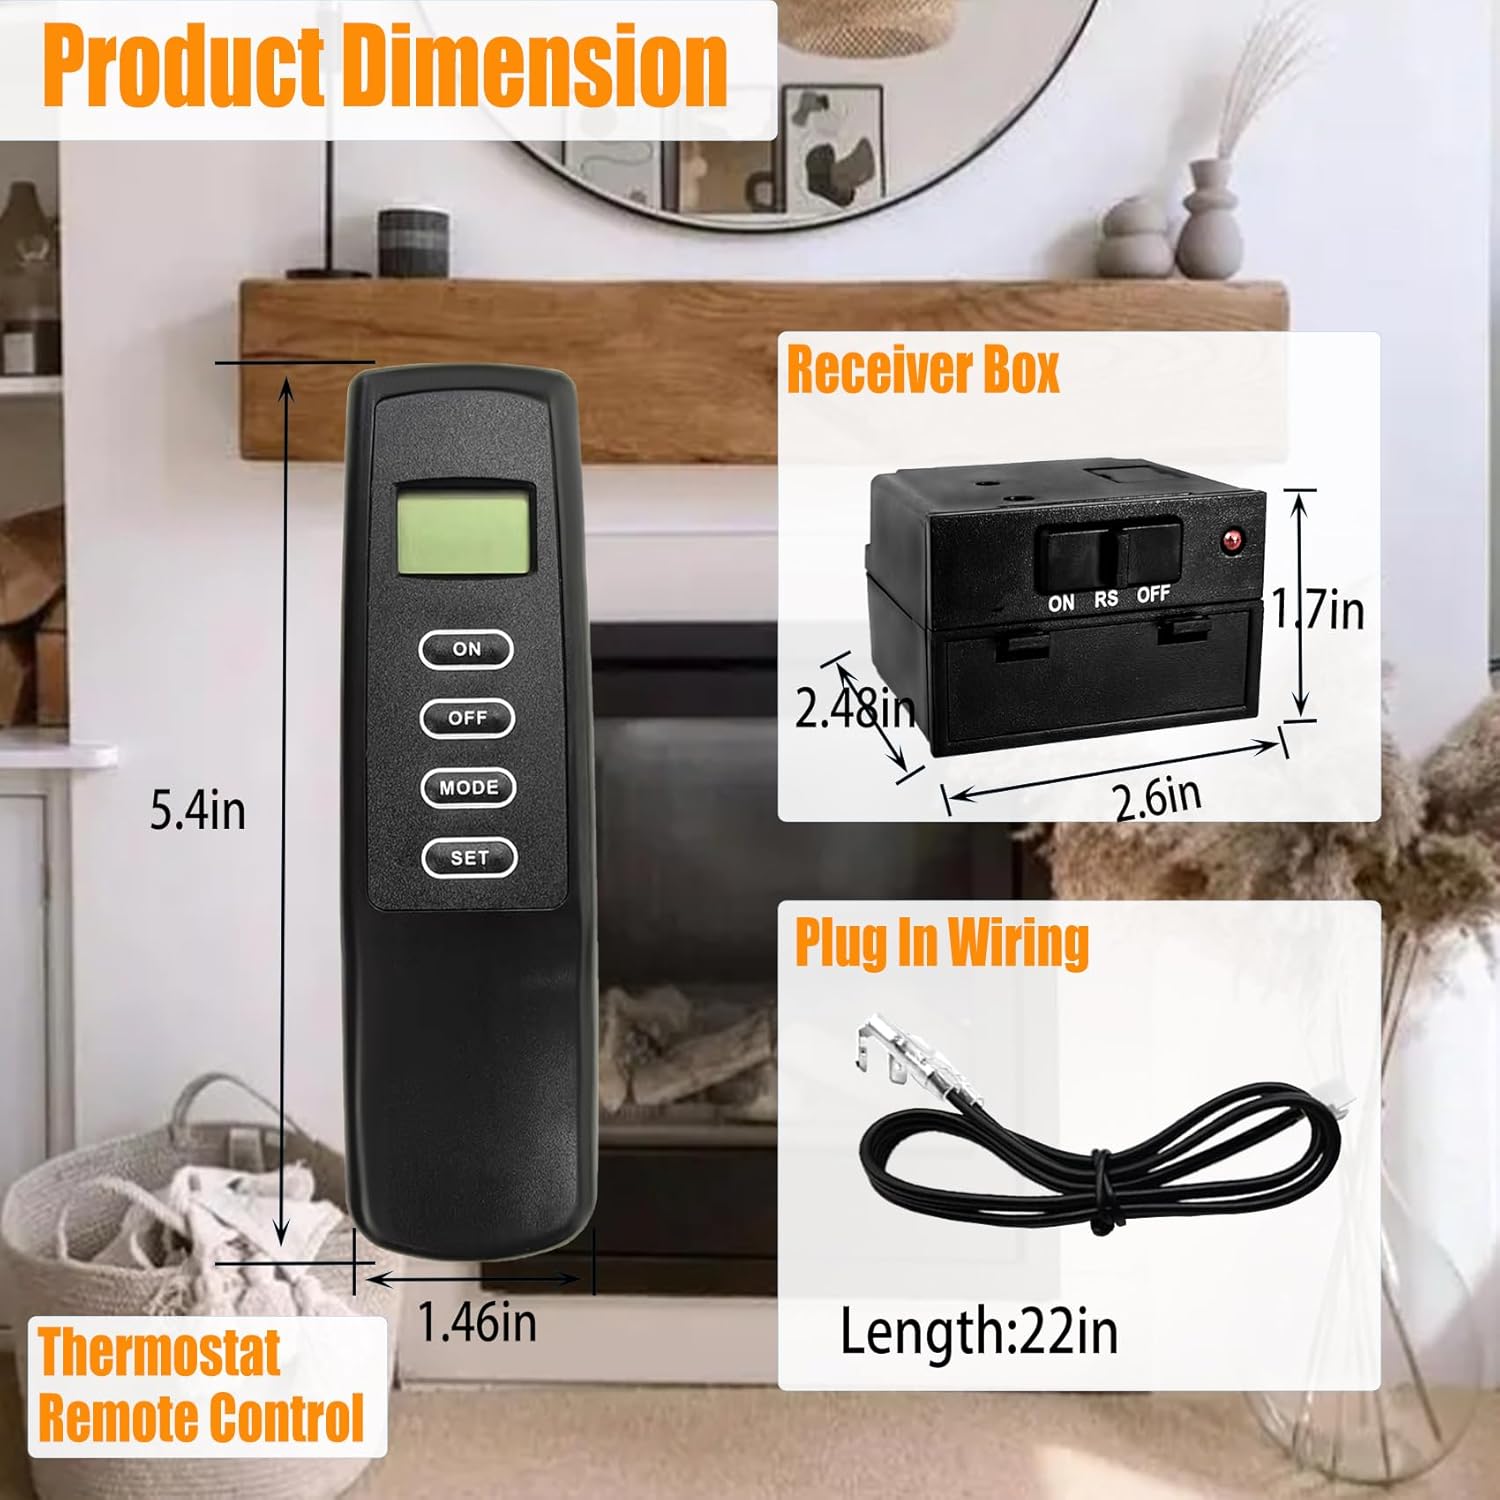
Image: The back of the remote control with the battery cover removed, showing the battery slots and DIP switches.
3.2. Connecting the Receiver to the Fireplace
Ensure the fireplace's gas supply is OFF before proceeding.
- Locate the millivolt gas valve on your fireplace. It typically has terminals labeled 'TH' and 'TH/TP'.
- Insert the white terminal of the plug-in wiring assembly into the back of the receiver box. The terminal wire block is designed to be installed only one way.
- Connect the two 1/4" female spade terminals of the wiring assembly to the 'TH' and 'TH/TP' terminals of the millivolt valve. The order of connection does not matter for these two terminals.
- Once connected, the receiver will emit a beep, indicating successful installation and connection.

Image: A detailed diagram illustrating the connection of the receiver to a millivolt gas valve, showing the wiring terminals and the receiver unit.
3.3. Pairing the Remote Control and Receiver
The kit is pre-programmed, but re-pairing may be necessary if the remote and receiver lose connection or if you are replacing a component.
- On the receiver box, locate the 'LEARN' button.
- Press and hold the 'LEARN' button until the indicator light on the receiver starts to flash.
- Within 10 seconds, press any button on the remote control. The receiver's indicator light will stop flashing and remain solid, confirming successful pairing.
Video: This video demonstrates the installation and re-pairing steps for a fireplace remote control system, showing how to connect the receiver and synchronize it with the remote.
Video: This video illustrates the process of upgrading a manual fireplace to a remote and thermostat-controlled system, highlighting the backlit remote control.
4. Operating Instructions
The remote control offers ON/OFF functionality and thermostat control.
4.1. Basic ON/OFF Control
- Press the 'ON' button on the remote to turn on the fireplace.
- Press the 'OFF' button on the remote to turn off the fireplace.
4.2. Thermostat Mode
In thermostat mode, the fireplace will automatically turn ON or OFF to maintain a set room temperature.
- Press the 'MODE' button until 'THERMO' appears on the LCD screen.
- Use the '+' and '-' buttons to set your desired room temperature.
- The fireplace will activate when the room temperature drops below the set temperature and deactivate when it rises above.

Image: The remote control with its LCD screen illuminated, showing temperature and mode settings, indicating its thermostatic control capabilities.
5. Maintenance
- Battery Replacement: Replace batteries in both the remote and receiver when the low battery indicator appears on the remote's LCD screen or when the system becomes unresponsive. Use only alkaline batteries.
- Cleaning: Wipe the remote and receiver with a soft, dry cloth. Do not use abrasive cleaners or solvents.
- Storage: If storing the unit for an extended period, remove batteries from both the remote and receiver to prevent leakage.
6. Troubleshooting
| Problem | Possible Cause | Solution |
|---|---|---|
| Fireplace does not turn ON/OFF. | Low or dead batteries in remote/receiver. Incorrect wiring. Receiver not paired. | Replace batteries. Check wiring connections. Re-pair remote and receiver (Section 3.3). |
| Remote LCD screen is blank or dim. | Low or dead batteries in remote. | Replace remote batteries. |
| Thermostat mode not working correctly. | Incorrect temperature setting. Remote/receiver out of range. | Adjust set temperature. Ensure remote is within range of receiver. |
| Receiver beeps continuously. | Wiring issue or short circuit. | Check all wiring connections for proper installation and ensure no bare wires are touching. |
7. Specifications
- Product Dimensions: 5.8 x 3.5 x 2.2 inches
- Item Weight: 7.7 ounces
- Remote Battery Type: 2 x 'AAA' Alkaline (not included)
- Receiver Battery Type: 4 x 'AA' Alkaline (not included)
- Compatibility: Millivolt gas valves (e.g., Skytech, Majestic, Ambient, Empire, Monessen, Vermont)
- Control Type: Thermostat On/Off Control, LCD Screen, Indicator Light
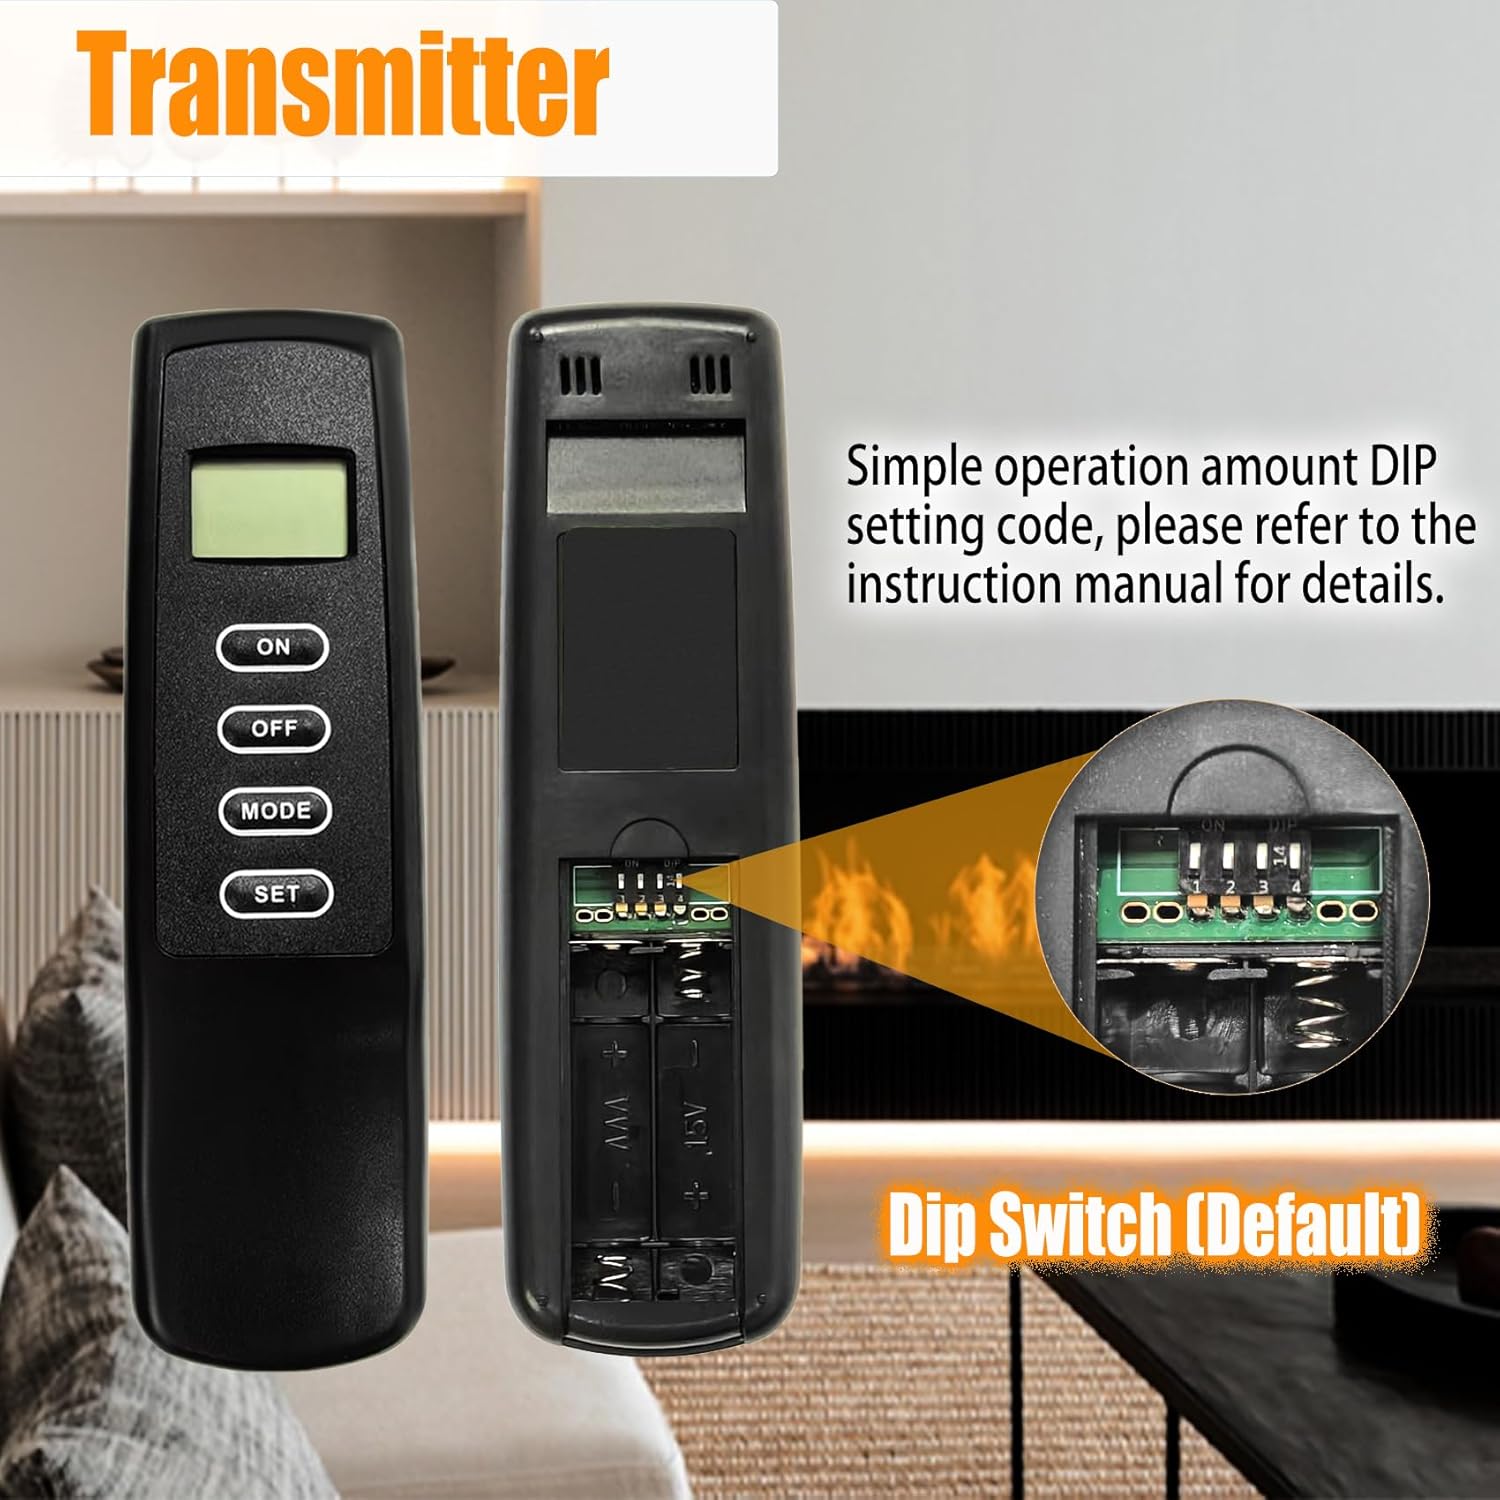
Image: A visual representation of the product dimensions for the remote control and receiver box, showing their height and width.
8. Warranty and Support
Bxmgr provides high-quality products and customer service. If you encounter any quality problems with the product, or if it is damaged or missing components upon receipt, please contact us through your order history. We are committed to resolving your issue responsibly within 12 hours and providing a solution within 24 hours to ensure your satisfaction.
For further assistance or technical support, please refer to the contact information provided with your purchase or visit the Bxmgr store on Amazon.
Note: This warranty does not cover damage caused by improper installation, misuse, or the use of non-alkaline batteries leading to corrosion.


