
Important Safety Information
Read all instructions before assembling and using this trampoline. Failure to follow these warnings and instructions may result in serious injury or death. This trampoline is designed for outdoor recreational use only. Adult supervision is required at all times.
- Always ensure the trampoline is placed on a level surface, away from overhead obstructions, fences, and other structures.
- Only one person should use the trampoline at a time to prevent collisions.
- Do not attempt or allow somersaults or flips. Landing on the head or neck can cause serious injury, paralysis, or death.
- Inspect the trampoline before each use for damaged, worn, or missing parts. Do not use if any parts are compromised.
- Keep the safety enclosure net zipped closed during use.
- Maximum user weight capacity: Refer to specifications for exact limits.
- Do not use the trampoline in wet or windy conditions.
Setup and Assembly
Follow these steps carefully for proper assembly. It is recommended that two adults perform the assembly. Refer to the video for visual guidance.
Assembly Video Guide
This video demonstrates the complete assembly process for the Lyromix Trampoline, including frame construction, spring attachment, safety net installation, and accessory setup.
Step-by-Step Instructions
- Unpack and Identify Parts: Lay out all components on a clean, flat surface. Verify all parts are present according to the packing list.
- Assemble the Frame Base: Connect the U-shaped leg bases to the main frame tubes. Ensure the spring buttons click into place for secure connections.
- Attach the Jumping Mat: Carefully spread the jumping mat over the frame. Begin attaching the springs diagonally across from each other to ensure even tension. Use the provided spring tool for easier and safer attachment.
- Install the Safety Pad: Place the safety pad over the springs and frame, ensuring it covers all exposed metal parts. Secure it using the attached straps or ties.
- Assemble and Install Safety Enclosure Poles: Insert the foam-padded curved poles into the designated slots on the frame. Secure them with the provided bolts and nuts.
- Install the Safety Enclosure Net: Thread the top rod through the sleeve of the safety net. Attach the net to the top of the curved poles and secure the bottom of the net to the jumping mat or frame as per instructions.
- Attach the Basketball Hoop: Assemble the basketball hoop components and attach it to one of the safety enclosure poles using the provided clamps and hardware.
- Assemble and Attach the Ladder: Connect the ladder steps and side rails. Securely hook the ladder onto the trampoline frame.

Image showing the connection of U-shaped legs to the main frame tubes.

Diagram illustrating the diagonal method for attaching springs to the jumping mat and frame.

Illustration of the curved safety poles designed to maximize jumping space and minimize contact with the enclosure.

A detailed view of the high-density trampoline net, highlighting its protective weave.
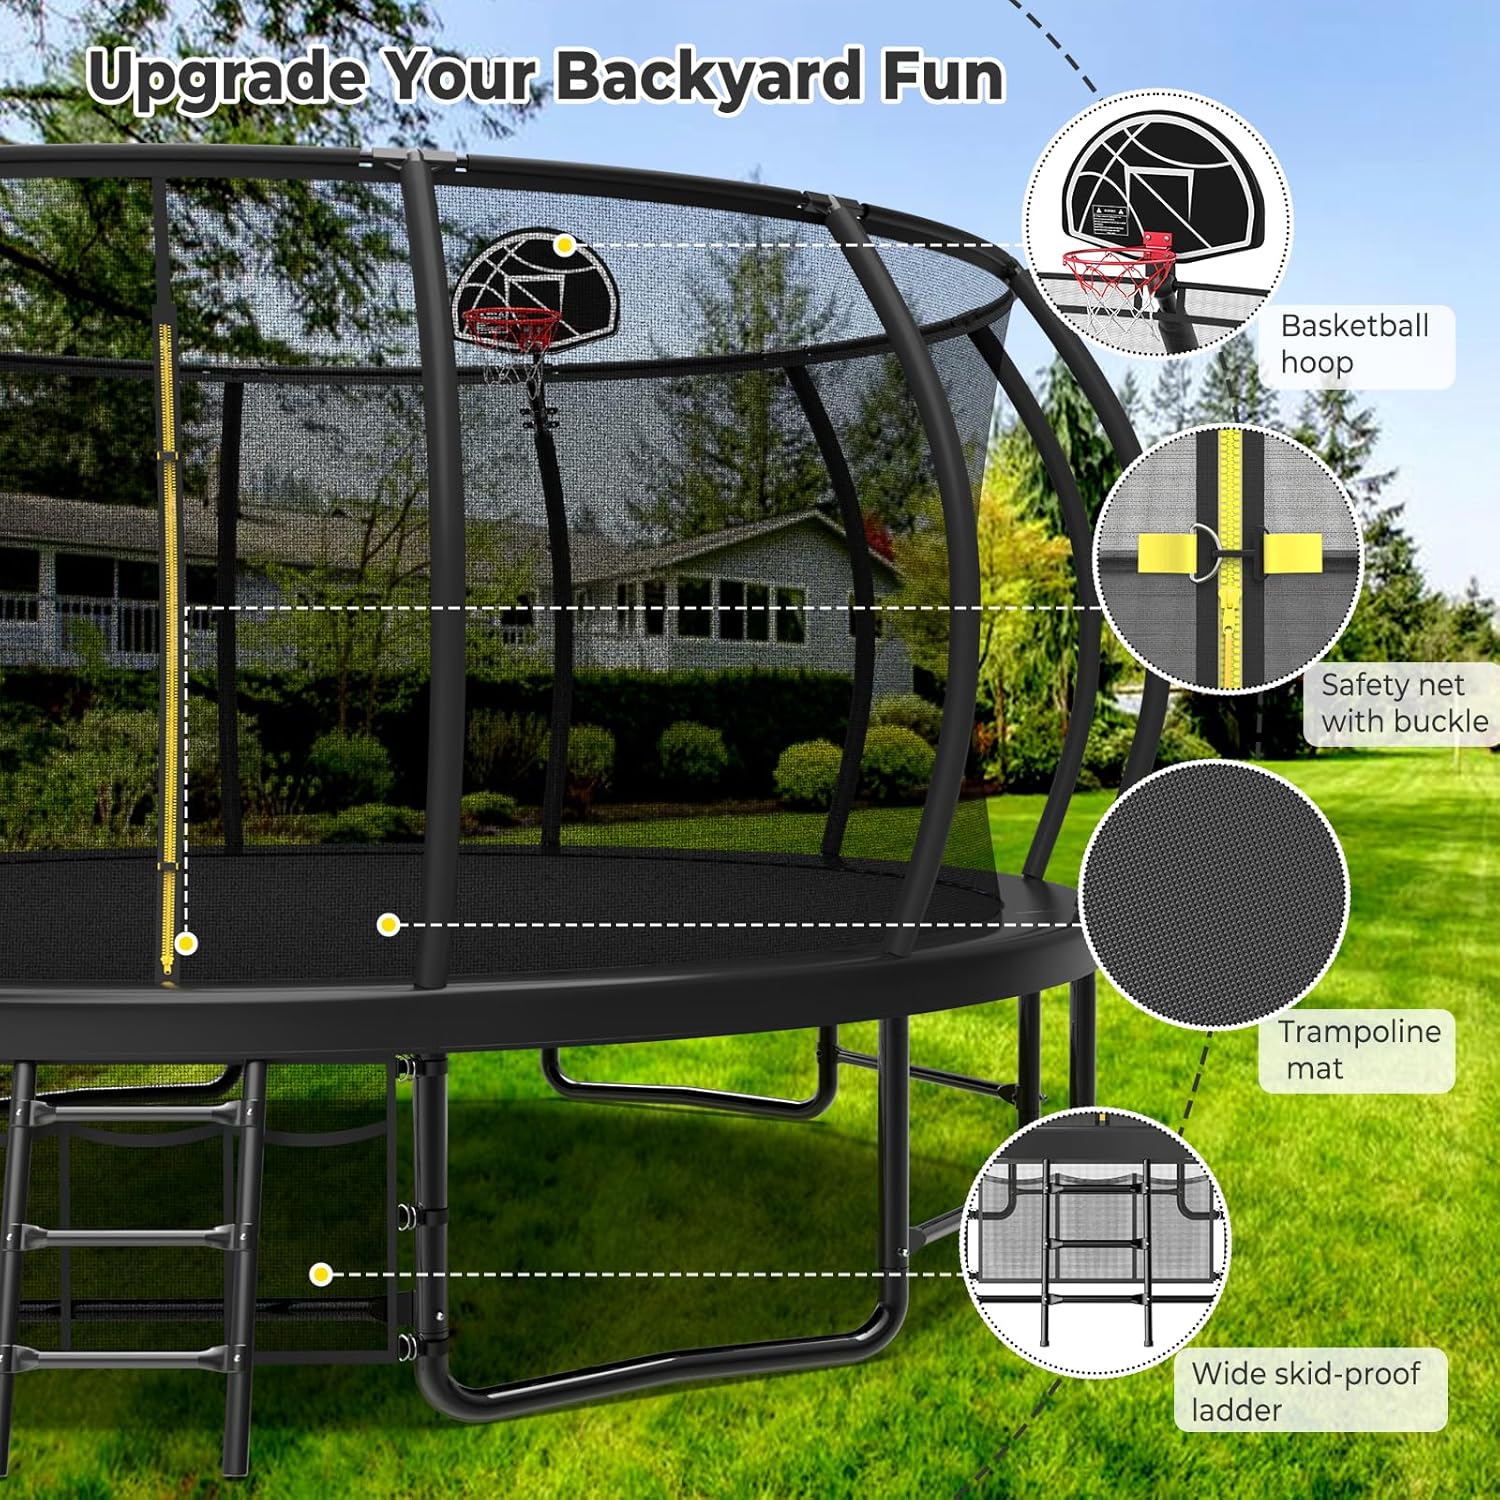
The trampoline featuring a basketball hoop and a wide skid-proof ladder for access.
Operating Instructions
To ensure a safe and enjoyable experience, follow these operating guidelines:
- Always enter and exit the trampoline using the ladder.
- Close the enclosure net zipper completely before jumping.
- Jump in the center of the mat for optimal bounce and control.
- Avoid jumping too high or attempting dangerous maneuvers.
- Do not wear shoes on the trampoline to prevent damage to the mat and reduce the risk of injury.
- Remove all sharp objects from pockets before use.
Maintenance
Regular maintenance will extend the life of your trampoline and ensure continued safety.
- Daily Inspection: Before each use, check the jumping mat, safety pad, enclosure net, springs, and frame for any signs of wear, tears, or damage. Ensure all connections are secure.
- Cleaning: Clean the jumping mat and safety pad with mild soap and water. Rinse thoroughly and allow to air dry. Do not use abrasive cleaners.
- Weather Protection: In extreme weather conditions (heavy winds, snow, ice), it is recommended to disassemble the trampoline or secure it properly to prevent damage. The materials are UV and water-resistant, but prolonged exposure to harsh elements can reduce lifespan.
- Rust Prevention: The frame is made of alloy steel with hot-dip galvanizing technology for rust resistance. However, regularly inspect for any signs of rust and address them promptly with appropriate rust-inhibiting treatments.
- Spring Replacement: If any springs become stretched, damaged, or broken, replace them immediately. Use only genuine Lyromix replacement parts.

Illustration detailing the multi-layer protection of the trampoline frame, including hot-dip galvanizing for enhanced durability and rust resistance.
Troubleshooting
Here are solutions to common issues you might encounter:
| Problem | Possible Cause | Solution |
|---|---|---|
| Trampoline feels unstable or wobbly. | Uneven ground; loose frame connections. | Relocate to a level surface. Check and tighten all frame bolts and ensure leg bases are fully inserted. |
| Jumping mat has reduced bounce. | Worn or stretched springs; damaged mat. | Inspect springs for damage and replace as needed. Check the mat for tears or excessive stretching and replace if necessary. |
| Safety net is sagging or torn. | Loose attachments; material wear; accidental damage. | Re-secure all net attachments to the poles and frame. If torn, replace the safety net immediately. |
| Poles are bent or damaged. | Impact; improper assembly; extreme weather. | Replace damaged poles immediately. Ensure proper assembly and secure the trampoline in high winds. |
Specifications
| Feature | Detail |
|---|---|
| Brand | Lyromix |
| Model Name | Pumpkin Trampoline (16FT) |
| Color | Black |
| Frame Size | 16 Feet |
| Shape | Round |
| Product Dimensions (L x W x H) | 192"L x 192"W x 108"H |
| Frame Material | Alloy Steel |
| Jumping Mat Material | Polypropylene (PP) |
| Safety Net Material | High-density PE |
| Number of Springs | 108 |
| Item Weight | 70 Pounds |
| Certifications | ASTM-certified |
| Included Components | Springs, Basketball Hoop, Safety Enclosure Net, Ladder |
Warranty and Support
This Lyromix trampoline comes with a 12-month warranty from the date of purchase, covering manufacturing defects.
For any questions, concerns, or to request replacement parts, please contact Lyromix customer service. Our team is committed to providing top-notch after-sales support to ensure a worry-free experience.
Please retain your purchase receipt for warranty claims.