1. Introduction
This manual provides essential information for the safe and efficient operation of your Panasonic NN-ST21QWEPG Solo Microwave Oven. Please read it thoroughly before using the appliance and retain it for future reference.
The Panasonic NN-ST21QWEPG is a compact 20-liter solo microwave oven designed for quick heating, easy meal preparation, and fast defrosting. Its modern, minimalist design integrates seamlessly into various kitchen environments, optimizing space without compromising functionality.

Figure 1.1: Front view of the Panasonic NN-ST21QWEPG Solo Microwave Oven in a kitchen setting, with a dish of pasta in the foreground.
2. Important Safety Instructions
To reduce the risk of fire, electric shock, injury to persons, or exposure to excessive microwave energy when using your appliance, follow basic precautions, including the following:
- Read all instructions before using the appliance.
- Do not attempt to operate this oven with the door open as this can result in harmful exposure to microwave energy.
- Do not place any object between the oven front face and the door or allow soil or cleaner residue to accumulate on sealing surfaces.
- Do not operate the oven if it is damaged. It is particularly important that the oven door closes properly and that there is no damage to the: (1) door (bent), (2) hinges and latches (broken or loosened), (3) door seals and sealing surfaces.
- The oven should not be adjusted or repaired by anyone except properly qualified service personnel.
- Ensure adequate ventilation around the appliance. Do not block any ventilation openings.
- Do not use corrosive chemicals or vapors in this appliance.
- This appliance is intended for household use only.
- Liquids or other foods must not be heated in sealed containers since they are liable to explode.
- Always use microwave-safe cookware.
- This appliance can be used by children aged from 8 years and above and persons with reduced physical, sensory or mental capabilities or lack of experience and knowledge if they have been given supervision or instruction concerning use of the appliance in a safe way and understand the hazards involved.
- Cleaning and user maintenance shall not be made by children unless they are older than 8 and supervised.
3. Setup and Installation
3.1 Unpacking
Carefully remove the microwave oven and all packing materials from the carton. Check the oven for any damage, such as dents or a misaligned door. Do not install if the oven is damaged.
3.2 Components Included
The following components are included with your microwave oven:
- Microwave Oven Unit
- Glass Turntable
- Roller Ring (Turntable Support)
- User Manual (this document)
3.3 Placement
Place the oven on a flat, stable surface that can support its weight and the heaviest food item likely to be cooked in it. Ensure there is adequate space for ventilation:
- Minimum 20 cm (7.9 inches) of free space above the oven.
- Minimum 10 cm (3.9 inches) of free space at the rear and sides.

Figure 3.1: Compact dimensions of the microwave oven, illustrating its suitability for various kitchen spaces.
3.4 Turntable Assembly
Before first use, assemble the turntable components:
- Place the roller ring in the center depression on the oven floor.
- Place the glass turntable on top of the roller ring, ensuring it sits securely in the center drive hub.

Figure 3.2: Interior view of the microwave, highlighting the 20L capacity and 255mm glass turntable.
3.5 Power Connection
Plug the power cord into a grounded electrical outlet. Ensure the voltage matches the appliance's requirements (230 Volts).
4. Operating Instructions
Your Panasonic NN-ST21QWEPG microwave oven features a user-friendly LED display and touch controls for various cooking functions.

Figure 4.1: The control panel with LED display, showing buttons for Micro Power, Defrost, Auto programs, Quick 30, and time adjustments.
4.1 Setting the Clock
Upon first connection or after a power outage, the display will show "0:00".
- Press the Clock button (if available, otherwise consult the specific model's detailed manual for clock setting).
- Use the time adjustment buttons (e.g., 10 min, 1 min, 10 sec) to set the current time.
- Press the Start button to confirm.
4.2 Manual Cooking (Microwave Power)
The oven offers 5 power levels up to 800 Watts for precise cooking and reheating.
- Place food in a microwave-safe container on the glass turntable.
- Close the oven door securely.
- Press the Micro Power button repeatedly to select the desired power level (e.g., 800W, 600W, 400W, 200W).
- Use the time adjustment buttons (e.g., 10 min, 1 min, 10 sec) to set the cooking time.
- Press the Start button to begin cooking.

Figure 4.2: Illustration of the microwave's 800 Watt power output and 5 power level options.
4.3 Automatic Programs
Simplify meal preparation with 11 automatic programs, including automatic reheating, for optimal results.
- Small/Large Portions
- Bread/Cake
- Refrigerated Meal
- Frozen Meal
- Fresh Vegetables
- Frozen Vegetables
- Fresh Fish
- Jacket Potatoes
- Fresh Chicken Portions
- Rice
- Automatic Reheating
- Place food in the oven.
- Press the Auto button repeatedly to select the desired program number.
- Follow on-screen prompts or refer to the program chart (if provided separately) for weight input or portion size.
- Press the Start button.
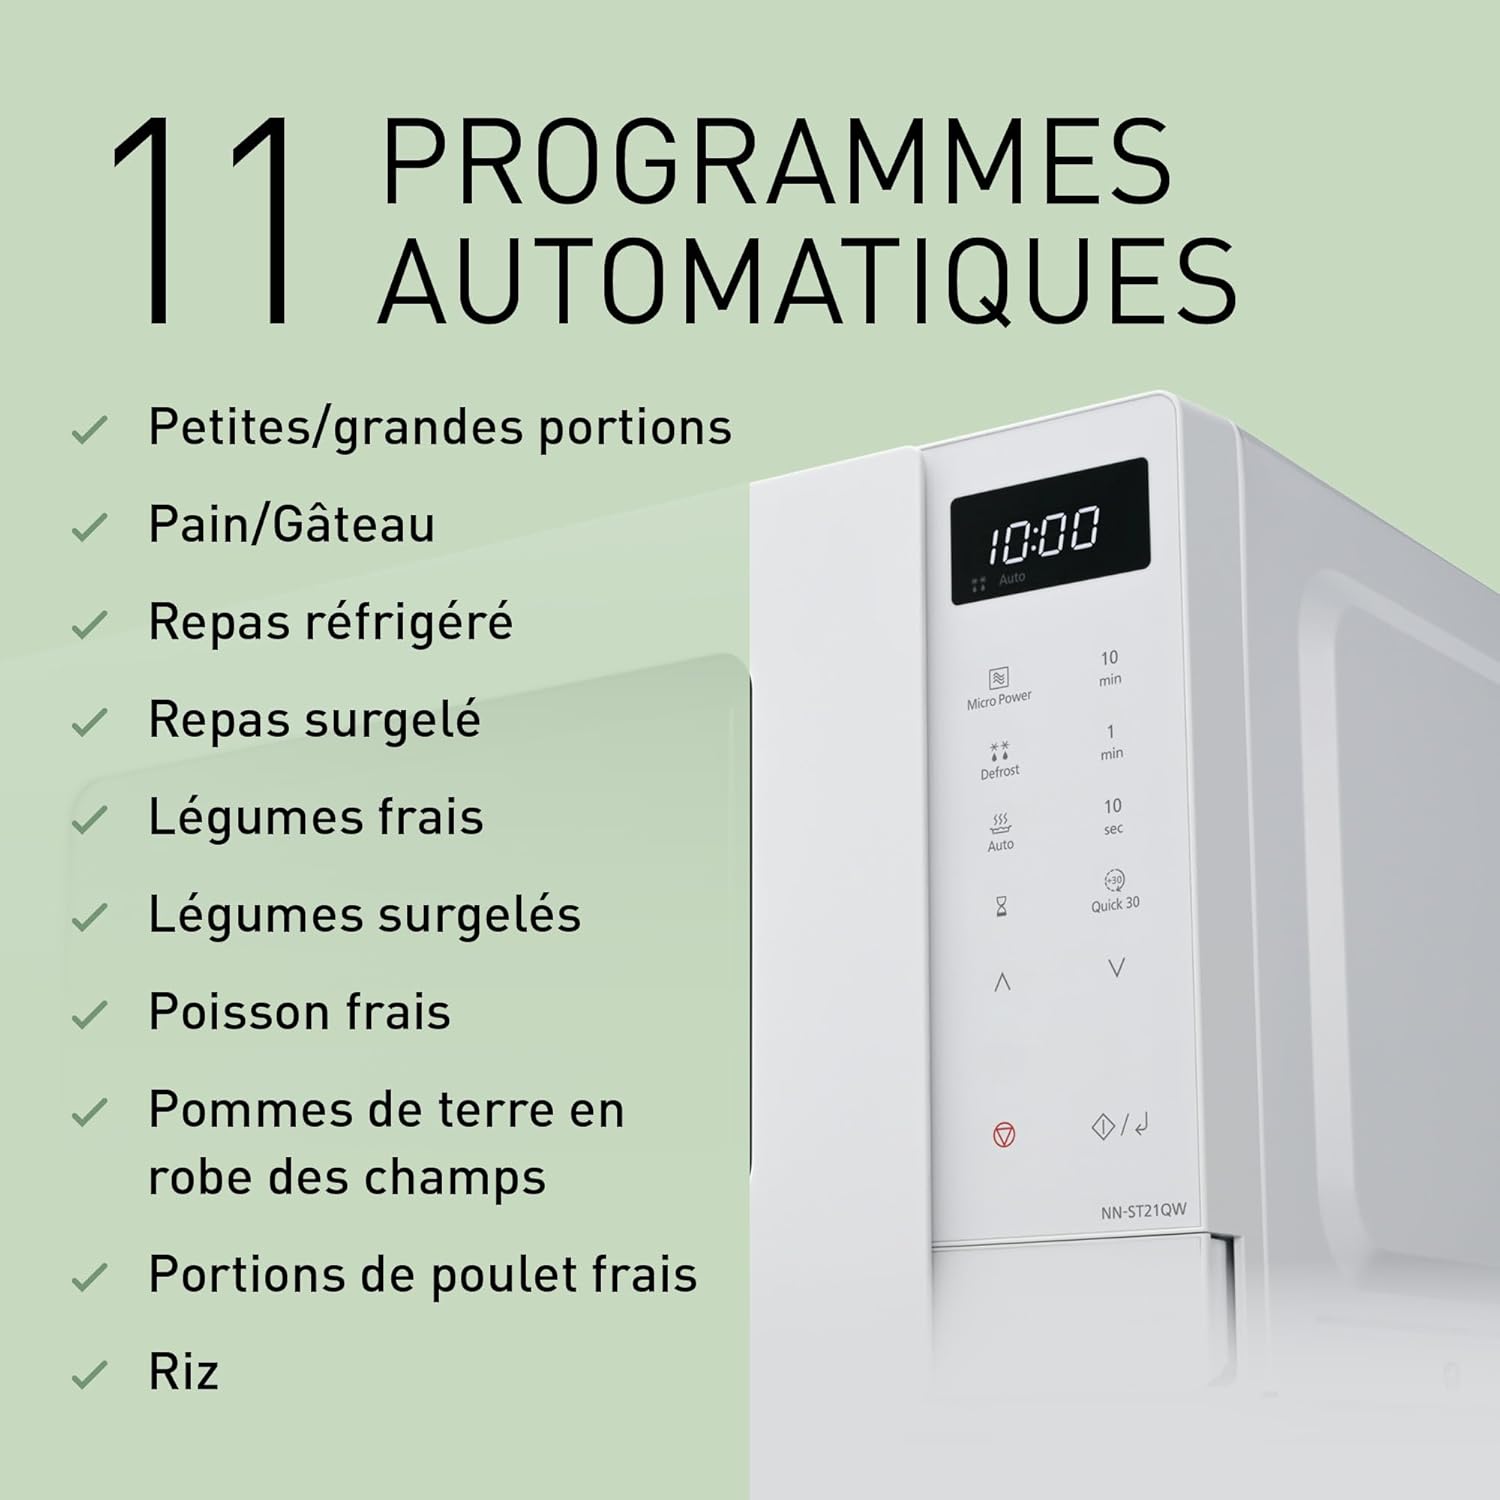
Figure 4.3: The 11 automatic programs offered by the microwave for various food types.
4.4 Automatic Defrost Modes
The oven features 3 automatic defrost modes that adjust heat based on weight, preserving food texture and flavor.
- Place frozen food in the oven.
- Press the Defrost button repeatedly to select the appropriate defrost category (e.g., Meat, Poultry, Seafood).
- Use the time adjustment buttons to input the weight of the food.
- Press the Start button.

Figure 4.4: Visual representation of the automatic defrost function, suitable for frozen foods like berries.
4.5 Quick 30 Function
The Quick 30 function allows for instant heating for 30 seconds at full power. Each press adds 30 seconds to the cooking time.
- Place food in the oven.
- Press the Quick 30 button. The oven will start immediately.
- Press Quick 30 again to add more time in 30-second increments.

Figure 4.5: The Quick 30 button on the control panel for rapid heating.
4.6 Add Time Function
During manual cooking or certain automatic programs, you can easily extend the heating time by pressing the Add Time button (often represented by the 10 sec or 1 min buttons during active cooking).
4.7 Child Safety Lock
To prevent unintended operation, especially by children, the oven is equipped with a child safety lock. Consult your specific model's detailed manual for activation and deactivation steps, typically involving holding down a specific button for a few seconds.
5. Maintenance and Cleaning
Regular cleaning and maintenance will ensure the longevity and optimal performance of your microwave oven.
5.1 Exterior Cleaning
Wipe the exterior surfaces with a soft, damp cloth. Do not use abrasive cleaners or harsh chemicals, as they may damage the finish.
5.2 Interior Cleaning
Clean the interior cavity after each use to prevent food splatters from drying and becoming difficult to remove.
- Wipe with a soft, damp cloth and mild detergent.
- For stubborn stains, place a bowl of water with lemon slices inside and heat on high for 2-3 minutes. The steam will loosen the residue, making it easier to wipe away.
- Ensure the interior is dry before closing the door.
5.3 Turntable and Roller Ring
The glass turntable and roller ring can be removed for cleaning. Wash them in warm, soapy water or in the dishwasher. Ensure they are completely dry before placing them back in the oven.
5.4 Door Seals
Regularly clean the door seals and adjacent parts with a soft, damp cloth to ensure proper sealing and prevent microwave energy leakage.
6. Troubleshooting
If you encounter issues with your microwave oven, refer to the following common problems and solutions:
| Problem | Possible Cause | Solution |
|---|---|---|
| Oven does not start. | Power cord not plugged in; Door not closed properly; Fuse blown or circuit breaker tripped; Child safety lock activated. | Ensure power cord is securely plugged in; Close door firmly; Check household fuse/circuit breaker; Deactivate child safety lock. |
| Food not heating. | Incorrect power level or cooking time set; Door not closed properly; Microwave-safe cookware not used. | Adjust power level and cooking time; Close door firmly; Use appropriate microwave-safe dishes. |
| Turntable not rotating. | Turntable or roller ring not correctly placed; Obstruction under the turntable. | Ensure turntable and roller ring are correctly seated; Remove any obstructions. |
| Sparking or arcing inside the oven. | Metal objects or foil inside; Damaged oven interior. | Remove all metal objects; Discontinue use and contact service if interior is damaged. |
| Oven light not working. | Bulb burnt out. | Contact qualified service personnel for bulb replacement. |
If the problem persists after attempting these solutions, please contact customer support.
7. Specifications
Detailed technical specifications for the Panasonic NN-ST21QWEPG Solo Microwave Oven:
| Feature | Specification |
|---|---|
| Brand | Panasonic |
| Model Number | NN-ST21QWEPG |
| Product Dimensions (L x W x H) | 44 cm x 32.4 cm x 25.8 cm (17.3 x 12.8 x 10.2 inches) |
| Weight | 11 Kilograms (24.25 lbs) |
| Capacity | 20 Liters |
| Installation Type | Freestanding |
| Microwave Power Output | 800 Watts |
| Power Levels | 5 |
| Voltage | 230 Volts |
| Control Type | Touch Control, Digital |
| Special Features | Digital Control, Automatic Cooking, Defrost, Turntable, Shortcut Keys |
| Included Components | Roller Ring, Turntable Support |
| Color | White |
8. Warranty and Support
Panasonic products are manufactured to high-quality standards and are backed by a manufacturer's warranty. Please refer to the warranty card included with your product for specific terms and conditions, including warranty period and coverage details.
8.1 Customer Support
For technical assistance, service, or to inquire about replacement parts, please contact Panasonic customer support. You can find contact information on the official Panasonic website or through the retailer where you purchased the product.
You can also visit the official Panasonic store for more information and products: Panasonic Brand Store


