1. Introduction
The RUGGARD EDC-230LC Electronic Dry Cabinet is designed to protect valuable items such as cameras, lenses, photographic and optical equipment, and mobile electronics from excessive moisture, dirt, and dust. This cabinet utilizes a fast-acting TE Cooling Wafer to regulate interior relative humidity, helping to prevent corrosion and damage to delicate gear. Its silent operation and dripless design make it an ideal storage solution.
This manual provides detailed instructions for the safe and efficient use of your RUGGARD EDC-230LC Electronic Dry Cabinet. Please read it thoroughly before operation and retain it for future reference.

Figure 1.1: RUGGARD EDC-230LC Electronic Dry Cabinet with typical contents.
2. Safety Information
To ensure safe operation and prevent damage, please observe the following safety precautions:
- Do not expose the cabinet to direct sunlight, high temperatures, or extreme humidity.
- Ensure the power supply is connected to a grounded outlet of the correct voltage (110-240 VAC, 50/60 Hz).
- Do not block the ventilation openings on the cabinet.
- Keep the cabinet away from water or other liquids.
- Do not attempt to disassemble or repair the cabinet yourself. Refer all servicing to qualified personnel.
- Place the cabinet on a stable, level surface to prevent tipping.
- Keep out of reach of children.
3. Package Contents
Carefully unpack your RUGGARD EDC-230LC Electronic Dry Cabinet and verify that all items listed below are included:
- RUGGARD EDC-230LC Electronic Dry Cabinet
- Multi-Voltage Power Supply
- 2 x Adjustable Steel Shelves
- 3 x Foam Liners
- 8 x Shelf Brackets
- 2 x Combination Lock Pins
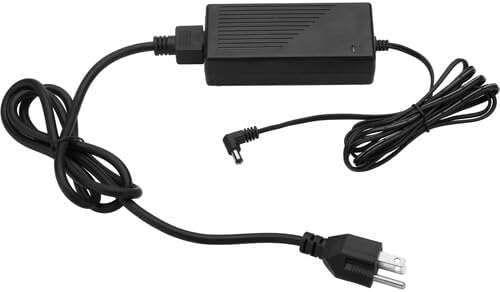
Figure 3.1: Included Multi-Voltage Power Supply.
4. Setup
4.1 Unpacking and Placement
- Remove all packaging materials from the cabinet.
- Place the dry cabinet on a flat, stable surface.
- Adjust the four leveling feet at the bottom of the cabinet to ensure it is stable and level.

Figure 4.1: Leveling legs (bottom right inset) for stability.
4.2 Shelf Installation
- Open the cabinet door.
- Insert the shelf brackets into the desired slots on the interior sides of the cabinet. Ensure all eight brackets are securely in place and level.
- Place the adjustable steel shelves onto the installed brackets.
- Lay the foam liners on top of the shelves to protect your items.

Figure 4.2: Removable, adjustable shelves and foam liners.

Figure 4.3: Cabinet interior with shelves installed.
4.3 Power Connection
Connect the multi-voltage power supply to the power input port on the cabinet, then plug the power supply into a suitable electrical outlet.
4.4 Combination Lock Setup
The cabinet features a three-digit combination lock. To set your personal combination:
- With the lock in the open position (default is 0-0-0), locate the small reset button on the side or bottom of the lock mechanism.
- Use a pen or a pointed object to press and hold the reset button.
- While holding the button, set your desired three-digit combination by rotating the dials.
- Release the reset button. Your new combination is now set. Test it immediately to ensure it works correctly before closing the door.
5. Operating Instructions
5.1 Powering On/Off
Once connected to power, the cabinet will automatically power on. There is no separate power switch. To turn off, simply unplug the power supply.
5.2 Humidity Control
The cabinet's TE Cooling Wafer electronically regulates the interior relative humidity. The humidity level can be adjusted from 60% down to 35% using the controls on the top panel. Refer to the display for current settings and status.
- Use the '+' and '-' buttons on the control panel to set the desired humidity level.
- The cabinet will automatically work to achieve and maintain the set humidity. Humidity adjustments typically take 1 to 3 hours to stabilize.
5.3 LCD Display
The large LCD screen on the top panel displays the ambient temperature (in Fahrenheit or Celsius) and the current relative humidity inside the cabinet. You can switch between Fahrenheit and Celsius display modes using the dedicated button on the control panel.
5.4 Interior LED Lighting
The cabinet is equipped with interior LED lights to improve visibility of your stored items. These lights can be turned on or off via a switch on the control panel.
5.5 Using the Combination Lock
To lock the cabinet, ensure the door is fully closed and scramble the combination dials. To unlock, dial your set three-digit combination and turn the handle.
6. Maintenance
6.1 Cleaning
To clean the exterior of the cabinet, wipe with a soft, damp cloth. Do not use abrasive cleaners or solvents. For the interior, remove items and wipe surfaces with a dry or slightly damp cloth. Ensure the cabinet is unplugged before cleaning.
6.2 Air Filters
The cabinet features air filters on the top panel. Periodically check these filters for dust accumulation. If necessary, gently clean them with a soft brush or vacuum cleaner to ensure proper airflow and dehumidification efficiency.
Figure 6.1: Air filters located on the top of the cabinet (top right inset).
7. Troubleshooting
| Problem | Possible Cause | Solution |
|---|---|---|
| Cabinet not powering on. | No power supply, power outlet issue, damaged power supply. | Ensure power supply is securely plugged into cabinet and a working outlet. Check power supply for damage. |
| Humidity not changing or too high. | Door not sealed, cabinet overloaded, ambient humidity too high, ventilation blocked. | Ensure door is fully closed and gasket is intact. Do not overload cabinet. Ensure proper ventilation around cabinet. Allow 1-3 hours for humidity to stabilize. |
| LCD display not working. | Power issue, display malfunction. | Check power connection. If problem persists, contact customer support. |
| Combination lock not working. | Incorrect combination, lock mechanism issue. | Ensure you are entering the correct combination. Re-set the combination if necessary (refer to Section 4.4). |
8. Specifications
| Feature | Specification |
|---|---|
| Model Name | EDC-230LC |
| Volume Capacity | 230 L (8.1 ft³) |
| Humidity Control Range | 60% to 35% RH |
| Security | Combination Lock |
| Control Interface | LCD Display |
| Input Power | 110 to 240 VAC, 50 / 60 Hz |
| Power Consumption | <15 W |
| Construction Material | Alloy Steel, Glass |
| Interior Dimensions (W x H x D) | 23.6 x 31.1 x 18.9" (59.9 x 79 x 48 cm) |
| Exterior Dimensions (W x H x D) without Casters | 23.6 x 33.2 x 18.9" (59.9 x 84.3 x 48 cm) |
| Exterior Dimensions (W x H x D) with Casters | 23.6 x 33.9 x 18.9" (59.9 x 86.1 x 48 cm) |
| Item Weight | 60.6 lb (27.5 kg) |
| Special Features | Virtually Silent Operation, Portable, Automatic Moisture Removal |
9. Warranty and Support
For warranty information or technical support, please refer to the warranty card included with your product or visit the official RUGGARD website. Keep your purchase receipt as proof of purchase for any warranty claims.
If you encounter any issues not covered in this manual, please contact RUGGARD customer service for assistance.


