1. Introduction
This manual provides detailed instructions for the installation, operation, and maintenance of the AVXANKTG Smart Switch TOMPD-63LW. This device integrates voltage, current, and leakage protection with energy metering and timer functions. Please read this manual thoroughly before installation and use to ensure safe and correct operation.
2. Safety Information
WARNING: Electrical shock hazard. Installation and servicing should only be performed by qualified personnel.
- Always disconnect power at the main circuit breaker before installing or servicing the device.
- Ensure all wiring connections are secure and comply with local electrical codes.
- Do not operate the device if it appears damaged.
- This device is designed for indoor use in dry locations only.
- Do not exceed the maximum rated current of 63A.
3. Product Overview
3.1 Key Features
- Integrated Voltage, Current, and Leakage Protection
- Energy Metering (kilowatt-Hour)
- Adjustable Protection Parameters (Overvoltage, Undervoltage, Overcurrent, Leakage Current)
- Programmable Timer Function
- Automatic Reconnection Function with Adjustable Delay
- Low Power Consumption (less than 2W)
3.2 Device Components
The AVXANKTG Smart Switch TOMPD-63LW is a compact unit designed for DIN rail mounting. It features a digital display for real-time monitoring and status indication, along with control buttons for configuration.
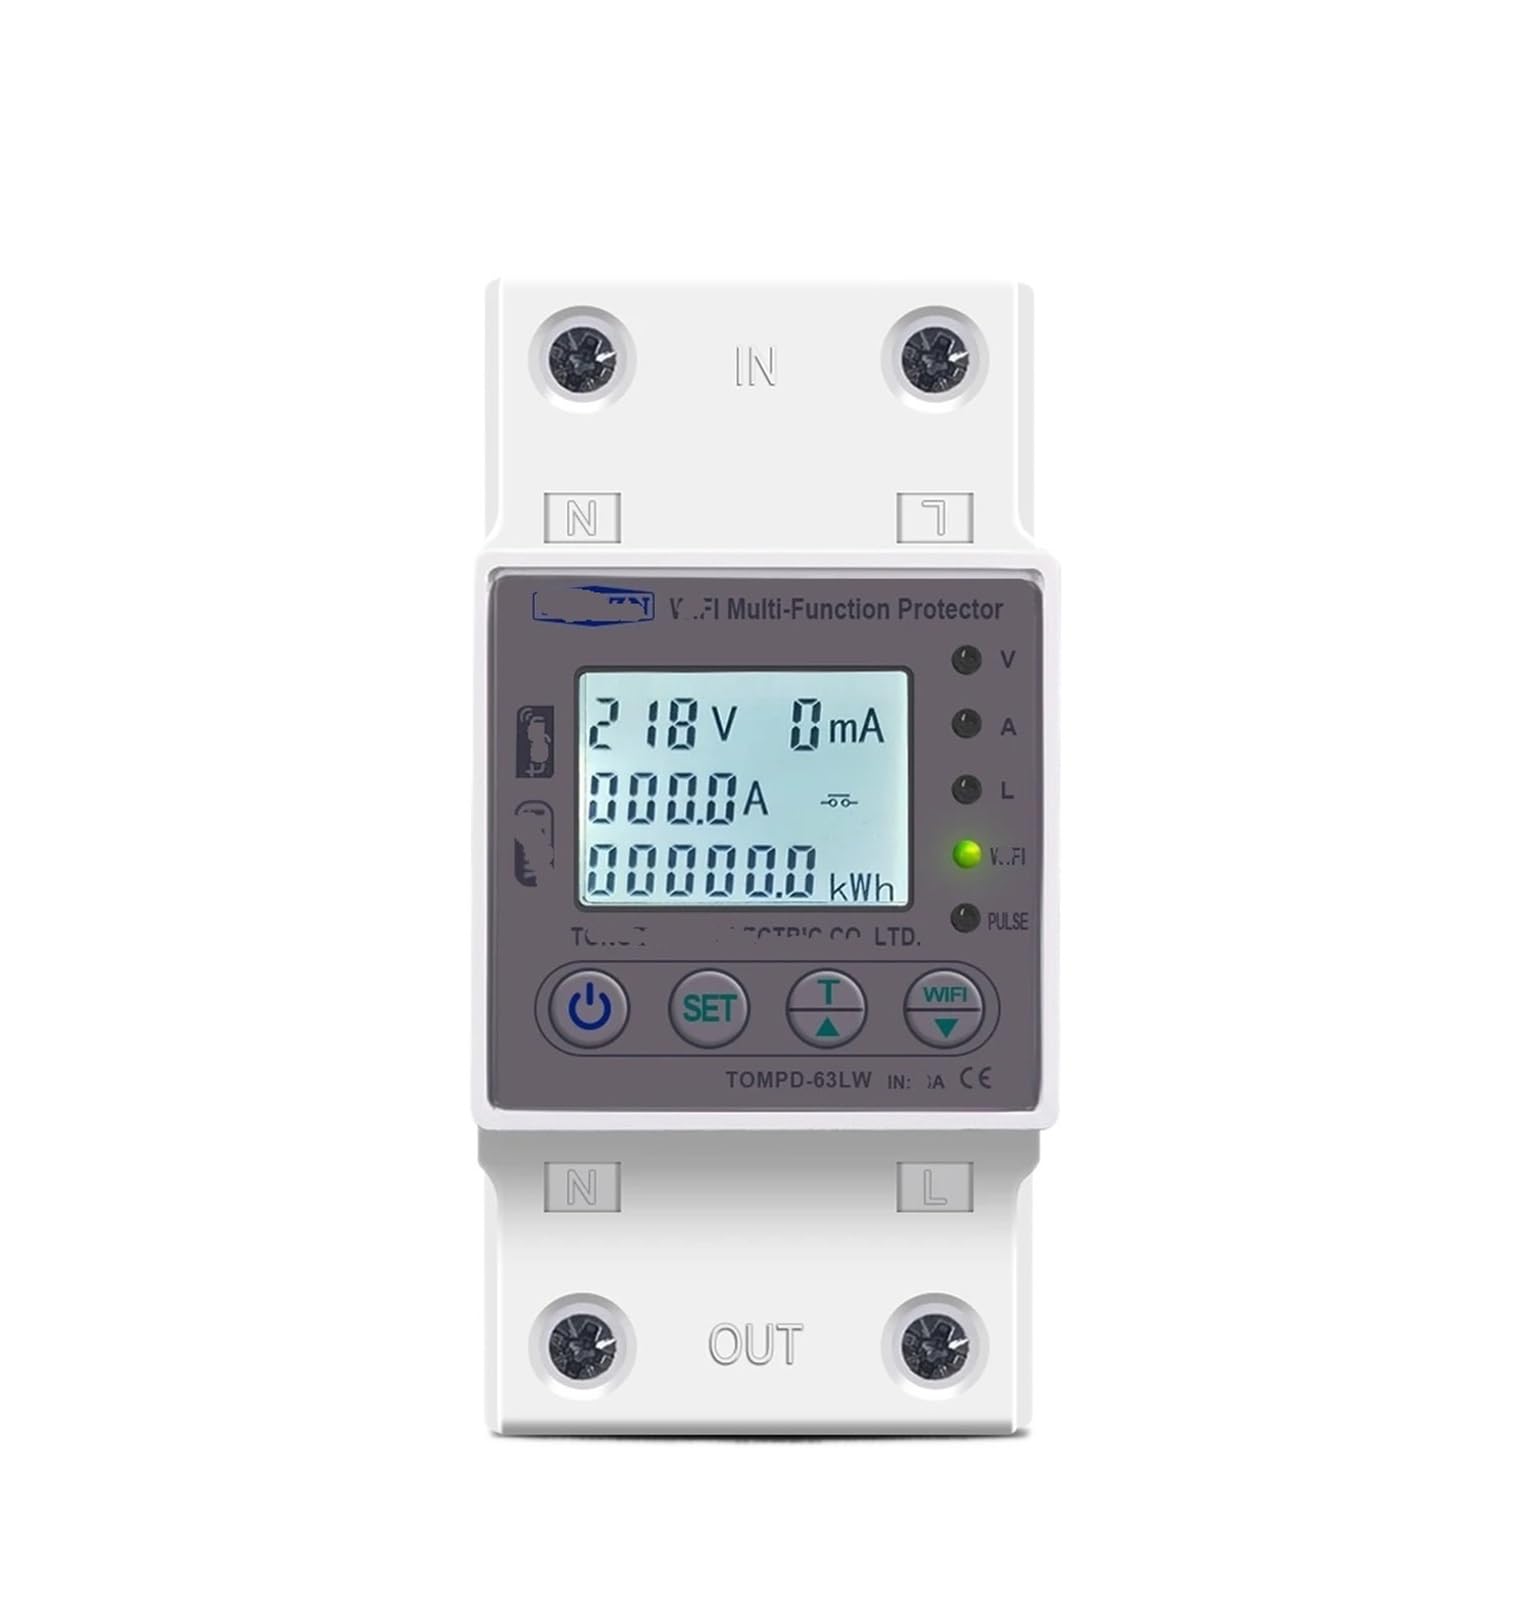
Figure 1: Front view of the AVXANKTG Smart Switch TOMPD-63LW, showing the digital display and control interface.
4. Setup and Installation
Installation of the AVXANKTG Smart Switch TOMPD-63LW should be performed by a qualified electrician to ensure safety and compliance with electrical standards.
- Power Disconnection: Before starting, turn off the main power supply at the circuit breaker panel. Verify that power is off using a voltage tester.
- Mounting: Mount the Smart Switch onto a standard DIN rail within your electrical panel.
- Wiring: Connect the incoming live and neutral wires to the designated input terminals (L-IN, N-IN) and the outgoing live and neutral wires to the output terminals (L-OUT, N-OUT). Ensure all connections are tight and secure. Refer to the wiring diagram typically found on the side of the device.
- Power Restoration: Once wiring is complete and verified, restore power to the circuit. The device display should illuminate.
5. Operating Instructions
Upon power-up, the device will display real-time voltage, current, and power consumption. Use the control buttons (typically 'SET', 'UP', 'DOWN') to navigate menus and adjust settings.
5.1 Real-time Monitoring
The digital display cycles through various parameters such as voltage (V), current (A), active power (W), and total energy consumption (kWh).
5.2 Manual On/Off Control
A dedicated button (often labeled 'ON/OFF' or integrated with 'SET') allows for manual switching of the connected load. Pressing this button will toggle the power state, overriding any timer or protection settings temporarily.
6. Configuration and Settings
Access the settings menu by pressing and holding the 'SET' button. Use 'UP' and 'DOWN' buttons to navigate through parameters and 'SET' to confirm selections or enter edit mode.
- Undervoltage Protection (UVP): Adjustable from 140V to 210V (Default: 170V). If voltage drops below this threshold, the circuit will trip.
- Overvoltage Protection (OVP): Adjustable from 225V to 295V (Default: 265V). If voltage exceeds this threshold, the circuit will trip.
- Overcurrent Protection (OCP): Adjustable from 1A to 63A (Default: 40A). If current exceeds this threshold, the circuit will trip.
- Leakage Current Protection (LCP): Specific leakage current threshold can be set. Refer to the device's on-screen menu for the exact range and default value.
- Reconnection Time (Delayed Opening Time): Adjustable from 1s to 500s (Default: 30s). This is the delay before the device attempts to reconnect after a protection trip.
- Voltage/Current/kW Calibration: Adjustable from -9.9% to 9.9%. Allows for fine-tuning of measurement accuracy.
- Action Time: Adjustable from 1s to 30s (Default: 1s). This refers to the response time for protection functions.
- Timer Function: Configure schedules for automatic on/off operations. Consult the on-screen menu for setting specific times and days.
7. Maintenance
The AVXANKTG Smart Switch TOMPD-63LW requires minimal maintenance.
- Periodically inspect the device and wiring for any signs of damage or loose connections.
- Clean the exterior with a soft, dry cloth. Do not use abrasive cleaners or solvents.
- Ensure proper ventilation around the device to prevent overheating.
8. Troubleshooting
| Problem | Possible Cause | Solution |
|---|---|---|
| Device does not power on | No power supply; incorrect wiring | Check main circuit breaker; verify wiring connections. |
| Device trips frequently | Overvoltage, undervoltage, overcurrent, or leakage detected; sensitive protection settings | Check connected load for faults; adjust protection thresholds if necessary (e.g., increase OCP/OVP/UVP limits within safe operating parameters). |
| Inaccurate readings | Calibration needed | Use the calibration setting to fine-tune voltage/current/kW readings. |
| Timer function not working | Incorrect timer settings; device in manual override mode | Verify timer program; ensure device is not in manual ON/OFF state. |
9. Specifications
| Parameter | Value |
|---|---|
| Model Number | TOMPD-63LW |
| Rated Current | 63A |
| Undervoltage Protection Range | 140V-210V (Default 170V) |
| Overvoltage Protection Range | 225V-295V (Default 265V) |
| Overcurrent Protection Range | 1A-63A (Default 40A) |
| Reconnection Time (Delay) | 1s-500s (Default 30s) |
| Voltage/Current/kW Calibration | -9.9% to 9.9% |
| Action Time | 1s-30s (Default 1s) |
| Power Consumption | Less than 2W |
| Package Dimensions | 1.18 x 0.79 x 0.39 inches |
| Item Weight | 1.76 ounces |
10. Warranty and Support
For warranty information and technical support, please refer to the product packaging or contact your retailer. Keep your purchase receipt as proof of purchase.


