
1. Introduction
This manual provides essential information for the assembly, operation, and maintenance of your IRONCK HK-XG-02 Rotating Shoe Rack Tower. Designed for efficient space utilization, this 360° revolving storage unit offers a practical solution for organizing footwear and other items. Please read these instructions thoroughly before assembly and use to ensure proper function and safety.

Image 1.1: The IRONCK Rotating Shoe Rack Tower in a typical home environment, showcasing its design and storage capabilities.
2. Safety Information
Always assemble and use the shoe rack according to the provided instructions. Do not overload the shelves to prevent tipping or damage. Keep the rack away from heat sources and do not place heavy or sharp objects on it. Ensure all connections are secure before use. For added stability and safety, especially in households with children, utilize the included anti-tip wall lock mechanism.
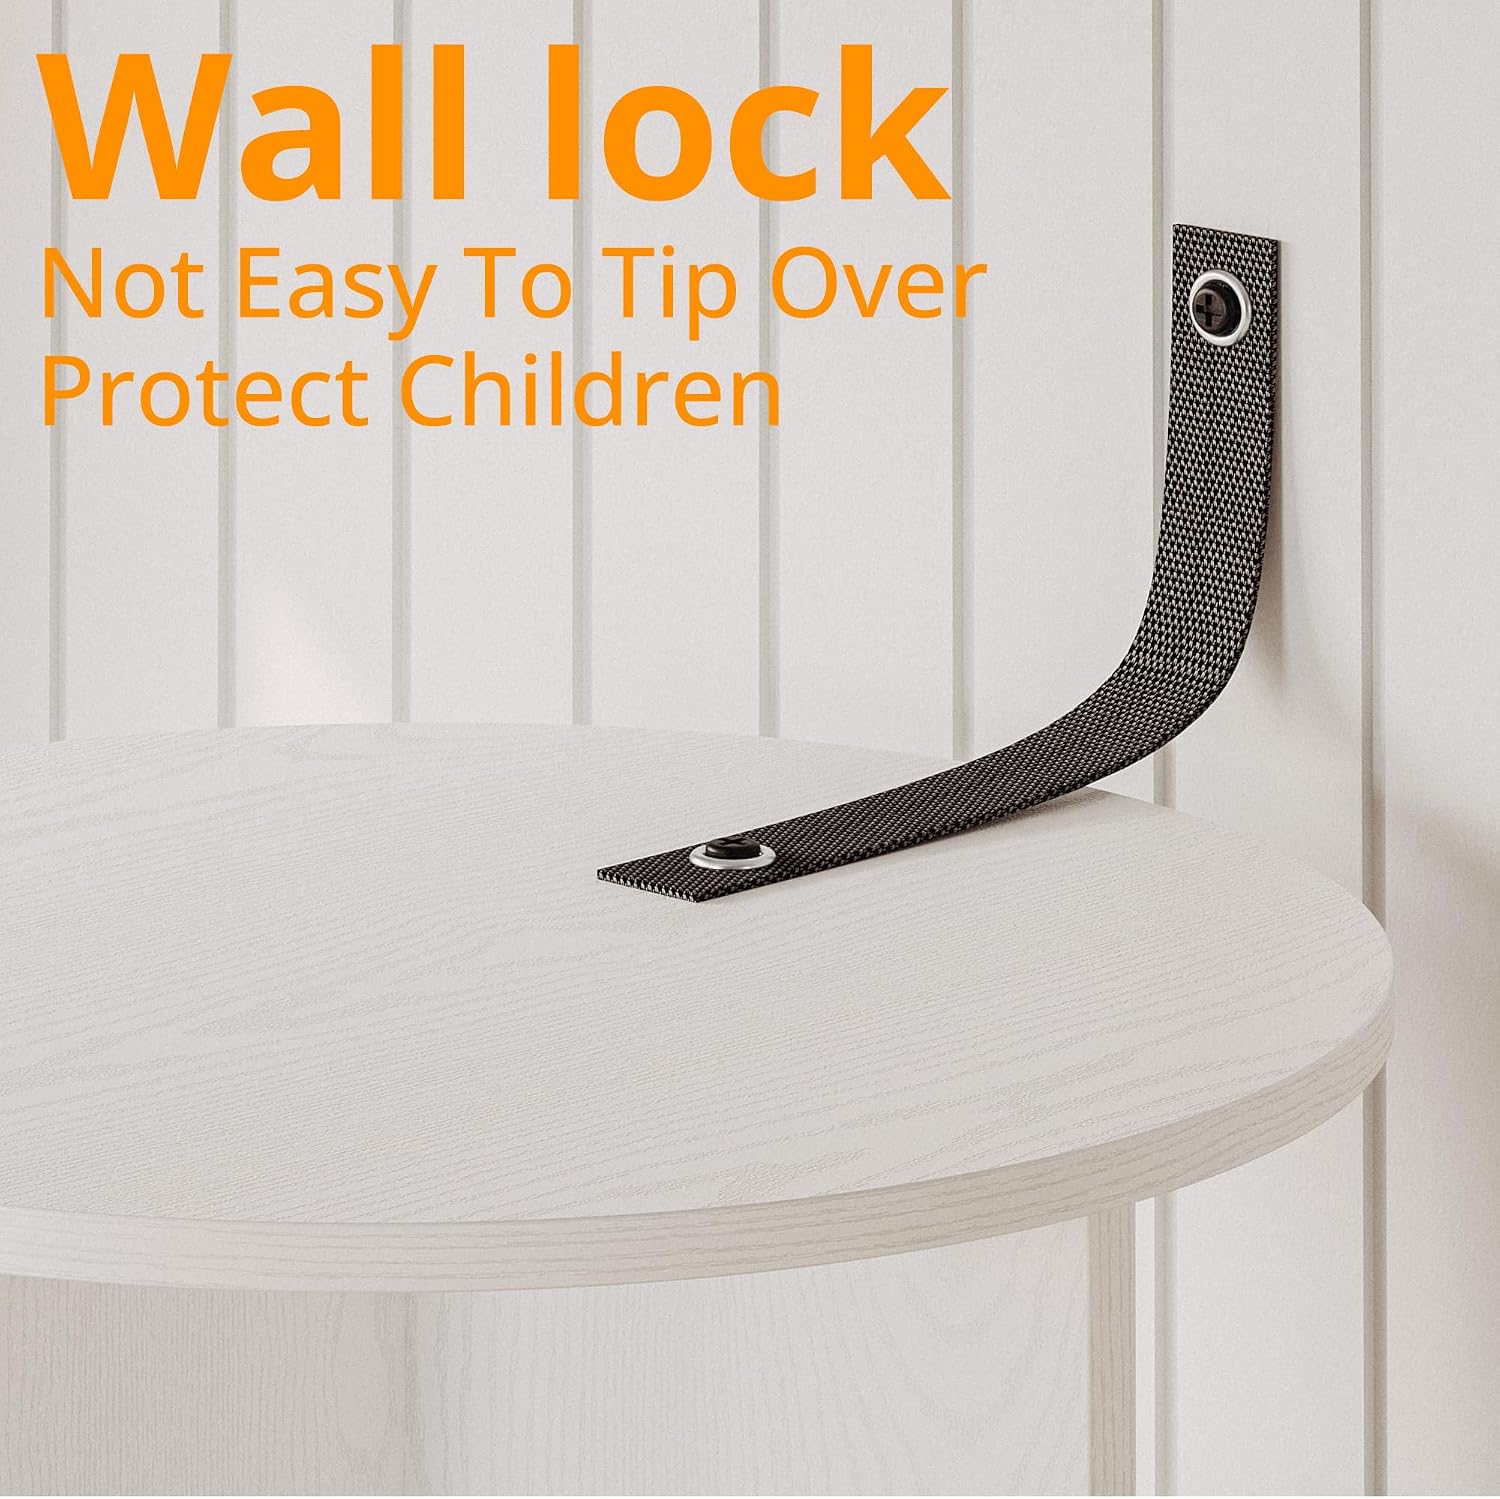
Image 2.1: Detail of the wall lock mechanism, designed to prevent the shoe rack from tipping over, enhancing safety.
3. Package Contents
Before beginning assembly, verify that all components are present and undamaged. The package typically includes various MDF panels for the shelves and vertical supports, a rotating base mechanism, and a hardware kit containing screws, dowels, and an Allen wrench.
- Top and Bottom Circular Panels
- Intermediate Circular Shelf Panels
- Vertical Support Panels
- Rotating Base Mechanism
- Assembly Hardware (screws, dowels, L-wrench)
- Anti-tip Wall Lock Strap
4. Assembly Instructions
Assembly requires careful attention to detail. It is recommended to have a clear, spacious area for assembly. Follow the numbered steps provided in the included instruction booklet. Ensure all screws are tightened firmly to secure the structure.
- Prepare the Base: Attach the vertical support panels to the bottom circular panel using the provided screws. Ensure they are aligned correctly to form the foundational structure.
- Install Rotating Mechanism: Secure the rotating base mechanism to the bottom of the assembled base structure. This mechanism allows for the 360° rotation of the unit.
- Assemble Shelves: Progressively attach the intermediate circular shelf panels and additional vertical supports. Pay close attention to the orientation of each panel to ensure proper alignment and stability.
- Attach Top Panel: Secure the top circular panel to complete the main structure.
- Secure Connections: Double-check all screws and connections to ensure they are tight and the unit is stable.
- Install Anti-Tip Device: Attach the anti-tip wall lock strap to the top rear of the shoe rack and secure it to a wall stud using appropriate hardware. This step is crucial for safety.

Image 4.1: Assembly diagrams showing how screws firmly join the various panels of the shoe rack.
5. Usage
The IRONCK Rotating Shoe Rack Tower is designed for versatile storage. Its 360° rotation allows easy access to all items stored on its shelves. The six tiers offer varying heights to accommodate different types of footwear, from flats and sneakers to boots. Each tier has an 11.4-inch radius, suitable for various shoe sizes.
- Shoe Storage: Organize shoes by type, frequency of use, or color. The open design allows for air circulation.
- Accessory Storage: Utilize shelves for bags, hats, or other personal accessories.
- Decorative Display: The top surface and some shelves can be used to display decorative items, books, or small plants.

Image 5.1: The shoe rack rotating, highlighting its 360-degree functionality for easy access to stored items.

Image 5.2: A detailed view of the shoe rack's shelves, illustrating the custom heights designed to accommodate different shoe types, including boots.
Video 5.1: An official product video from IRONCK HOME demonstrating the features and versatility of the Rotating Shoe Rack Tower.
6. Maintenance
To maintain the appearance and longevity of your shoe rack, follow these simple care instructions:
- Cleaning: Wipe surfaces with a soft, damp cloth. Avoid abrasive cleaners or harsh chemicals that may damage the laminated finish.
- Dusting: Regularly dust the shelves and panels to prevent buildup.
- Inspection: Periodically check all screws and connections to ensure they remain tight. Re-tighten if necessary.
- Placement: Avoid placing the unit in direct sunlight or near heat sources to prevent material degradation.
7. Troubleshooting
If you encounter any issues with your IRONCK Rotating Shoe Rack Tower, consider the following:
- Wobbling/Instability: Ensure all assembly screws are fully tightened. Verify that the unit is placed on a flat, level surface. If the issue persists, check the anti-tip device installation.
- Difficulty Rotating: Ensure the rotating base mechanism is clean and free of debris. Avoid overloading the shelves, which can impede smooth rotation.
- Missing Parts: If any parts were missing upon delivery, contact customer support immediately for assistance.
8. Specifications
| Feature | Detail |
|---|---|
| Brand | IRONCK |
| Model Name | HK-XG-02 |
| Product Dimensions | 23.2"D x 23.2"W x 65.7"H (59cm D x 59cm W x 167cm H) |
| Item Weight | 77.4 Pounds |
| Color | White |
| Material | MDF (Medium-Density Fiberboard) |
| Finish Type | Laminated |
| Number of Shelves | 7 (including top surface) |
| Special Feature | 360° Rotating, Anti-tip Wall Lock |
| Assembly Required | Yes |

Image 8.1: Dimensional diagram of the shoe rack, indicating overall height and width, as well as individual shelf heights and radius.
9. Warranty and Support
For warranty information, product support, or to order replacement parts, please refer to the contact details provided with your purchase or visit the official IRONCK website. Keep your purchase receipt for warranty claims.